View Kernel Messages in Linux | dmesg Command (original) (raw)
Last Updated : 15 Nov, 2025
The dmesg (display message) command is used to view kernel messages from the ring buffer, providing insights into hardware detection, driver initialization, and system errors during boot and runtime.
- Displays low-level kernel and hardware messages not visible in standard logs.
- Useful for diagnosing hardware failures, driver issues, and boot problems.
- The kernel messages are stored temporarily in the ring buffer and permanently in /var/log/dmesg.
- Supports options like -T for readable timestamps and --follow to monitor live kernel events in real time.
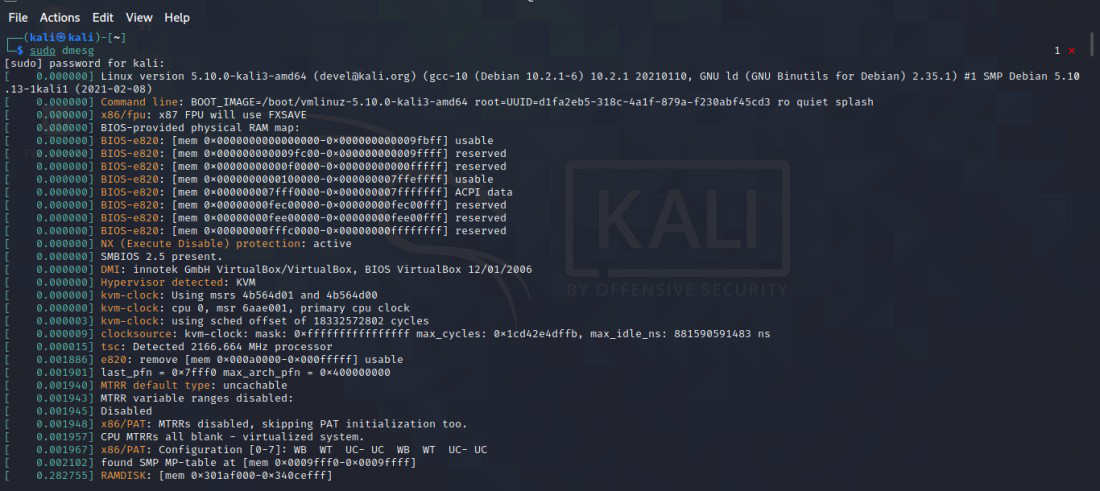
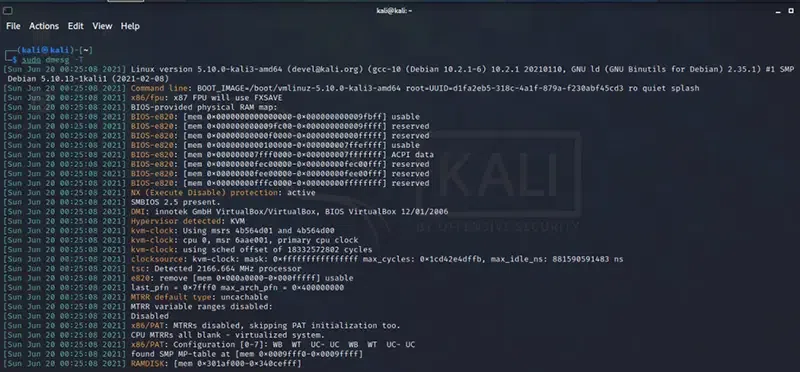
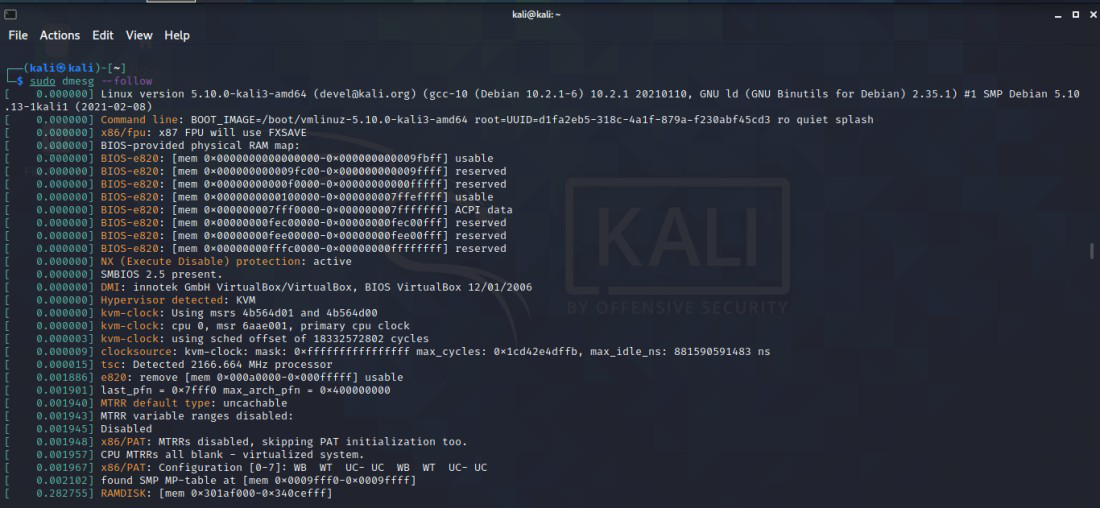
Basic Example: View All Kernel Messages
This displays all messages from the kernel ring buffer.
**Command:
sudo dmesg
**Output:
Key Options of dmesg command
The following are the options of dmesg command with describing its functionality:
| Option | Description | Example Usage |
|---|---|---|
| -H | It provides the human-readable output, making timestamps and information more understandable | dmesg -H |
| -T | It shows only human-readable timestamps for each message | dmesg -T |
| -l | It filter the messages by log level (e.g., err, warn, info) | dmesg -l err |
| -k | It only prints the kernel messages (filter out userspace messages) | dmesg -k |
| -s | It specifes the buffer size to read messages | dmesg -s 1024 |
| -f | It filters the messages by facility (e.g., kern, user, daemon) | dmesg -f kern |
| -r | It takes the Raw output and do not decode syslog(2) priority to facility and level | dmesg -r |
| -x | It helps with providing the decode facility and level to human-readable prefixes (e.g., kern.info) | dmesg -x |
Syntax of the dmesg Command
dmesg [options]
Installation and setup dmesg command
The following are the steps that guides in install and setup the dmesg command:
**Step 1: Check if dmesg is Installed
Firstly, whether the dmesg software is already available or not using the following command:
which dmesg
**Step 2: Install dmesg
For Debian-based systems (Ubuntu, Mint, etc.):
sudo apt udpate
sudo apt install util-linux
For RedHat-based systems (Fedora, CentOS, etc.):
sudo yum install util-linux
**Step 3: Verify dmesg Installation
After installation of **dmesg command, verify its successful installation using the following command:
dmesg --version
Basic Usage and Examples of dmesg Command
The dmesg command provides detailed kernel-level information useful for diagnosing hardware, driver, and boot-related issues. Below are common examples demonstrating its basic usage and key functionalities.
1. Viewing Logs Page-Wise with Less
- Used to scroll through kernel messages conveniently, one page at a time.
**Command:
sudo dmesg | less
**Output:
Here,
- Displays kernel messages page by page for easier reading.
- The less pager allows smooth scrolling through long outputs.
- Prevents terminal overflow and improves readability.
2. Colorizing dmesg Output
- Adds color to different log types for better visibility and quick identification.
**Command:
sudo dmesg -L
**Output:
Here,
- Highlights errors, warnings, and informational messages in different colors.
- Makes log analysis faster and visually easier.
- Ideal for distinguishing critical events at a glance.
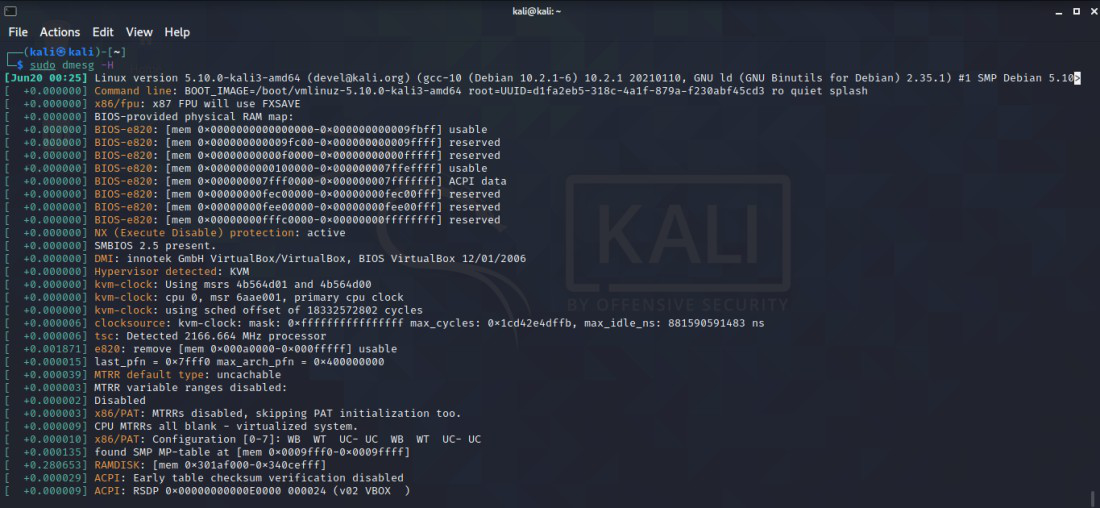
3. Displaying Human-Friendly Timestamps
- Converts raw timestamps into seconds and nanoseconds for easier reading.
**Command:
sudo dmesg -H
**Output:
Here,
- Displays timestamps in an easily readable format.
- Shows precise timing of kernel messages since boot.
- Helps track system events with microsecond accuracy.
**4. Displaying Standard Date and Time Format
- Shows log timestamps in a standard, human-readable date and time format.
**Command:
sudo dmesg -T
**Output:
Here,
- Converts timestamps into real-world date and time.
- Useful for correlating kernel messages with system or user actions.
- Slightly reduces time resolution to improve readability.
**5. Monitoring Real-Time Logs
- Continuously displays new kernel messages as they are generated.
**Command:
sudo dmesg --follow
**Output:
**Explanation:
- Works like tail-f for live kernel log updates.
- Shows new events such as hardware connections or system errors in real time.
- Useful for monitoring system behavior continuously.
**6. Viewing Specific Number of Messages with Head
- Displays only the first few kernel messages for a concise overview.
**Command:
sudo dmesg | head -10
**Output:

**Explanation:
- Shows the first 10 messages from the kernel log.
- Useful for reviewing early boot or initialization events.
- Helps focus on startup information only.
**7. Viewing Last 10 Messages with Tail
- Shows the most recent kernel messages for quick inspection.
**Command:
sudo dmesg | tail -10
**Output:
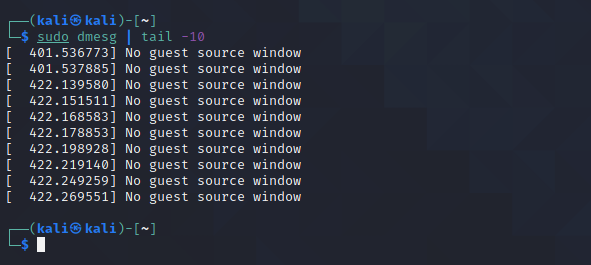
**Explanation:
- Displays the last 10 kernel log entries.
- Helps identify recent hardware or system changes.
- Commonly used for troubleshooting after connecting devices.
8. Case-Insensitive Searching
Finds specific messages without worrying about uppercase or lowercase text.
**Command:
sudo dmesg | grep -i usb
**Output:
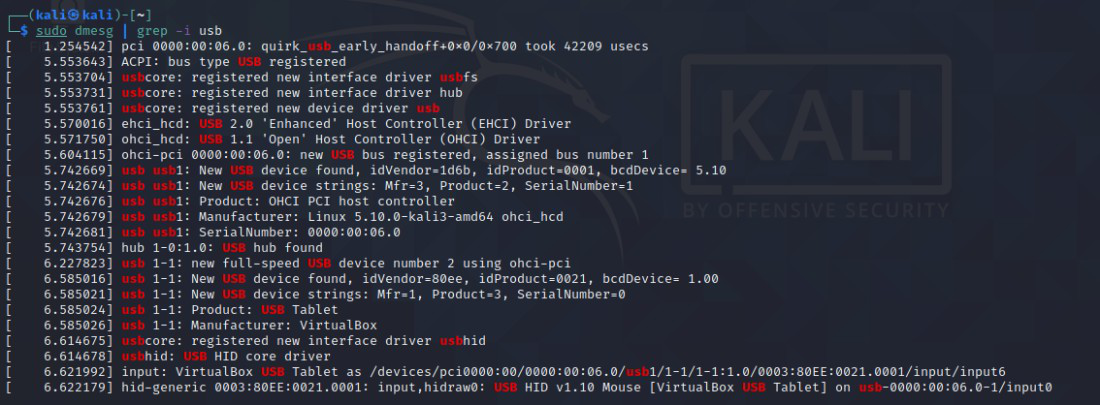
**Explanation:
- Searches for messages containing “USB” or “usb”.
- Helps verify whether USB devices were detected correctly.
- Simplifies pattern-based message filtering.
- Searches kernel messages related to disks or storage devices.
**Command:
sudo dmesg | grep -i sda
**Output:
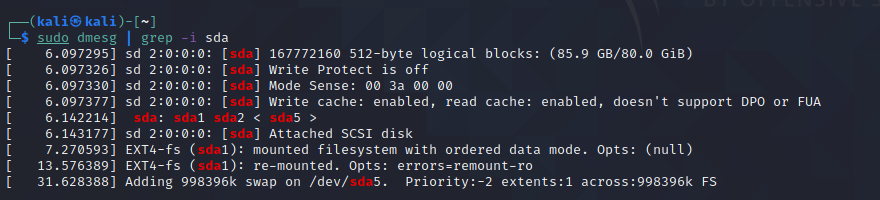
**Explanation:
- Finds log entries related to disk drives (/dev/sda).
- Displays events like detection, mounting, or disk errors.
- Commonly used to troubleshoot hard drive or SSD issues.
10. Filtering Messages by Log Level (Info)
- Displays kernel messages based on their severity or importance level.
**Command:
sudo dmesg -l info
**Output:
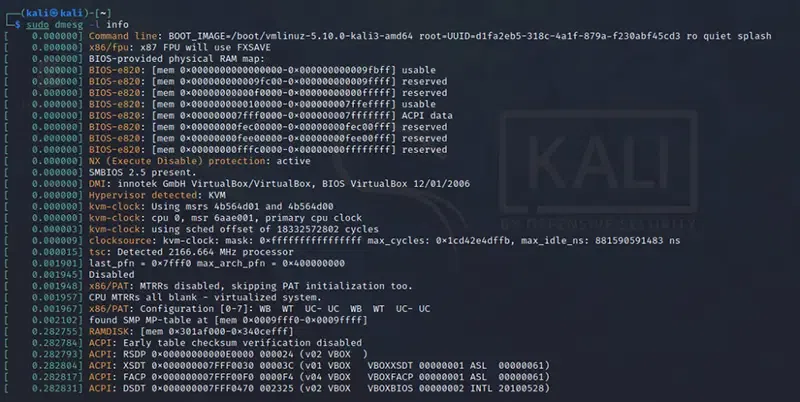
**Explanation:
- Shows informational messages only.
- Filters logs to focus on normal system operations.
- Reduces noise from warnings or errors for clarity.
11. Combining Multiple Log Levels
- Retrieves kernel messages that match more than one log level.
**Command:
sudo dmesg -l debug,notice
**Output:
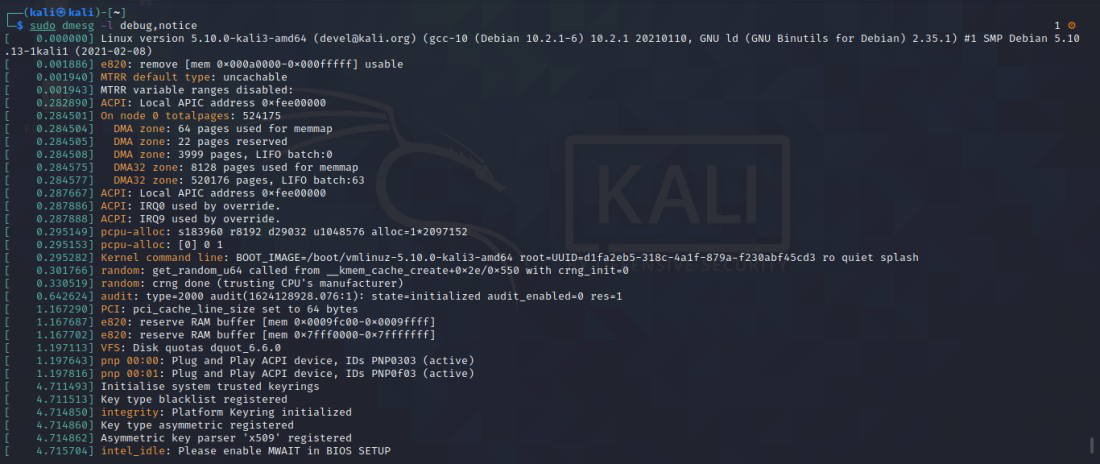
**Explanation:
- Displays both debug and notice-level messages.
- Helps developers track both normal and detailed system activities.
- Useful for performance monitoring and testing.
12. Combining Log Levels (err and warn)
Filters messages to show only errors and warnings for quick issue detection.
**Command:
sudo dmesg --level=err,warn
**Output:
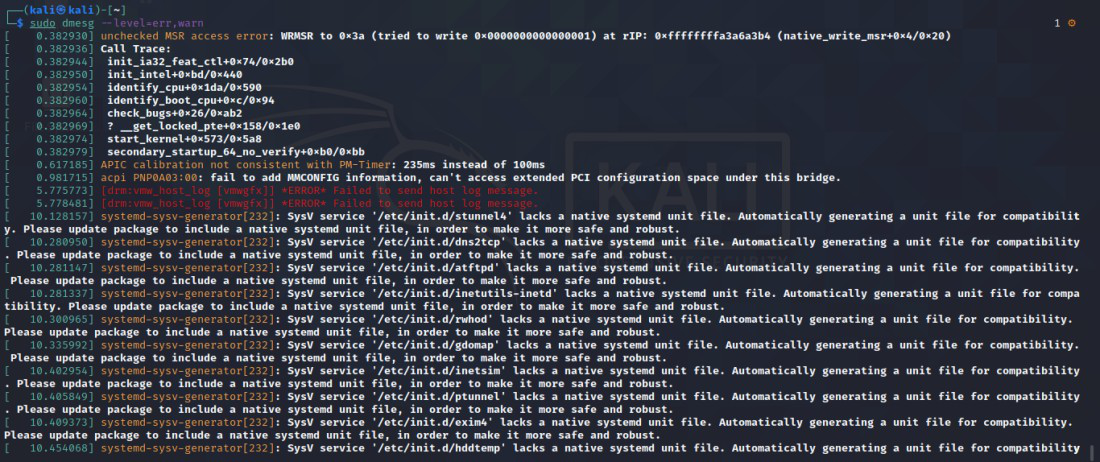
**Explanation:
- Shows critical system issues and warnings together.
- Simplifies troubleshooting by focusing on potential problems.
- Useful for detecting driver or kernel module errors.
**13. Filtering Messages for Specific Network Interface (eth0)
- Displays messages related to a particular network interface, like eth0.
**Command:
sudo dmesg | grep -i eth0
**Output:
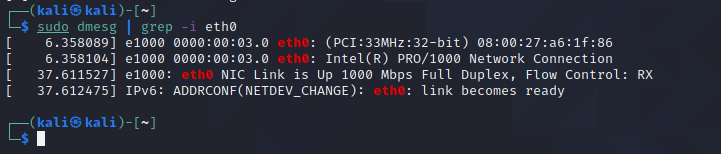
**Explanation:
- Filters logs for a specific network adapter.
- Shows driver loading, link status, and connection issues.
- Helps in diagnosing network-related problems.
14. Filtering Messages by Facility (daemon)
- Shows kernel messages categorized under a specific facility.
**Command:
sudo dmesg -f daemon
**Output:
**Explanation:
- Filters logs by facility (e.g., daemon, kernel, system).
- Helps target messages from a particular source or subsystem.
- Useful for narrowing log analysis to specific components.
15. Decoding Facility and Level
Displays each log message with readable facility and severity labels.
**Command:
sudo dmesg -x
**Output:

**Explanation:
- Adds facility and log level prefixes to each message.
- Makes it easier to identify where messages come from and their severity.
- Ideal for advanced log analysis and debugging.
Difference between syslog and dmesg
The following are the difference between syslog and dmesg:
| Feature | syslog | dmesg |
|---|---|---|
| **Purpose | It is a general logging system for various system messages and events | It a command that helps in displays kernel ring buffer messages |
| **Scope | Logs messages from kernel, system services, and applications | Logs only kernel messages |
| **Log Files | Stores logs in files like /var/log/syslog, /var/log/messages | Does not store logs in files; displays current kernel log |
| **Persistence | Logs are persistent and can be archived for long-term storage | Logs are transient and only available until next reboot |