Deploy an AI Model using Streamlit Library (original) (raw)
Last Updated : 11 May, 2026
Streamlit is an open-source Python library designed to make it easy for developers and data scientists to turn Python scripts into fully functional web applications without requiring any front-end development skills. It allows us to quickly prototype and deploy interactive AI-powered apps directly from our local machine or the cloud.
Implementation
Step 1: Install dependencies
We will install the required dependencies for our model such as streamlit, google-generativeai.
bash `
pip install streamlit python-dotenv google-genai
`
Step 2: Set Up API Key
We need to create a environment file named .env in project directory to store our API Key.
Python `
GEMINI_API_KEY="your_api_key_here"
`
Step 3: Build the Model
Now we will build our model:
- **Environment Setup: The .env file stores the API key securely, loaded with dotenv.
- **Model Initialization: The Gemini model "models/gemini-2.5-flash" is loaded using Google’s GenAI SDK.
- **Session Management: st.session_state ensures chat history persists during interaction.
- **Real-Time Interaction: Users type queries and responses are fetched dynamically from Gemini.
- **Auto Refresh: st.rerun() refreshes the app interface after each user message. Python `
import streamlit as st from google import genai from dotenv import load_dotenv import os
load_dotenv() API_KEY = os.getenv("GEMINI_API_KEY")
if not API_KEY: st.error("Missing GEMINI_API_KEY in .env file. Please add it and restart the app.") st.stop()
client = genai.Client(api_key=API_KEY) MODEL_NAME = "models/gemini-2.5-flash"
st.set_page_config(page_title="PersonalBot", layout="centered") st.title("🤖 PersonalBot") st.markdown("An intelligent assistant powered by Gemini and Streamlit.")
if "history" not in st.session_state: st.session_state.history = []
def get_gemini_response(prompt): response = client.models.generate_content( model=MODEL_NAME, contents=prompt ) return response.text
for role, msg in st.session_state.history: if role == "user": st.markdown(f"🧑 You: {msg}") else: st.markdown(f"🤖 PersonalBot: {msg}")
user_input = st.text_input("Type your message here...")
if st.button("Send"): if user_input.strip(): st.session_state.history.append(("user", user_input)) with st.spinner("PersonalBot is thinking..."): try: reply = get_gemini_response(user_input) except Exception as e: reply = f" Error: {e}"
    st.session_state.history.append(("bot", reply))
    st.rerun()
else:
    st.warning("Please enter a message before sending.")
`
Step 4: Run the Streamlit App
We will start the Streamlit server and it will open our chatbot model in browser. The default URL is usually http://localhost:8501.
bash `
python -m streamlit run app.py
`
**Output:
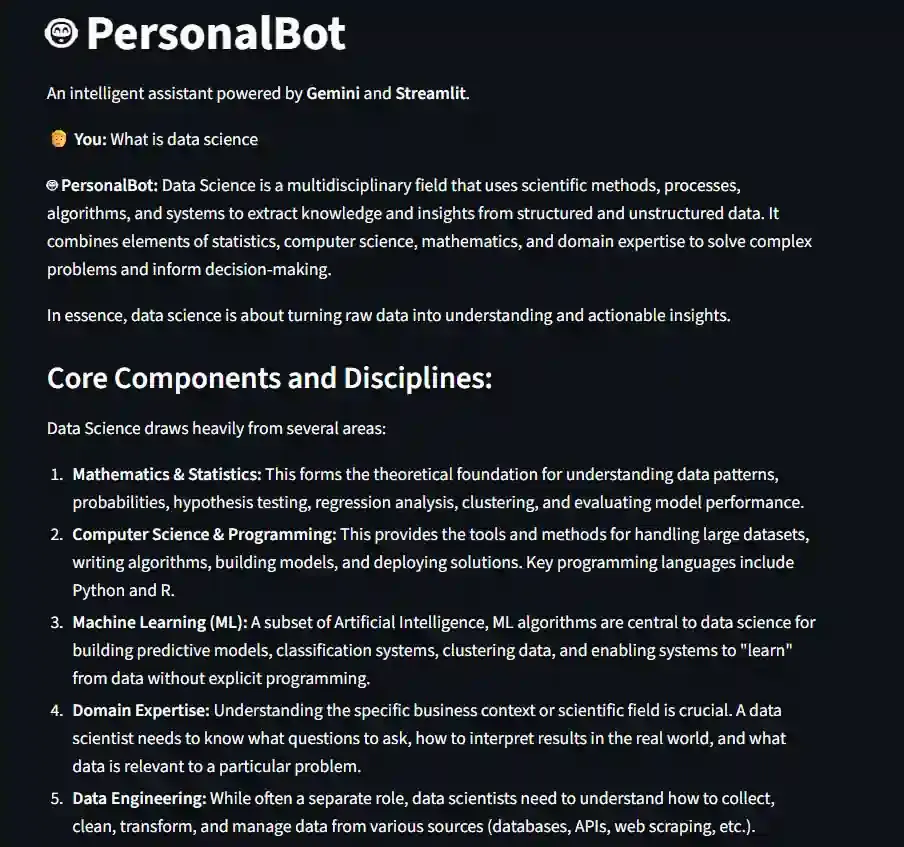
Result
The source code can be downloaded from here.
Advantages
- **Rapid Deployment: Streamlit makes it effortless to transform simple Python scripts into interactive web apps which is perfect for quick AI demos or prototypes.
- **Intelligent AI Responses: Integrating Google Gemini ensures the model provides human-like, context-aware answers with exceptional reasoning and creativity.
- **Interactive User Interface: Streamlit offers dynamic UI components like text inputs, buttons and markdowns to build engaging, chat-style AI interfaces.
- **Easy Integration & Scalability: The architecture can be easily extended, allowing developers to connect databases, APIs or even train custom models for specialized tasks.