Deploy Machine Learning Model using Flask (original) (raw)
Last Updated : 7 Apr, 2026
Deploying a Machine Learning model using Flask enables integration of trained models into web applications for real-time predictions. It allows users to provide input through a simple interface and receive instant results powered by the model. This approach helps transform machine learning solutions into practical, user-accessible systems.
- Connect backend ML models with frontend interfaces using Flask routes and APIs
- Handle user input, data preprocessing, and prediction flow within the application
- Structure and organize the project for smooth deployment and scalability
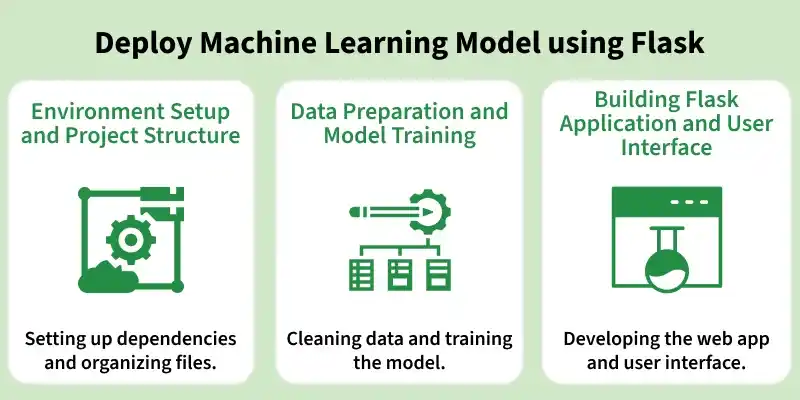
Deploy Machine Learning Model using Flask
1. Environment Setup and Project Structure
Before building and deploying the Flask application, it is important to set up the development environment and organize the project files properly. A clean setup ensures smooth development, easy debugging and better scalability of the application.
Installation and Setup
Start by creating and activating a virtual environment to manage dependencies efficiently. Then install all the required libraries for this project using the following commands:
Python `
pip install flask pip install pandas pip install numpy pip install scikit-learn
`
Project Structure
After completing the project, your directory should be well-organized to separate the model, application logic, and static files. A typical structure looks like this:

File Structure
- **app.py: Main Flask application file
- **model.pkl: Saved trained Machine Learning model
- **templates/: HTML files for the user interface
- **static/: CSS, JavaScript, and other static assets
- **requirements.txt: List of project dependencies
A proper structure helps in maintaining the codebase, simplifies deployment, and makes the project easier to understand and extend.
2. Data Preparation and Model Training
To build an effective Machine Learning application, it is essential to properly prepare the dataset and train a reliable model. In this section, we will load the dataset, perform preprocessing and train a Decision Tree Classifier, followed by saving the trained model for deployment.
Step 1: Load and Explore the Dataset
Import the required libraries, load the dataset and preview its structure to understand the features.
Download dataset from here
Python `
import pandas as pd import numpy as np df = pd.read_csv("Yours Dataset") df.head()
`
**Output:

Dataset
Step 2: Handle Missing Values
Replace missing values with NaN and fill them using the most frequent value (mode) of each column.
Python `
df.replace("?", np.nan, inplace=True) df.fillna(df.mode().iloc[0], inplace=True)
`
Step 3: Simplify Categorical Data
Reduce complexity by grouping similar categories into fewer meaningful classes.
Python `
df.replace(['Divorced', 'Married-AF-spouse', 'Married-civ-spouse', 'Married-spouse-absent', 'Never-married', 'Separated', 'Widowed'], ['divorced', 'married', 'married', 'married', 'not married', 'not married', 'not married'], inplace=True)
`
Step 4: Encode Categorical Variables
Here converts categorical features into numerical values using Label Encoding and stores the mapping for reference.
- **LabelEncoder() transforms each categorical column into numeric form, and mapping_dict stores the original-to-encoded value mapping
- **df.drop([...], axis=1, inplace=True) removes unnecessary columns that do not contribute to model training Python `
from sklearn import preprocessing
category_col = ['workclass', 'race', 'education', 'marital-status', 'occupation', 'relationship', 'gender', 'native-country', 'income']
label_encoder = preprocessing.LabelEncoder()
mapping_dict = {}
for col in category_col: df[col] = label_encoder.fit_transform(df[col]) mapping_dict[col] = dict(enumerate(label_encoder.classes_))
print(mapping_dict)
df.drop(['fnlwgt', 'educational-num'], axis=1, inplace=True)
`
Step 5: Split Features and Target
Separate the dataset into input features (X) and target variable (Y) for training.
Python `
X = df.iloc[:, :-1].values Y = df.iloc[:, -1].values
`
Step 6: Train the Model
Split the dataset into training and testing sets, then train the Decision Tree Classifier.
Python `
from sklearn.model_selection import train_test_split from sklearn.tree import DecisionTreeClassifier
Train-test split
X_train, X_test, y_train, y_test = train_test_split(X, Y, test_size=0.3, random_state=100)
Train model
dt_clf_gini = DecisionTreeClassifier(criterion="gini", random_state=100, max_depth=5, min_samples_leaf=5) dt_clf_gini.fit(X_train, y_train)
`
Step 7: Evaluate Model Performance
Check how well the model performs using accuracy.
Python `
from sklearn.metrics import accuracy_score
y_pred = dt_clf_gini.predict(X_test) print("Accuracy:", accuracy_score(y_test, y_pred))
`
**Output:
Accuracy: 0.8313031016480704
Step 8: Save the Trained Model
Save the trained model so it can be reused in the Flask application.
Python `
import pickle
with open("model.pkl", "wb") as model_file: pickle.dump(dt_clf_gini, model_file)
`
3. Building the Flask Application and User Interface
Here we create the main Flask application that connects the trained Machine Learning model with a user-friendly web interface. Users can enter their details and see predictions directly on the same page.
Step 1: Create Flask Application (app.py)
The app.py file handles loading the trained model, accepting user inputs, making predictions and rendering results.
- Loads the saved model.pkl and maps predicted values to readable income categories.
- Accepts user input via the HTML form and converts it into numeric features.
- Returns the prediction. Python `
from flask import Flask, render_template, request import pickle import numpy as np app = Flask(name) with open("model.pkl", "rb") as file: model = pickle.load(file)
mapping_dict = {'income': {0: '<=50K', 1: '>50K'}}
@app.route('/') def home(): return render_template('index.html')
@app.route('/result', methods=['POST']) def result(): try: features = [ int(request.form['age']), int(request.form['w_class']), int(request.form['edu']), int(request.form['martial_stat']), int(request.form['occup']), int(request.form['relation']), int(request.form['gender']), int(request.form['race']), int(request.form['c_gain']), int(request.form['c_loss']), int(request.form['hours_per_week']), int(request.form['native-country']) ]
    prediction = model.predict([features])[0]
    predicted_income = mapping_dict['income'][prediction]

    return render_template('index.html', prediction_text=f"Predicted Income: {predicted_income}")

except Exception as e:
    return render_template('index.html', prediction_text=f"Error: {str(e)}")
if name == "main": app.run(debug=True)
`
Step 2: Create the Input Form (index.html)
The index.html file collects user data and displays the prediction dynamically.
HTML `
Income Prediction FormIncome Prediction Form
Age <label for="w_class">Working Class</label>
<select id="w_class" name="w_class" required>
<option value="0">Federal-gov</option>
<option value="1">Local-gov</option>
<option value="2">Never-worked</option>
<option value="3">Private</option>
<option value="4">Self-emp-inc</option>
<option value="5">Self-emp-not-inc</option>
<option value="6">State-gov</option>
<option value="7">Without-pay</option>
</select>
<label for="edu">Education</label>
<select id="edu" name="edu" required>
<option value="0">10th</option>
<option value="1">11th</option>
<option value="2">12th</option>
<option value="3">1st-4th</option>
<option value="4">5th-6th</option>
<option value="5">7th-8th</option>
<option value="6">9th</option>
<option value="7">Assoc-acdm</option>
<option value="8">Assoc-voc</option>
<option value="9">Bachelors</option>
<option value="10">Doctorate</option>
<option value="11">HS-grad</option>
<option value="12">Masters</option>
<option value="13">Preschool</option>
<option value="14">Prof-school</option>
<option value="15">Some-college</option>
</select>
<label for="martial_stat">Marital Status</label>
<select id="martial_stat" name="martial_stat" required>
<option value="0">divorced</option>
<option value="1">married</option>
<option value="2">not married</option>
</select>
<label for="occup">Occupation</label>
<select id="occup" name="occup" required>
<option value="0">Adm-clerical</option>
<option value="1">Armed-Forces</option>
<option value="2">Craft-repair</option>
<option value="3">Exec-managerial</option>
<option value="4">Farming-fishing</option>
<option value="5">Handlers-cleaners</option>
<option value="6">Machine-op-inspect</option>
<option value="7">Other-service</option>
<option value="8">Priv-house-serv</option>
<option value="9">Prof-specialty</option>
<option value="10">Protective-serv</option>
<option value="11">Sales</option>
<option value="12">Tech-support</option>
<option value="13">Transport-moving</option>
</select>
<label for="relation">Relationship</label>
<select id="relation" name="relation" required>
<option value="0">Husband</option>
<option value="1">Not-in-family</option>
<option value="2">Other-relative</option>
<option value="3">Own-child</option>
<option value="4">Unmarried</option>
<option value="5">Wife</option>
</select>
<label for="race">Race</label>
<select id="race" name="race" required>
<option value="0">Amer Indian Eskimo</option>
<option value="1">Asian Pac Islander</option>
<option value="2">Black</option>
<option value="3">Other</option>
<option value="4">White</option>
</select>
<label for="gender">Gender</label>
<select id="gender" name="gender" required>
<option value="0">Female</option>
<option value="1">Male</option>
</select>
<label for="c_gain">Capital Gain</label>
<input type="number" id="c_gain" name="c_gain" min="0" max="99999" required>
<label for="c_loss">Capital Loss</label>
<input type="number" id="c_loss" name="c_loss" min="0" max="4356" required>
<label for="hours_per_week">Hours per Week</label>
<input type="number" id="hours_per_week" name="hours_per_week" min="1" max="99" required>
<label for="native-country">Native Country</label>
<select id="native-country" name="native-country" required>
<option value="0">Cambodia</option>
<option value="1">Canada</option>
<option value="2">China</option>
<option value="3">Columbia</option>
<option value="4">Cuba</option>
<option value="5">Dominican Republic</option>
<option value="6">Ecuador</option>
<option value="7">El Salvador</option>
<option value="8">England</option>
<option value="9">France</option>
<option value="10">Germany</option>
<option value="11">Greece</option>
<option value="12">Guatemala</option>
<option value="13">Haiti</option>
<option value="14">Netherlands</option>
<option value="15">Honduras</option>
<option value="16">HongKong</option>
<option value="17">Hungary</option>
<option value="18">India</option>
<option value="19">Iran</option>
<option value="20">Ireland</option>
<option value="21">Italy</option>
<option value="22">Jamaica</option>
<option value="23">Japan</option>
<option value="24">Laos</option>
<option value="25">Mexico</option>
<option value="26">Nicaragua</option>
<option value="27">Outlying-US(Guam-USVI-etc)</option>
<option value="28">Peru</option>
<option value="29">Philippines</option>
<option value="30">Poland</option>
<option value="31">Portugal</option>
<option value="32">Puerto-Rico</option>
<option value="33">Scotland</option>
<option value="34">South</option>
<option value="35">Taiwan</option>
<option value="36">Thailand</option>
<option value="37">Trinadad&Tobago</option>
<option value="38">United States</option>
<option value="39">Vietnam</option>
<option value="40">Yugoslavia</option>
</select>
<input type="submit" value="Predict">
</form>
{% if prediction_text %}
<h3 class="result">{{ prediction_text }}</h3>
{% endif %}
</div>`
Step 3: Add Styles (styles.css)
This file improves the UI design making the form visually appealing and readable.
CSS `
body { font-family: Arial, sans-serif; background-color: #f4f6f8; display: flex; justify-content: center; align-items: center; min-height: 100vh; margin: 0; }
.container { background-color: #fff; padding: 30px 40px; border-radius: 12px; box-shadow: 0 4px 15px rgba(0,0,0,0.2); width: 400px; }
h2 { text-align: center; color: #333; margin-bottom: 25px; }
form label { display: block; margin-top: 10px; font-weight: bold; color: #555; }
form input[type="number"], form select { width: 100%; padding: 8px 10px; margin-top: 5px; border-radius: 5px; border: 1px solid #ccc; }
form input[type="submit"] { width: 100%; margin-top: 20px; padding: 10px; background-color: #007bff; color: white; font-size: 16px; border: none; border-radius: 6px; cursor: pointer; }
form input[type="submit"]:hover { background-color: #0056b3; }
.result { text-align: center; margin-top: 20px; color: green; font-weight: bold; }
`
Step 4: Running the Flask Application
Once your Flask app and required files are ready, you can start the web application locally and access it via a browser to make predictions.
- Open a browser and go to: http://127.0.0.1:5000/
- Fill in the Income Prediction Form and click Predict to see the results. Python `
python app.py
`
**Output:
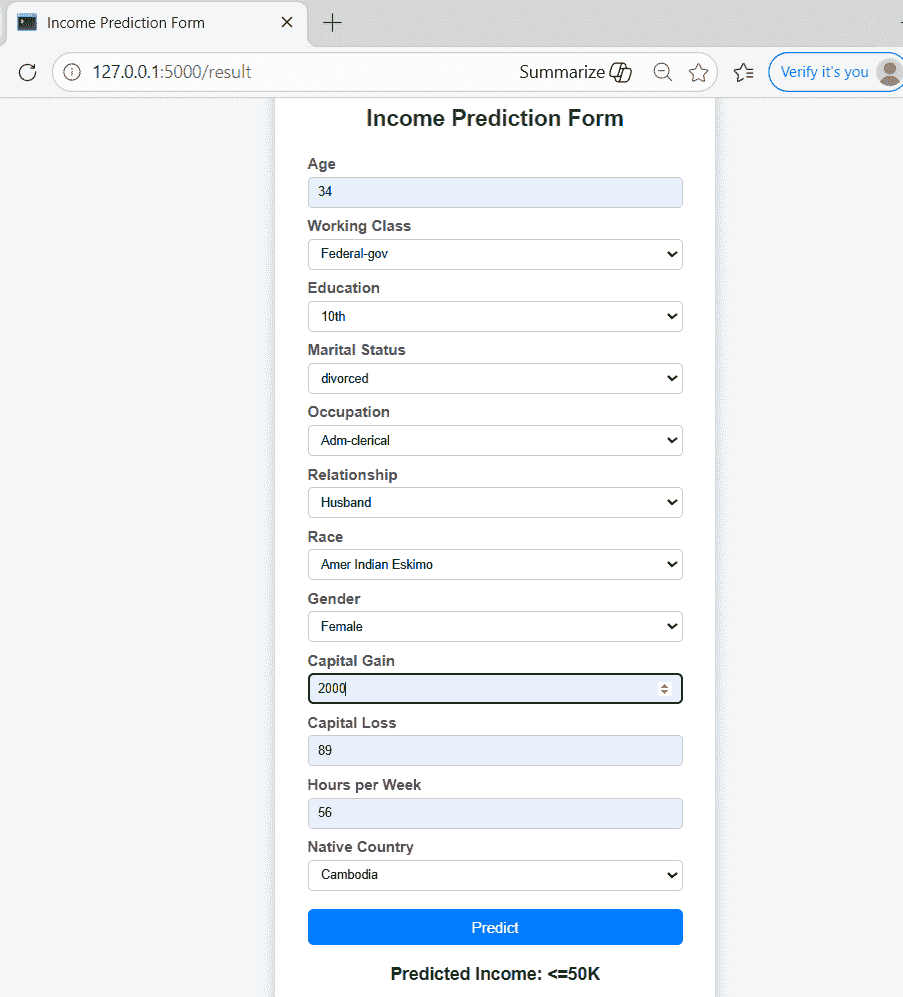
Web App
Download full code from here