Image Enhancement Techniques using OpenCV Python (original) (raw)
Last Updated : 15 Jun, 2026
Image enhancement is the process of improving the quality and appearance of an image to make it more suitable for viewing, analysis or further processing. It helps highlight important details and correct imperfections present in an image.
- Improve image contrast, sharpness and brightness.
- Reduce noise, blur and unwanted distortions.
- Enhance colors and visual details.
- Improve image quality for analysis and interpretation.
Image Enhancement Techniques
1. Brightness and Contrast Adjustment
Brightness and contrast adjustment improves image visibility by controlling overall brightness and the difference between light and dark regions.
- Brightness controls how light or dark an image appears.
- Contrast controls the difference between bright and dark areas.
- Proper adjustment helps reveal details and improve image quality.
- OpenCV provides the cv2.addWeighted() function for this purpose. Python `
import cv2 import matplotlib.pyplot as plt import numpy as np
image = cv2.imread('image path')
if image is None: print("Image not found") exit()
image = cv2.cvtColor(image, cv2.COLOR_BGR2RGB)
plt.subplot(1, 2, 1) plt.title("Original") plt.imshow(image) plt.axis('off')
brightness = 10 contrast = 1.5
image2 = cv2.addWeighted( image, contrast, np.zeros(image.shape, image.dtype), 0, brightness )
plt.subplot(1, 2, 2) plt.title("Brightness & Contrast") plt.imshow(image2) plt.axis('off')
plt.show()
`
**Output:

Brightness and contrast
2. Image Sharpening
Image sharpening is an image enhancement technique used to highlight edges and fine details, making an image appear clearer and more defined.
- Enhances edges and important features in an image.
- Helps reduce the effect of slight blur or softness.
- Improves image clarity and visual quality.
- OpenCV provides the cv2.filter2D() function to apply sharpening filters using convolution kernels. Python `
import cv2 import matplotlib.pyplot as plt import numpy as np
image = cv2.imread('GFG.jpeg')
plt.subplot(1, 2, 1) plt.title("Original") plt.imshow(image)
kernel = np.array([[0, -1, 0], [-1, 5, -1], [0, -1, 0]])
sharpened_image = cv2.filter2D(image, -1, kernel)
cv2.imwrite('sharpened_image.jpg', sharpened_image)
plt.subplot(1, 2, 2) plt.title("Sharpening") plt.imshow(sharpened_image) plt.show()
`
**Output:
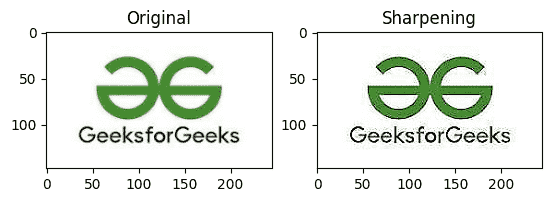
Sharpening
3. Noise Reduction
Noise reduction is an image enhancement technique used to remove unwanted noise and improve image quality. It helps create smoother images while preserving important details.
- Makes images easier to analyze and process.
- OpenCV provides filters such as Median Blur and Gaussian Blur for noise reduction.
- The cv2.medianBlur() function is particularly effective for removing salt-and-pepper noise. Python `
import cv2 import matplotlib.pyplot as plt import numpy as np
image = cv2.imread('GFG.jpeg')
plt.subplot(1, 2, 1) plt.title("Original") plt.imshow(image)
filtered_image = cv2.medianBlur(image, 11)
cv2.imwrite('Median Blur.jpg', filtered_image)
plt.subplot(1, 2, 2) plt.title("Median Blur") plt.imshow(filtered_image) plt.show()
`
**Output:
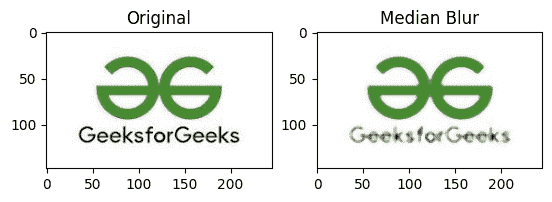
Median Blur
4. Color Enhancement
Color enhancement improves the appearance of an image by making colors more vibrant and balanced.
- Enhances color intensity and saturation.
- Helps correct color imbalances.
- OpenCV provides the cv2.cvtColor() function to work with different color spaces for color enhancement. Python `
import cv2 import matplotlib.pyplot as plt import numpy as np
image = cv2.imread('GFG.jpeg')
plt.subplot(1, 2, 1) plt.title("Original") plt.imshow(image)
image = cv2.cvtColor(image, cv2.COLOR_BGR2HSV)
image[:, :, 0] = image[:, :, 0] * 0.7 image[:, :, 1] = image[:, :, 1] * 1.5 image[:, :, 2] = image[:, :, 2] * 0.5
image2 = cv2.cvtColor(image, cv2.COLOR_HSV2BGR)
cv2.imwrite('enhanced coloured.jpg', image2)
plt.subplot(1, 2, 2) plt.title("enhanced coloured") plt.imshow(image2) plt.show()
`
**Output:

Enhanced Coloured
5. Image resizing and scaling
Image resizing and scaling are used to change the dimensions of an image. They help fit images to specific sizes while maintaining acceptable image quality.
- Used to enlarge or shrink an image.
- Different interpolation methods help preserve image quality.
- OpenCV provides the cv2.resize() function for resizing images. Python `
import cv2 import matplotlib.pyplot as plt
image = cv2.imread('Image path') image = cv2.cvtColor(image, cv2.COLOR_BGR2RGB)
resized_image = cv2.resize(image, (400, 300))
scaled_image = cv2.resize(image, None, fx=1.5, fy=1.5)
plt.figure(figsize=(12, 4))
plt.subplot(1, 3, 1) plt.imshow(image) plt.title("Original") plt.axis('off')
plt.subplot(1, 3, 2) plt.imshow(resized_image) plt.title("Resized (400x300)") plt.axis('off')
plt.subplot(1, 3, 3) plt.imshow(scaled_image) plt.title("Scaled (1.5x)") plt.axis('off')
plt.show()
`
**Output:

Resizing ans Scaling
6. Inverse Transform
Image inversion, also known as negative transformation, creates the negative of an image by reversing its pixel intensities. Dark pixels become light and light pixels become dark.
- Converts an image into its negative representation.
- Highlights certain details that may be less visible in the original image.
- Performed by subtracting each pixel value from 255. Python `
import cv2 import matplotlib.pyplot as plt import numpy as np
image = cv2.imread('GFG.jpeg')
plt.subplot(1, 2, 1) plt.title("Original") plt.imshow(image)
inverse_image = 255 - image
cv2.imwrite('inverse_image.jpg', inverse_image)
plt.subplot(1, 2, 2) plt.title("Inverse color") plt.imshow(inverse_image) plt.show()
`
**Output:

Inverse color
7. Equalizing histograms
Histogram equalization is an image enhancement technique used to improve image contrast by redistributing pixel intensity values. It makes details in dark or low contrast regions more visible.
- Improves visibility of details in low contrast areas.
- Redistributes pixel intensities over a wider range.
- OpenCV provides the cv2.equalizeHist() function for histogram equalization. Python `
import cv2 import matplotlib.pyplot as plt import numpy as np
image = cv2.imread('GFG.jpeg')
plt.subplot(1, 2, 1) plt.title("Original") plt.imshow(image)
gray_image = cv2.cvtColor(image, cv2.COLOR_BGR2GRAY)
equalized_image = cv2.equalizeHist(gray_image)
cv2.imwrite('equalized.jpg', equalized_image)
plt.subplot(1, 2, 2) plt.title("equalized") plt.imshow(equalized_image) plt.show()
`
**Output:

Equalized
Download full code from here
Additional Image Enhancement Techniques
Image enhancement includes several other techniques that help improve image quality, extract useful information and prepare images for analysis.
- **Morphological Transformations: Used to modify the shape and structure of objects in an image through operations such as dilation, erosion, opening and closing.
- **Edge Detection: Identifies object boundaries by detecting sharp changes in pixel intensity using methods such as Canny, Sobel and Laplacian.
- **Color Correction: Adjusts color balance and intensity to produce more natural and visually appealing images.
- **Image Gradients: Highlights intensity changes in an image and is commonly used for edge detection and segmentation.
- **mage Cropping: Removes unwanted regions to focus on the important parts of an image.
- **Image Rotation: Changes the orientation of an image by rotating it through a specified angle.
- **Image Blending: Combines multiple images into a single image using weighted averaging techniques.
- **Image Thresholding: Converts an image into binary or segmented regions based on pixel intensity values.
- **Image Deblurring: Reduces blur caused by motion, camera shake or focus issues to improve image clarity.