Creating Database using MongoDB Compass (original) (raw)
Last Updated : 5 May, 2026
MongoDB is a document-oriented NoSQL database, and MongoDB Compass is a GUI tool that simplifies database interaction without complex query syntax.
- MongoDB stores data as BSON documents instead of tables and rows.
- Uses a document-oriented storage model.
- MongoDB Compass provides a graphical interface for database interaction.
- Enables easy data exploration and management without deep query knowledge.
MongoDB Compass
MongoDB Compass is a free GUI tool that provides an intuitive way to manage and interact with MongoDB databases.
- Simplifies database management through a visual interface.
- Allows creating, querying, updating, and deleting documents.
- Eliminates the need to write complex MongoDB commands.
- Ideal for users who prefer graphical tools over manual queries.
MongoDB Document-Oriented Data Model
MongoDB uses a document-oriented data model that differs from relational databases like MySQL by storing data in flexible, JSON-like documents.
- MongoDB uses a document-oriented data model.
- Data is stored internally in BSON and accessed using JSON.
- MongoDB automatically converts JSON to BSON.
- Collections are conceptually similar to tables in relational databases but differ in structure and flexibility.
- Documents are conceptually similar to rows but support flexible, nested data structures.
- Fields (key-value pairs) are conceptually similar to columns but are more flexible.
- Supports flexible and schema-less data storage compared to MySQL.
Example of a Document
The Document contains the information of a STUDENT in JSON format.
{
"Name" : "Ron",
"Age" : 21,
"Gender" : "Male",
"Dept" : "CS"
}
Example of a Collection
The Bunch of documents creates a collection.
[
{
"Name" : "Ron",
"Age" : 21,
"Gender" : "Male",
"Dept" : "CS"
},
{
"Name" : "Kim",
"Age" : 19,
"Gender" : "Male",
"Dept" : "BBA"
},
{
"Name" : "Ron",
"Age" : 21,
"Gender" : "Male",
"Dept" : "HIS"
},
{
"Name" : "Alen",
"Age" : 21,
"Gender" : "Male",
"Dept" : "CS"
}
]
Installation of MongoDB Compass
MongoDB Compass is a GUI tool for MongoDB that allows users to analyze and manage data without knowing MongoDB query syntax. To create a database using MongoDB Compass, the application must first be installed on the system.
Steps to Install MongoDB Compass
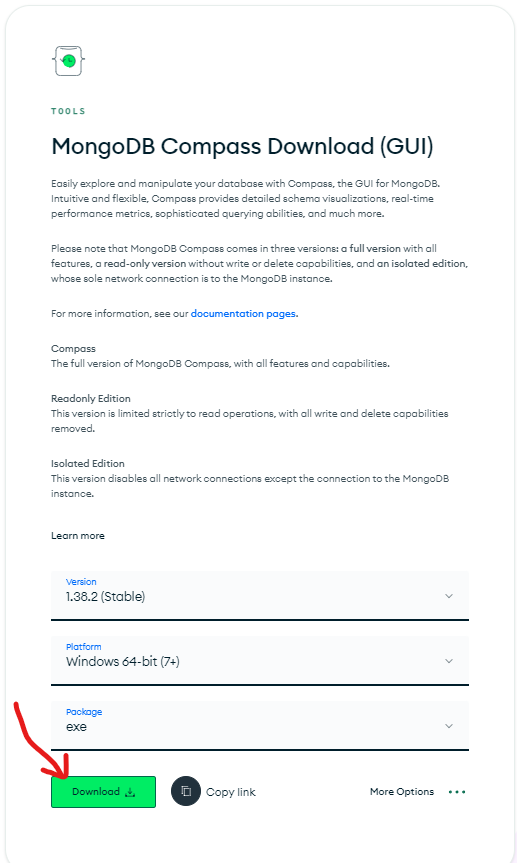
**Step 1: Download the MongoDB Compass exe package from MongoDB official Website.
**Step 2: After Redirect to that page Click on "Download" Button.
**Step 3: After Successful Download, Open the downloaded file by double click on Downloaded File.
**Step 4: After Double Click on the Downloaded File. MongoDB Compass Starts Installing in your system. It takes a few seconds to install.
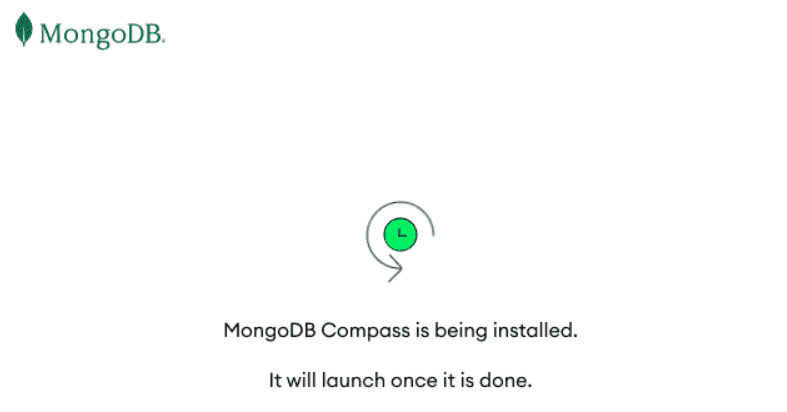
**Step 5: After Successful Install it will be automatically opened in your system.

From the Above Steps, we have learned how to Install MongoDB Compass. Now Lets, Learn How to Create a Database using MongoDB Compass.
Steps to Create a Database Using MongoDB Database
Now that MongoDB Compass is installed, follow these steps to create your first database and collection:
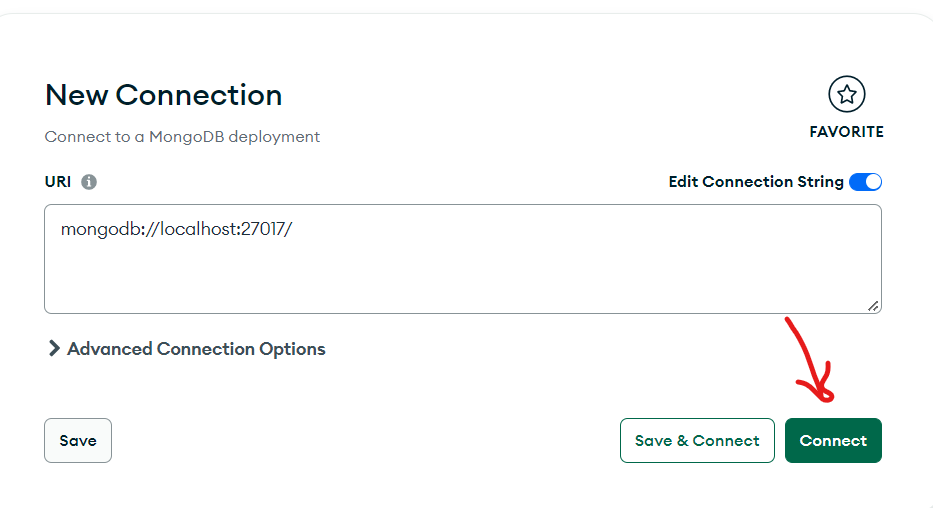
**Step 1: Simply Open MongoDB Compass on your system.
**Step 2: After Successfully Opening, click the Connect button to connect to your MongoDB server.
**Step 3: If you're using MongoDB Atlas, copy the connection string from the Atlas dashboard and paste it into the Compass connection field. If you're working with a local MongoDB instance, use the default connection URI: mongodb://localhost:27017.
**Step 4: After connecting to MongoDB, click the plus (+) sign next to Databases on the left sidebar.
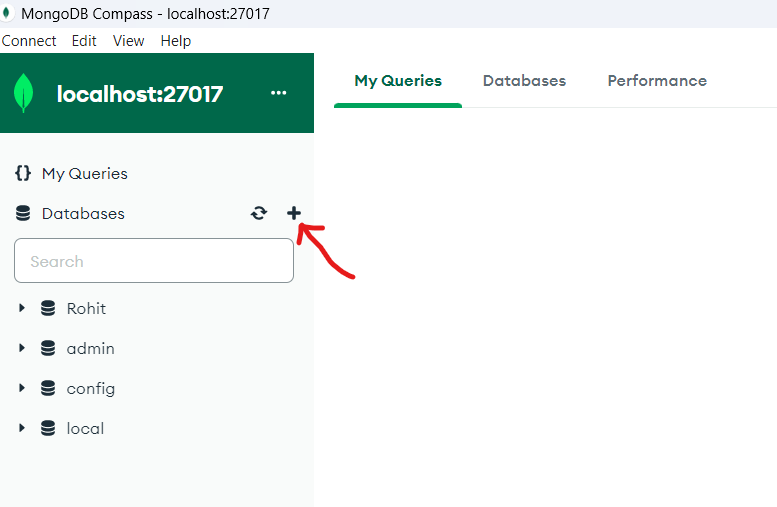
**Step 5: Click on Plus (+) icon, a popup will appear in which you have to give Database Name and Collection Name.
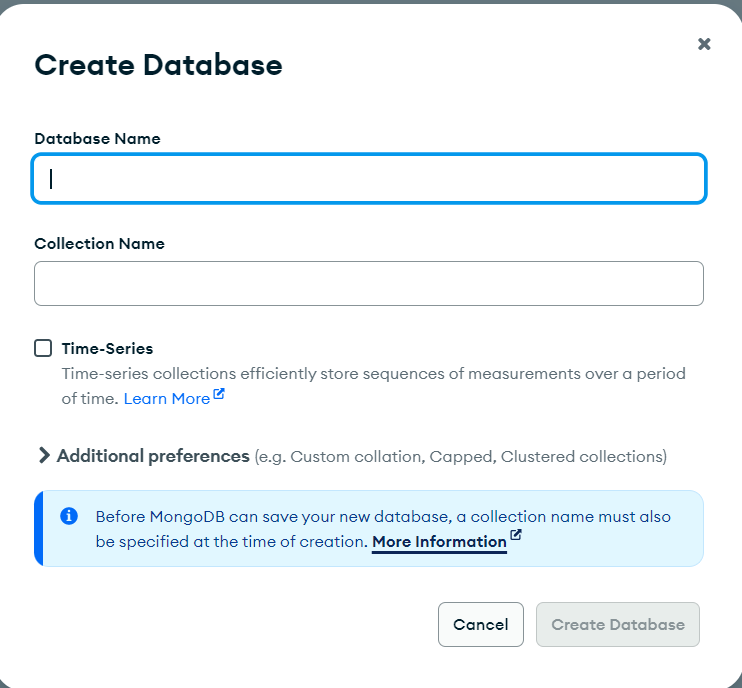
**Step 6: Here we can give any Database Name and Collection Name as per your Choice. Here taking the Database name "GFG" and Collection Name "college".
**Step 7: Click on the "Create Database" Button.
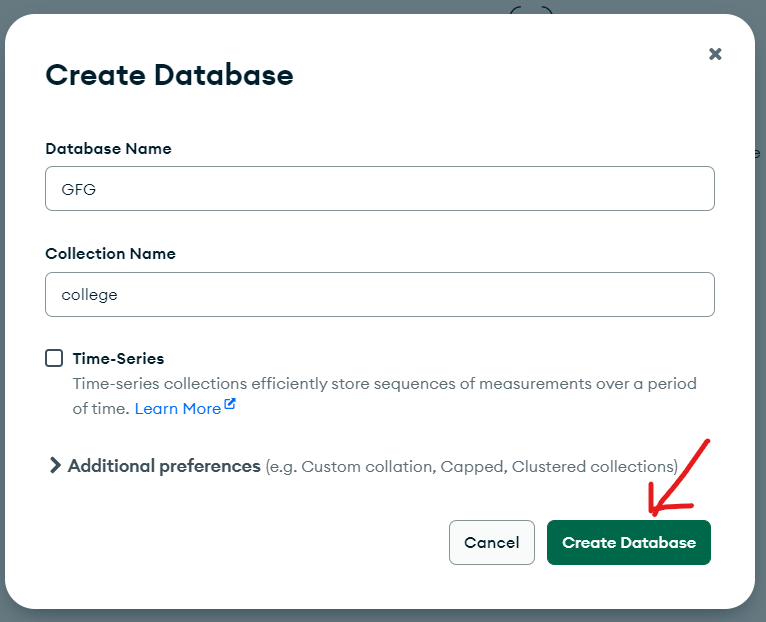
From the above Steps Database of the name "GFG" will be Created.
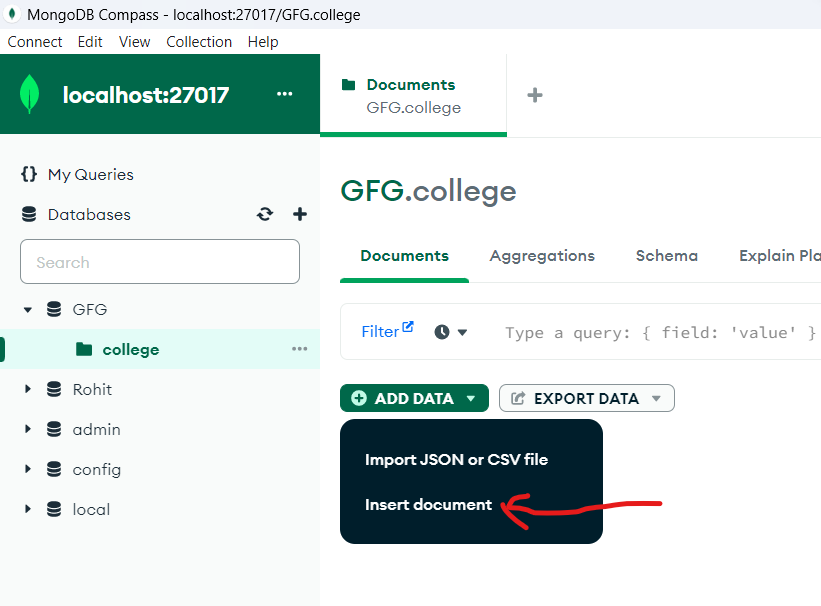
**Step 8: After that, click on "ADD DATA" and select the "Insert document" option.
**Step 9: Click on "Insert document" a new popup appear.
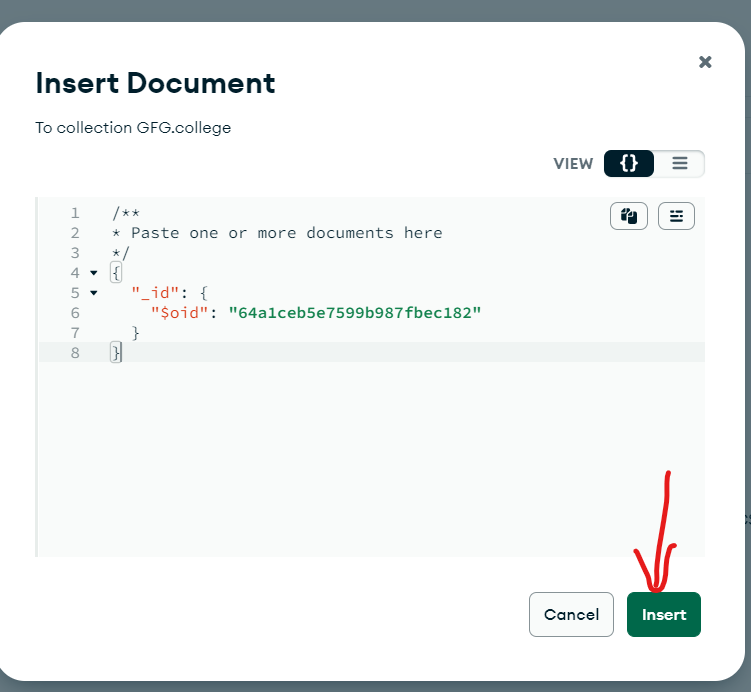
**Step 10: Paste or write the bunch of documents that is Collection and then Click on the "Insert" Button.
Database has created using MongoDB compass.