Installation of MongoDB on MacOS (original) (raw)
Last Updated : 5 May, 2026
MongoDB is a popular open-source NoSQL database designed for flexibility, scalability, and high performance. It is widely adopted for modern applications that require handling large volumes of real-time data efficiently.
- Used by major companies like Adobe, Uber, IBM, and Google.
- Stores data in document format (BSON), making it schema-less and flexible.
- Well-suited for big data applications and real-time analytics.
System Requirements for Installing MongoDB on MacOS
Before installing MongoDB, ensure the system meets the following requirements:
- **macOS version: 11 (Big Sur) or later is recommended.
- **64-bit processor: Required for running MongoDB on macOS (x86_64 architecture).
- **Permissions: Ensure the account running MongoDB has read and write access to the data and log directories.
Install MongoDB on MacOS Using .tgz tarball
To install MongoDB on MacOS, first download the MongoDB and then setup the command line. Follow these step-by-step instructions to install MongoDB on our macOS system using the .tgz tarball file.
Step 1:Download MongoDB
1. Go to MongoDB Download Center to download the MongoDB Community Server.
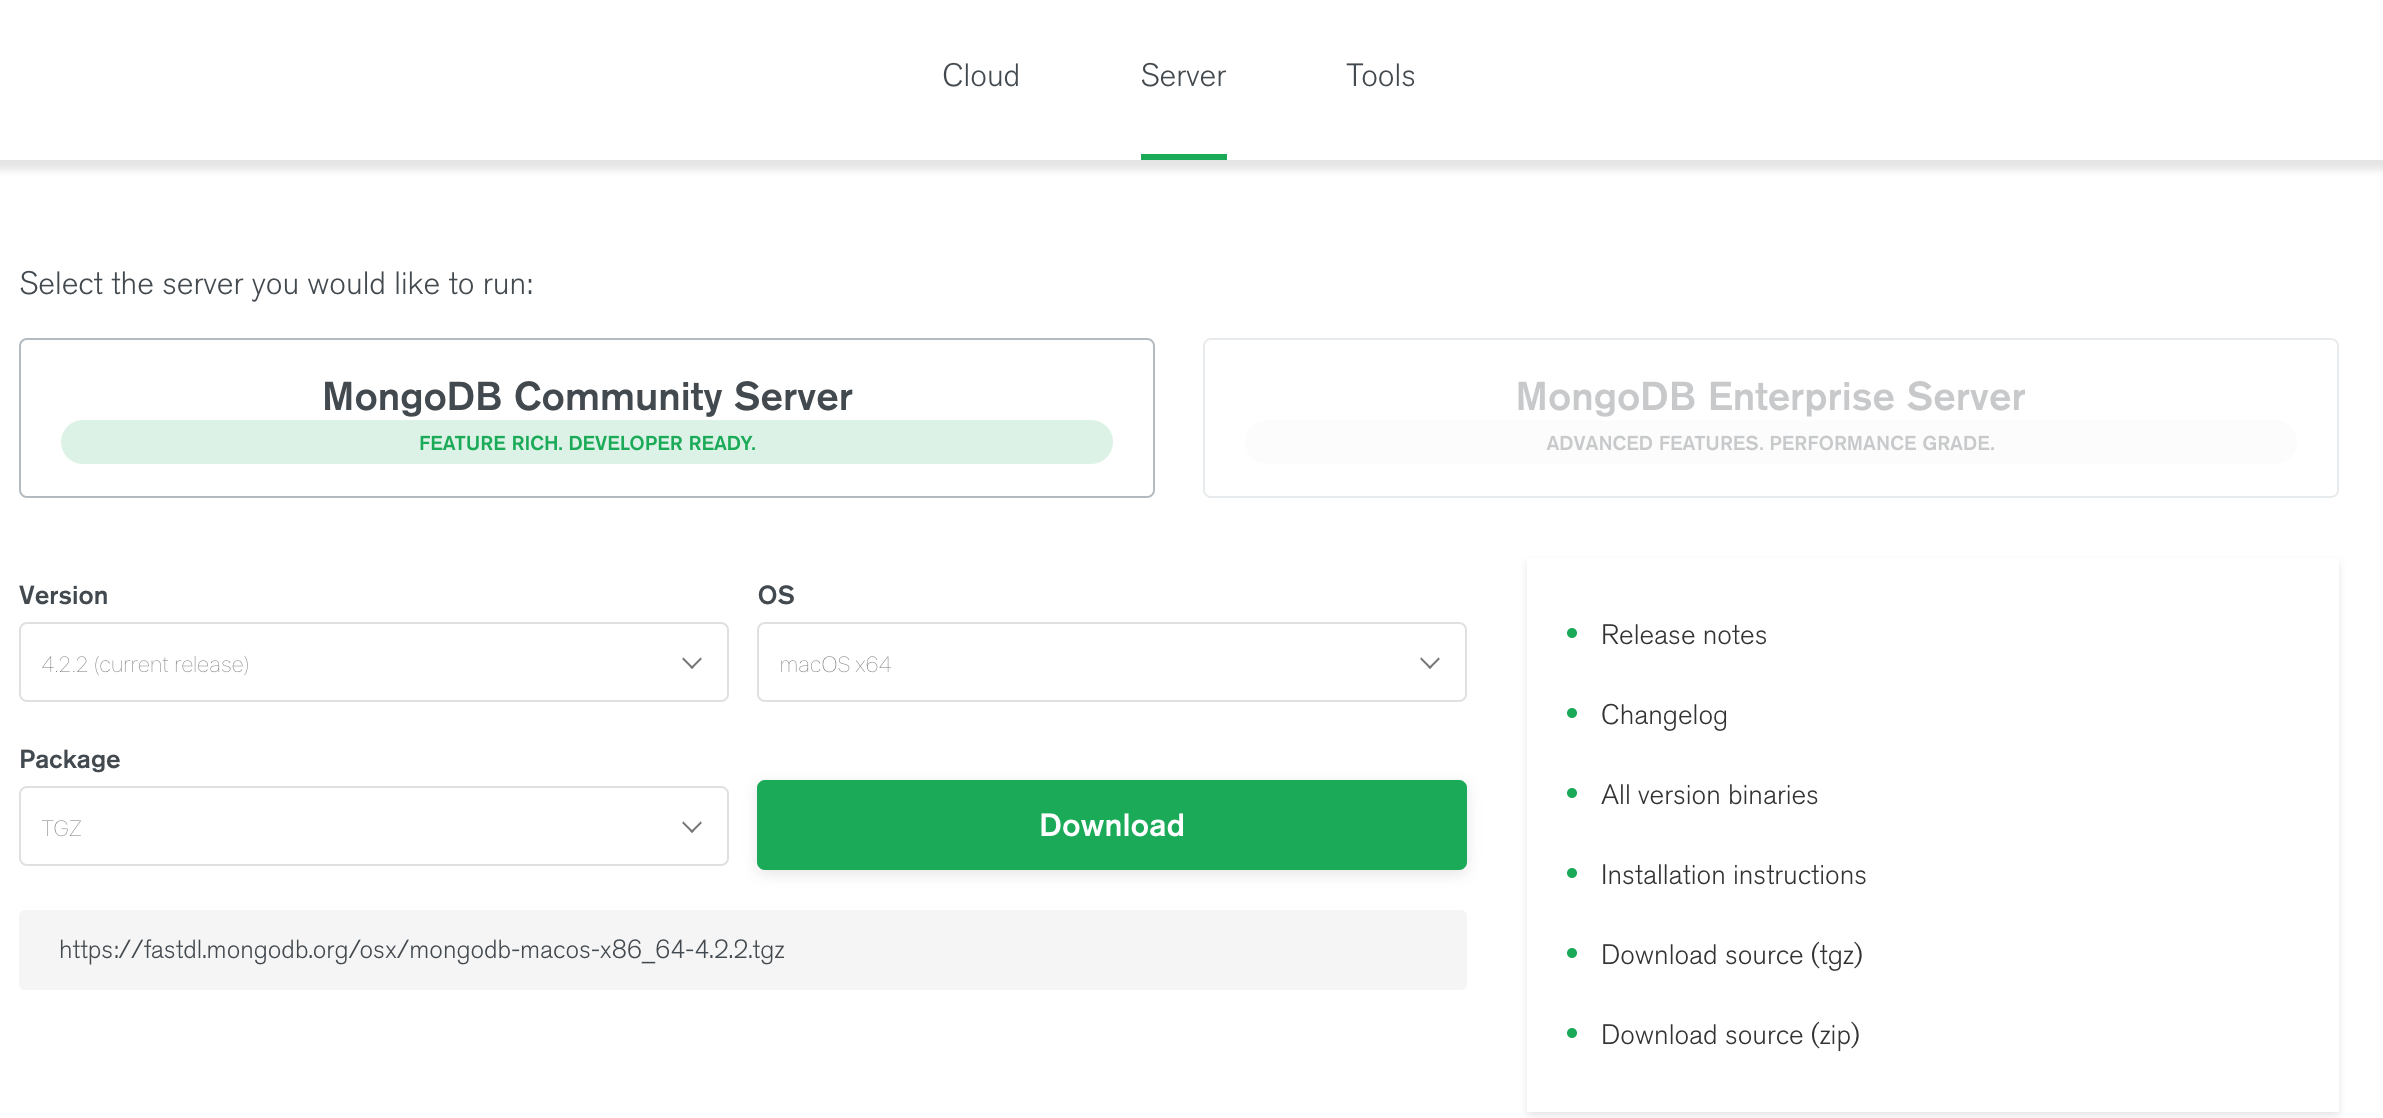
2. Here, We can select any version, OS, and package according to our requirement. For macOS we need to choose:
- **Version: Latest stable version (e.g., 6.x or 7.x)
- **OS: macOS x64
- **Package: TGZ
3. After selecting the appropriate version and settings, click on Download. Once the download is complete, you will have a .tgz file on your machine
1. Open Terminal and navigate to the folder where the .tgz file is located.
2. Extract the file with the following command
tar -xvzf mongodb-macos-x86_64-.tgz

3. The bin folder contains important executables:
- mongod: MongoDB server process (not the database itself)
- mongosh: Modern MongoDB shell (replaces deprecated mongo)
- mongodump: Tool for creating database backups
Step 3: Setting Command Line Interface (mongo Shell)
To run MongoDB Shell, set the environment path using a profile file.
1. Use .bash_profile (macOS Mojave or earlier) or .zprofile (Catalina or later).
2. Create the file if it doesn’t exist in the home directory.
**Terminal commands:
- **Go to home directory: cd ~/
- **Create file: touch .bash_profile or touch .zprofile
- **Edit file: open -e .bash_profile or open -e .zprofile
- **Apply changes: source ~/.bash_profile or source ~/.zprofile
**Note: Hidden files can be viewed in Finder using Command + Shift + .
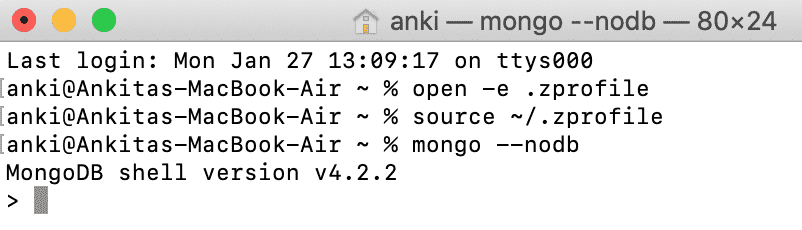
After creating or getting .bash_profile or .zprofile set your path. Like, as shown in the below image:

Here, /Users/anki/mongodb-macos-x86_64-4.2.2/bin points to the MongoDB binaries, while :$PATH ensures existing commands remain accessible. After updating .bash_profile or .zprofile, save the file and reload it using source so the terminal recognizes the new path.
**Note: For Catalina users when you run mongo or mongo --nodb command in your terminal, your macOS would not allow to run mongo. So, to run mongo you need to give them permission manually i.e,
System Preferences > Security & Privacy > Allow Anyway
Same procedure to run mongod
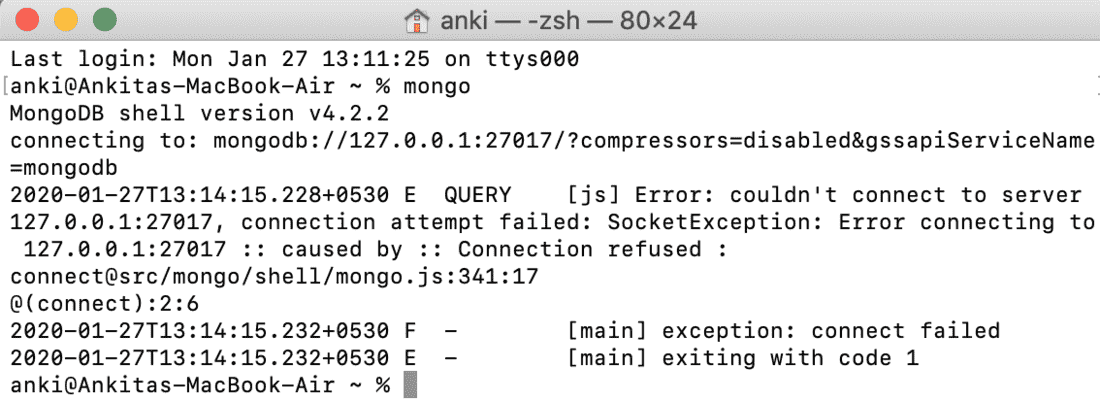
After setting up the MongoDB Shell, connection attempts may fail because the MongoDB server (mongod) is not running. To use the shell, the mongod service must be started locally on the system.
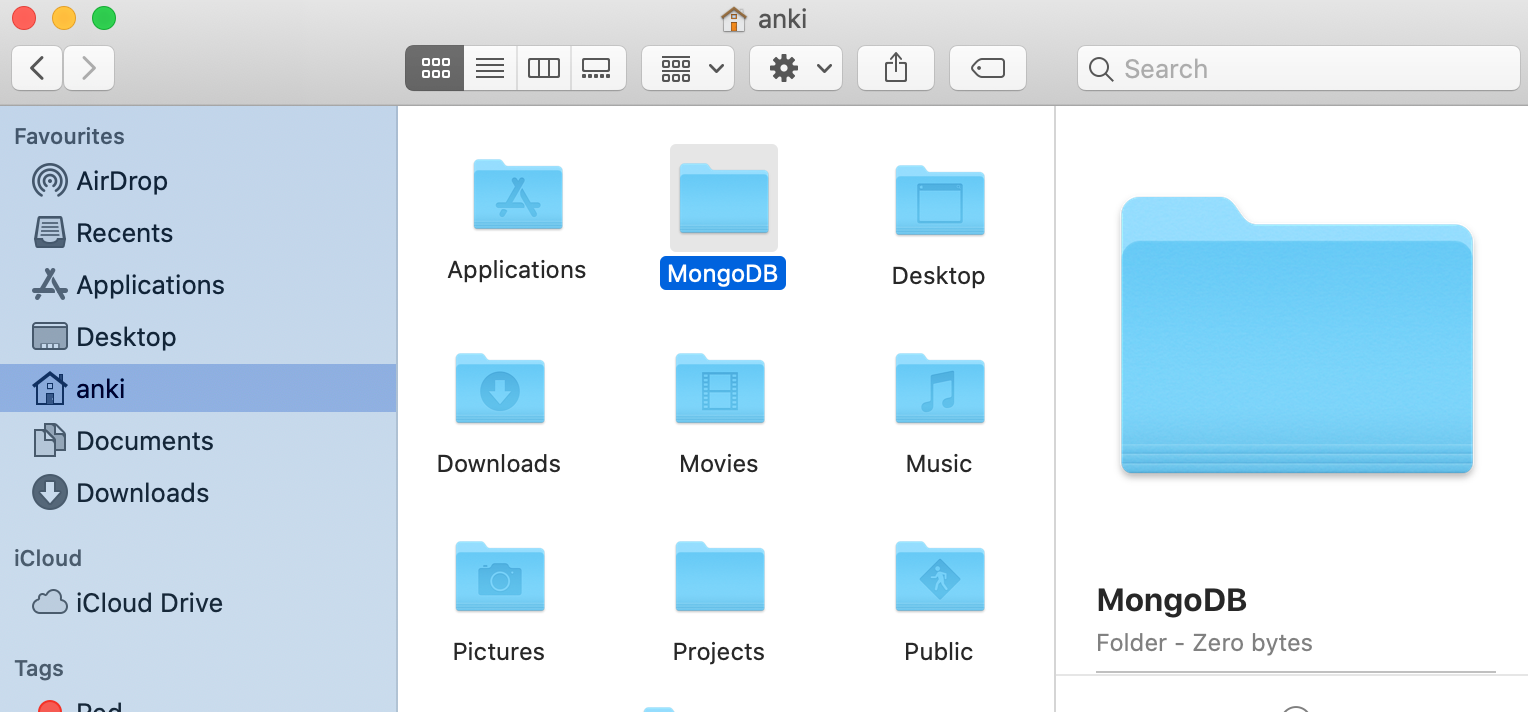
Step 4:Create a Data Directory for MongoDB
Before running mongod first we will create a folder or directory which will store all the data processed by the mongod.
1. Before running MongoDB, you need to create a directory to store MongoDB’s data.
- For macOS Mojave or earlier, MongoDB uses the default directory /data/db.
- For macOS Catalina and later, create a custom path like ~/data/db due to Apple’s restrictions on the default data path.
2. Create the data directory using the following command:
mkdir -p ~/data/db
This directory will store the MongoDB data during its operation.
Step 5:Run the MongoDB Server (mongod)
Now we are going to run mongod with its data directory path. Here, mongod is the database server provided by the MongoDB. To start mongod you can use one of the following commands:
mongod --dbpath /data/db
- This starts the MongoDB server and points it to the data directory for storing data.
- If you encounter any permission issues (especially for newer macOS versions), prepend the command with sudo:
sudo mongod --dbpath /data/db

Here, sudo mongod --dbpath ~/MongoDB command to start mongod server and ~/MongoDB is data directory.
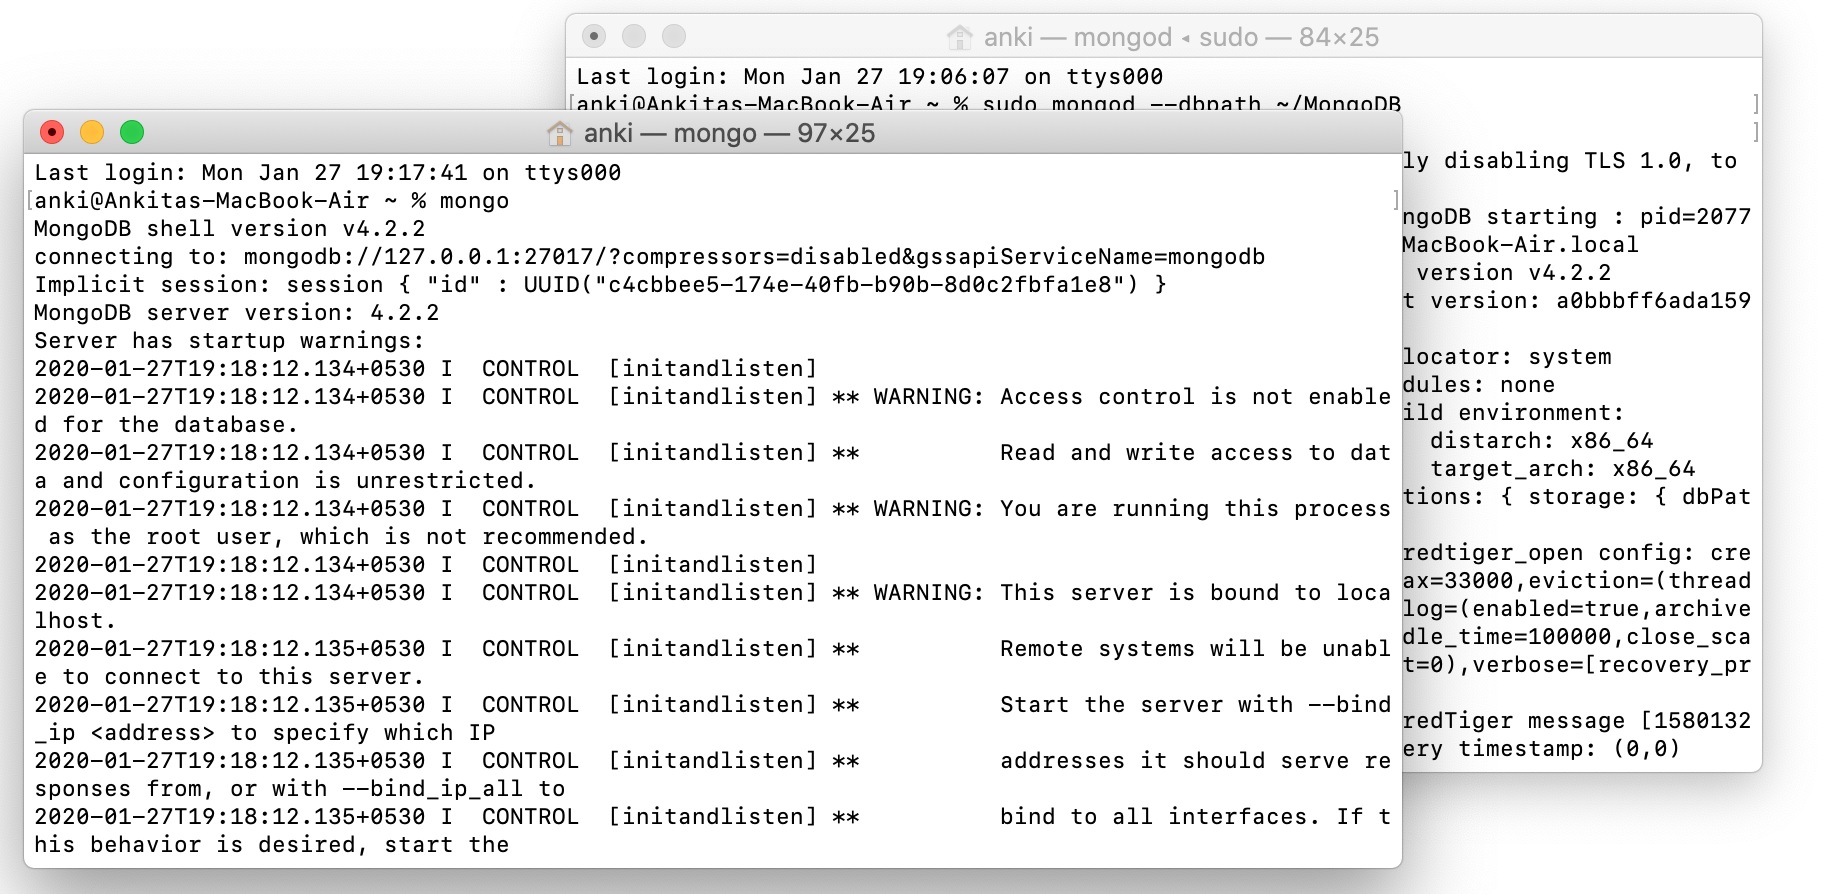
Step 6: Connect to MongoDB Using the Mongo Shell
Now we are going to connect our server (mongod) with mongo shell. So, keep that mongod terminal window and open a new terminal window and write mongo and now our mongo shell will successfully connect to the mongod.
**NOTE:
- Please do not close the mongod terminal window, if you close this terminal window your server will stop working and you will not connect to the mongo shell.
- The mongo shell is deprecated and mongosh is used in modern MongoDB versions.
Now, we are ready to write queries in the mongo Shell.