Next.js Docker Images (original) (raw)
Last Updated : 23 Jul, 2025
Using Next.js Docker images allows your app to deploy to multiple environments, and is more portable, isolated and scalable in dev and prod. Docker’s containerization makes app management super easy, you can move from one stage to another with performance.
Before we get started, let’s cover the basics of a Docker image. A Docker image is a read-only template with all the instructions to create a container that runs on Docker. You can think of it as a snapshot of the application’s current state, with the source code, libraries, dependencies, tools and other files needed for the app to work.
Use of Docker for Next.js Applications
Docker provides many benefits to Next.js apps, making development and deployment easier and faster. Here’s how Docker can help:
- **Consistent Environments: Docker wraps all dependencies, so you have the same setup for dev, test, and prod, and can troubleshoot and have the same app everywhere.
- **Scalability: Scale by adding containers during high traffic, and the app will be responsive and use resources wisely.
- **Cross-Platform Portability: Run your Next.js app anywhere—AWS, Google Cloud, Azure, or local servers—and can switch providers if needed.
- **Resource Utilization: Containers are light, share the host OS, so cheaper, faster to start and better performance.
- **CI/CD Integration: Docker is suitable for CI/CD pipelines, automates testing and deployment to speed up development and catch issues early.
Use of Docker for Next.js Deployments
Using Docker for Next.js applications is useful in many situations. Here are some scenarios where Docker shines:
- **Environment Control: When you have specific config requirements for your app, Docker help you in this. You can define and customise the environment to exactly what your app needs. Everything will work as expected without relying on the underlying infrastructure.
- **Cloud Provider Integration: Docker ensures your app runs the same everywhere, especially when deploying to cloud providers like AWS or Google Cloud Run. This makes cloud services integration a breeze, so you can use all the features of your chosen platform without hitting any unexpected roadblocks.
- **Dependency Management: One of Docker’s superpowers is to package your app with all its dependencies. This avoids the common problems that come with different environment setups, so you get reliable builds and smooth performance no matter where your app is deployed.
- **Microservices Architecture: If your Next.js app is part of a larger microservices architecture, Docker is even more useful. You can deploy and manage each microservice independently, so you have more control and flexibility over each part of your app. This independence makes updates, scaling and maintenance a breeze, so development and deployment is more efficient.
Setting Up a Basic Docker Environment for Next.js
To start your journey with Docker and Next.js, you need to first create a new Next.js application. Open your terminal and run:
npx create-next-app@latest my-next-app
cd My-next-app
Once the application is installed Make sure you have all important files, especially next.config.js. This file is important for customizing how your Next.js app works if it doesn't already exist. You can create it to customize the specific settings you want for your application.
Understanding Dockerfile Configurations for Next.js
Now, let's talk about the Dockerfile, which is required for building your Docker image. Here's a quick overview of some of the main commands you'll use.
- **From: This command specifies the base image to build your container on.
- **WORKDIR: This sets the working directory where all subsequent commands will be run.
- **COPY: Used to copy files from your machine to the container.
- **Reveal: Shows the port that the app will use when the container is running.
- **CMD: This command tells Docker what to run when the container starts. This is usually the command to launch your app.
1. Creating a Simple Development Dockerfile
Here’s a simple Dockerfile you can use to run your Next.js app in development mode:
FROM node:18
WORKDIR /app
COPY package*.json ./
RUN npm install
COPY . .
EXPOSE 3000
CMD ["npm", "run", "dev"]
- **FROM node:18: This line sets the base image to Node.js version 18.
- **WORKDIR /app: It defines
/appas the working directory inside the container. - **COPY package.json ./: This copies your package files into the container.
- **RUN npm install: This installs all the dependencies listed in your package files.
- **COPY . .: This copies your entire application code into the container.
- **EXPOSE 3000: This tells Docker that your app will be using port 3000.
- **CMD ["npm", "run", "dev"]: Finally, this command starts the Next.js development server.
2. Advanced Multi-stage Dockerfile for Next.js
Using a multi-stage Dockerfile can greatly optimize your build process. Here’s how it breaks down:
FROM node:18-alpine as base
WORKDIR /app
COPY package*.json ./
RUN npm install
FROM base as builder
COPY . .
RUN npm run build
FROM base as production
COPY --from=builder /app/.next ./.next
COPY --from=builder /app/node_modules ./node_modules
COPY --from=builder /app/public ./public
CMD ["npm", "start"]
FROM base as dev
ENV NODE_ENV=development
COPY . .
CMD ["npm", "run", "dev"]
- **base: Base stage installs the dependences and sets up the environment.
- **builder: Here, the app is built with
npm run build. - **production: This stage prepares the production image by copying the necessary files from the builder stage.
- **dev: This configuration is for development, which makes testing and debugging easier.
3. Using Docker Compose with Next.js
Docker Compose helps you manage your application by defining multiple containers. To set it up for your Next.js app, create a docker-compose.yml file like this:
version: '3.8'
services:
app:
build:
context: .
dockerfile: Dockerfile
ports:
- "3000:3000"
volumes:
- .:/app
- **version: It shows which version of the Compose file format currently you are using.-
- **services: Services define about the different services in your app, with app being the main one.
- **build: This specifies the context and Dockerfile for building your image.
- **ports: This maps port 3000 of the container to port 3000 on your host machine.
- **volumes: It allows real-time code updates and this also mounts your current directory to the container.
4. Optimizing Docker for Next.js Builds
To make your Docker images more efficient, consider these tips:
- **Use Lightweight Base Images: Try to use images like
node:18-alpineto keep your final image size small. - **Set NODE_ENV: In your production Dockerfile, set the
NODE_ENVvariable toproductionfor better performance. - **Remove Unused Dependencies: Regularly check your
package.jsonand clean up any unnecessary packages to keep your image lean.
Building Efficient and Lightweight Docker Images for Next.js
Optimizing Docker images for a Next.js app is crucial for better performance, security, and efficient use of resources. Here are some practical tips to help you streamline your images:
- **Use Multistage Builds for Cleaner Images: With multistage builds, you can create a more efficient Docker image by separating the build process into multiple stages. This setup lets you keep only the essential files in the final image, cutting down on unnecessary files and reducing the overall image size. It also boosts security by ensuring only the needed parts are included in the production image.
- **Choose a Minimal Base Image: Going with a lightweight base image, such as 'node:alpine', keeps your Docker image small. This means faster deployments and lower memory usage, which are both essential for smooth app performance. Alpine images contain only the basics, so they’re perfect for lightweight Next.js apps that don’t require extra packages.
- **Environment-specific Dockerfiles: Having dedicated Dockerfiles for different environments (e.g., 'Dockerfile' for production and 'dev.Dockerfile' for development) helps you optimize for each use case. A production Dockerfile can create a smaller, more secure image with limited permissions, while the development Dockerfile can include additional tools and settings to make debugging and testing easier.
**Steps to Initialize Next.js Docker Images
Follow the below steps to initialize the NextJs Docker Images:
**Step 1: Initializing NextJs project
Go to the directory where you want to initialize your project and use npx to download all required files.
$ npx create-next-app

**Step 2: Switch to Project in code editor
Open The Application On your code editor. I am using vs code and the command to open my NextJs project on it will be:
$ cd my-app && code .
**Step 3: Create a Dockerfile in the root directory of your Next.js application.
A **Dockerfile is a text document that contains all the commands a user could call on the command line to assemble an image. In this step, we will create two dockerfiles.
- **Dockerfile: Dockerfile for production, alternatively you can name it prod.Dockerfile
- **dev.Dockerfile: Dockerfile for development
Production means when the application is deployed for use and development means when the application is under development.

**This is the Dockerfile used in the production of the application:
# Dockerfile for production # Install dependencies only when needed FROM node:16-alpine AS deps # Check https://github.com/nodejs/docker-node/tree/b4117f9333da4138b03a546ec926 ef50a31506c3#nodealpine to understand why libc6-compat might be needed. RUN apk add --no-cache libc6-compat WORKDIR /app # Install dependencies based on the preferred package manager COPY package.json yarn.lock* package-lock.json* pnpm-lock.yaml* ./ RUN \ if [ -f yarn.lock ]; then yarn --frozen-lockfile; \ elif [ -f package-lock.json ]; then npm ci; \ elif [ -f pnpm-lock.yaml ]; then yarn global add pnpm && pnpm i; \ else echo "Lockfile not found." && exit 1; \ fi # Rebuild the source code only when needed FROM node:16-alpine AS builder WORKDIR /app COPY --from=deps /app/node_modules ./node_modules COPY . . # Next.js collects completely anonymous telemetry data about general usage. # Learn more here: https://nextjs.org/telemetry # Uncomment the following line in case you want to disable telemetry during the build. # ENV NEXT_TELEMETRY_DISABLED 1 RUN yarn build # If using npm comment out above and use below instead # RUN npm run build # Production image, copy all the files and run next FROM node:16-alpine AS runner WORKDIR /app ENV NODE_ENV production # Uncomment the following line in case you want to disable telemetry during runtime. # ENV NEXT_TELEMETRY_DISABLED 1 RUN addgroup --system --gid 1001 nodejs RUN adduser --system --uid 1001 nextjs COPY --from=builder /app/public ./public # Automatically leverage output traces to reduce image size # https://nextjs.org/docs/pages/api-reference/config/next-config-js/output COPY --from=builder --chown=nextjs:nodejs /app/.next/standalone ./ COPY --from=builder --chown=nextjs:nodejs /app/.next/static ./.next/static USER nextjs EXPOSE 3000 ENV PORT 3000 CMD ["node", "server.js"]
You can create a file named "Dockerfile" in the root directory of your project and paste these instructions into it.
**This is the Dockerfile used in the development of your application:
dev.Dockerfile for development
FROM node:18-alpine
WORKDIR /app
Install dependencies based on the preferred package manager
COPY package.json yarn.lock* package-lock.json* pnpm-lock.yaml* ./
RUN \
if [ -f yarn.lock ]; then yarn --frozen-lockfile; \
elif [ -f package-lock.json ]; then npm ci; \
elif [ -f pnpm-lock.yaml ]; then yarn global add pnpm && pnpm i; \
else echo "Lockfile not found." && exit 1; \
fi
COPY . .
CMD yarn dev
**Step 4: Altering next.config.js.
To add support for Docker to an existing project, just copy the Dockerfile into the root of the project and add the following to the next.config.js file:
// next.config.js
module.exports = {
// ... rest of the configuration.
output: 'standalone',
}
**Step 5: Build The Dockerfile and dev.Dockerfile
$ docker build -t nextjs-docker .
$ docker build -t nextjs-docker-dev -f dev.Dockerfile .
It usually takes time to build the Image for the first time.


**Step 6: Run your application
Based on the tags you gave to your Dockerfiles you can now run them withthe docker run command.
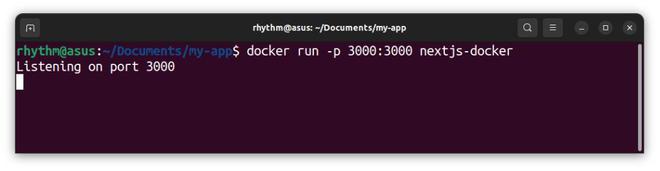
For production
$ docker run -p 3000:3000 nextjs-docker
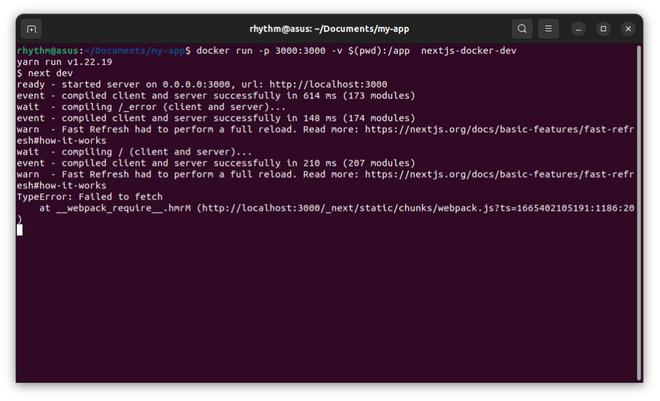
For development, files wont be synced until step 8
$ docker run -p 3000:3000 nextjs-docker-dev
The -p flag exposes the container's port to services outside docker.


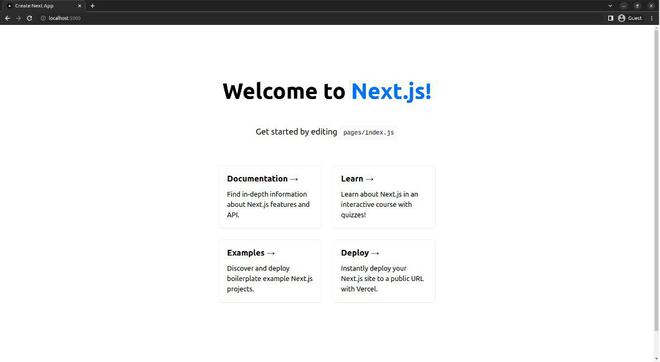
**Step 7: Verify the output
Verify if our application is running.
**Step 8: Allow file change detection
Everything looks great so far, but there is one small problem that we did not solve. As we know Images are read-only and any file change made after the files have been built will not reflect on the localhost. For this, we have to use a **bind mount. With bind mounts, we control the exact mount point on the host. We can use this to persist data, but it’s often used to provide additional data into containers.
$ docker run -p 3000:3000 -v $(pwd):/app nextjs-docker-dev
-v $(pwd):/app specifies the mount point of the application so that file changes can be detected.
Try making some changes in your files and see if changes are being tracked. This was all about creating NextJs Docker Images. Read more about NextJs on geeks for geeks.
Best Practices and Troubleshooting Tips for Next.js Docker Images
Here are some useful practices and troubleshooting tips to make Dockerizing a Next.js app easier:
- **Optimize Layer Caching: Organize your Dockerfile to make use of Docker’s caching. Start by copying over the 'package.json' and 'yarn.lock' files and install dependencies first. This way, if only your code changes (and not dependencies), Docker can skip re-installing dependencies, speeding up builds.
- **Manage Environment Variables Easily: Using '.env' files is a smart way to handle environment variables, so you don’t need to edit the Dockerfile every time you switch environments. Keep sensitive info out of Dockerfiles to avoid exposing secrets—stick to '.env' files for secure management.
- **Handle Static Assets for Static Deployments: For static deployments with Next.js, running 'next export' can be a big help. It generates static HTML files for each page, which reduces the number of dependencies needed at runtime, making it simpler to manage containers for static content.
- **Troubleshoot Common Issues: Some common problems include missing dependencies that can cause build errors or issues with hot-reloading in development. Solutions include installing 'libc6-compat' to avoid compatibility issues or adjusting bind mounts to ensure file changes sync properly during development.
Troubleshooting Common Issues in Next.js Dockerization
While Dockerizing your Next.js application, you might run into some common issues. Here are some solutions for frequent problems:
- **Python Dependency Errors: If you encounter errors related to Python on macOS, try adding the following command to your Dockerfile to install the necessary build tools:
RUN apk add --no-cache g++ make py3-pip libc6-compat - **Missing Build Files: If you see errors about missing files in the
/app/.nextdirectory, double-check your build process. Make sure your volume mappings indocker-compose.ymlare set correctly.
Conclusion
Dockerizing a Next.js application makes development, testing, and deployment much simpler by creating an environment that’s consistent and easy to scale. Docker helps you handle dependencies, set up CI/CD pipelines, and optimize your builds with multistage Dockerfiles to boost efficiency and performance. By sticking to best practices and using tools like Docker Compose, you can deploy your Next.js app across different platforms with minimal hassle—giving you more time to focus on building and growing your application.