Row Level Security in Power BI (original) (raw)
Last Updated : 20 Jan, 2026
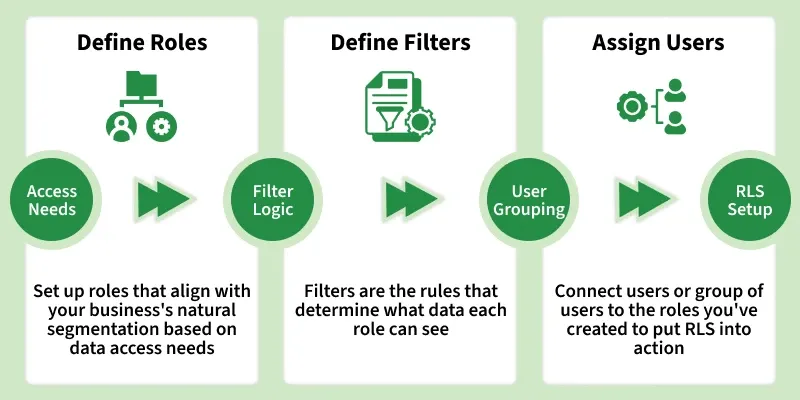
Row-level security (RLS) in Power BI is used to control and restrict data access for specific users by applying filters at the row level. These filters are defined within security roles, ensuring that users only see the data relevant to their permissions.
RLS
In Power BI, anyone with access to a workspace can access the semantic models within that workspace however RLS is enforced only for users with Viewer permissions. It does not apply to Admins, Members or Contributors who have unrestricted access to the data.
Implementing Role-Based Security in Power BI Desktop
Step 1: Importing into Power BI and Creating a Reference Visualisation
1. Open Power BI Desktop.
2. Select Home, then Get Data and choose Text/CSV.
You can download dataset from here
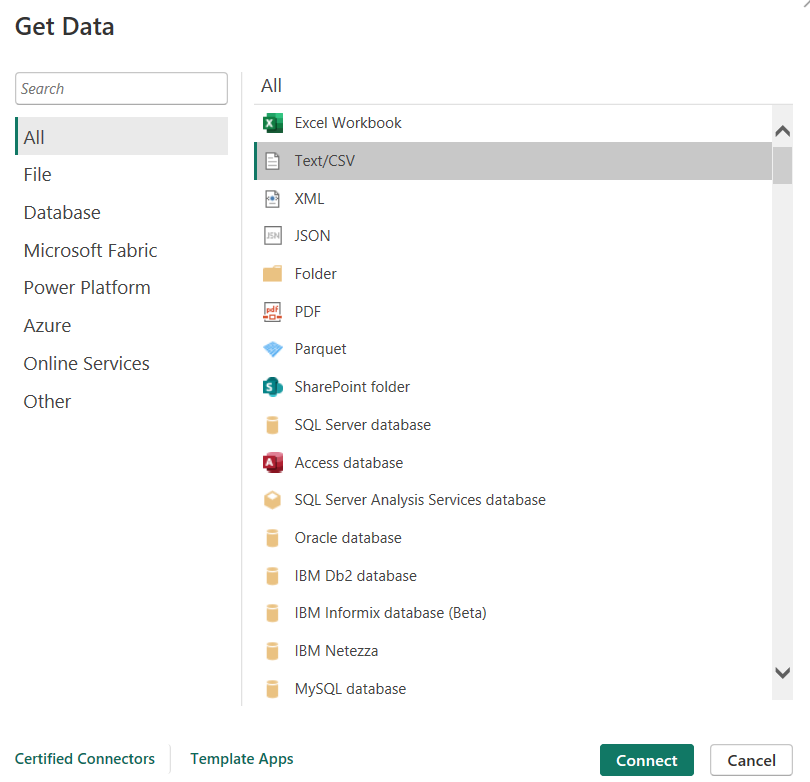
Get Data
3. Browse to the file and load it into the data model.
4. Add a basic visualization as a reference view.
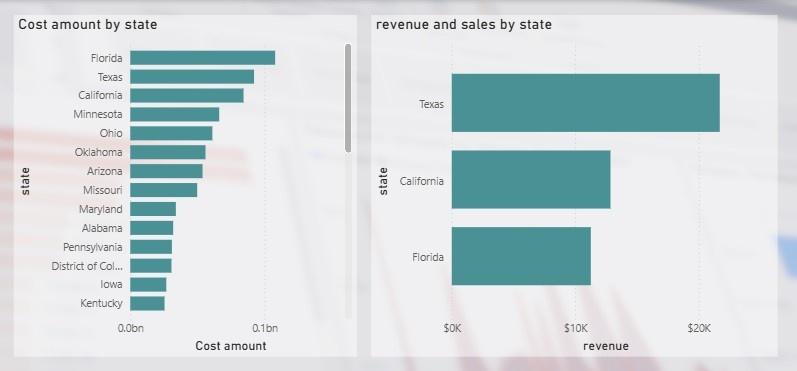
Visualizations
Step 2: Creating Roles
Here we will define security roles that control which users can access specific data within the report. Each role applies filters to tables, ensuring users only see the data permitted by their role.
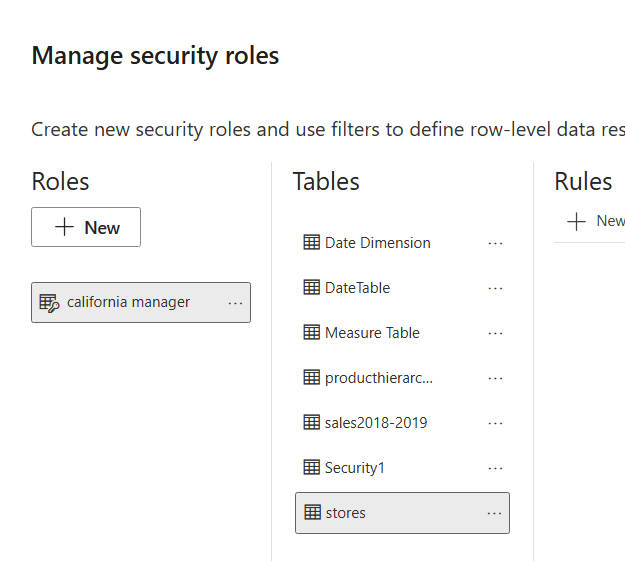
1. Open Power BI Desktop and select Modeling, then Manage Roles.

Manage Roles
2. Click Create and provide a meaningful role name.
3. Select the appropriate table to which the security rule should be applied.
Select Table
4. Enter the required rules to restrict data access.
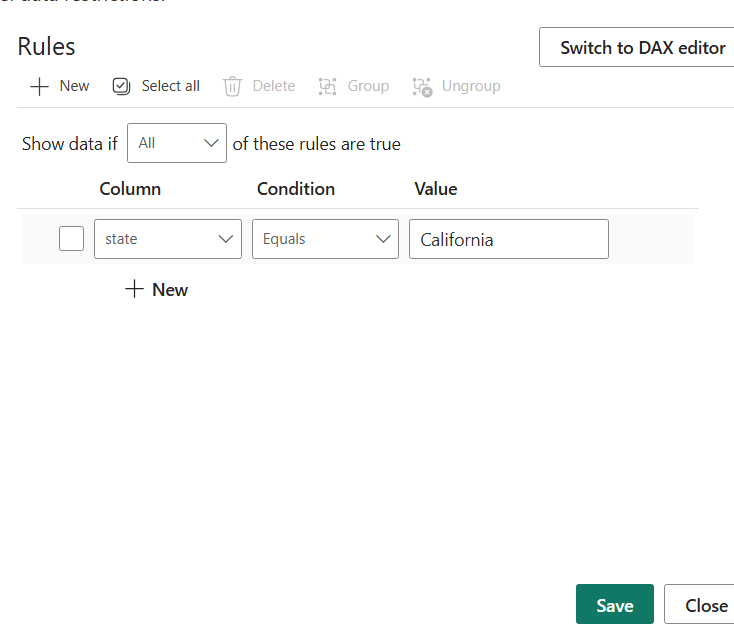
Access Rules
5. Save and close the Manage roles dialog.
Step 3. Testing Roles
After creating roles it is important to verify that they work as expected before publishing the report.
1. Select Modeling then choose View as Roles in Power BI Desktop.

View as
2. Enable the role created earlier.
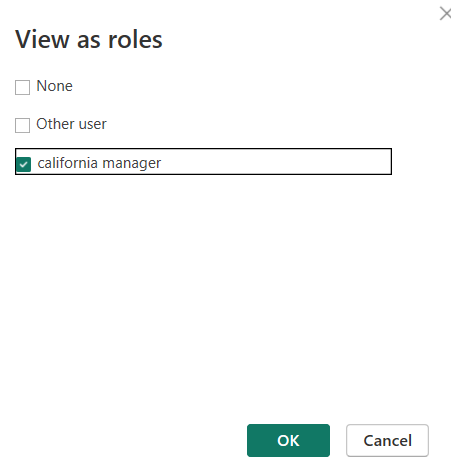
View as role
3. Apply the role to simulate the user perspective.
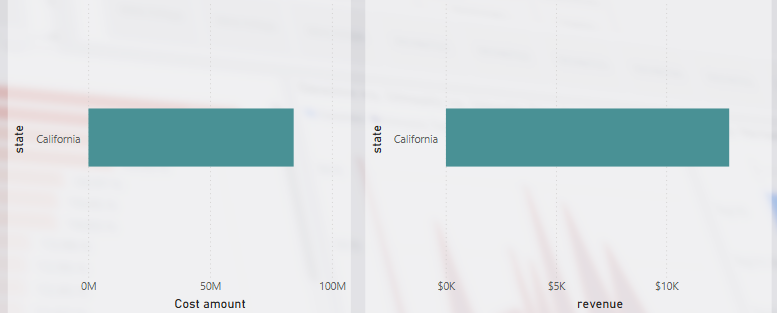
Output
Review the report visuals to confirm that the data is correctly filtered based on the selected role.
You can download the Power BI report from here
Managing User Access and Roles in Power BI Service
After creating and validating Row-Level Security (RLS) roles in Power BI Desktop the next step is to publish the report to Power BI Service and assign users or security groups. This ensures that data access is controlled and enforced when the report is shared.
Step 1: Publish the Report to Power BI Service
1. Open Power BI Desktop.
2. Click Home then Publish and select To Power BI.

Publish
3. Choose the appropriate workspace in Power BI Service.
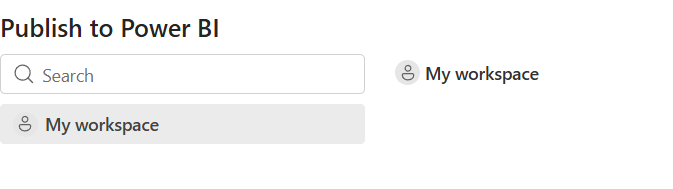
Select Workspace
4. After publishing is complete sign in to Power BI Service using your browser.
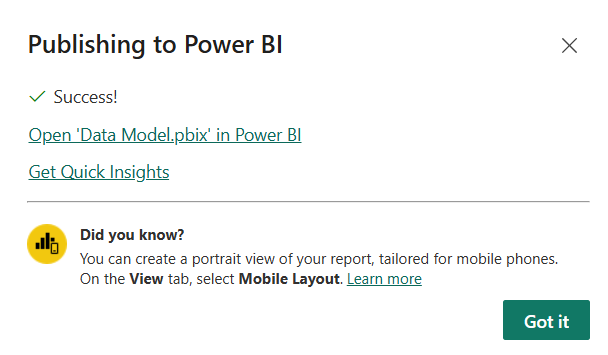
Publish complete
Step 2: Access Dataset Security Settings
1. Open the workspace containing the published report.
2. Locate the semantic model associated with the report.
3. Click the ellipsis ( … ) next to the dataset and select Security.
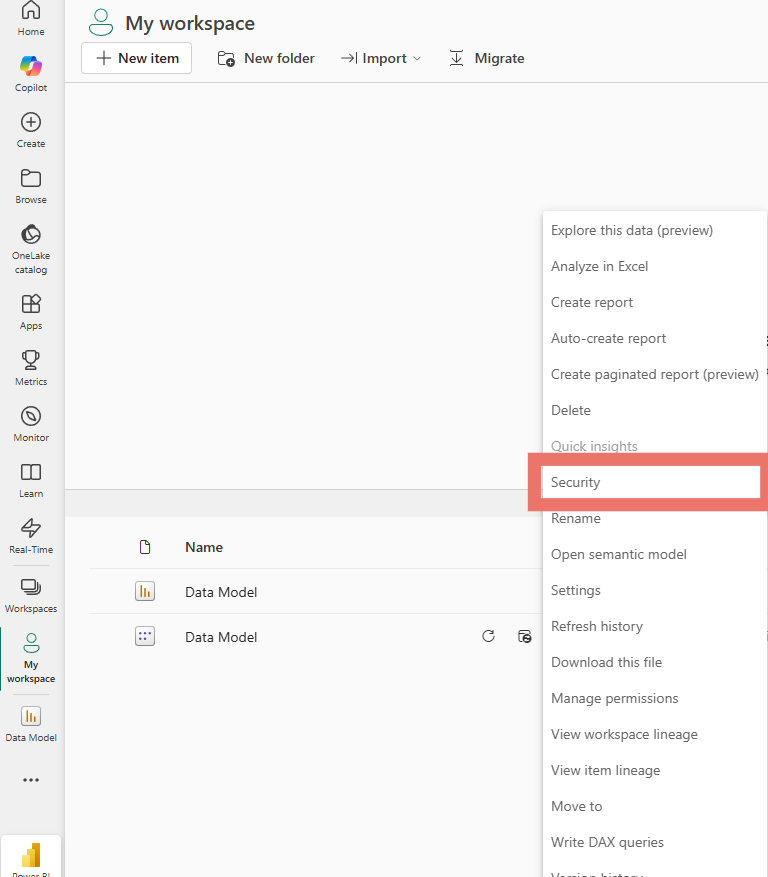
Security
4. A list of RLS roles created in Power BI Desktop will be displayed.
Step 3: Assign Users and Azure AD Security Groups
1. Enter the email address of an individual user, press Enter and click Add.
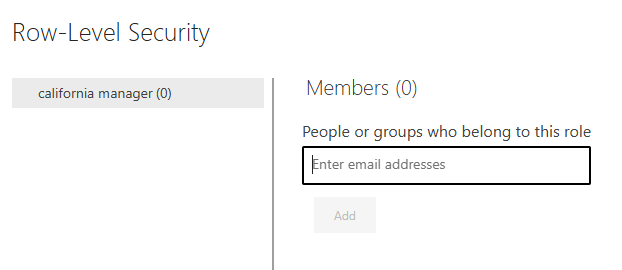
Enter email
2. Ensure that the security group already exists and is managed in Azure Active Directory.
Step 4: Verify Role-Based Access
1. Confirm that users and groups are assigned to the correct roles.
2. Each user will only see data filtered by the DAX expression defined for their role.
3. Power BI does not automatically notify users about role assignments, so communicate access details separately if needed.
Step 5: Test Role Assignments in Power BI Service
1. On the Security page, select the role name.
2. Click the ellipsis ( … ) and choose Test as role.
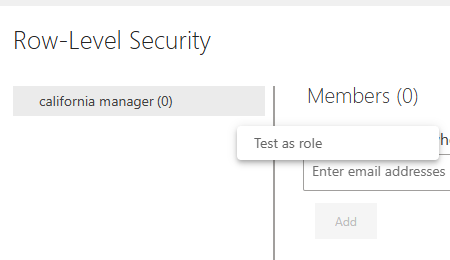
Test as role
3. Power BI opens a read-only view of the report showing only the data allowed for that role.
Dynamic Row-Level Security (Dynamic RLS)
Dynamic Row-Level Security (Dynamic RLS) automatically filters data based on the logged-in user identity, ensuring each user sees only the data relevant to their role or attributes.
- **User-based data filtering: Dynamically restricts data access based on the identity of the logged-in user.
- **DAX-driven security logic: Uses DAX functions such as USERPRINCIPALNAME() or USERNAME() to determine who is accessing the report.
- **User mapping table dependency: Relies on a mapping table that links users to attributes like region, department or business unit.
- **Reduced role maintenance: Eliminates the need to create and manage separate roles for each individual user.
- **Enterprise scalability: Well-suited for large organizations requiring flexible, scalable and centrally managed security rules.
Advanced RLS Techniques
Row-Level Security (RLS) can be deeply integrated into your Power BI architecture using advanced implementation techniques. These approaches help improve scalability, performance and governance, especially in enterprise environments.
1. Security Group Integration
Integrating Azure Active Directory (AAD) security groups with RLS allows you to manage access at the group level rather than assigning permissions to individual users.This approach is ideal for large organizations where team memberships change frequently.
2. Complex Data Model Considerations
In large or complex data models poorly designed relationships can negatively impact RLS behavior and performance. Careful model design ensures that filters are applied accurately and efficiently.
- Using a star schema to simplify relationships and reduce filter ambiguity.
- Limiting bi-directional relationships to scenarios where they are strictly required.
- Avoiding ambiguous relationships that may cause incorrect or unexpected filtering.
- Optimizing performance by minimizing calculated columns in tables heavily affected by RLS filters.
3. Hybrid RLS Approaches
A hybrid RLS approach combines static and dynamic security models to achieve flexible and layered access control. For example a static role can restrict access to a specific business unit, while dynamic filtering within that role uses user attributes such as email address or username.
This enables granular control without creating an excessive number of roles and supports complex organizational hierarchies.
4. Object-Level Security (OLS)
Object-Level Security (OLS) extends data protection beyond rows by allowing entire tables or specific columns to be hidden from certain roles.
Advantages
- **Granular data control: Ensures users can access only the specific rows of data they are authorized to view.
- **Improved data security: Protects sensitive information by enforcing role-based access rules at the dataset level.
- **Single report for multiple users: Eliminates the need to create separate reports for different user groups.
- **Centralized security management: Applies consistent security rules across all reports using the same semantic model.
- **Scalable access management: Easily scales in enterprise environments when combined with Azure Active Directory security groups.