Create and Write on Excel File using xlsxwriter Module Python (original) (raw)
Last Updated : 07 Apr, 2025
**XlsxWriter The xlsxwriter module in Python is used to create Excel .xlsx files and write data into them. It supports:
- Writing text, numbers, and formulas
- Creating multiple worksheets
- Formatting, charts, images, filters, and conditional formatting
Installation
Before using **xlsxwriter, we need to install it using pip:
pip install xlsxwriter
**Note:
Rows and columns are zero-indexed. For example:
- Cell A1 - (0, 0)
- Cell B1 - (0, 1)
- Cell A2 - (1, 0)
Examples of xlsxwriter module
Example 1: Writing to Excel Using A1 Notation
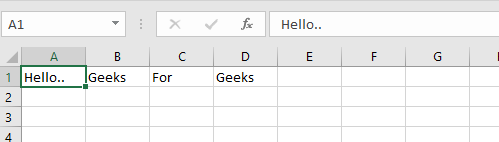
In this example, we'll create a new Excel file and write simple text values to specific cells using the familiar A1-style cell notation:
Python `
import xlsxwriter
workbook = xlsxwriter.Workbook('path_to_hello.xlsx') worksheet = workbook.add_worksheet()
worksheet.write('A1', 'Hello..') worksheet.write('B1', 'Geeks') worksheet.write('C1', 'For') worksheet.write('D1', 'Geeks')
workbook.close()
`
**Output:
**Explanation:
- **Workbook() creates a new Excel file.
- **add_worksheet() adds a new worksheet to the workbook.
- **write(cell, value) writes values to specific cells like '**A1', '**B1', etc.
- **close() saves and closes the file.
This creates a single worksheet with text in the first row from columns A to D.
Example 2: Writing Using Row-Column Indexing
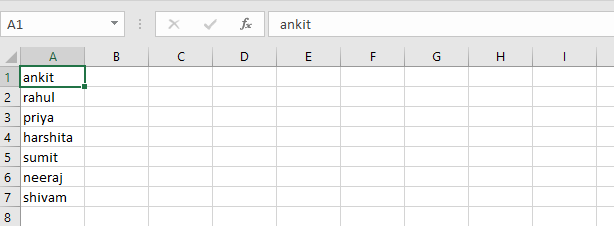
This example shows how to write a list of names to the first column using zero-based indexing (row, column) instead of A1-style cell notation:
Python `
import xlsxwriter
workbook = xlsxwriter.Workbook('example2.xlsx') worksheet = workbook.add_worksheet()
content = ["ankit", "rahul", "priya", "harshita", "sumit", "neeraj", "shivam"]
for row, name in enumerate(content): worksheet.write(row, 0, name)
workbook.close()
`
**Output:
**Explanation:
- We loop through a list of names using **enumerate() to get the row index.
- Each name is written to column 0 (i.e., column A), starting from row 0.
- **Result: Each name appears in a new row under the first column.
Example 3: Creating a Named Worksheet and Writing Rows
Here, we create a custom-named worksheet and write a **2D list of names and scores into it **row-by-row:
Python `
import xlsxwriter
workbook = xlsxwriter.Workbook('example3.xlsx') worksheet = workbook.add_worksheet("My Sheet")
scores = [ ['ankit', 1000], ['rahul', 100], ['priya', 300], ['harshita', 50], ]
for row, (name, score) in enumerate(scores): worksheet.write(row, 0, name) worksheet.write(row, 1, score)
workbook.close()
`
**Output:

**Explanation:
- The worksheet is named "My Sheet" instead of the default "Sheet1".
- We write both names and their corresponding scores into two columns.
- Column A - Names
- Column B - Scores
- The data is written row-by-row using **enumerate().
Advantages of xlsxwriter
- Supports more Excel features than most other Python libraries.
- Produces files nearly identical to those created by Excel itself.
- Offers detailed documentation, examples, and testing support.
- Fast and memory-efficient, even for large files.
Limitations
- Cannot read or modify existing Excel files.
- It is strictly a write-only library for .xlsx format.