Django ModelForm – Create Forms from Models with Field Types (original) (raw)
A ModelForm is a class that automatically generates a form from a Django model. It links your form fields directly to the model fields, reducing repetitive code and making form creation faster and cleaner. ModelForm also provides built-in methods and validation to simplify form processing.
To explain the working of ModelForm, we will create a basic project and an app, then create a model and map it to a Django form.
Step 1: Create the Model
In geeks/models.py, define a model as follows:
Python `
from django.db import models
class GeeksModel(models.Model): title = models.CharField(max_length=200) description = models.TextField() last_modified = models.DateTimeField(auto_now_add=True) img = models.ImageField(upload_to="images/")
def __str__(self):
    return self.title
`
This model includes:
- **CharField: short text (title)
- **TextField: long text (description)
- **DateTimeField: timestamp
- **ImageField: image upload
Step 2: Register Your App
Add the geeks app to the INSTALLED_APPS list in settings.py:
INSTALLED_APPS = [
# other apps,
'geeks',
]
Step 3: Make Migrations and Migrate
Run the following commands to create and apply the migration for your model:
python manage.py makemigrations
python manage.py migrate
Step 4: Verify Model Creation
Verify that the model is accessible in the Django admin interface by visiting:
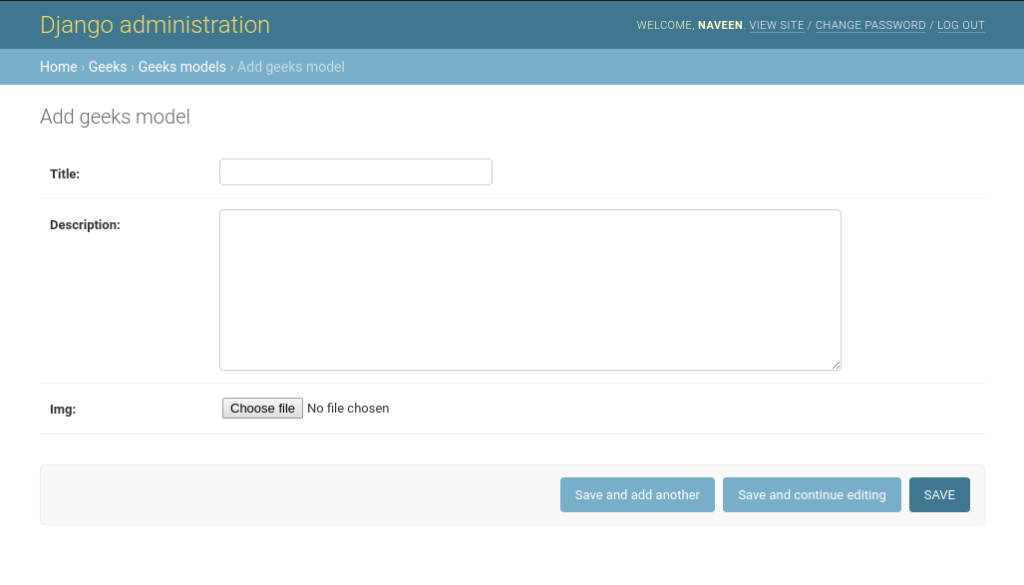 Step 5: Create the ModelForm
In geeks/forms.py, create a ModelForm to automatically generate a form from the model:
Python `
from django import forms from .models import GeeksModel
class GeeksForm (forms.ModelForm): class Meta: model = GeeksModel fields = "all" # or list fields explicitly for security
`
This form takes two arguments **fields or **exclude.
- **fields: A list or special value '__all__' indicating which model fields should be included in the form. It is highly recommended to explicitly specify the fields to avoid potential security risks.
- **exclude: A list of fields to exclude from the form.
**Example:
Python `
class PartialGeeksForm(forms.ModelForm): class Meta: model = GeeksModel exclude = ['img']
`
Step 6: Use the ModelForm in Your View
In **geeks/views.py:
Python `
from django.shortcuts import render from .forms import GeeksForm
def home_view(request): context = {} form = GeeksForm(request.POST or None, request.FILES or None) if form.is_valid(): form.save()
context['form'] = form
return render(request, "home.html", context)
`
- **request.FILES is required for handling file uploads.
- The form instance is added to the context dictionary to be rendered in the template.

Visit **http://127.0.0.1:8000/. The page displays a form where each model field is automatically mapped to a corresponding form field. Next, enter data into the form and verify that it is successfully saved to the database.
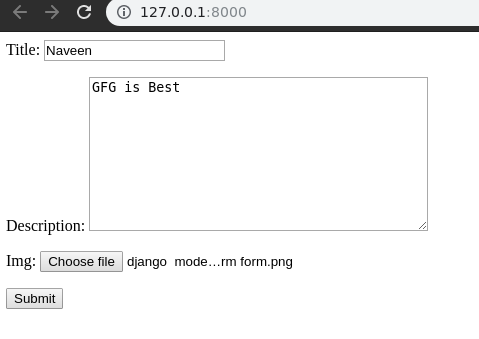
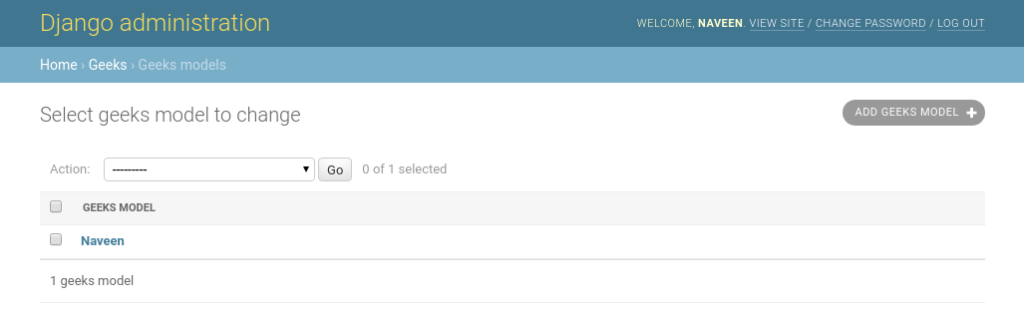
Click Submit and the form data is automatically saved to the database. This can be verified at:
Mapping Model Fields to Form Fields
A ModelForm automatically converts Django model fields to corresponding form fields. This ensures that the form uses the correct input type, validation and widgets for each field.
| Model Field | Form Field |
|---|---|
| CharField | forms.CharField |
| TextField | forms.CharField(widget=forms.Textarea) |
| DateTimeField | forms.DateTimeField |
| ImageField | forms.ImageField |
| BooleanField | forms.BooleanField |
| IntegerField | forms.IntegerField |
| EmailField | forms.EmailField |
Customizing Field Widgets
Sometimes it is necessary to customize how a form field appears in the UI. This can be achieved by overriding the widget for a specific field in the ModelForm.
**Example:
Python `
from django import forms from .models import GeeksModel
class GeeksForm(forms.ModelForm): class Meta: model = GeeksModel fields = "all" widgets = { 'title': forms.TextInput(attrs={'placeholder': 'Enter title'}), 'description': forms.Textarea(attrs={'rows': 4, 'cols': 50}), }
`