Face Detection using Cascade Classifier using OpenCV Python (original) (raw)
Face detection is a fundamental computer vision task that involves locating human faces in images or video streams. OpenCV provides an efficient solution for this using Haar Cascade Classifiers. Haar Cascades are trained using two types of images:
- **Positive images: Images that contain the object to be detected such as faces or eyes.
- **Negative images: Images that do not contain the target object and represent the background.
After training, the classifier scans images at multiple scales to detect faces in real time. This approach is widely used in surveillance systems, attendance systems and camera-based applications.
Step-by-Step Implementation
In this section, we will implement face and eye detection using pre-trained Haar Cascade classifiers provided by OpenCV.
Step 1: Importing required Libraries
To begin, we import the necessary libraries like OpenCV, Numpy and Matplotlib.
Python `
import cv2 import numpy as np import matplotlib.pyplot as plt
`
**Explanation:
- cv2 provides computer vision functions.
- numpy is used internally by OpenCV for image representation.
- matplotlib.pyplot is used to display images in notebook environments.
Step 2: Loading Haar Cascade Classifiers
Next, we load the pre-trained Haar Cascade XML files for face and eye detection.
You can download these classifier from this link.
Python `
face_cascade = cv2.CascadeClassifier("/content/haarcascade_frontalface_default.xml") eye_cascade = cv2.CascadeClassifier('/content/haarcascade_eye.xml')
`
**Explanation:
- CascadeClassifier() loads the trained XML model.
- These XML files contain learned features for detecting faces and eyes.
Step 3: Creating Function to Detect Faces
Now, we define a function that detects faces in an image and draws rectangles around them.
Python `
def adjusted_detect_face(img): face_img = img.copy() face_rect = face_cascade.detectMultiScale(face_img, scaleFactor=1.2, minNeighbors=5)
for (x, y, w, h) in face_rect:
    cv2.rectangle(face_img, (x, y), (x + w, y + h), (255, 255, 255), 10)

return face_img
`
**Explanation:
- detectMultiScale() detects faces at different scales and scaleFactor controls image scaling.
- minNeighbors reduces false positives and cv2.rectangle() draws bounding boxes around detected faces.
Step 4: Creating Function to Detect Eyes
Similarly, we create a function to detect eyes using the eye cascade classifier.
Python `
def detect_eyes(img): eye_img = img.copy() eye_rect = eye_cascade.detectMultiScale(eye_img, scaleFactor=1.2, minNeighbors=5)
for (x, y, w, h) in eye_rect:
    cv2.rectangle(eye_img, (x, y), (x + w, y + h), (255, 255, 255), 10)

return eye_img
`
**Explanation: The process is similar to face detection, rectangles are drawn around detected eyes using separate classifiers improves detection accuracy.
Step 5: Loading a Image
Now, we load an image on which face and eye detection will be performed.
**Note: We are using a sample image "andrew.jpg", to download click here.
Python `
img = cv2.imread('/content/andrew.jpg') img_copy1 = img.copy() img_copy2 = img.copy() img_copy3 = img.copy()
plt.imshow(cv2.cvtColor(img, cv2.COLOR_BGR2RGB))
`
**Output
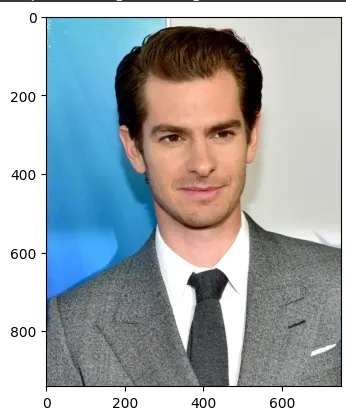
sample image
**Explanation:
- cv2.imread() reads the image.
- Multiple copies are created to apply different detections.
- OpenCV reads images in BGR format, so we convert it to RGB for display.
Step 6: Detecting Faces and Eyes
After running the code you will see three images Face Detection, Eyes Detection and Face and Eyes Detection. These images will also be saved as face.jpg, eyes.jpg and face+eyes.jpg respectively.
**Face Detection
Python `
face = adjusted_detect_face(img_copy1) plt.imshow(cv2.cvtColor(face, cv2.COLOR_BGR2RGB)) plt.show() cv2.imwrite('face.jpg', face)
`
**Output

face detection
**Eyes Detection
Python `
eyes = detect_eyes(img_copy2) plt.imshow(cv2.cvtColor(eyes, cv2.COLOR_BGR2RGB)) plt.show() cv2.imwrite('eyes.jpg', eyes)
`
**Output
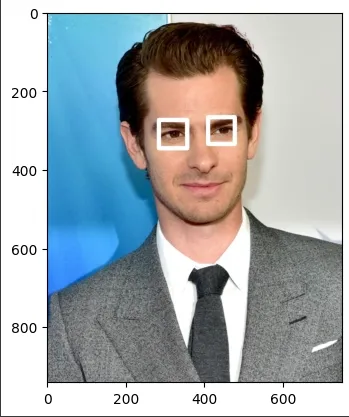
eyes detection
**Face and Eyes Detection
Python `
eyes_face = adjusted_detect_face(img_copy3) plt.imshow(cv2.cvtColor(eyes_face, cv2.COLOR_BGR2RGB)) plt.show() cv2.imwrite('face+eyes.jpg', eyes_face)
`