Flask Asynchronous Programming Using async.io (original) (raw)
Flask is inherently synchronous, meaning each request is processed one at a time. However, modern web applications often require handling multiple tasks simultaneously, such as:
- Making external API calls
- Processing large datasets
- Managing real-time communication
Asynchronous programming allows us to execute multiple tasks **concurrently, improving performance and responsiveness.
With Python's built-in asyncio, we can introduce asynchronous behavior in Flask applications, allowing tasks like database queries and API requests to run without blocking the main application thread.
Features of asynchronous programming
- **Improves Performance – Handles multiple tasks without waiting for each to complete.
- **Non-Blocking I/O – Ideal for tasks like fetching external data or database operations.
- **Better User Experience – Reduces delays for users when making API requests.
Syntax of async.io Programs
Before using async.io in Flask, let’s understand how asynchronous functions work in Python.
Declaring an Asynchronous Function
In Python, asynchronous functions are defined using the **async def keyword:
Python `
import asyncio
async def my_async_function(): print("Task started") await asyncio.sleep(2) # Simulates an async operation print("Task completed")
Running the async function
asyncio.run(my_async_function())
`
**Explanation:
- **async def: Declares a function as **asynchronous, meaning it can perform non-blocking operations.
- **await: Suspends execution of the function until the **awaited task completes, preventing blocking.
Running Multiple Async Tasks
To run multiple async functions concurrently, use **asyncio.gather():
Python `
async def task_1(): await asyncio.sleep(2) return "Task 1 Complete"
async def task_2(): await asyncio.sleep(3) return "Task 2 Complete"
async def main(): results = await asyncio.gather(task_1(), task_2()) # Runs both tasks concurrently print(results)
asyncio.run(main())
`
**Explanation:
- **async def functions must be awaited inside another async function.
- **await **asyncio.sleep(n) simulates non-blocking behavior.
- **asyncio.gather() executes multiple async functions in parallel.
Now that we have the fundamental understanding of how asynchronus programming works, let's understand how we can implement it in Flask applications with some basic flask app examples:
Asynchronous Database Queries in Flask
Flask's traditional database extensions like Flask-SQLAlchemy are synchronous. To perform asynchronous database operations, we can use **Tortoise-ORM, an async ORM for Python.
Let's create a basic Flask app that creates a user table, stores user data and fetches it.
Installation:
Flask does not support async routes by default in a WSGI environment, so to keep using async def routes, we need to install Flask with the "**async" extra using this command:
pip install "flask[async]"
Install the Tortoise-orm using this command in terminal:
pip install tortoise-orm aiosqlite
Creating the Application:
This app wil have features to insert, fetch, and list users asynchronously using Tortoise-ORM.
Python `
from flask import Flask, jsonify, request from tortoise import Tortoise, fields from tortoise.models import Model import asyncio
app = Flask(name)
Define an asynchronous User model
class User(Model): id = fields.IntField(pk=True) name = fields.CharField(50) email = fields.CharField(100, unique=True)
Initialize Tortoise ORM properly
async def init_tortoise(): await Tortoise.init( db_url="sqlite://db.sqlite3", # Database connection modules={"models": ["main"]} # Register models ) await Tortoise.generate_schemas() # Create tables
@app.before_request def initialize(): """Ensure Tortoise ORM is initialized before handling any request.""" loop = asyncio.new_event_loop() asyncio.set_event_loop(loop) loop.run_until_complete(init_tortoise())
Asynchronous route to create a new user
@app.route('/add-user', methods=['POST']) async def add_user(): data = request.get_json() # No await here
# If using Tortoise ORM (which is async)
user = await User.create(name=data['name'], email=data['email'])  # Use await on async functions

return jsonify({"message": "User created", "user": {"id": user.id, "name": user.name, "email": user.email}})
Asynchronous route to fetch a user by ID
@app.route('/user/int:user_id') async def get_user(user_id): user = await User.get_or_none(id=user_id) if user: return jsonify({"id": user.id, "name": user.name, "email": user.email}) return jsonify({"error": "User not found"}), 404
Asynchronous route to fetch all users
@app.route('/users') async def get_users(): users = await User.all().values("id", "name", "email") # Fetch all users asynchronously return jsonify(users)
if name == 'main': app.run(debug=True)
`
**Code Breakdown:
- **User Model: Defines an async User model with fields for **id, **name, and **unique email.
- **Database Initialization: **init_tortoise() function asynchronously connects to an **SQLite database and generates schemas.
- **Before Request Hook: **initialize() function uses an event loop to run **init_tortoise() before handling requests.
- ****/add-user Route**: Accepts **JSON input and creates a new user asynchronously, then returns the user details.
- ****/user/int:user_id Route**: Asynchronously **fetches a user by **ID; returns user data if found or a 404 error otherwise.
- ****/users Route**: Retrieves all users **asynchronously and returns them as a **JSON list.
Running and Testing the Application
**Adding a user:
1. Run the application using command - **python app.py and open **Postman Api application to test it.
2. First we need to **add a user in the **databse, follow these steps to do it:
3. Select **POST as the request type.
4. Enter the API URL- **http://127.0.0.1:5000/add-user
5. Go to the "**Body" Tab, **select raw, **choose JSON from the dropdown and paste the following in the Body section:
{
"username": "Geek,
"email": "geeks@gfg.org"
}
6. Click send and the user is added in the database.

Adding a user
**Fetching user data:
To fetch the user data, make a get request to the URL - **http://127.0.0.1:5000/users
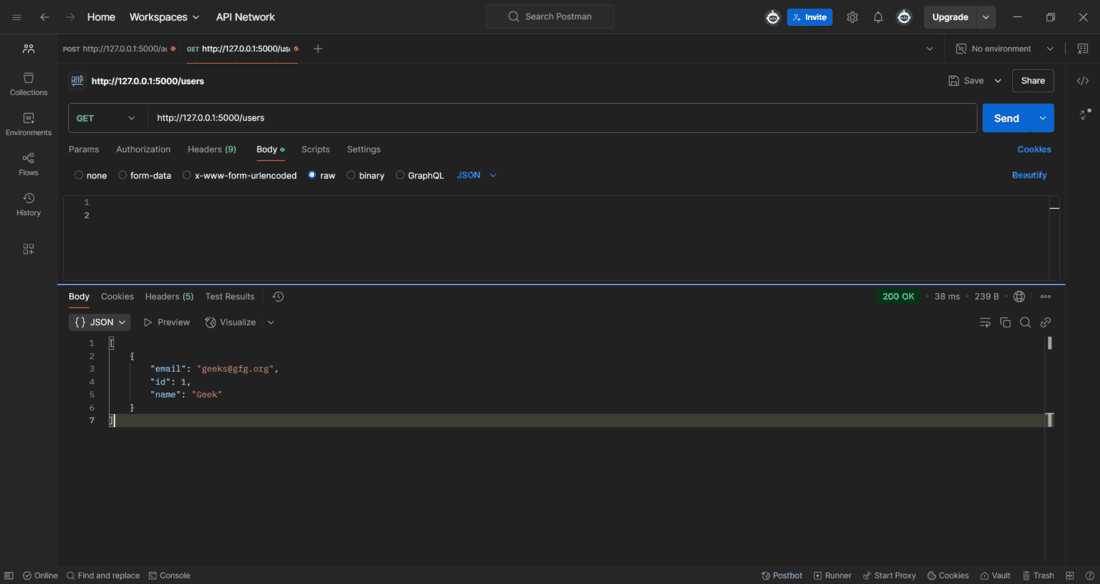
Fetching user data
Running Background Tasks in Flask
Flask doesn't natively support background tasks, but we can use **asyncio.create_task() for lightweight tasks that run without blocking the main application.
Python `
from flask import Flask import asyncio
app = Flask(name)
async def background_task(): await asyncio.sleep(5) print("Background task completed")
@app.route('/start-task') def start_task(): asyncio.run(background_task()) # Ensures an event loop runs the task return {"message": "Task started"}
if name == 'main': app.run(debug=True)
`
**Explanation:
**1. background_task() – An asynchronous function that **waits for 5 seconds before printing a message.
**2. start_task() Route
- Creates a new event loop.
- Uses **executor.submit() to run **background_task() without blocking Flask.
- Returns a response immediately while the task runs in the background.
Run the application and open **Postman application to make a **GET Request on URL- **http://127.0.0.1:5000/start-task.

GET Request
After making the GET request, we will receive a background task completed message in the terminal after **5 seconds of delay.
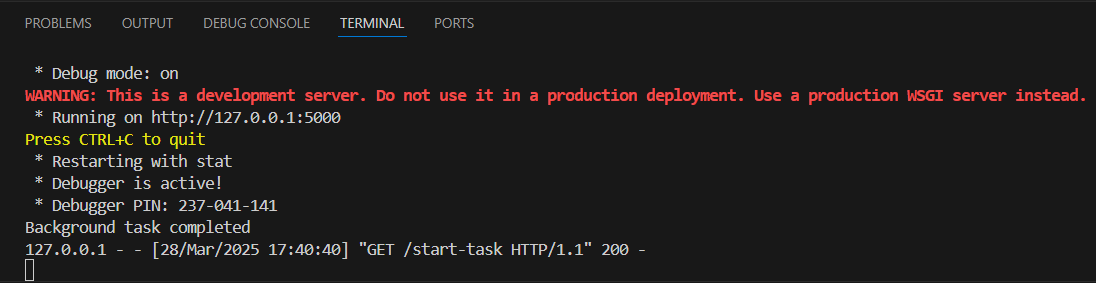
Delayed Message