Flask Rendering Templates (original) (raw)
Flask provides template rendering using the Jinja2 templating engine, which allows HTML pages to display dynamic data. Templates help separate the application logic from the user interface, making web applications easier to manage and build.
Implementing Template Rendering
Step 1: Create a Flask App
First, create a file named app.py and initialize a basic Flask application.
Python `
from flask import Flask app = Flask(name)
if name == "main": app.run()
`
**Explanation:
- Flask(__name__) initializes the Flask app.
- app.run() starts the server.
Step 2: Create the Templates Folder
Flask automatically looks for HTML files inside a folder named templates. Create a templates folder in the project directory and add an index.html file inside it.
**index.html
Python `
Flask AppWelcome to Flask
This is a basic template rendering example.
`
**Explanation:
- index.html contains the HTML content that will be displayed in the browser.
- Flask renders this file using the render_template() function.
Step 3: Render HTML Template
Now, update app.py to render the index.html template.
Python `
from flask import Flask, render_template app = Flask(name)
@app.route("/") def index(): return render_template("index.html")
if name == "main": app.run()
`
**Explanation:
- @app.route("/") maps the home URL to the index() function.
- render_template("index.html") loads and renders the HTML template from the templates folder.
Step 4: Pass Dynamic Data Using Jinja2
Flask uses Jinja2 templating to pass dynamic data from Python code to HTML templates. Update app.py with a new route:
Python `
from flask import Flask, render_template app = Flask(name)
@app.route("/") def welcome(name): return render_template("welcome.html", name=name)
if name == "main": app.run()
`
**Explanation:
- / captures the value entered in the URL.
- name=name passes the captured value to the HTML template.
Step 5: Create a Dynamic HTML Template
Create a file named welcome.html inside the templates folder.
HTML `
FlaskTestWelcome To GFG
Welcome, {{name}}
`
**Output
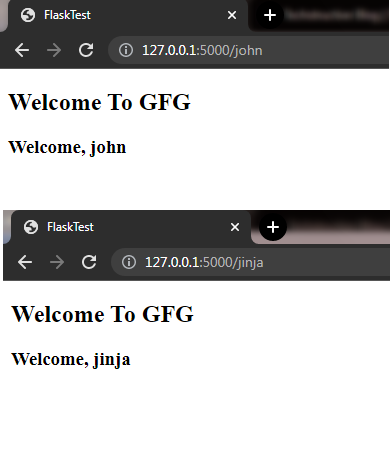
Using Jinja template
**Explanation:
- {{ name }} is a Jinja2 placeholder used to display dynamic data.
- The value passed from render_template() replaces {{ name }} during rendering.
Inducing Logic in Templates
Jinja2 templates support logical operations such as loops and conditional statements. This allows HTML pages to display dynamic content based on data passed from Flask routes.
Step 1: Using for Loop in Templates
A for loop in Jinja2 is used to display multiple items dynamically inside an HTML template. Add the following route in app.py:
Python `
@app.route("/about") def about(): sites = ['twitter', 'facebook', 'instagram', 'whatsapp'] return render_template("about.html", sites=sites)
`
**Explanation:
- sites stores a list of social media names.
- sites=sites passes the list to the HTML template.
Create about.html inside the templates folder.
HTML `
{% extends 'index.html' %} {% block body %}
-
{% for social in sites %}
- {{ social }} {% endfor %}
`
**Explanation:
- {% for social in sites %} loops through each element in the list.
- {{ social }} displays the current item inside the loop.
- {% endfor %} marks the end of the loop block.
Step 2: Adding Navigation Links
Navigation links help move between Flask routes easily using url_for(). Update index.html:
HTML `
FlaskTestWelcome To GFG
Flask: Rendering Templates
Home Index About {% block body %}<p>This is a Flask application.</p>
{% endblock %}`
**Explanation:
- url_for() generates route URLs dynamically.
- {% block body %} creates a section that child templates can replace.
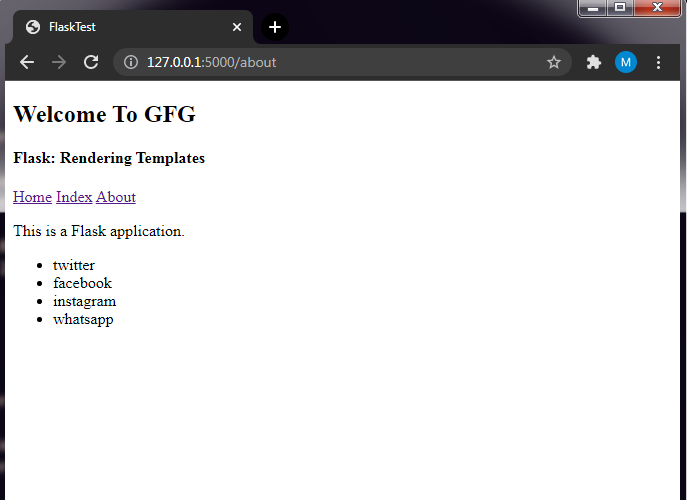
Demonstrating for loop-in templates
Step 3: Using if-else Conditions in Templates
Conditional statements in Jinja2 allow templates to display different content based on values received from Flask routes. Add the following route in app.py:
Python `
@app.route("/contact/") def contact(role): return render_template("contact.html", person=role)
`
**Explanation:
- / captures the value entered in the URL.
- person=role passes the value to the template.
Create contact.html inside the templates folder.
HTML `
{% extends 'index.html' %} {% block body %}
{% if person == "admin" %}
Admin Section
{% elif person == "maintainer" %}
App Source Page for Maintainer
{% elif person == "member" %}
Hope you are enjoying our services
{% else %}
Hello, {{ person }}
{% endif %} {% endblock %}
`
In the template, we check the **person variable, which comes from the URL and is passed via **render_template(). The **if-else syntax is similar to Python but enclosed in ****{% %}**. It follows a simple if-elif-else structure to generate HTML based on the value.
**Output
If Statement Demonstration in Flask
**Explanation:
- {% if %}, {% elif %} and {% else %} are used for conditional rendering.
- person stores the value passed from the Flask route.
- {{ person }} displays the variable value inside the template.