Getting Started with Conda (original) (raw)
Last Updated : 24 May, 2024
Let us start our journey to Conda, a versatile and indispensable tool for data scientists, analysts, and developers. This sophisticated tool goes beyond the limitations of traditional management systems, delivering a holistic solution that simplifies the process of configuring, managing, and deploying software packages and dependencies life is hassle-free in the world of technology.
In this article, we will cover topics like installation, environment management, package handling, advanced usage, how to troubleshoot, its comparison to other tools out there, and integration with third-party applications.
Table of Content
- What is Conda?
- Conda Installation
- Environment Management
- Package Handling in Conda
- Advanced Uses of Conda
- Troubleshooting Conda
- Conda Comparison With Other Tools
- Conda Integration With Other Tools
- Conclusion
- Frequently Asked Questions
What is Conda?
Conda is an open-source package management and environment management system that is widely used in the scientific computing and data science communities. It helps users manage software packages, dependencies, and environments, making it easier to install, run, and maintain different software tools and libraries.
Here are some key features and aspects of Conda:
- **Cross-Platform Compatibility: Conda works on Windows, macOS, and Linux, making it a versatile tool for developers and researchers across different operating systems.
- **Package Management: Conda allows users to easily install, update, and remove software packages. It supports a wide range of software, including Python packages, R packages, and even non-Python libraries and tools.
- **Environment Management: Conda enables the creation of isolated environments. This means you can create separate environments for different projects, each with its own specific set of packages and dependencies. This isolation helps prevent conflicts between packages and makes it easier to manage project-specific requirements.
- **Version Control: By using Conda environments, you can ensure that your projects are using specific versions of packages, which helps in maintaining reproducibility and consistency in your work.
- **Dependency Management: Conda automatically handles package dependencies, ensuring that all required packages are installed and compatible with each other.
Conda Installation
Installation of Conda is quite simple. Just follow these steps and you will be able to install and run Conda on your system.
Select the Distribution of Conda
First, you must choose between the Anaconda and Miniconda Conda distributions before starting the installation.
- **Anaconda: An extensive feature set makes this full-featured Conda distribution ideal for users who need a lot of tools and libraries right out of the box. There is a vast array of pre-installed features included with it.
- **Miniconda: Simply the Conda package manager and its dependencies are included in this lightweight Conda distribution. This compact approach is more appropriate for users who prefer a more customized environment because it allows them to install only the packages that they need.
In this article, we will be installing Miniconda.
Install the Installer
Visit the official Conda distribution website after selecting the one that best meets your needs and download the appropriate installer for your operating system (Windows, macOS, or Linux).
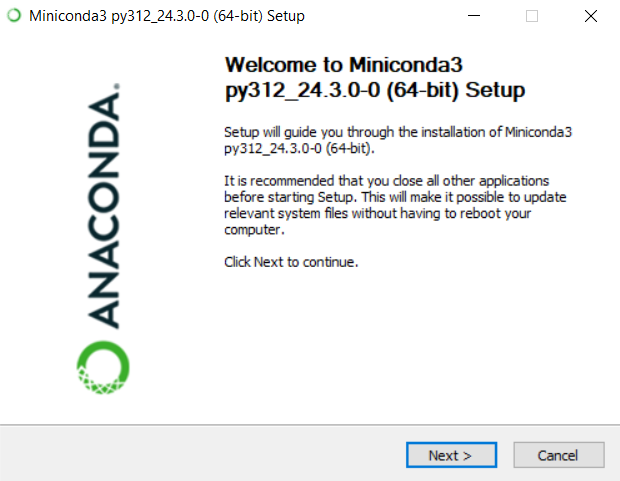
Launch the Installer
Find the installer file in your file explorer after downloading it, and double-click to launch the installation wizard. To continue with the installation, follow the on-screen instructions.
Conda Installation
Select Installation Options
You will be given various options to personalize your Conda installation during the installation process. These are some important decisions you might have to make:
- **Installation Location: Select the directory on your computer where Conda should be installed. For most users, the default location is usually fine.
- **Add to PATH: You can use Conda commands from any directory in your terminal or command prompt by choosing to add Conda to your system's PATH environment variable.
- **Set Anaconda up as the Python system: When installing Anaconda, you will possess the chance to register Conda as the default Python interpreter. Make this choice based on your preferences.
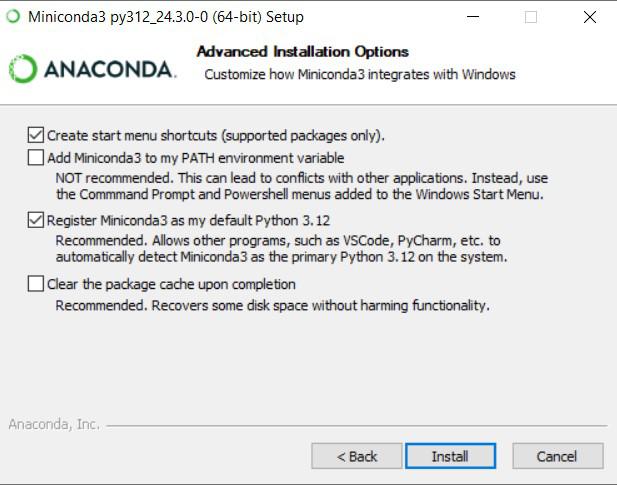
Conda Installation Options
Finish the Installation
Continue with the installation procedure after you've customized the installation options to your preference. The installer will set up Conda correctly and copy the required files to your system.
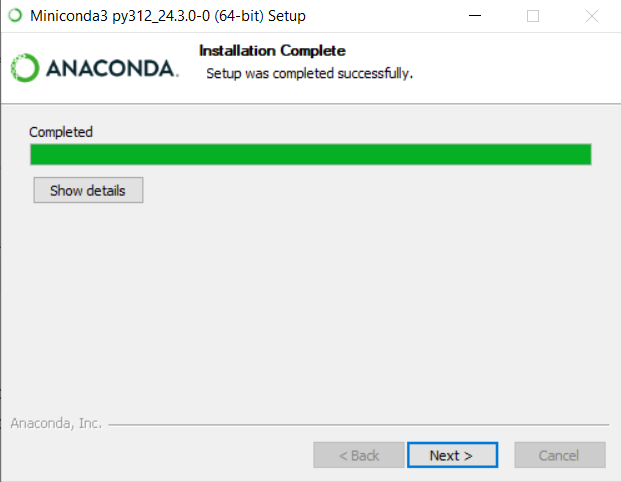
Conda Installation Complete
Verify Conda Installation
Once the installation is finished, you can run the following command in a new terminal or command prompt window to confirm that Conda has been installed correctly:
conda --version
The version number of Conda should show up in the terminal or command prompt if the installation went well.
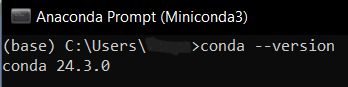
Miniconda installation verification
Set up Conda
Conda must be initialized by executing the following command before you can use it. By using this command, you can set your shell to automatically activate the base Conda environment and recognize Conda commands.
conda init
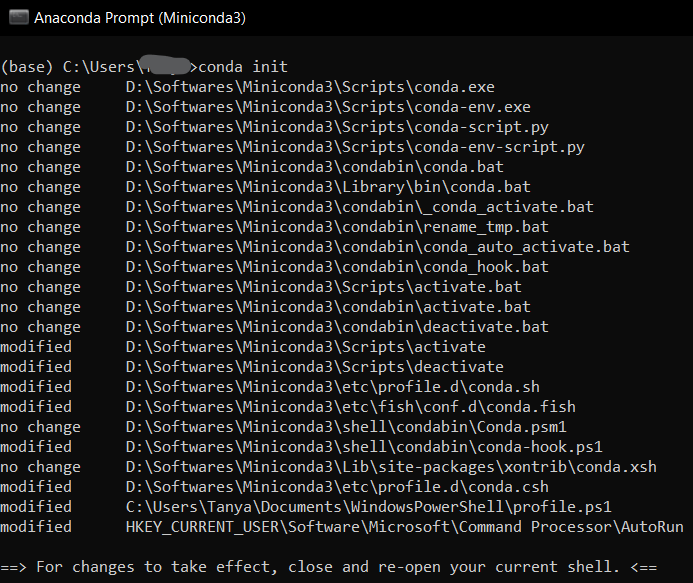
Initializing Conda
You can use Conda to manage your environments and install packages now that it has been installed and initialized. Simple Conda commands like conda create, conda activate, and conda install allow you to create a new environment, activate it, and start installing packages.
Environment Management
Conda shines in data science and software development because it offers a strong environmental strategy. It allows users to configure sites, each with its own dependencies and packages, so you can work on multiple projects at once without worrying about incompatibilities or conflict of interest.
Create Environment
In Conda, creating a new environment is a simple process. Just type the following command in the miniconda prompt.
conda create -- name myenvironment
This command creates an environment with the name myenvironment.
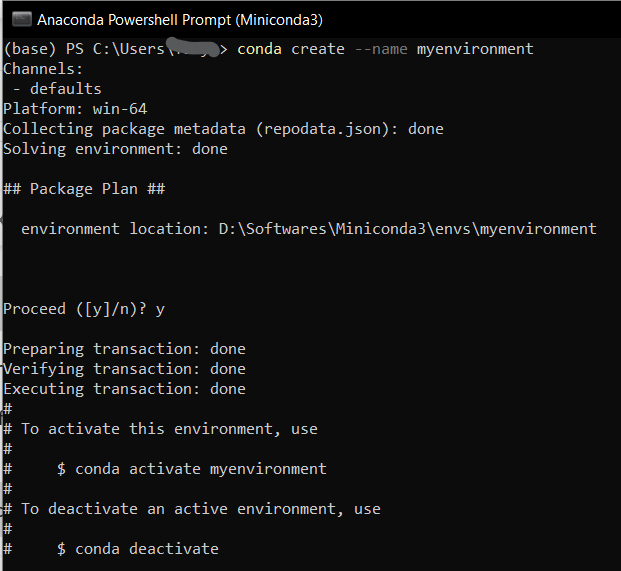
Creaating Conda Environment
Users can also add commands to install specific packages in the environment by adding the names in the above command.
conda create -- name myenvironment python=3.8 numpy
This creates the environment myenvironment with Python 3.8 interpreter and numpy loaded in as well.
Activate Environment
The conda activate command and the environment name is used to activate a newly created environment. The myenvironment environment will be launched upon execution of this command, and it will be used for any further Python executions or package installations.
conda activate myenvironment

Activating Conda Environment
Deactivate Environments
The conda deactivate command can be used to end an active environment and resume the base environment. By using this command, you will go back to the base environment and deactivate the current environment.
conda deactivate
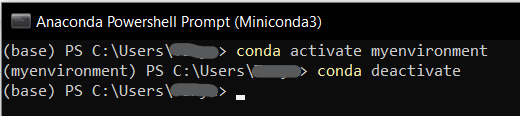
Deactivating Conda Environment
List Available Environments
The conda env list command can be used to see a list of all environments that are available on your system. The names of all current environments and their corresponding disk locations will be shown by this command.
conda env list
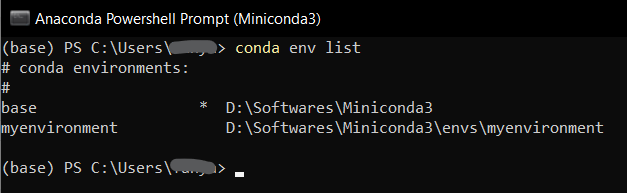
Listing Conda Environment
Remove Existing Environments
The conda env remove command, followed by the environment name, can be used to remove an environment if it is no longer needed. By running this command, you can clean up disk space and get rid of all packages and dependencies along with the myenvironment environment.
conda remove --name myenvironment --all
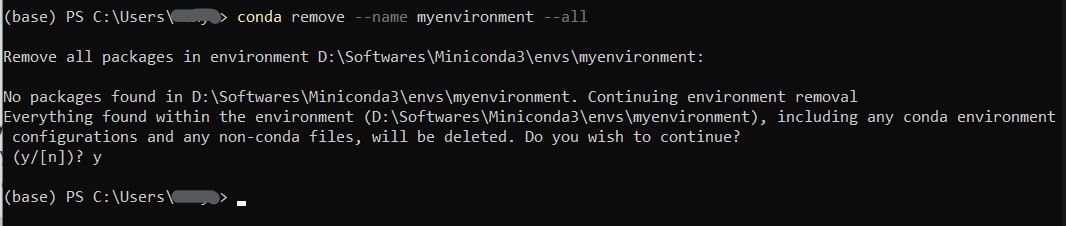
Removing Conda Environment
Export and Sharing Environments
Conda allows you to export an environment's specifications to a YAML file that you can share or use to duplicate the environment on another computer. Use the conda env export command and the environment name to export the environment specs to a YAML file. he myenvironment environment's specifications will be exported with this command and saved in a file called myenvironment.yml.
conda env export > myenvironment.yml
This command will create yml file in the directory from where this command is executed. You can further share this file via email or Git.

Exporting Conda Environment
As you can see, users can easily create, manage, and share isolated environments thanks to Conda's environment management features allowing you to simplify dependency management, optimize workflow, and concentrate on what really matters—creating amazing software.
Package Handling in Conda
In the intricate world of data science and software development, managing dependencies is essential. Conda's powerful package handling capabilities make this process simpler. Let us look at the basic features Conda provides in handling packages:
Install Packages
Conda makes package installation simple. The package name you wish to install should be followed by the conda install command. The numpy package will be installed in the active environment by using this command.
conda install numpy
By adding the version number after the package name, you can additionally indicate which version of the package you wish to install.
conda install numpy=1.21.0
The numpy package version 1.21.0 will be installed using this command.

Installing Package in Conda
Package Updates
Updating your packages is crucial to preserving compatibility and security. The conda update command in Conda makes it simple to update packages to the most recent versions.
conda update numpy
With this command, the numpy package will be updated to the most recent version that is available in the Conda repository.
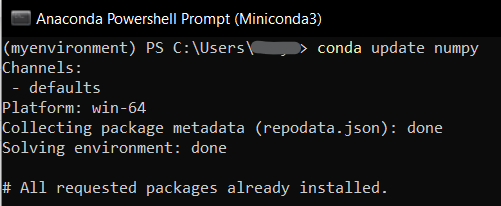
Updating Packages in Conda
Remove Packages
Use the conda remove command and the package name to remove a particular package from your environment if you no longer need it.
conda remove numpy
By removing the numpy package from your environment, you'll clear up disk space and get rid of any dependencies that came with it.
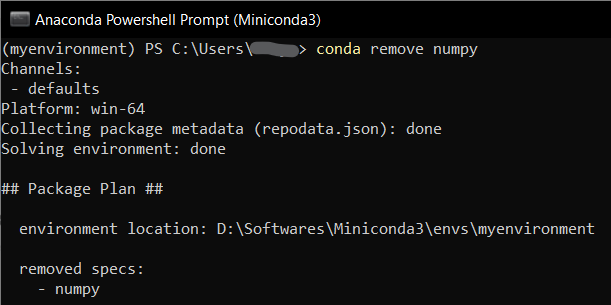
Removing Conda Package
Displaying Packages Installed
Use the conda list command to see a list of every package installed in your environment. All installed packages' names, versions, and corresponding channels will be shown by this command.
conda list
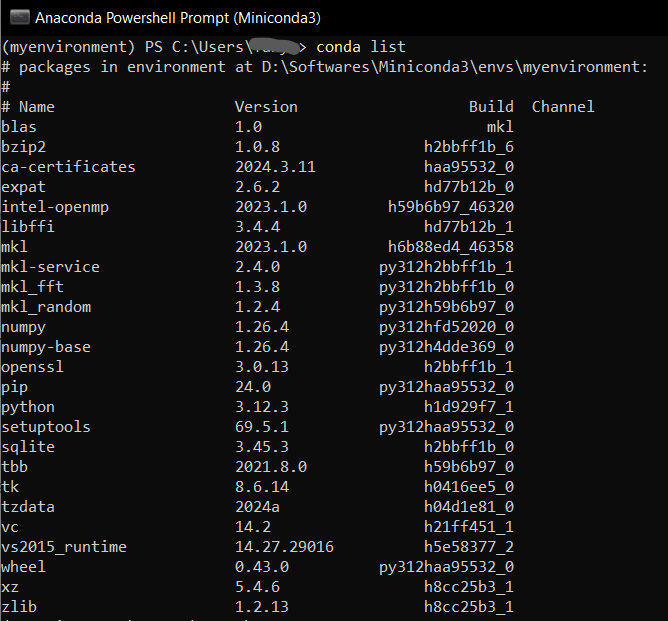
Listing Packages in Conda
Searching for Packages
Use the conda search command to look for packages by keyword if you are unsure of a package's exact name. The packages that are connected to the keyword "matplotlib," along with their versions and channels, will be shown by this command.
conda search MatplotLib
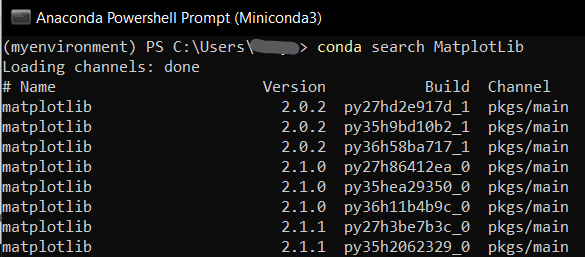
Searching Package in Conda
Create Personalised Packages
You can make personalized packages with Conda and distribute them to other users. Packages can be built from source code or recipes using tools such as conda build, then uploaded to your own package repository. This makes it possible for you to share your dependencies and software with others and promotes teamwork.
To sum up, Conda's package handling features make software development processes more efficient and make dependency management simpler. Now, let us look at some advanced uses of Conda.
Advanced Uses of Conda
Conda offers many sophisticated features for power users in addition to a user-friendly interface for managing environments and packages. Users can tailor their environments and workflows to meet their unique requirements with Conda's advanced usage capabilities, which include version control, dependency pinning, environment freezing, and reproducibility.
Dependency Pinning and Version Control
With version numbers or version specifiers, Conda enables you to define precise versions of dependencies and packages. You can pin a package to a particular version.
conda install numpy=1.21.0
This command installs the numpy package version 1.21.0. Version specifiers can also be used to define an acceptable version range.
conda install "numpy>=1.20,<1.22"
Here, any version of Numpy between 1.20 (inclusive) and 1.22 (exclusive) can be installed with this command.
Freezing an Environment
In order to preserve the current state of an environment for later use, freezing entails saving all installed packages and their dependencies in a file. This guarantees that the environment can be precisely recreated as it was at a given time. The conda list --export command can be used to freeze an environment in the manner described here:
conda list --export > environment.yml
The installed packages and their versions are exported by this command to a YAML file called environment.yml. Then, using the conda env create command, you can use this file to replicate the environment on a different machine.
Sharing of the Environment and Reproducibility
Conda makes it simple to replicate environments from YAML files and share them with others, which promotes reproducibility and environment sharing. The conda env create command can be used to create a new environment from a YAML file in the following manner:
conda env create --file environment.yml
By using the parameters in the environment.yml file, this command builds a new environment. At that point, you can turn on the environment and begin working in it.
Using YAML Files to Manage Environments
Conda also offers an easy way to share and work together on environments: it lets you manage environments straight from YAML files. With the conda env export command, you can export the current state of an environment to a YAML file, make any necessary modifications to the file, and then use the conda env update command to recreate the environment from the modified file.
Particular Channels and Package Storage Facilities
Users can distribute their own packages and dependencies using Conda's support for custom channels and package repositories. With the conda index command, you can make your own channel, and the anaconda upload command allows you to upload packages to it. After you've configured your channel, users can add it to their Conda configuration and install packages.
Therefore, Conda helps you to ensure reproducibility and consistency across your projects by streamlining your development process, whether you're freezing environments, managing custom channels, or pinning dependencies. Now, what if we face issues despite these features? Let us look at how to troubleshoot some common problems you might face in your experience with Conda.
Troubleshooting Conda
Although Conda aims to offer a flawless package and environment management experience, users might occasionally run into problems and errors. In this section, we'll examine typical issues users might run into with Conda and offer fixes.
Update Conda
Outdated Conda installations are one common problem that users might run into. You can use the following command to update Conda and make sure you have the most recent version of both it and its dependencies. The Conda package manager will be updated to the most recent version via this command.
conda update conda
Resolving Conflicts of Dependency
Installing or updating packages can lead to dependency conflicts, particularly in complex environments where there are many dependencies. You can try updating or installing a specific version of the package, or you can try removing conflicting packages from your environment, to resolve dependency conflicts.
Cache Cleaning
Disk space problems could arise from Conda's cache directory accumulating extra files over time. Disk space will be freed up by running this command to remove unnecessary packages and cached files from the Conda cache directory. The following command can be used to clear the Conda cache:
conda clean --all
Reinstalling Packages
You can attempt to fix errors related to particular packages by reinstalling them. You can use the following command to reinstall a package. The specified package will be reinstalled using this command, overwriting any previous dependencies and files.
conda install --force-reinstall
Examining Repositories and Channels
Problems with package channels or repositories can sometimes result in package installation errors. Make sure the packages you're trying to install are available in the Conda channels that you have set up correctly.
Conda Environment Updating
Make sure your Conda environment is up to date with the most recent specifications if you're working in a shared workspace or collaborating with others. With the following command, you can update your environment from a YAML file. Your environment will be updated with this command to conform to the details in the environment.yml file.
conda env update --file environment.yml
For troubleshooting advice, solutions, and support from knowledgeable users and developers, the Conda documentation, forums, and community channels are excellent resources available in the Conda Community.
You can overcome difficulties and guarantee a flawless Conda experience by using the troubleshooting methods described in this guide and the community's support when required. Recall that troubleshooting frequently entails trial and error until the problem is fixed, so be patient and persistent.
Conda’s unique features and functionality set it apart from other package managers. However, it is important to understand how Conda compares to other package managers and integrates with pre-existing tools and ecosystems.
Conda vs PIP
- **Environment Mangement: Configuring isolated environments with particular package dependencies is made possible by Conda's powerful environment management features. In contrast, Pip lacks native environment management features and is primarily focused on package installation.
- **Package Dependencies: Conda installs binary packages that have already been precompiled, which simplifies the installation of complex packages on various platforms. Pip depends on system-level dependencies and installs packages from the Python Package Index (PyPI), which could cause compatibility problems.
- **Package Availability: Conda provides a large selection of pre-built packages, both Python and non-Python, in its default channels. Conda has a wider range of packages available than PyPI, which makes it more appropriate for data science and scientific computing even though PyPI has a greater selection of Python packages.
Conda vs Apt
- **Compatibility with Multiple Platforms: Conda is compatible with Linux, macOS, and Windows. Conversely, Apt is exclusive to Linux-based distributions like Ubuntu and Debian.
- **Package Management: On Linux distributions, Apt is mostly used for software installation and system-level package management. Conda, on the other hand, is primarily concerned with the management of non-Python packages as well as Python packages and their dependencies.
- **Environment Isolation: Conda is a good tool for managing project dependencies and reproducibility because it lets users create isolated environments with particular package dependencies. Native environment isolation features are not available in Apt.
This section will explain how it integrates with other tools and environments.
**Integration with IDEs
Conda has integrations with a number of well-known integrated development environments (IDEs), including VS Code, PyCharm, and Jupyter Notebook. Installing packages straight from the IDE and switching between environments is made simple by the built-in support for managing Conda environments that these IDEs offer.
**Integration with Version Control Systems
Git and other version control systems can be used to version and share Conda environments. You can guarantee consistency and reproducibility between various development environments by including environment specification files (like environment.yml) in your project repository.
**Integration with Cloud Platforms
Conda is compatible with cloud platforms, including Microsoft Azure, Google Cloud Platform, and Amazon Web Services. These platforms provide cloud application deployment and management environments and tools that are compatible with Conda.
Conda, in summary, differs from other package managers with its special features and capabilities. For Python developers, data scientists, and researchers, its strong environment management, package dependency resolution, and platform compatibility make it a desirable option. Users can fully utilize Conda to optimize their development workflows and increase productivity by learning how it stacks up against other package managers and how it works with their current tools and environments.
Conclusion
For software development and data science, Conda offers all-inclusive and environmental solutions. It gives users the freedom to create, manage and share environments thanks to a simple installation process, sophisticated usage features and troubleshooting. Its robust package control capabilities, reproducibility and environment isolation make it a valuable tool for researchers, data scientists and developers to continuously improve. This way, users can use their focus is on building better software by leveraging Konda’s features and capabilities to increase performance, guarantee repeatability and compatibility.