Next.js Functions: NextRequest (original) (raw)
Last Updated : 23 Jul, 2025
In Next.js, particularly with the introduction of Next.js 13 and the new App Router, **NextRequest is part of the API used in the new routing system. It is designed to provide a simple and more powerful way to handle HTTP requests within Next.js applications, especially in API routes and middleware functions.
This article will give an overview of **NextRequest, its use cases, and how to work with it effectively.
Table of Content
What is NextRequest?
**NextRequest is an abstraction provided by Next.js that represents an incoming HTTP request. It offers a consistent API for accessing request details and manipulating requests within middleware and API routes. This class is a part of the new experimental features that improve the developer experience and provide enhanced functionality for handling HTTP requests.
**Syntax:
import { NextRequest, NextResponse } from 'next/server';
export function middleware(request) {
request.cookies.set('key', 'value'); // Set cookie
const value = request.cookies.get('key'); // Get cookie
const exists = request.cookies.has('key'); // Check cookie
request.cookies.delete('key'); // Delete cookie
const path = request.nextUrl.pathname; // Access pathname
return NextResponse.next(); // Continue request
}
- **request.cookies.set('key', 'value'): Sets a cookie with a specified key and value.
- **request.cookies.get('key'): Retrieves the value of a cookie by its key.
- **request.cookies.has('key'): Checks if a cookie with the specified key exists.
- **request.cookies.delete('key'): Deletes a cookie by its key.
- **request.nextUrl.pathname: Accesses the path of the request URL.
- **NextResponse.next(): Continues processing the request.
Key Features of NextRequest
1. Enhanced Cookies Management:
- **Set a Cookie: You can set cookies on a request using request.cookies.set(name, value). This sets a Set-Cookie header on the request.
// Example: Setting a cookie to hide a banner\
request.cookies.set('show-banner', 'false'); // Sets Set-Cookie: show-banner=false; path=/home
- **Get a Cookie: Retrieve the value of a cookie by name using request.cookies.get(name). If the cookie is not found, it returns undefined.
// Example: Retrieving the 'show-banner' cookie
const bannerStatus = request.cookies.get('show-banner'); // Returns 'false'
- **Get All Cookies: Use request.cookies.getAll(name) to get all values of a specific cookie or all cookies if no name is provided.
// Example: Getting all 'experiments' cookies
const experiments = request.cookies.getAll('experiments'); // Returns an array of cookies
- **Delete a Cookie: Remove a cookie using request.cookies.delete(name), which returns true if the cookie is deleted or false if it wasn't found.
// Example: Deleting the 'experiments' cookie
request.cookies.delete('experiments'); // Returns true if deleted
- **Check for a Cookie: Use request.cookies.has(name) to check if a cookie exists on the request.
// Example: Checking if the 'experiments' cookie exists
const hasExperiments = request.cookies.has('experiments'); // Returns true or false
- **Clear Cookies: Use request.cookies.clear() to remove all Set-Cookie headers from the request.
// Example: Clearing all cookies
request.cookies.clear();
2. nextUrl Property:
- nextUrl extends the native URL API with additional Next.js-specific properties, allowing detailed handling of request URLs within the app.
// Example: Accessing pathname and search parameters
const path = request.nextUrl.pathname; // e.g., '/home'
const params = request.nextUrl.searchParams; // e.g., { 'name': 'lee' }
- **Properties:
- **basePath: The base path of the URL.
- **buildId: The unique build identifier of the Next.js application.
- **pathname: The path part of the URL.
- **searchParams: An object representing the search parameters of the URL.
How to Use NextRequest?
1. Using Middleware Functions
Middleware functions in Next.js 13+ can use NextRequest to handle requests before they reach the actual route handlers. Here’s an example of how to use NextRequest in middleware:
// middleware.ts
import { NextRequest, NextResponse } from 'next/server';
export function middleware(request: NextRequest) {
const { pathname } = request.nextUrl;
// Example: Redirect requests to `/old-page` to `/new-page`
if (pathname === '/old-page') {
    const url = request.nextUrl.clone();
    url.pathname = '/new-page';
    return NextResponse.redirect(url);
}

return NextResponse.next();
}
export const config = {
matcher: '/:path*',
};
**In this example:
- request.nextUrl provides access to the URL of the incoming request.
- NextResponse.redirect creates a redirect response if the requested path matches /old-page.
- NextResponse.next allows the request to continue to the next middleware or route handler if no action is taken.
2. Using API Route
You can also use **NextRequest in API routes to process incoming requests. Here’s a basic example:
// app/api/hello/route.ts
import { NextRequest, NextResponse } from 'next/server';
export async function GET(request: NextRequest) {
const userAgent = request.headers.get('user-agent');
const url = request.nextUrl;
const name = url.searchParams.get('name') || 'World';
return NextResponse.json({
    message: `Hello, ${name}!`,
    userAgent,
});
}
**In this example:
- request.headers.get('user-agent') retrieves the User-Agent header from the request.
- request.nextUrl provides access to the URL and its query parameters.
- NextResponse.json sends a JSON response with the greeting message and user agent.
3. Handling Different Request Methods
NextRequest allows you to handle different HTTP methods within your routes. You can use the request.method property to determine the method of the incoming request:
// app/api/data/route.ts
import { NextRequest, NextResponse } from "next/server";
export async function handler(request: NextRequest) {
switch (request.method) {
case "GET":
return NextResponse.json({ message: "GET request received" });
case "POST":
const data = await request.json();
return NextResponse.json({ message: "POST request received", data });
default:
return NextResponse.json(
{ error: "Method not allowed" },
{ status: 405 }
);
}
}
Steps To Implement Next.js Functions: NextRequest
Step 1: Create a New Next.js Application
Use the create-next-app command to bootstrap a new Next.js project:
npx create-next-app@latest my-next-app
cd my-next-app

Create Next.js application
Folder Structure
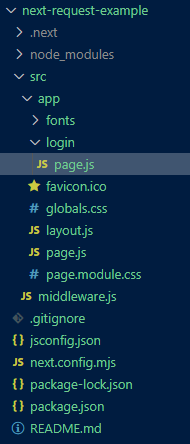
Folder Structure
Dependencies
"dependencies": {
"react": "^18",
"react-dom": "^18",
"next": "14.2.11"
}
**Example: Create a middleware file to demonstrate the usage of NextRequest for handling cookies and URL manipulations.
JavaScript `
//src/middleware.js
import { NextRequest, NextResponse } from 'next/server';
export function middleware(request) { const path = request.nextUrl.pathname; const query = request.nextUrl.searchParams.get('name') || 'guest';
if (path === '/dashboard' && query === 'guest') {
    return NextResponse.redirect(new URL('/login', request.url));
}

return NextResponse.next();
}
export const config = { matcher: '/:path*', };
JavaScript
//app/login/page.js
"use client";
export default function LoginPage() { const handleSubmit = (e) => { e.preventDefault(); alert("Logged in successfully!"); };
return (
    <div className="min-h-screen flex items-center justify-center bg-gray-100">
        <div className="bg-white p-8 rounded shadow-md w-80">
            <h2 className="text-2xl font-bold mb-6">Login</h2>
            <form onSubmit={handleSubmit}>
                <div className="mb-4">
                    <label
                        htmlFor="username"
                        className="block text-sm font-medium text-gray-700"
                    >
                        Username
                    </label>
                    <input
                        type="text"
                        id="username"
                        className="mt-1 p-2 border border-gray-300 rounded w-full"
                        required
                    />
                </div>
                <div className="mb-6">
                    <label
                        htmlFor="password"
                        className="block text-sm font-medium text-gray-700"
                    >
                        Password
                    </label>
                    <input
                        type="password"
                        id="password"
                        className="mt-1 p-2 border border-gray-300 rounded w-full"
                        required
                    />
                </div>
                <button
                    type="submit"
                    className="w-full bg-blue-500 text-white py-2 rounded hover:bg-blue-600"
                >
                    Login
                </button>
            </form>
        </div>
    </div>
);
}
`
**To start the application run the following command.
npm run dev