Setting Up C Development Environment (original) (raw)
Last Updated : 22 Apr, 2025
C is a commonly used programming language developed in the 1970s by Dennis Ritchie. It is known for providing low-level memory access, which makes it ideal for system programming and embedded systems. To start programming in C, we should be able to run or execute C source codes. We have two ways to run C codes:
Use Onlinе IDE
Onlinе IDEs offer a convenient option for those who choose not to set up a local environment. You just need to enter your code and press a button. An example is the online IDE provided by GееksforGееks at _ide.geeksforgeeks.org_.
GeeksforGeeks also provides an option to run the code in the article itself just by clicking the play button on the top right corner of the code snippet.
C `
// Using online IDE for C #include <stdio.h>
int main() { printf("Learning C at GeekforGeeks"); return 0; }
`
Output
Learning C at GeekforGeeks
Install C in Your Computer
Installing C in your own computer requires downloading and installing two software that together forms the C development environment:
- **C Compiler: A compiler is a software that converts your C code into executable programs.
- **Text Editor (IDE): A compiler only compiles the C source code into executable code. We also need a code editor (or IDE) for editing and writing C code.
Install C Compiler
There are many C compilers provided by different vendors available. Below are the instructions for installing GCC (GNU Compiler Collection) on different operating systems.
Install GCC on Linux
To **install GCC on Linux (Ubuntu, Debian, Linux Mint, and Kali Linux), you can use the **apt package manager. Just enter and run the following commands one by one in the terminal:
C++ `
sudo apt update sudo apt install build-essential
`
The above command will download and install GCC in your system.
Install GCC on Windows
To **install GCC on Windows, we can use MinGW (Minimalist GNU for Windows) installer. Follow these steps:
- First download MinGW.
- Run the installer and select the GCC package.
- Once installed, add the MinGW\bin directory to the system’s PATH variable to be able to use GCC from command line.
Install GCC on Mac
On macOS, GCC can be installed using Homebrew package manager. First install Homebrew in macOS using the following command:
C++ `
/bin/bash -c "$(curl -fsSL https://raw.githubusercontent.com/Homebrew/install/HEAD/install.sh)"
`
Then enter the following command to install GCC:
C++ `
brew install gcc
`
Verify Installation
We can check if the GCC compiler is successfully installed on the operating system by using the following command in the command line interface:
C++ `
gcc --version
`
If the installation was successful, below text is shown:

Install Code Editor (IDE)
There are many IDEs available on the internet for free use. One popular code editor is VS Code, which is an excellent and lightweight code editor. Follow the below steps to install VS code:
**Step 1: Download the suitable VS Code installer according to your **operating system.
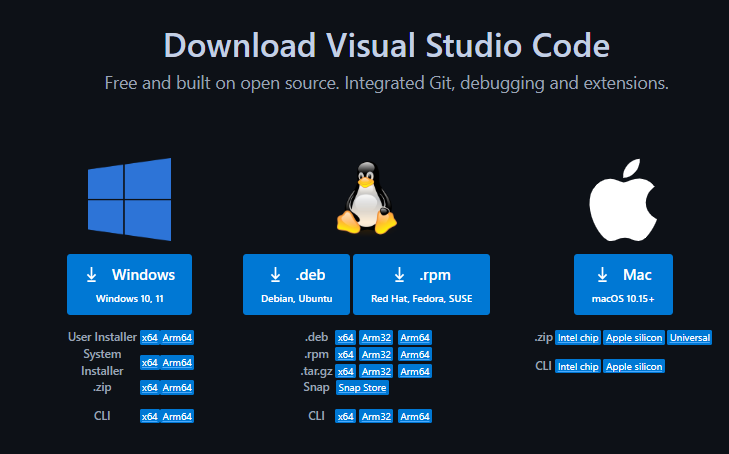
**Step 2: Once downloaded, open it and install the VS Code with recommended settings.
For installing different IDEs, you can refer to the articles given below:
Configure VS Code for C
As GCC is already added to PATH, then we don't need to explicitly tell VS Code the installation directory of the compiler. But we still can do a few things to make C development easier.
Install Extensions
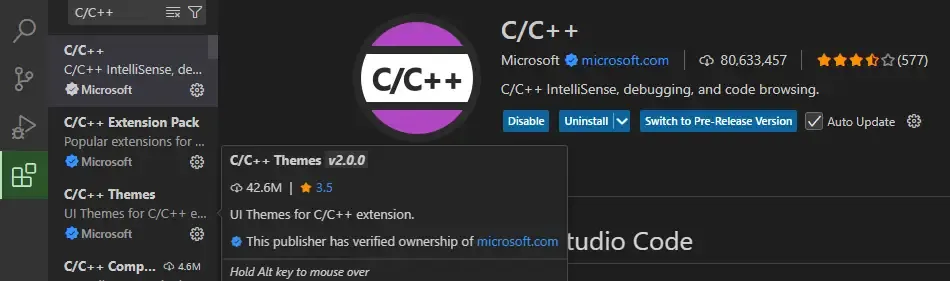
Install C/C++ Extension Pack and Code Runner extensions by:
- Go to the extensions tab.
- Search for the given extension in the search bar.
- Install the extension by clicking on it.
Configure Terminal Execution
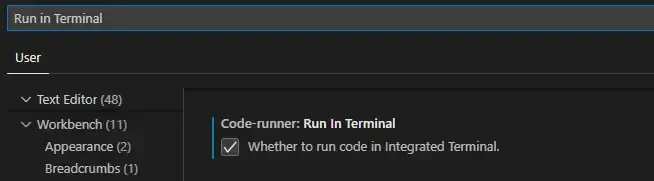
By default, code runner runs the program in the **output console in which we can't give input to the program from the terminal. To change this:
- Go to the File -> Preferences -> Setting.
- Click on **extension tab and search for "**Run in Terminal" and check the box.
Run "Hello World" Program
Let's run a simple program to check if everything is fine.
- First open a **folder in which you want to store C source code files.
- Create a File with any name but with ****.c extension.**
- Paste the ****"Hello World"** code in that file. C `
#include <stdio.h> int main() { printf("Hello World"); return 0; }
`
- Run the code using **ctrl + alt + N.
As we can see, our local C development environment is ready to use!