Selenium with Java Tutorial (original) (raw)
Last Updated : 23 May, 2026
Selenium with Java is a tool for automating web application testing across different browsers and platforms. It helps testers build reliable, maintainable and scalable test automation suites.
- Platform-independent and supports cross-browser testing.
- Strong community support with wide adoption in the industry.
- Start with Selenium WebDriver setup and basic navigation.
- Learn to handle dynamic elements, waits and form submissions.
Selenium Automation Workflow
Selenium Automation Workflow describes how Selenium WebDriver communicates between the test script and the web browser to perform automated actions such as clicking, typing, and navigation. It follows a step-by-step process using WebDriver APIs and browser drivers.

Selenium Automation Workflow
- **User Test Script: The tester writes automation scripts in Java using Selenium commands to define browser actions and test scenarios.
- **Selenium Client Library: It acts as a bridge between the test script and WebDriver by converting the code into understandable commands.
- **WebDriver API: The WebDriver API sends standardized automation requests from the Selenium script to the browser driver.
- **Browser Driver: Browser drivers such as ChromeDriver and GeckoDriver establish communication between WebDriver and the browser.
- **Browser: The browser executes actions like opening webpages, clicking elements, entering text, and navigation.
- **Response Returned: After execution, the browser sends the response and results back through the browser driver to the test script.
- **Output: The final output is returned to the user, such as retrieving the webpage title “GeeksforGeeks”.
Steps to Configure Java Environment
Step 1. Install JDK
First, configure the Java Development Kit on your system.
**Verify Installation:
java -version
Step 2. Install IDE – Eclipse, IntelliJ IDEA or NetBeans.
Now, install an Integrated Development Environment (IDE) such as Eclipse, IntelliJ IDEA or NetBeans.
Step 3. Download Selenium WebDriver
- Download the Selenium WebDriver library for Java.
- Extract the ZIP file and add all required Selenium JAR files to your project.
Step 4. Install Browser Driver
- Download the browser driver according to your browser version (e.g., ChromeDriver for Chrome).
- Extract the ZIP file and locate the
chromedriver.exefile. - This driver path is used in Selenium scripts to launch the browser.
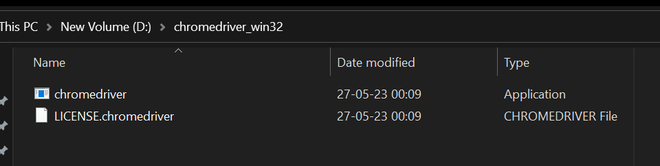
**Example Path:
D:\chromedriver_win32\chromedriver.exe
Selenium Manager in Selenium 4.6+
Modern Selenium versions (Selenium 4.6 and above) include Selenium Manager, which automatically downloads and manages browser drivers such as ChromeDriver and GeckoDriver. In many cases, manual driver setup and system property configuration are no longer required.
WebDriver driver = new ChromeDriver();
Selenium Manager automatically detects the browser version and configures the required driver during execution.
Create a Selenium with Java Project in Eclipse
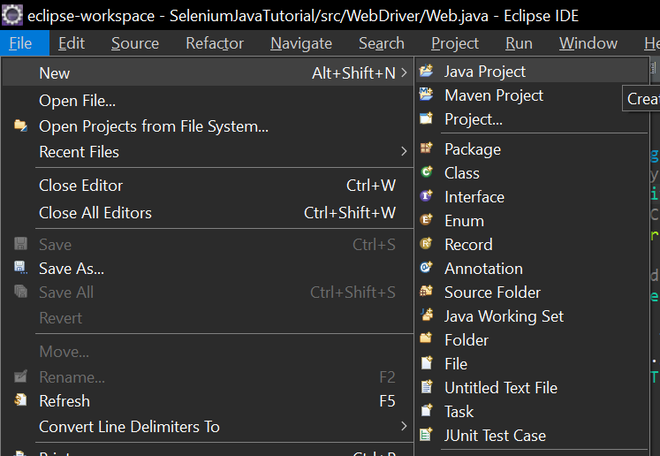
**Step 1: Launch Eclipse and select.
**File -> New -> Java Project
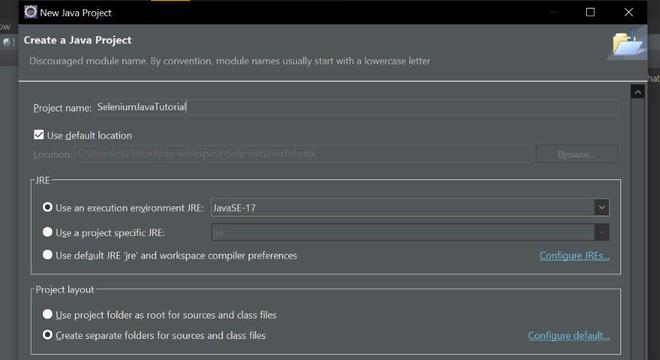
**Step 2: Enter a name for your project and click **Finish.
**Example: SeleniumJavaTutorial
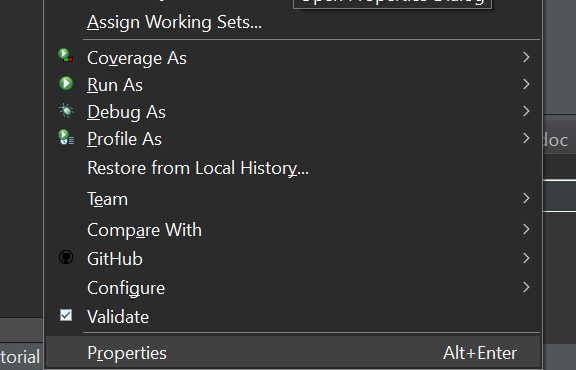
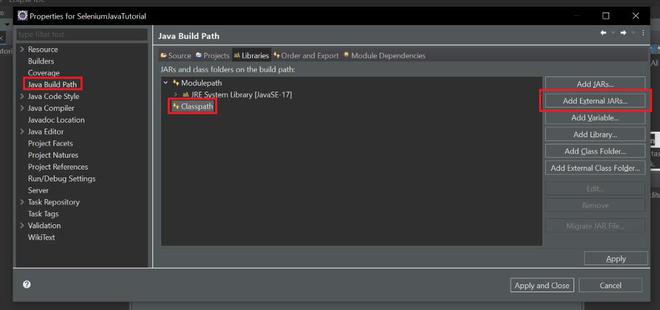
**Step 3: Right-click on your project in **Package Explorer and select **Properties.
**Step 4: Select Java Build Path from the left panel click on the libraries tab and then select Classpath. Click on Add External JARs and browse to the location where you downloaded the Selenium WebDriver library (e.g., **selenium-java-4.1.0.zip).
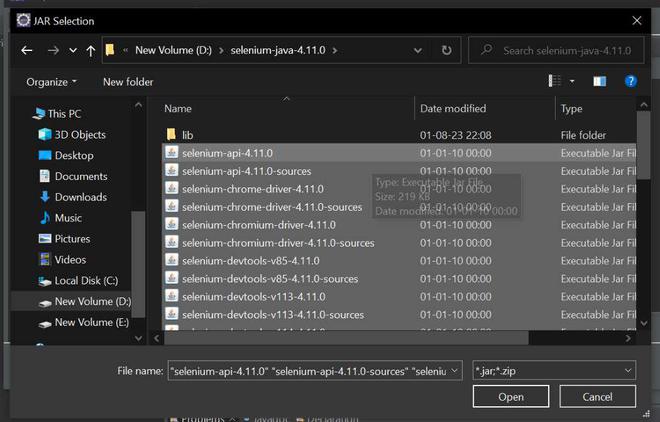
**Step 5: Select all the JAR files inside the zip file and click Open and also all the files inside the lib folder.
**D:\selenium-java-4.11.0
**D:\selenium-java-4.11.0\lib
**Step 6: Click Apply and Close to save the changes.

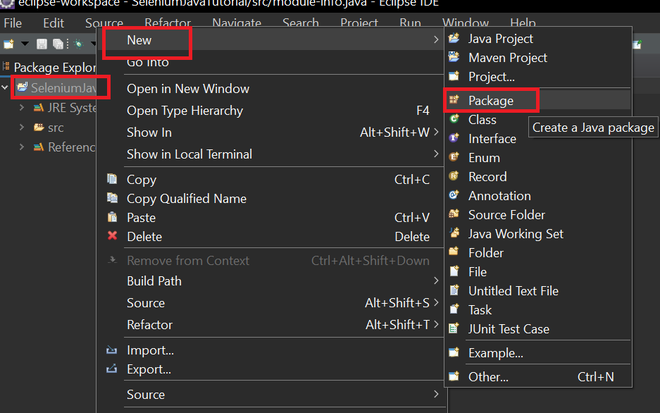
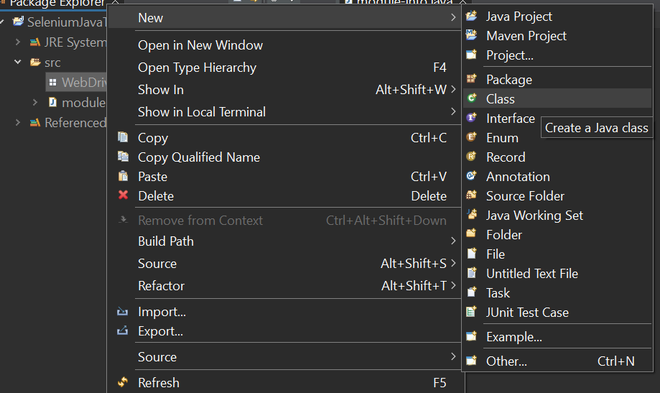
**Step 7: Create a new package under your project by right-clicking on the src folder and selecting **New -> Package.
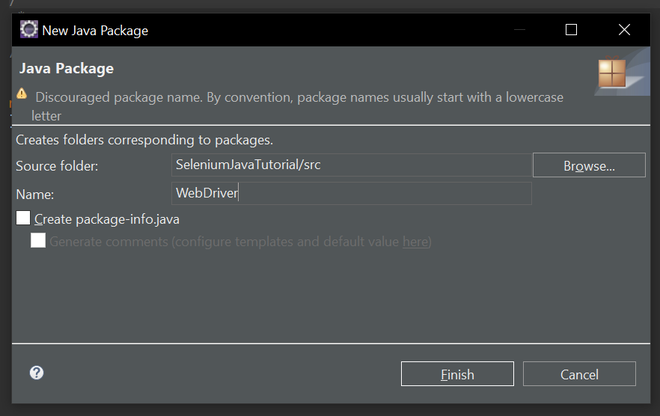
**Step 8: Add the name of your package
**Example: WebDriver
**Step 9: Create a new class under your package (e.g., **WebDriver) by right-clicking on the package and selecting **New -> Class, then Enter a name for your class and click Finish.
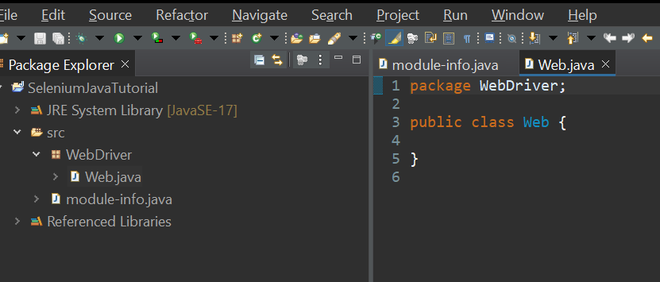
**Step 10: After all the steps your file structure looks like this.
Steps for Writing Code
**Step 1: Import the required packages at the top of your class:
Java `
import org.openqa.selenium.webdriver; import org.openqa.selenium.chrome.chromedriver;
`
After importing if still getting errors in import just delete the module-info.java file.
**Step 2: Create a main class inside the Web class.
Java `
public class Web { public static void main(String[] args) { } }
`
**Step 3: Set the system property for ChromeDriver (path to chromedriver executable).
****(e.g., D:/chromedriver_win32/chromedriver.exe)**
Java `
System.setProperty("webdriver.chrome.driver", "D:/chromedriver_win32/chromedriver.exe");
`
**Step 4: Create an instance of ChromeDriver.
Java `
WebDriver driver = new ChromeDriver();
`
**Step 5: Navigate to the desired website.
driver.get("https://www.geeksforgeeks.org/");
Step 6: Get and print the page title.
Java `
String pageTitle = driver.getTitle(); System.out.println("Page Title: " + pageTitle);
`
**Step 7: Wait for a few seconds.
Java `
try { Thread.sleep(3000); } catch (InterruptedException e) { e.printStackTrace(); }
`
**Step 8: Close the browser.
driver. Quit();
Below is the Java program to implement the above approach:
Java `
package webdriver;
import org.openqa.selenium.webdriver; import org.openqa.selenium.chrome.chromedriver;
public class Web { public static void main(String[] args) { // Set the system property for ChromeDriver (path to chromedriver executable) System.setProperty("webdriver.chrome.driver", "D:/chromedriver_win32/chromedriver.exe");
    // Create an instance of ChromeDriver (launch the Chrome browser)
    WebDriver driver = new ChromeDriver();

    try {
        // Navigate to the desired website (GeeksforGeeks in this example)
        driver.get("https://www.geeksforgeeks.org/");

        // Get and print the page title
        String pageTitle = driver.getTitle();
        System.out.println("Page Title: " + pageTitle);

        // Wait for a few seconds (for demonstration purposes only)
        Thread.sleep(3000);
    } catch (InterruptedException e) {
        e.printStackTrace();
    } finally {
        // Close the browser
        driver.quit();
    }
}
}
`
**Output:
Handling Alerts, Frames and Windows
1. Alerts
- Alerts are pop-up messages in web applications.
- Selenium provides Alert interface to handle them: Java `
import org.openqa.selenium.Alert;
// Switch to alert Alert alert = driver.switchTo().alert(); alert.accept(); // Click OK alert.dismiss(); // Click Cancel alert.getText(); // Get alert text
`
2. Frames
- Frames embed one HTML document inside another.
- Use switchTo().frame() to interact with elements inside frames: Java `
driver.switchTo().frame("frameName"); // By name/id driver.switchTo().frame(0); // By index driver.switchTo().defaultContent(); // Back to main page
`
3. Multiple Windows / Tabs
- Selenium can switch between browser windows/tabs using windowHandles: Java `
String parentWindow = driver.getWindowHandle(); for (String handle : driver.getWindowHandles()) { driver.switchTo().window(handle); } // Switch back to parent window driver.switchTo().window(parentWindow);
`