Spring Initializr (original) (raw)
Last Updated : 6 Aug, 2025
**Spring Initializr is a popular tool for quickly generating **Spring Boot projects with essential **dependencies. It helps developers set up a new application with minimal effort, supporting Maven and Gradle builds. With its user-friendly interface, it simplifies project configuration, making it an essential resource for modern Spring Boot development.
Spring Initializr web-based tool provides simple web UI to generate the Spring Boot project structure or we can say it builds the skeleton of the Spring-based application. The spelling 'Initializr' is intentionally different from 'Initializer' to reflect its unique identity as a tool. It provides extensible APIs for creating JVM (Java Virtual Machine) based projects. Modern IDEs have integrated Spring Initializr which provides the initial project structure. The Spring Initializr tool takes care of the following configuration for any Spring-based project.
System Requirements
- An IDE (Spring Tool Suite(STS), IntelliJ IDEA Ultimate and IntelliJ IDEA Community Edition(Limited Configuration options), Netbeans, and VSCode) OR CLI.
- Java 17 or later Version
- Build tool (Maven repository or Gradle repository) to build the application.
- Spring Boot version (Dependencies are added based on the version)
- Dependencies required for the project.
- Project Metadata like name, packaging (Jar or War), package name, etc.
With all the provided information, the Spring Initializr generates the Spring project structure. We can use the Spring Initializr either from the Web or IDE or Command-Line.
Using Spring Initializr Web UI
Let us learn how to use the Spring Initializr web UI to generate the Spring Boot project for which the prior step is navigating to start.spring.io to get it. The window that will pop up is depicted below which is as follows:

**The Spring Initializr UI has the following options:
- **Project: Using this one can create Maven or Gradle project i.e; Maven or Gradle can be used as a build tool. The default option is Maven Project. Maven project is used in the entire tutorial.
- **Language: Spring Initializr provide Java, Kotlin and Groovy as a programming language for the project. Java is the default option.
- **Spring Boot Version: Using this one can select the Spring Boot version for their project. Spring Boot latest Version is 3.1.5. The SNAPSHOT versions are under development and are not stable.
- **Project Dependencies: Dependencies are artifacts that we can add to the project.
- **Project Metadata: It is the information about the project. Information in the metadata does include below key points:
- **Group ID: It is the ID of the project group.
- **Artifact: It is the name of the Application.
- **Name: Application name.
- **Description: About the project.
- **Package name: It is the combination of Group and Artifact Id.
- **Packaging: Using this Jar or War packaging can be selected
- **Generate: When generate option is clicked, the project is downloaded in zip format. The zip file can be unzipped and the project can be loaded into an IDE.
- **Explore: This allows to see and makes changes in the generated project.
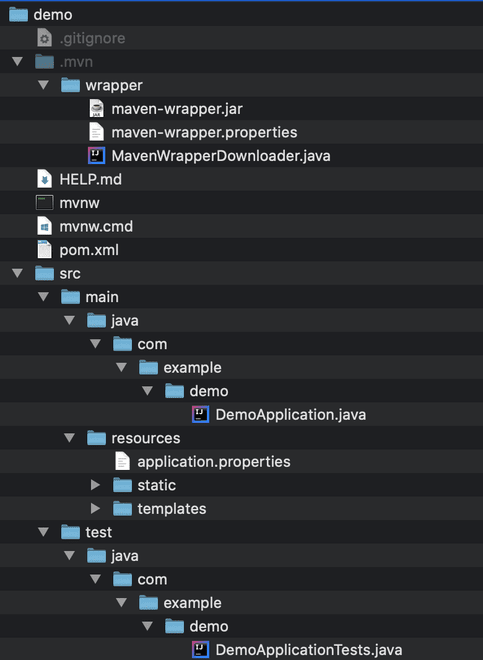
Project Structure
The Spring Boot project looks as follows:
Ways to Use Spring Initializr
Spring Initializr can be achieved via two ways which are as follows:
Spring Initializr using IDE's
Spring Initializr is supported by various IDEs like Spring Tool Suite(STS), IntelliJ IDEA Ultimate and IntelliJ IDEA Community Edition(Limited Configuration options), Netbeans, and VSCode.
- If you are using Netbeans, **Spring Initializr plugin can be added to the IDE.
- If you are using VSCode, **vscode-spring-initializr plugin can be added to the VSCode.
1. Using IntelliJ Community Edition
Steps to be followed:
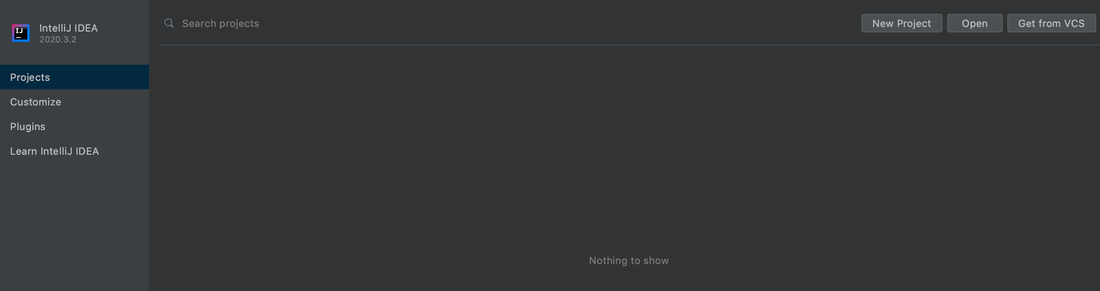
- Open IntelliJ CE IDE.
- Click on New Project.
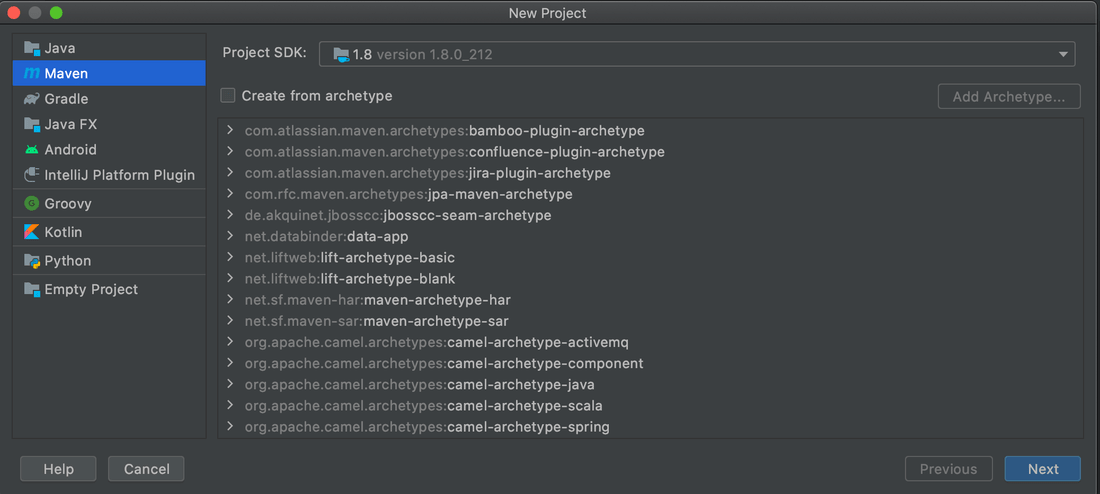
- Select Maven Project and Java JDK Home path
- Enter Project Metadata details
- Click the Finish button.
Let us pictorially depict the above steps to get a fairer understanding
- Open IntelliJ CE IDE.
- Click on New Project.
Select Maven Project and Java JDK Home path.
Enter Project Metadata details such as Name, GroupId, ArtifactId.
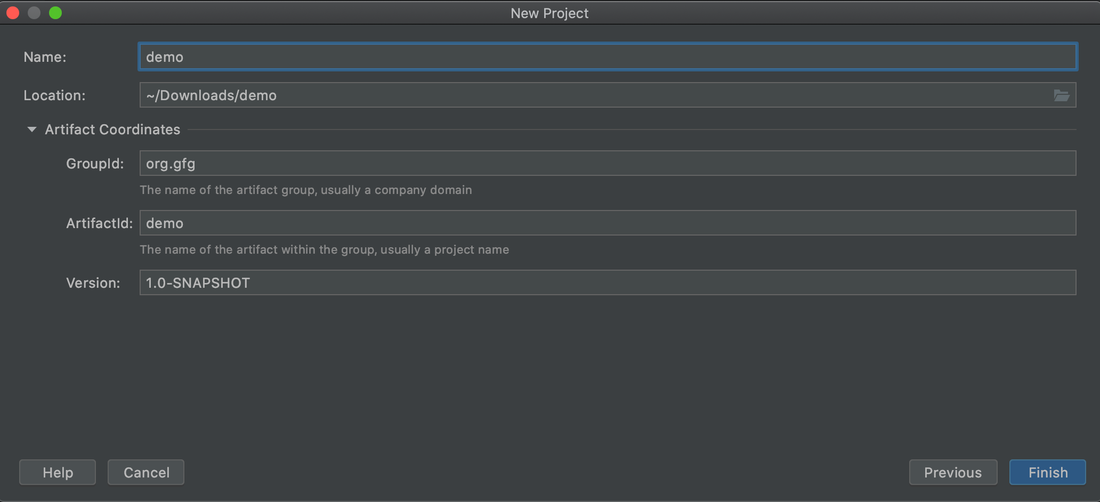
Click the Finish button.
**Note: If you are using IntelliJ Ultimate Edition, the steps are available here.
2. Using Spring Initializr via Command Line
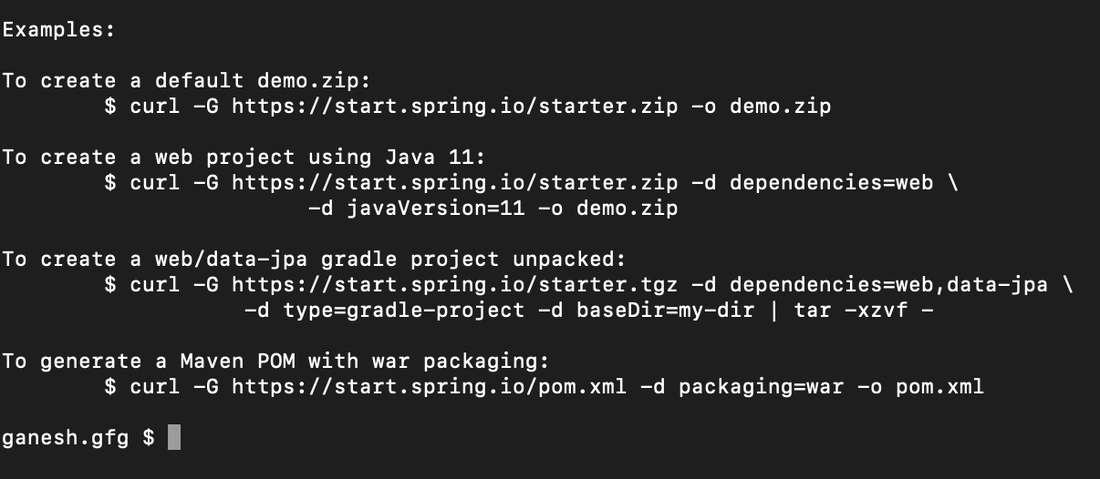
A lot of developers love to do things from the command line. For them, there is an option to create the Spring project using command-line utilities like Spring Boot CLI (Command Line Interface), cURL or HTTPie. To use cURL or HTTPie, one has to install them prior to the usage.
The above command will give the entire instructions on how to create a project using cURL.
Let’s assume that you want to generate a demo.zip project based on Spring Boot 3.1.5 RELEASE, using the web and developer tools dependencies (remember, those two IDs are displayed in the capabilities of the service):
curl https://start.spring.io//starter.zip -d dependencies=web,devtools -d bootVersion=3.1.5 -o demo.zip
The exact same project can be generated using the HTTP command as well:
http https://start.spring.io//starter.zip dependencies==web,devtools bootVersion==3.1.5 --download --output=demo.zip
**Note: Apart from all these, Spring Initializr teams also provide extensible APIs for creating JVM-based projects. Also, one can create their own instance of Spring Initializr for their own projects. It also provides various options for the project that are expressed in a metadata model. The metadata model allows us to configure the list of dependencies supported by JVM and platform versions, etc.