Spring ResultSetExtractor (original) (raw)
Last Updated : 8 Oct, 2025
ResultSetExtractor is an interface used to extract data from a ResultSet object returned by executing an SQL query. It is especially useful when mapping an entire ResultSet (multiple rows or nested data) into a single object or collection.
- Used when a RowMapper is not sufficient (e.g., custom or hierarchical mapping).
- Allows manual control over ResultSet iteration and transformation.
- The JdbcTemplate.query() method accepts a ResultSetExtractor instance.
**Method Syntax:
Java `
public T extractData(ResultSet resultSet) throws SQLException, DataAccessException;
`
**query() method syntax:
Java `
public T query(String sql, ResultSetExtractor resultSetExtractor);
`
- **Java: 21 or later
- **Spring Boot: Version 3.2.0 or higher
- **Database: MySQL
- **Build Tool: Maven
Step-by-Step Implementation
Step 1: Define the Database Schema
Execute the following SQL statements to create and populate the Student table.
CREATE TABLE Student (
id INT PRIMARY KEY AUTO_INCREMENT,
name VARCHAR(45) NOT NULL,
department VARCHAR(45) NOT NULL
);
INSERT INTO Student (name, department)
VALUES ('geek', 'computer science');
Step 2: Add Dependencies
Include the following dependencies in your pom.xml file.
pom.xml:
XML `
<modelVersion>4.0.0</modelVersion>
<groupId>com.example</groupId>
<artifactId>resultset-extractor-demo</artifactId>
<version>1.0.0</version>

<properties>
    <java.version>21</java.version>
    <spring-boot.version>3.2.0</spring-boot.version>
</properties>

<dependencies>
    <!-- Spring Boot Starter JDBC -->
    <dependency>
        <groupId>org.springframework.boot</groupId>
        <artifactId>spring-boot-starter-jdbc</artifactId>
        <version>${spring-boot.version}</version>
    </dependency>

    <!-- MySQL Connector -->
    <dependency>
        <groupId>com.mysql</groupId>
        <artifactId>mysql-connector-j</artifactId>
        <version>8.0.33</version>
        <scope>runtime</scope>
    </dependency>

    <!-- Spring Boot Starter Test -->
    <dependency>
        <groupId>org.springframework.boot</groupId>
        <artifactId>spring-boot-starter-test</artifactId>
        <version>${spring-boot.version}</version>
        <scope>test</scope>
    </dependency>
</dependencies>

<build>
    <plugins>
        <plugin>
            <groupId>org.springframework.boot</groupId>
            <artifactId>spring-boot-maven-plugin</artifactId>
            <version>${spring-boot.version}</version>
        </plugin>
    </plugins>
</build>
`
Step 3: Create a Model Class
Define the model class representing the student entity.
**Student.java:
Java `
public record Student(int id, String name, String department) {}
`
Step 4: Create a DAO Interface
Create a StudentDao interface for database access operations.
Java `
import java.util.List;
public interface StudentDao { List getAllStudents(); }
`
Create the implementation class that uses ResultSetExtractor to map query results.
**StudentDaoImpl.java:
Java `
import org.springframework.jdbc.core.JdbcTemplate; import org.springframework.jdbc.core.ResultSetExtractor; import org.springframework.stereotype.Repository; import java.sql.ResultSet; import java.sql.SQLException; import java.util.ArrayList; import java.util.List;
@Repository public class StudentDaoImpl implements StudentDao {
private final JdbcTemplate jdbcTemplate;

public StudentDaoImpl(JdbcTemplate jdbcTemplate) {
    this.jdbcTemplate = jdbcTemplate;
}

@Override
public List<Student> getAllStudents() {
    String sql = "SELECT id, name, department FROM Student";
    return jdbcTemplate.query(sql, new StudentResultSetExtractor());
}

private static class StudentResultSetExtractor implements ResultSetExtractor<List<Student>> {
    @Override
    public List<Student> extractData(ResultSet rs) throws SQLException {
        List<Student> students = new ArrayList<>();
        while (rs.next()) {
            int id = rs.getInt("id");
            String name = rs.getString("name");
            String department = rs.getString("department");
            students.add(new Student(id, name, department));
        }
        return students;
    }
}
}
`
Step 6: Configure Database Connection
Add the configuration to application.yml.
**application.yml:
spring:
datasource:
url: jdbc:mysql://localhost:3306/school_db
username: root
password: pass
driver-class-name: com.mysql.cj.jdbc.Driver
Step 7: Create the Main Application Class
Create a main class to bootstrap the Spring Boot application.
**ResultSetExtractorApplication.java:
Java `
import org.springframework.boot.SpringApplication; import org.springframework.boot.autoconfigure.SpringBootApplication;
@SpringBootApplication public class ResultSetExtractorApplication { public static void main(String[] args) { SpringApplication.run(ResultSetExtractorApplication.class, args); } }
`
Step 8: Write the Test Class
Write a simple integration test to verify data fetching.
**StudentDaoTest.java:
Java `
import org.junit.jupiter.api.Test; import org.springframework.beans.factory.annotation.Autowired; import org.springframework.boot.test.context.SpringBootTest; import java.util.List; import static org.junit.jupiter.api.Assertions.assertFalse;
@SpringBootTest public class StudentDaoTest {
@Autowired
private StudentDao studentDao;

@Test
public void testGetAllStudents() {
    List<Student> students = studentDao.getAllStudents();
    assertFalse(students.isEmpty());
    students.forEach(System.out::println);
}
}
`
Step 9: Run the Application
Run the project using:
mvn spring-boot:run
Output
When executed, the console will print the student records retrieved from the database.
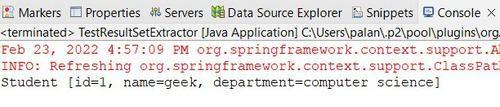
Output