Spring Security FormBased Authentication (original) (raw)
Last Updated : 17 Jan, 2026
Form-Based Authentication in Spring Security provides a secure and customizable way to authenticate users using a custom login page instead of the default browser login prompt. It allows better control over authentication flow, user experience, and security configurations.
- Customizable login and logout mechanisms.
- Protection against common security threats like session fixation and brute force attacks.
- Seamless integration with Spring Boot and Thymeleaf.
- Easy role-based access control configuration.
In this article, we will learn how to set up a Spring Boot application with Spring Security to implement a custom login page.
Steps to Create a Custom Login Form with Spring Security
Step 1: Create a Spring Boot Project
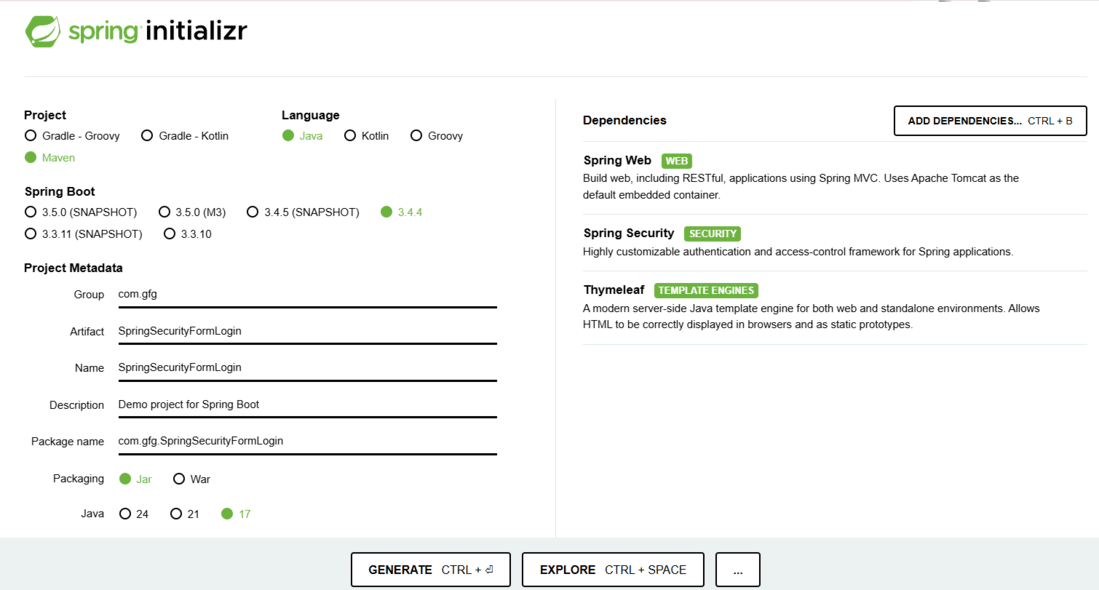
Use Spring Initializr to bootstrap your project with the following dependencies:
- **Spring Web: For building web applications.
- **Spring Security: For authentication and authorization.
- **Thymeleaf: For rendering HTML templates.
Step 2: Project Structure
Your folder structure should look like this:
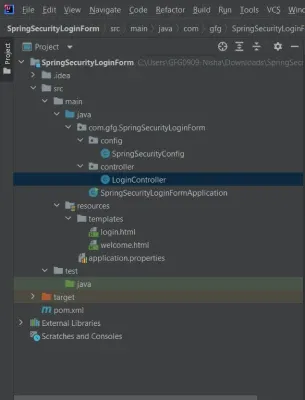
Project Structure
Step 3: Configure pom.xml
The pom.xml defines the configuration of the dependencies of the project, we don't need to add other dependencies right now as we are using spring boot and most of the things that we need for this project are auto-configured.
**pom.xml:
XML `
4.0.0 org.springframework.boot spring-boot-starter-parent 3.4.4 com.gfg SpringSecurityLoginForm 0.0.1-SNAPSHOT SpringSecurityLoginForm Demo project for Spring Boot <java.version>17</java.version> org.springframework.boot spring-boot-starter-security org.springframework.boot spring-boot-starter-web org.springframework.boot spring-boot-starter-thymeleaf org.springframework.boot spring-boot-starter-test test org.springframework.security spring-security-test test
<build>
    <plugins>
        <plugin>
            <groupId>org.springframework.boot</groupId>
            <artifactId>spring-boot-maven-plugin</artifactId>
        </plugin>
    </plugins>
</build>
`
Step 4: Create the Application Class
Java `
package com.gfg.SpringSecurityLoginForm;
import org.springframework.boot.SpringApplication; import org.springframework.boot.autoconfigure.SpringBootApplication;
@SpringBootApplication public class SpringSecurityLoginFormApplication { public static void main(String[] args) { SpringApplication.run(SpringSecurityLoginFormApplication.class, args); } }
`
Step 5: Create a Controller
Create a controller to handle requests for login and welcome pages.
Java `
package com.gfg.SpringSecurityLoginForm.controller;
import org.springframework.stereotype.Controller; import org.springframework.web.bind.annotation.GetMapping;
@Controller public class LoginController {
@GetMapping("/welcome")
public String welcome() {
    return "welcome"; // Thymeleaf template name
}

@GetMapping("/login")
public String login() {
    return "login"; // Thymeleaf template name
}
}
`
Step 6: Create Security Configuration
Create SpringSecurityConfig.java:
Java `
package com.gfg.SpringSecurityLoginForm.config;
import org.springframework.context.annotation.Bean; import org.springframework.context.annotation.Configuration; import org.springframework.security.config.annotation.web.builders.HttpSecurity; import org.springframework.security.core.userdetails.User; import org.springframework.security.core.userdetails.UserDetails; import org.springframework.security.provisioning.InMemoryUserDetailsManager; import org.springframework.security.web.SecurityFilterChain;
@Configuration public class SpringSecurityConfig {
@Bean
public InMemoryUserDetailsManager userDetailsService() {
    UserDetails user = User.withUsername("user")
            .password("{noop}pass") // plain text password
            .roles("USER")
            .build();
    return new InMemoryUserDetailsManager(user);
}

@Bean
public SecurityFilterChain securityFilterChain(HttpSecurity http) throws Exception {
    http
        .authorizeHttpRequests(auth -> auth
            .requestMatchers("/login").permitAll()
            .anyRequest().authenticated()
        )
        .formLogin(form -> form
            .loginPage("/login")
            .defaultSuccessUrl("/welcome", true)
        )
        .logout(logout -> logout
            .logoutSuccessUrl("/login")
            .permitAll()
        );

    return http.build();
}
}
`
Step 7: Create application.properties
spring.security.user.name=user
spring.security.user.password=pass
spring.thymeleaf.cache=false
spring.thymeleaf.cache=false ensures templates reload automatically during development.
Step 8: Create Templates
**login.html
HTML `
Insert title hereLogin page
`
**Welcome.html
HTML `
Insert title hereLoggedIn Successful
Welcome Back! Click here to logout.
`
Step 9: Run the Application
Now it's time to run your created project, run your program as a Java application,
- Open your browser and navigate to http://localhost:8080/welcome.
- You will be redirected to the custom login page (http://localhost:8080/login).
- Enter the username (user) and password (pass).
- Upon successful login, you will be redirected to the welcome page.
After successful authentication spring will automatically redirect to the welcome page.
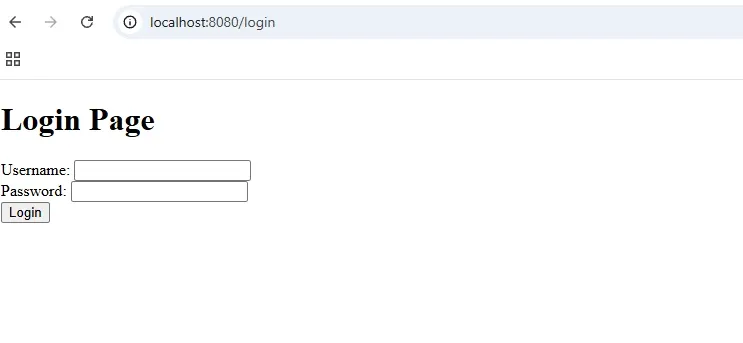
Login Page
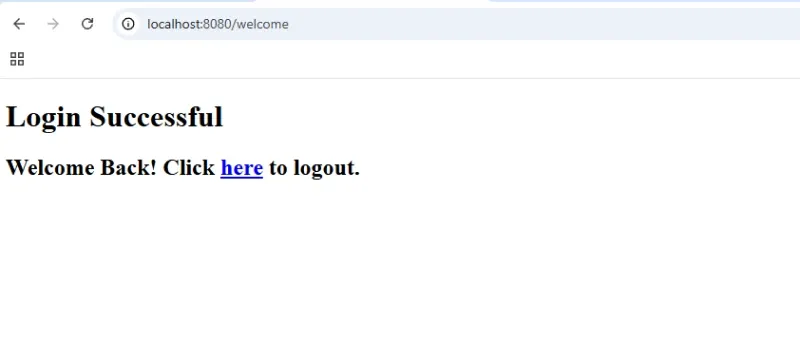
Welcome Page
So, we have created a very basic custom Form-Based Authentication using spring security and tested it locally.