How to Insert and Edit a Table In Gmail (original) (raw)
Last Updated : 17 Dec, 2025
Gmail still doesn’t have a native “Insert Table” button in 2025, but there are several fast, reliable ways to add clean, professional-looking tables to your emails. Whether you’re sending reports, schedules, pricing comparisons, or invoices, these methods work perfectly on desktop and mobile.
Here are the **best and simplest ways to add and edit tables in Gmail today.
**Insert a Table in a Google Email Message using Google Docs or MS Word
One of the easiest ways to **add a table in Gmail is by creating it in **Google Docs or MS Word and then **copying it into your email. Here’s how:
Step 1: Insert a Table in Google Docs
Open Google Docs and select "**Insert".**a From the dropdown box, click "**Table" and choose the desired number of cells. Your **data presentation will be built upon this.
-660.jpg)
Step 2: Fill and Structure Table
Fill out the Google Docs table with relevant information and clearly label the **columns and **rows. Complete the table since **Gmail's post-pasting editing is limited.
-660.jpg)
Step 3: Copy the Table
To copy the table to your **clipboard, **right-click on the whole table and choose "**Copy" or press **Ctrl+C.
.jpg)
Step 4: Compose Email in Gmail
Open **Gmail and begin **writing a new message. Move the mouse to where you want to add the table. Tap ****"Paste"** or press **Ctrl+V. Tables are placed where you specify in emails.
-660.jpg) **How to Add table in Gmail from Excel or Google Sheets
**How to Add table in Gmail from Excel or Google Sheets
The best way to insert a table in **Gmail is to insert a table from excel or sheets, follow the steps given below:
Step 1: Compose Email
Create a new **email and **write your message first.
Step 2: Open Google Sheet
Open a new **Google Sheet in a different **tab or **window.
Step 3: Create and Format Table
**Create your **table in Google Sheets and **arrange it as needed..jpg)
Step 4: Copy the Table
Select every cell in the table by using shortcut key "**Ctrl + C" or by **right click on the selected table and then select "**copy"..jpg)
Step 5: Paste into Email
- Insert the **copied cells into your email message when you return to Gmail.
- You can see that the layout of all the **cells and **tables has been kept. **Utilizing this way, you can include more than one table.
.jpg)
**How to Insert Table in Gmail Message Using Plain Text Mode
Now another way comes out of inserting table table in Gmail messages follow the steps given below to use the Plain Text Mode:
Step 1: Identify Jumbled Table
Allow **Plain Text Mode if your table needs to be more organized when you attach it to an email.
Step 2: Access More Options
At the bottom right corner, **tap on the three dots icon to browse through the ****"More"** option.
Step 3: Disable Plain Text Mode
To remove it, click "**Plain Text Mode" in the list of choices that have grown. **Toggle off Plain Text Mode to see organized tables..jpg)
Step 4: Remove Messy Data
Delete the **email's messy table text after **turning off Plain Text Mode.
Step 5: Paste Table Again
Place the table again after cleaning it. It should look right now since Plain Text Mode isn't changing the screen.
How to Add Table in Gmail Using Google Chrome Extension
**Table Chrome and **Gmail Tables by cloudHQ are two examples of Gmail Tables applications that can be useful to you. Using them, you can make a simple table and change or add to its contents. You can't change the table format or rearrange the rows and columns once you've inserted data. Please follow these steps to **set up Gmail Tables by cloudHQ. Just add the app to Chrome and do what it says below.
.jpg)
Step 1: Open Gmail and Start writing
To add a table to your Gmail message, tap ****"Compose,"** then position the cursor where you want the table to appear, and finally, click the three dots beside "**Send." Head to the main menu and select ****"Table."**.jpg)
Step 2: Configure Table Settings
You can alter the table's size, the number of rows and columns, the heads and backgrounds' colors, and more. To confirm your decisions, click "OK."
.jpg)
Step 3: Enter Data and Edit Table
Once you're done inserting, start typing in the table. You can change things by adding or removing columns and rows..jpg)
How To Insert A Table In Gmail On Mobile (Android/iOS)
Adding a table to an email with Gmail's mobile app will be very different and more challenging than when we do it on a computer.
The procedures are nearly identical, so there's no need to fret. But there are some things you need to do. Using the app, here's how to add a table to Gmail on your phone.
Step 1: Open Google Sheets
After completing the **application download and **installation processes, open up Google Sheets.
Step 2: Open a New Document and Fill the cells or table
There is a + sign at the bottom of the **Google Sheets app. Tap it. It will make a new **Google Spreadsheet file. Fill cells manually. Enter all the information from the table.
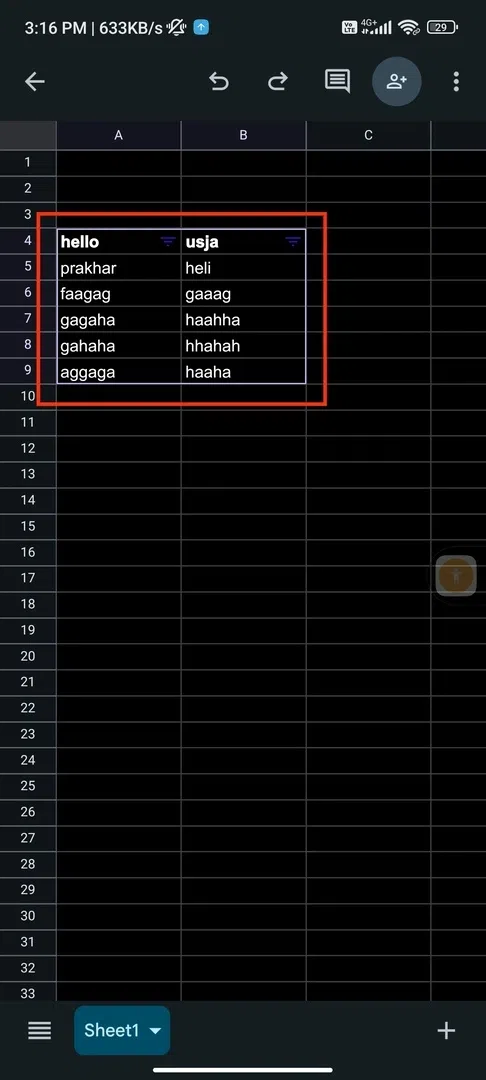
Open a New Document >> Fill the cells or table
Step 3: Select & Copy Cells
Hold one end of the cell and go on selecting the end of the cell. Make sure you **select all the cells and then **hold your finger on the screen; an option of '**copy' will appear; tap that.
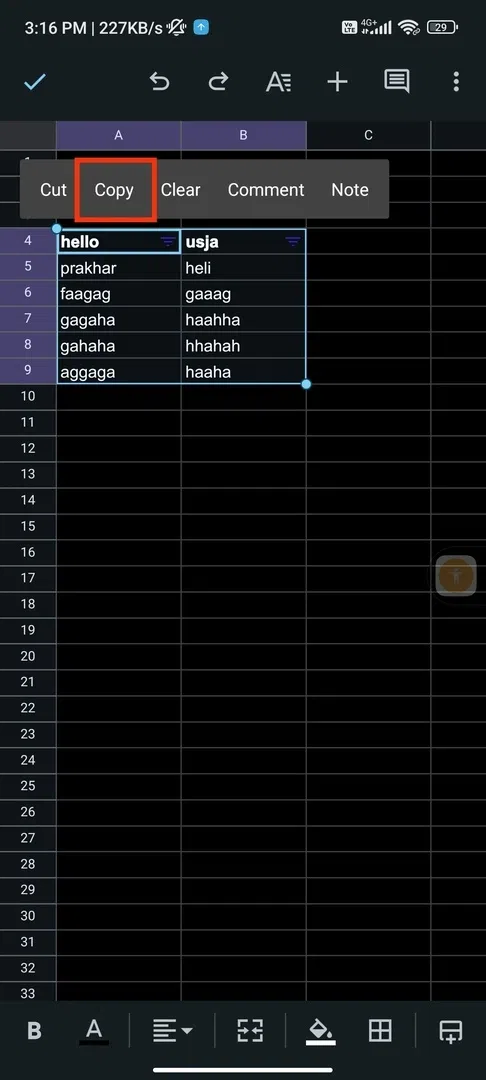
Select & Copy Cells
Step 4: Open Gmail Email and Paste the Table
Now **launch the Gmail App on the same phone and tap '**Compose.' Long press at the email's particular portion. Click on the ****"Paste"** option that pops up.
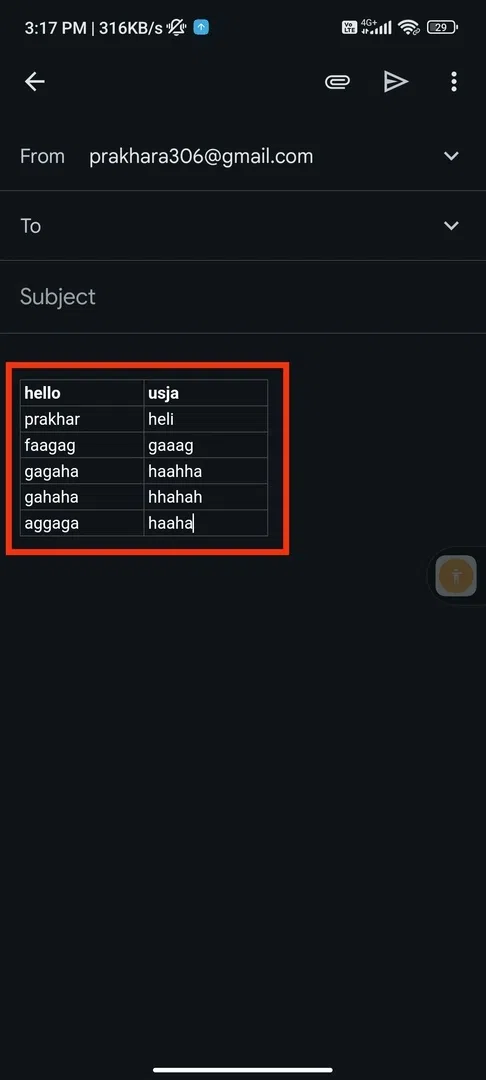
Open Gmail Email >> Paste the Table
Step 5: Enter The Receiver Details and Send
In the receiver section, add an appropriate email address. **Add cc, subject, and other details and click on "**Send".

Enter The Receiver Details >> Send
How to Edit Table in Gmail Easily
If you want to edit the table that is already present in the mail then you can follow the steps given below:
Step 1: Open Gmail and Choose the Email
Visit Gmail and choose the email or compose a new one to edit the table.
Step 2: Select the Table and Edit
Now select the table and edit it according to you, also you can edit a particular cell in the table.

Select the Table >> Edit
Step 3: Send the Mail
When you are done with editing the mail click on the **Send button to send the email.

Send the Mail