How To Recover Deleted Emails in Gmail (original) (raw)
Last Updated : 12 Jan, 2026
Accidentally deleted an important email? Wondering how to recover deleted emails in Gmail, especially if they’re no longer in your Trash? You’re not alone. Every day, thousands of users search for ways to restore Gmail emails not in trash, or recover them even after 30 days.
This step-by-step Gmail email recovery guide shows you how to recover both recently deleted and permanently deleted emails in Gmail, including tips on contacting Gmail support and using Google’s internal tools to get your lost data back.
Disclaimer: If your emails are permanently deleted or purged beyond Gmail’s standard retention period, results may vary based on account activity, backup settings, and response from Gmail Support.

1. Where Do Deleted Gmail Emails Go
When you delete an email, it moves to your Trash folder, where it stays for 30 days. After that, Gmail automatically deletes it permanently.
If you're wondering can you recover permanently deleted Gmail emails, the answer depends on where the email was and how long ago it was deleted.
2. Four Proven Methods to Recover Deleted Emails in Gmail
Here are the effective methods to recover all your deleted emails in Gmail:
2.1. Method 1: Recover Emails from the Trash Folder (Within 30 Days)
If you’ve deleted an email recently, you can often recover it easily from the Trash folder within 30 days. Here’s how:
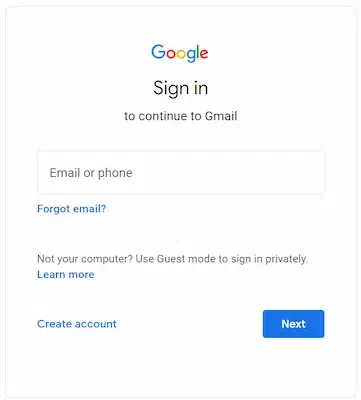
Step 1: Sign In to Gmail
Go to Gmail and log in to your account.
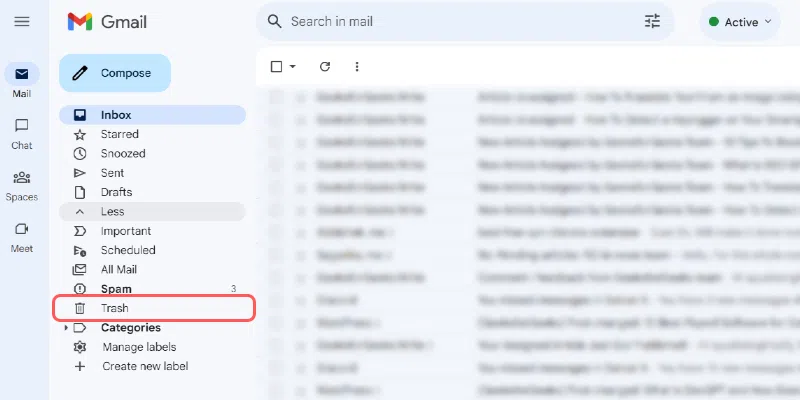
Step 2: Open the Trash Folder
On the left sidebar, scroll down and click on Trash. If it’s hidden, click “More” to expand the menu.
Step 3: Find the Deleted Email
Look through the emails listed in the Trash folder. Use the search bar if necessary.
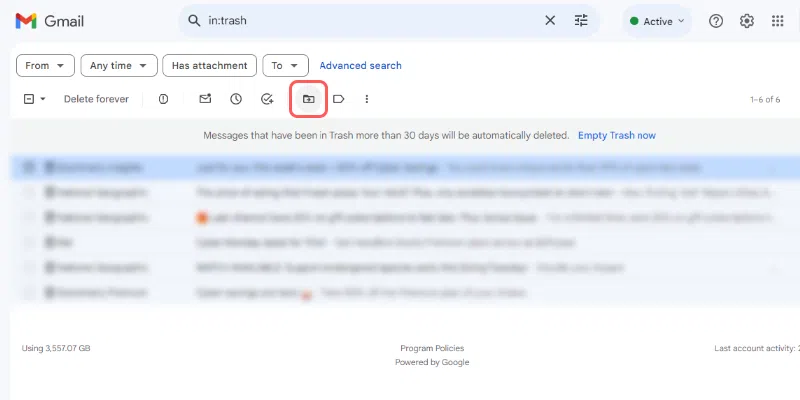
Step 4: Move the Email Back
Select the email(s) you want to restore, then click on the “Move to” icon and choose Inbox or another folder to recover the email.
2.2. Method 2: How to Recover Permanently Deleted Emails in Gmail (After 30 Days)
Once a message is deleted from the Trash, Gmail labels it as permanently deleted — but there’s still a short window where you can attempt recovery.
Step 1: Use Gmail Message Recovery Tool
Visit the Gmail Message Recovery Tool.
Step 2: Submit a Recovery Request
Fill out the form explaining your issue. This tool is designed for accidental deletions and suspicious account activity.
Step 3: Wait for Google’s Response
If the system detects retrievable data, Gmail will attempt to restore it.
Gmail doesn't guarantee recovery, but acting promptly increases your chances.
2.3. Method 3: How to Recover Emails After 30 Days (For Google Workspace Admins)
If you're a Google Workspace administrator, you have 25 additional days beyond the user Trash retention to restore deleted Gmail data.
Step 1: Sign In to Admin Console
Visit admin.google.com and sign in with your admin credentials.
Step 2: Go to Directory → Users
In the menu, navigate to Directory and select Users.
Step 3: Find the User
Locate the user whose Gmail data you want to recover.
Step 4: Open “Restore Data” Option
Click More Options next to the user’s account, then select “Restore Data.”
Step 5: Choose Date Range
Set a date range within the past 25 days.
Step 6: Select Gmail as the Data Type
Ensure that Gmail is chosen as the data type for restoration.
Step 7: Click Restore
Confirm and submit the restore request. The process might take time depending on the volume of data.
Important Note:
If your organization uses Google Vault, it's possible to retrieve older Gmail messages, but Vault is not a restore tool.
- Vault must have had retention rules or holds in place before the email was deleted.
- Admins can search and export messages, but cannot restore them directly to the user's inbox.
- This method is typically used for legal holds, compliance investigations, or data exports.
2.4. Method 4: How to Retrieve Emails That Aren’t in Trash or Spam
Sometimes emails are misplaced, not deleted. If you can’t find an email, try this method:
Step 1: Use the Gmail Search Bar
Enter keywords, sender names, or phrases from the missing email into the search bar at the top.
Step 2: Search in “All Mail”
Type in:all in the search bar to browse every message, including archived ones.
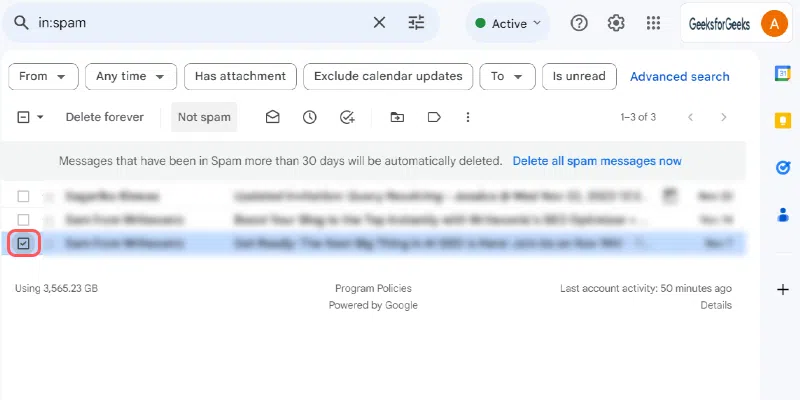
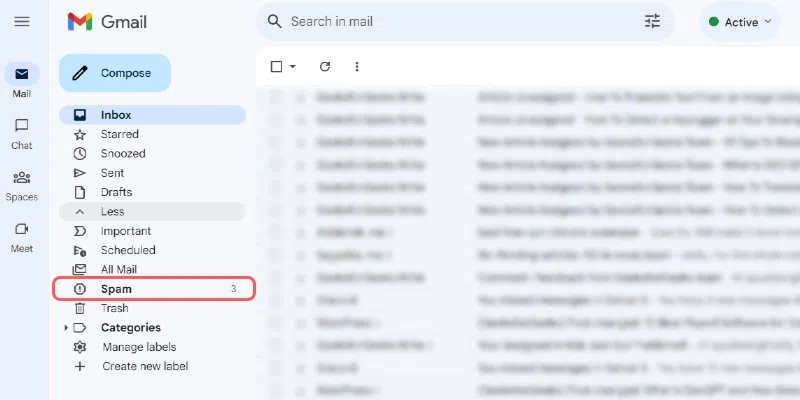
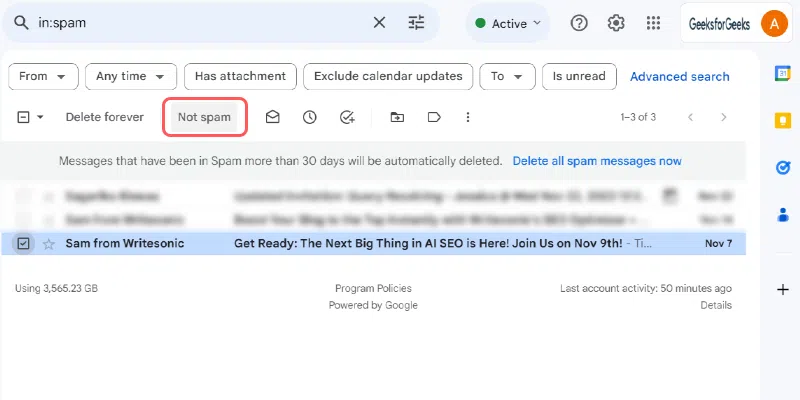
Step 3: Check the Spam and Archive Folders
Use in:spam or in:archive to locate messages that may have been miscategorized.
Step 4: Use Gmail Filters to Search
You can add filters like from:, to:, or subject: in your search for more targeted results.
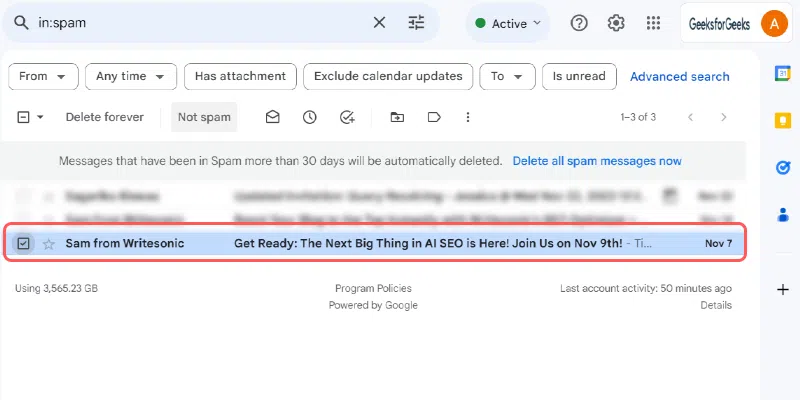
Step 5: Click on the button labelled “Not Spam.”
Once you click on it, you get a notification at the bottom of the screen indicating that the message has been marked as not spam or “Unmarked as Spam.”
Now, if you want to recover emails in bulk, Select all the emails you want to recover and move them to your inbox.
3. How to Backup Gmail Emails to Prevent Future Loss
Prevention is key to avoid permanent loss of emails in the future. Here's how to back them up:
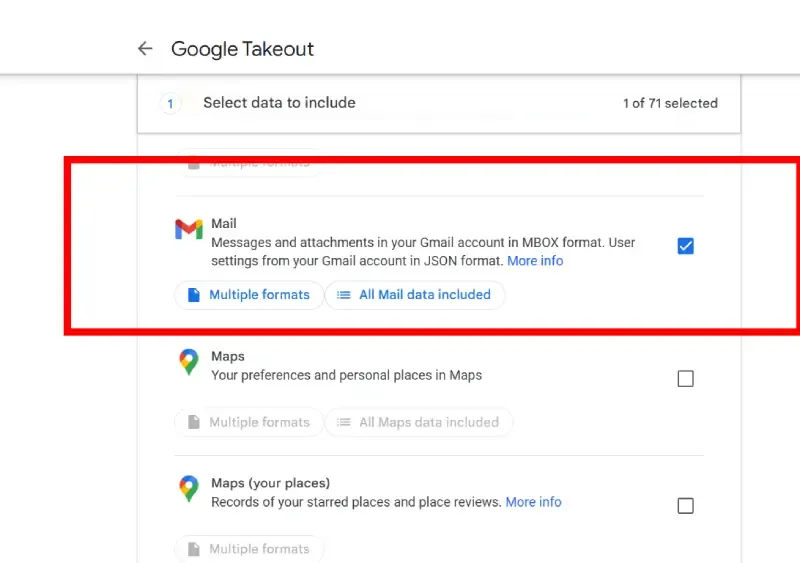
Step 1: Use Google Takeout
Visit Google Takeout to export and download all Gmail data.
Step 2: Select Gmail as the Export Option
Choose Mail and deselect other services if you only want to back up emails.
Step 3: Customize Your Backup Settings
Decide whether to receive your backup via link or have it delivered to cloud storage.
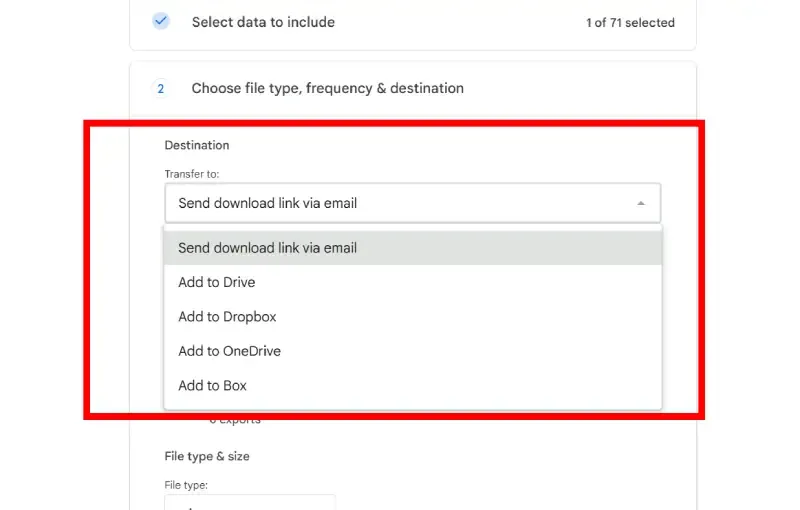
Customize Your Backup Settings
Step 4: Download the Backup File
Once the archive is ready, download it and save it in a secure location.
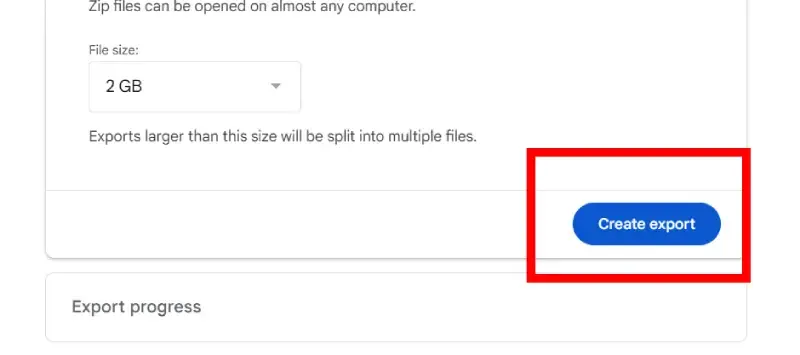
Download the Backup File
If your emails are business-critical or sensitive, consider using tools like:
- Third-party tools like Backupify or Spanning Backup
- Filters to auto-forward emails to another Gmail account
- Enable 2-Step Verification to prevent hacking.