How to Take Screenshots in Windows 11 (original) (raw)
Last Updated : 23 Jul, 2025
Did you know over 70% of Windows users are worldwide, and if we go more specifically with Windows 11, then according to Wikipidia, over 35% of users in the world are using Windows 11 as there PC operating system? This is a huge number, showing how popular Microsoft's latest OS is. If you're among these users, learning to take screenshots is key.
In this guide, you'll find out **how to take screenshots in Windows 11. You'll learn to document and share your digital life easily.
How to Take Screenshots in Windows 11
Table of Content
- Method 1: Take Screenshots on Windows 11 using Shortcut Key
- Method 2: Using Snip & Sketch (Earlier Snipping Tool)
- Method 3: Capture Screenshot in Windows 11 using Xbox Gamebar
Methods to Take Screenshots in Windows 11
Taking a screenshot in Windows 11 is an essential skill for capturing and sharing content from your screen. Whether you're using the built-in Windows 11 screenshot tool or exploring other methods, in the upcoming section you will walk you through the different ways to capture your screen in Windows 11. From the Snipping Tool to the keyboard shortcuts, you'll learn how to quickly and efficiently take screenshots in Windows 11.
Method 1: Take Screenshots on Windows 11 using Shortcut Key
Using the keyboard of your device, you can take the screenshot on your Windows 11 device. There are a lot of options present to capture screenshots using keyboards. We will discuss all of those sub-methods one by one.
**1. Use Windows + PrtScr:
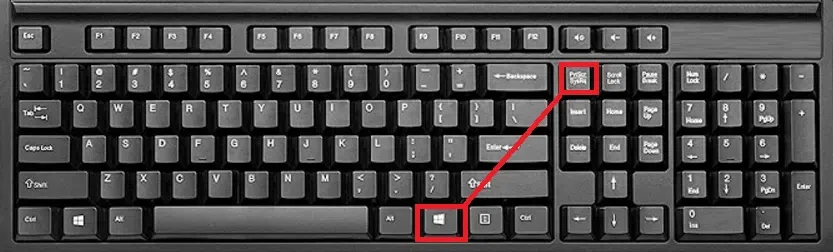
Use Windows + PrtScr
Another method to capture the screenshot is to use the **Windows key + Print Scan (PRTSC) key. On your required screen, press these two keys. The screenshot will be automatically captured & saved to its default folder. The default folder is the Pictures under the C Drive. Hence, there is no need to use another app to save it.
**2. Use ALT + PrtScr:

Use ALT + PrtScr
This particular operation is to be used for taking a screenshot of any particular application. If a user doesn't want to take a complete screenshot, this method can be used. You have to first stay on the application which screenshot you are taking. Now press the **Alter key (ALT) + Print Scan (PRTSC) key to save the screenshot on your clipboard. Now, paste on any application.
**Step 1: Press Win+Shift+S
- Go to the Screen that should be captured & press the keys **Windows + Shift + S simultaneously.
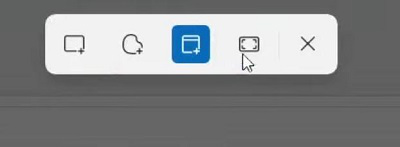
**Step 2: Select Screen Capturing Options
- A new small tab will be present on the upper side of the screen using four types of screen-capturing techniques.
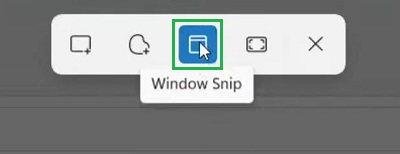
**Step 3: Choose Windows Snip
- Click on the third option, **Window Snip to capture the whole screen of the system. And it will be saved automatically.
Hence, we have successfully captured screenshots in Windows 11 using the **Latest Snip & Sketch Tool earlier Snipping Tool.
Method 3: Capture Screenshot in Windows 11 using Xbox Gamebar
**Step 1: Click Win+G
- On your keyboard press these keys simultaneously to open the Xbox Game Bar. **Press Windows + G.
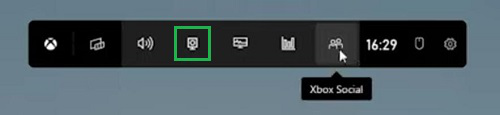
**Step 2: Choose Xbox Game Bar Options
- The **Xbox Game Bar will open on the upper side of the screen. Click on the 4th option, **Capture there to get some more options.
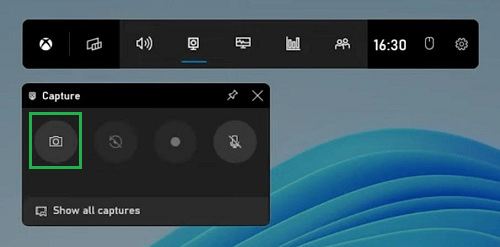
**Step 3: Select Camera Option
- Now, under the capture section, you will get a **Camera Option, click on that to take a screenshot of the present screen.
Capturing screenshots in Windows 11 is easy and versatile, thanks to the variety of built-in tools and methods available.
Conclusion
With several options available to **take screenshots in Windows 11, you'll find it easy to capture and share your screen. Whether you prefer using the **Windows 11 Snipping Tool, keyboard shortcuts, or **full screen screenshot options, Windows 11 makes it simple to get the job done. Experiment with these different methods to find the one that works best for your needs and enjoy the flexibility that **Windows 11 screen capture provides.
Also Read