How to Set Up a Dual Boot with Ubuntu and Windows? (original) (raw)
Last Updated : 12 Jan, 2026
Creating a dual boot system with Linux and Windows allows you to enjoy the best of both operating systems on a single machine. Whether you're a developer needing a versatile environment, a student exploring different software, or just someone who enjoys flexibility, dual booting provides a practical solution. This guide will walk you through the steps to set up a dual boot system, ensuring you can seamlessly switch between Linux and Windows as needed.
Prerequisites
- It is recommended that you have 100 - 150 GB of free Hard Disk space, although anything above 40 GB would do the job. ****(This step is important as it is the amount of space you will be dedicated to your Linux OS, and once Linux is installed you will not be able to access this space through Windows).**
- A USB flash drive has a minimum space of 8 GB.
- ****(Optional, Only for newer machines)** Make sure whether Windows is installed in UEFI mode or Legacy BIOS Mode.

Making Sure whether Windows is installed in legacy BIOS mode or UEFI mode
**STEP 1: Unallocating the Required amount of Hard Disk Space
This step is required to free up some space from your NTFS formatted Hard Disk. This unallocated space will contain the Linux System Partition and hence it is necessary for you to decide carefully how much space you will be devoting to linux. To do this go to the Windows Disk Management Service. You can go to 'Run' enter 'diskmgmt.msc' and run.
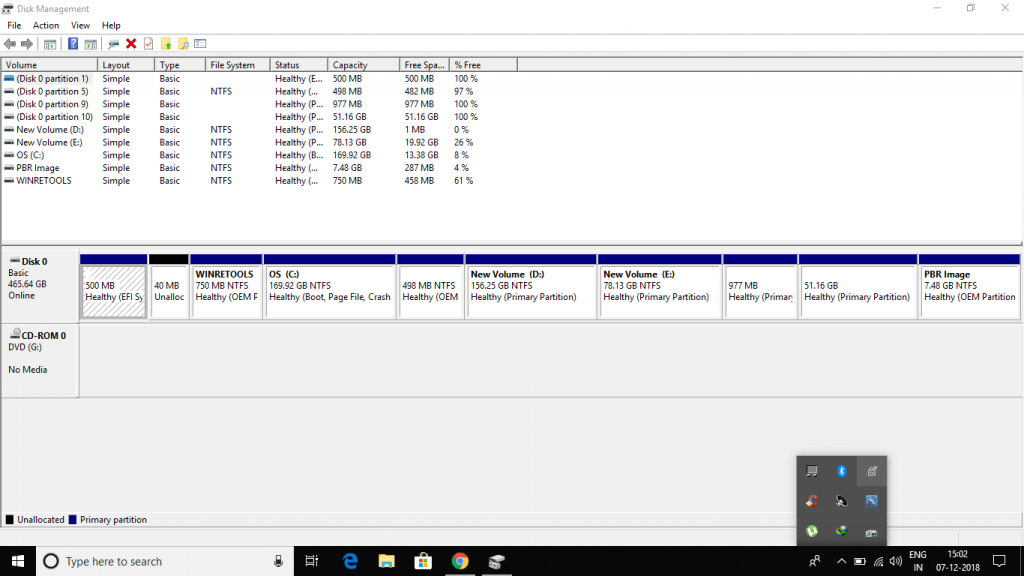
Windows Disk Management Service

Shrinking an existing Volume to create unallocated space

Specifying Amount to be Shrinked
On the Disk Management Window right click on the Partition from which you want to extract the required (**recommended 100 - 150 Gb) amount of free space, and click of 'Shrink Volume'. In the Dialog Box that pops up enter the 'amount of space to shrink' as 102400 Mb (100 Gb) and continue. This would reduce the space of the present volume by 100 Gb and the remaining 100 Gb would be shown as Unallocated Space. This Completes the 1st Step.
**STEP 2: Creating a Bootable Linux USB Drive
For the purpose of this article, we will be installing 'Ubuntu' as the Linux OS of choice as it is the most popular Linux OS and has a large support base. We first need to Download the Disc Image File (.iso file) of the Ubuntu OS from the Official Ubuntu website (www.ubuntu.com). The Latest LTS (Long Term Support) Version is preferred over the non-LTS version, as they provide update support for 5 years rather than 9 months for the non-LTS versions. We also need another software called Rufus for the creation of a Bootable USB Drive. A **Bootable Drive is one from which the machine can load the OS without installing it. Then we need to backup all the Contents of the USB flash Drive and Start Rufus. In Rufus, we make the following settings as shown below.

Setting Up Rufus

Writing Image in ISO mode

Creation of Bootable USB
After the completion of the above Process, we are ready with our Bootable USB Drive.
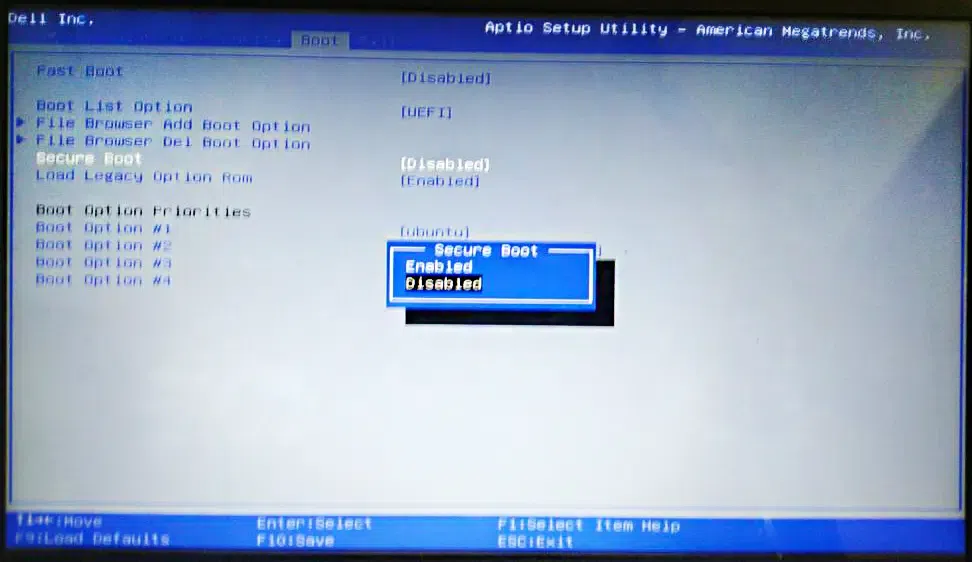
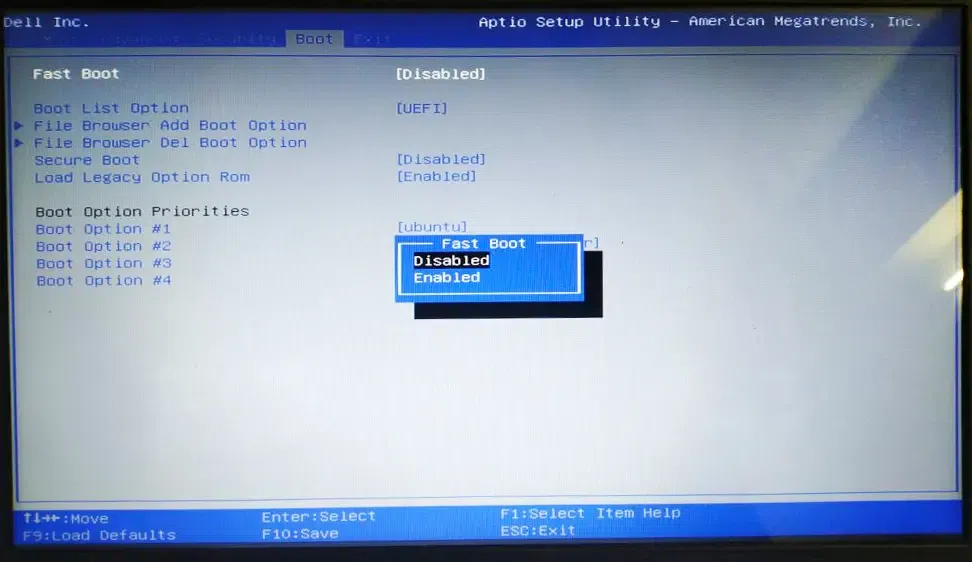
**STEP 3: Disabling Secureboot and Fastboot (Only for Newer Machines)
- **Attention! To ensure successful installation of Ubuntu, it is important to disable BitLocker and secure boot from your bootable drive. It should be noted that in most modern machines, there is only one drive for booting and storing data, and disabling secure boot without disabling BitLocker may automatically trigger security measures that prevent the installation of Ubuntu. Therefore, to disable BitLocker, navigate to the Manage BitLocker option via the Start menu, select "Turn off BitLocker," and follow the prompts to complete the process. You could get you recovery keys from authorised microsoft account that is logged in you machine. After creating a backup of recovery keys you can safely go to the next steps for disabling secure boot.

Bitlocker Recovery Screen (You shouldn't be here without recovery keys)
- This step is not required for older machines say, older than 2012. In this step we need to enter the BIOS/UEFI menu of our Computer. In case you are running Windows 8.1/10, before entering the BIOS/UEFI Menu you need to disable 'Fast Startup'. For this go to the 'Power Options'. On the left side options go to 'Choose what the power buttons do' then click of 'Change Settings that are currently unavailable' and Untick 'Fast Startup' Below and save these changes.

Power Options

Choosing what the power buttons do

Turning Off Fast Startup
- Now this step of the Process is manufacturer specific. I suggest you to Google a bit to get the exact key combination you need to press during the machine startup that will get you into the BIOS/UEFI Menu. In most Cases you need to press either one of the f1, f2 or f12 keys after turning on the machine but before windows starts booting up.
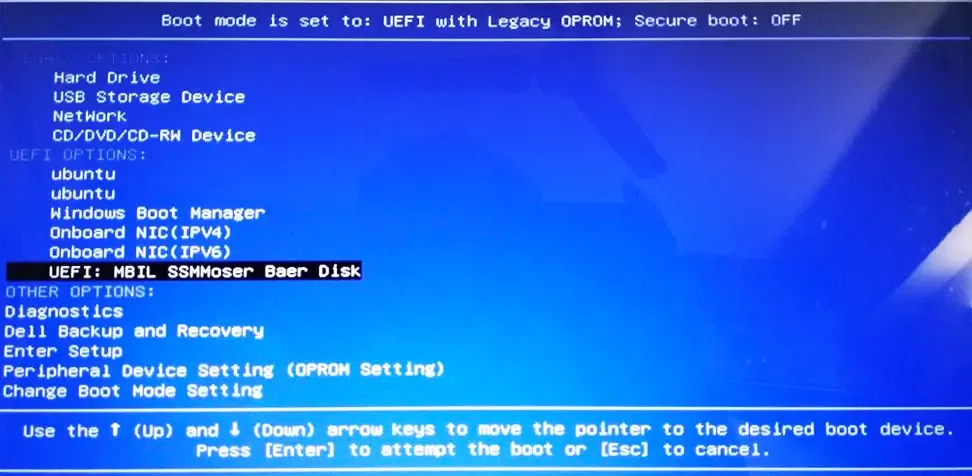
**STEP 4: Booting Ubuntu Linux From USB Drive
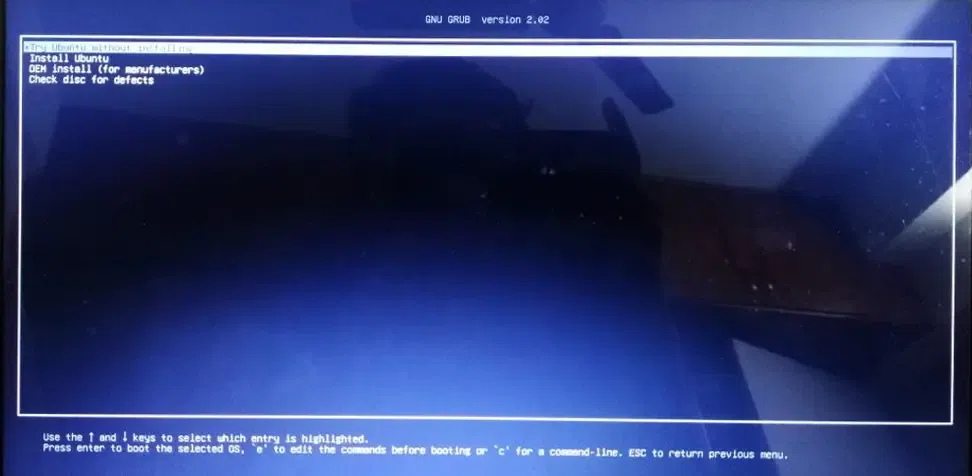
- In the next step we boot Linux from the USB Flash Drive we just created. To do this we enter into the 'Boot Options' during the machine starts up but before windows starts loading. The 'Boot Options Menu' is shown below:
- First Bootup of Ubuntu Linux:

Ubuntu Desktop
**STEP 5: Installing Ubuntu Linux
- Once Ubuntu has booted off the USB Flash Drive you can try out the different applications that the linux distribution has to offer and once you verify all the basic functionality of the OS that you will be using work on your machine, we can proceed with the installation. Run the 'Install Ubuntu' icon shown on the Ubuntu Desktop by Double Clicking it and Follow the steps as shown below.

Selecting Language

Choosing Keyboard Layout

Choosing Type of Installation: Normal or Minimal

Installation Type: 'Something Else' is selected
- Once you reach the Step asking you 'How do you want to install Ubuntu'? Select 'Something Else' and continue. In the next screen you will see a window showing all the hard disk partitions on your machine. You need to find from among all the partitions, the one you unallocated in the 1st step, it will be labelled as free space in this window and it's space should roughly match 102400 Mb. Highlight this 'free space' by left clicking it and then select the small '+' sign below, this will pop a dialog box for the creation of a new Partition.

Modifying the Partition Table
- After installing Linux on your system, you will see that there are 2 partitions of types 'swap' and 'ext4' these two are the Linux Partitions. But if you didn't have Linux installed previously you would only find a portion labelled as free space as mentioned above. 1st we will be creating a 'swap area' we highlight the 'free space' open the new partition creation window and enter the amount of space for swap as equal to the amount of RAM you have. then select the 'New Partition type' as 'Primary' and finally select 'Use as' 'swap area'. Now as i already mentioned since i already have linux installed, from now on i am going to continue the installation process in a virtual machine and hence the exact partition table and partition sizes may not match.

Free Space (Exact Partition Sizes would not match)

Creating swap area

'swap area' created

Creating Root File System Partition

Partition Table Created
- Also make sure your 'Device for Bootloader Installation' is set to your internal Hard Disk Drive. (Where Windows is installed and Linux is going to be installed) in most cases this is '/dev/sda'

Device for Bootloader Installation
- After this is created you press 'Install Now' and confirm you changes to the Partition Table as shown below:

Confirmation of Modifications (Make sure both the partitions you created out of the free space are listed)
- After all this is done you simply need to proceed as follows till the installation starts:

Selecting Your Timezone
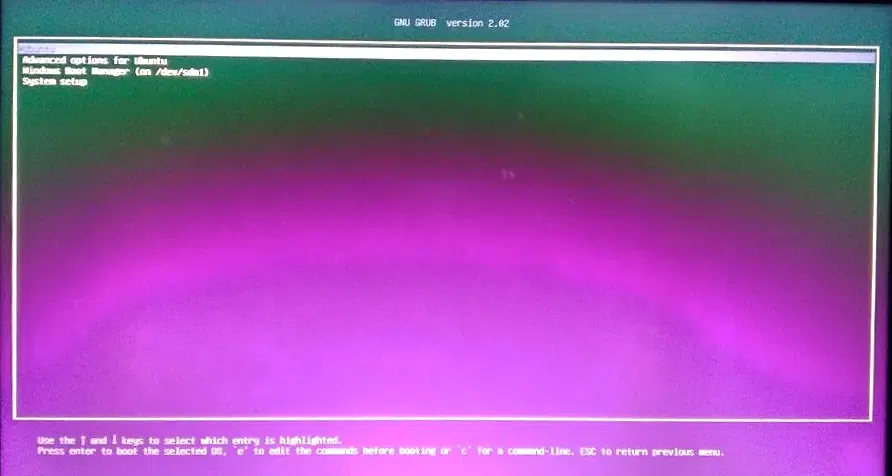
- After this you simply need to continue and give your login credentials (Username, Password) and then the installation begins. After the installation completes you can shut down your computer, remove the bootable USB drive and the next time turn on your machine you should be presented by a grub window as shown below, letting you choose between Linux (Ubuntu, 1st Option) and Windows (Windows Boot Manager). And there you have your own dual booted system.
Setting up a dual boot system with Linux and Windows provides a versatile and efficient way to utilize both operating systems on one device. By following the steps outlined in this guide, you can enjoy the flexibility and functionality of both platforms, tailored to your specific needs. Embrace the power of dual booting to maximize your productivity and explore new possibilities.