Model Context Protocol (MCP) | AI Assistant (original) (raw)
AI Assistant can interact with external tools and data sources via the Model Context Protocol (MCP). By connecting to MCP servers, AI Assistant gains access to a range of tools that significantly extend its capabilities.
Supported transport mechanisms
Currently, AI Assistant supports only one transport mechanism for communicating with an MCP server: stdio. This means that AI Assistant launches the MCP server as a subprocess and exchanges data through its standard input and output streams.
Where to get an MCP server
There are many MCP-compatible servers available, depending on your use case and setup. As a starting point, you can explore the reference servers provided in the official MCP repository, which includes examples, usage instructions, and configuration details.
What is needed to connect to an MCP server
To connect AI Assistant to an MCP server, you need a JSON configuration that defines the command and arguments for starting the server. The exact configuration depends on the specific MCP server. In most cases, the server's developers will provide a recommended configuration you can get and use.
Connect to an MCP server
To connect to an MCP server:
- Go to .
Alternatively, you can open the screen with the MCP settings by typing/in the chat and selecting the Add Command option.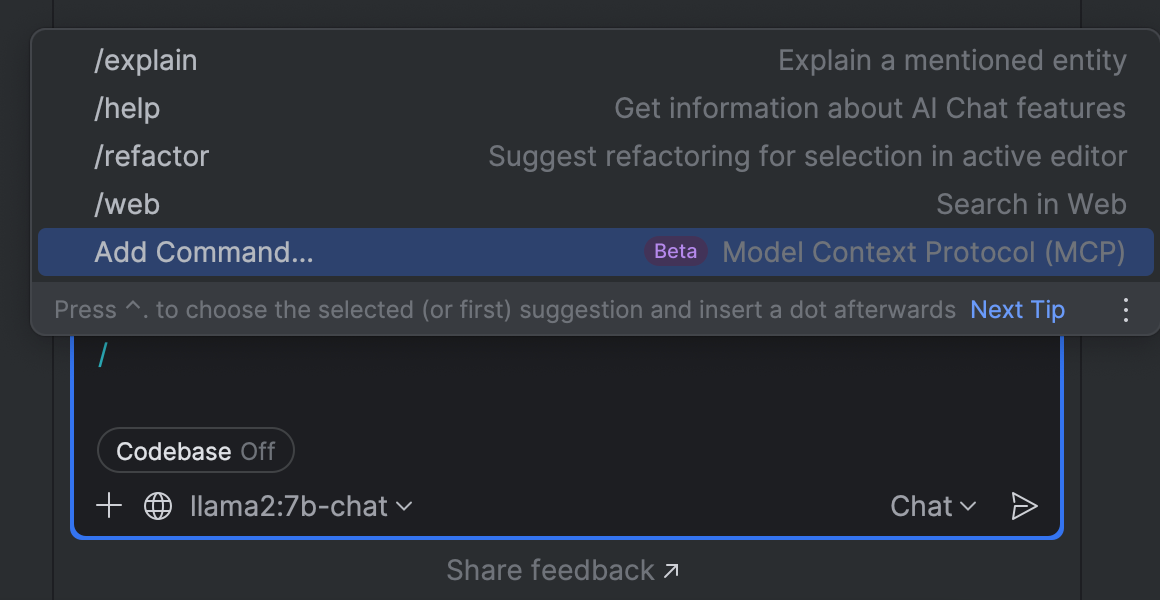
- On the Model Context Protocol (MCP) settings page, click
 Add to add a new MCP server configuration.
 - In the New MCP Server dialog, select how you want to specify the parameters of the MCP server:
Define a command that starts the MCP server:
- Name – specify a name for the MCP server.
- Command – specify the command used to launch the MCP server.
- Arguments – specify additional parameters passed to the command at server startup.
- Environment Variables – specify optional variables the server may need (API keys or configuration settings).
- Working directory – specify the path to the folder from which the server is launched. This allows you to use relative paths in arguments instead of absolute paths.
Provide a JSON configuration:
- JSON configuration – provide a JSON snippet with the parameters required to start the MCP server.
The configuration must follow this format:
{ "mcpServers": { "yourServerName": { "command": "path-or-command-to-start-server", "args": [ "optional-arguments-passed-to-server" ] } } } - Working directory – specify the path to the folder from which the server is launched. This allows you to use relative paths in arguments instead of absolute paths.
- Click OK. The MCP server will appear in the list.
- In the Level column, select whether the setup must be available globally or only in the current project.
- Click Apply. This will start the configured server and establish a connection to it.
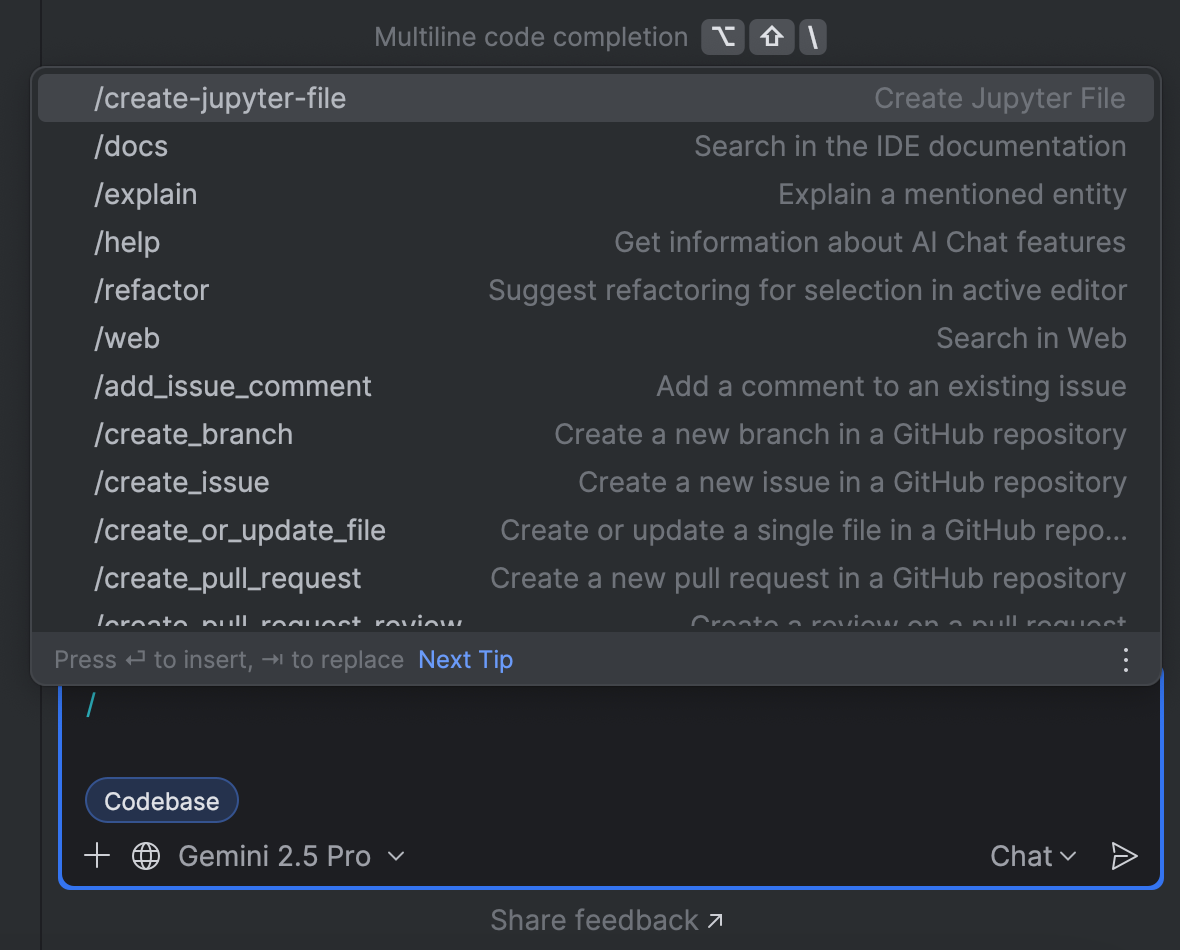
As a result, the tools provided by the MCP server become available to AI Assistant. It can trigger them automatically when processing your request, or you can invoke them manually by typing the appropriate / command in the chat:
Review available tools
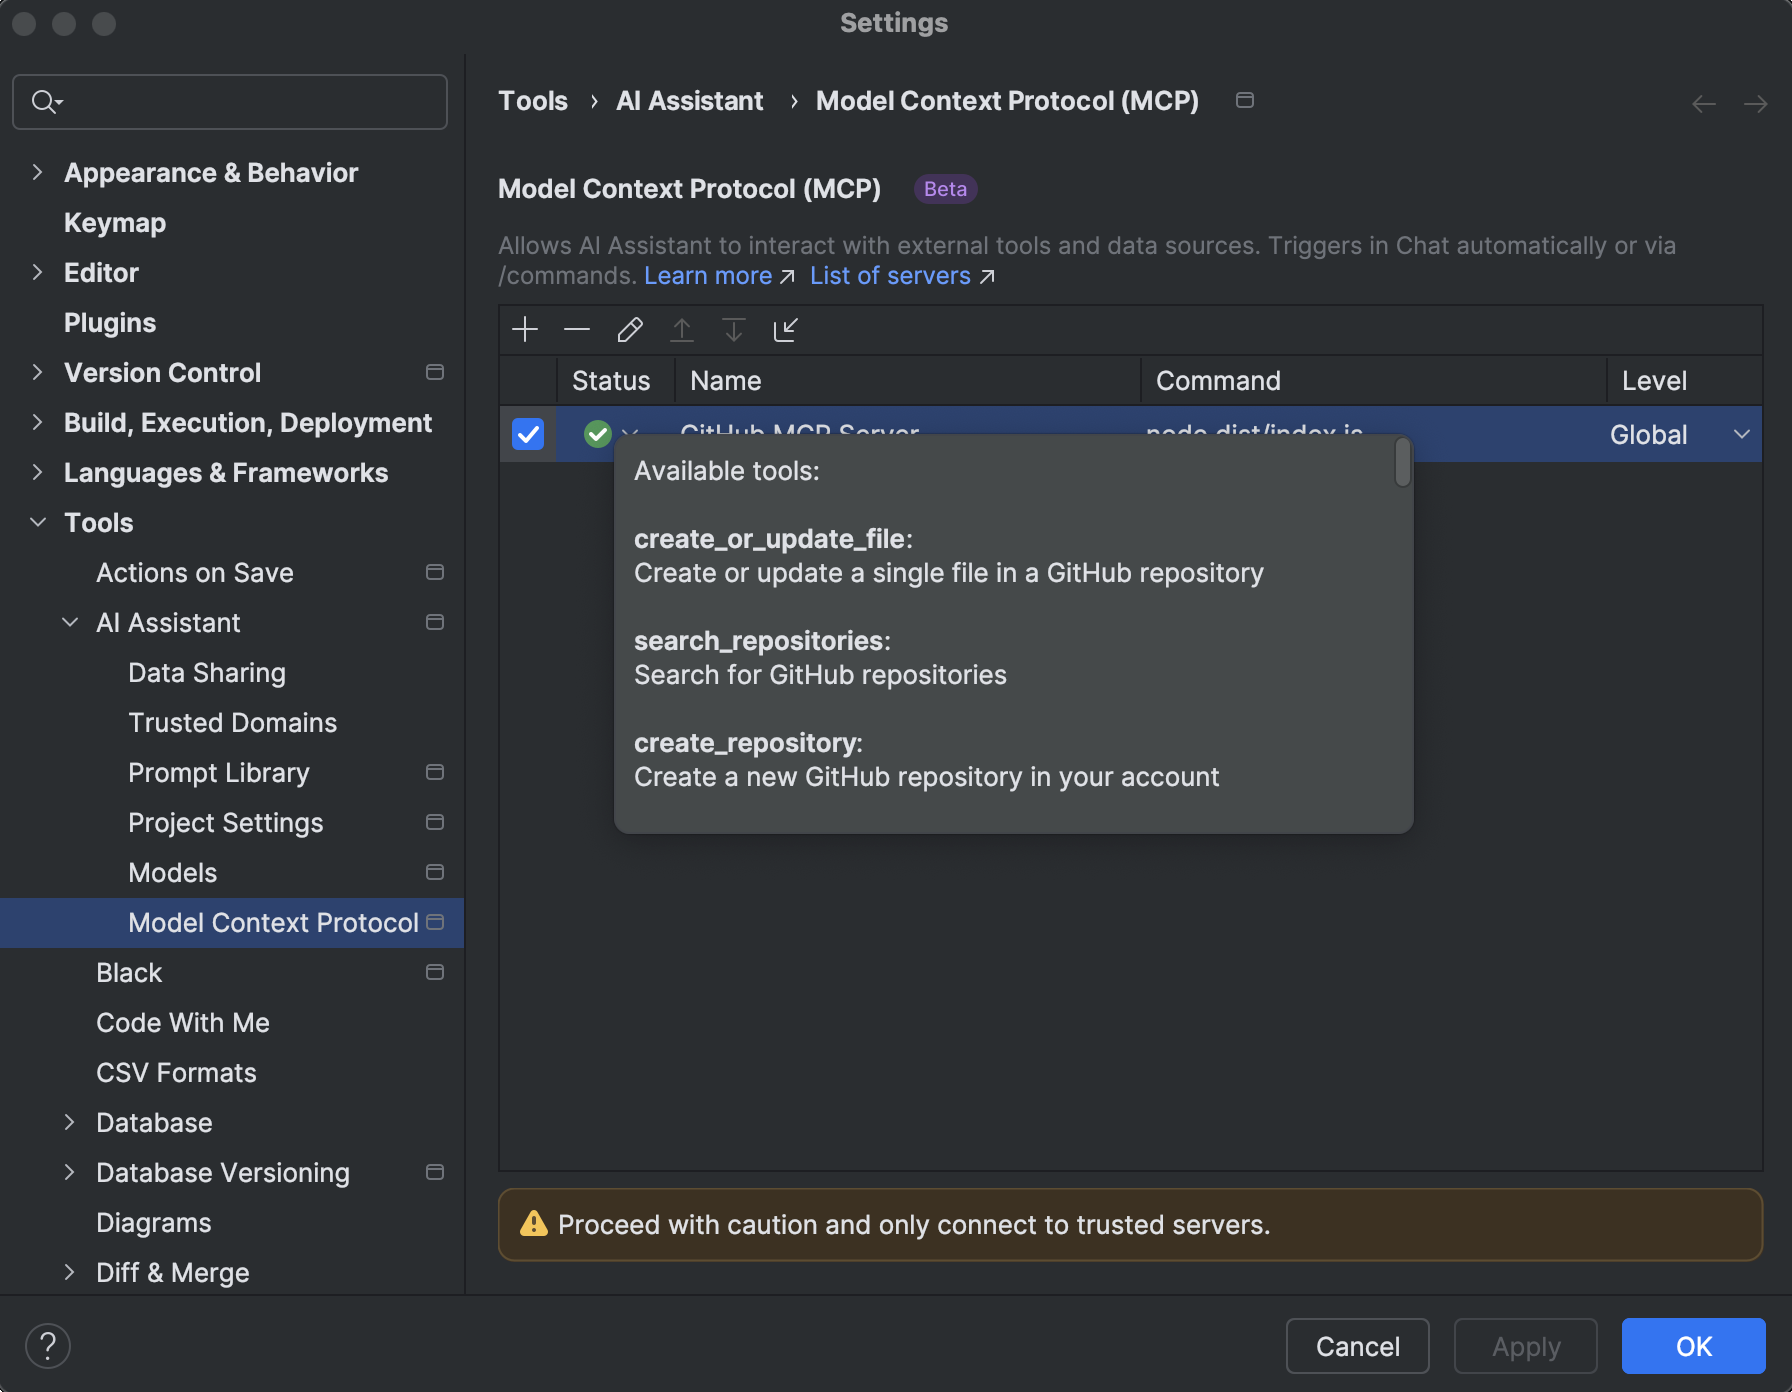
Once the connection to the MCP server is successfully established, you can review the list of available tools by clicking the icon in the Status column.
Stop the MCP server
To stop the MCP server:
- Deselect the checkbox for the MCP server you want to stop.
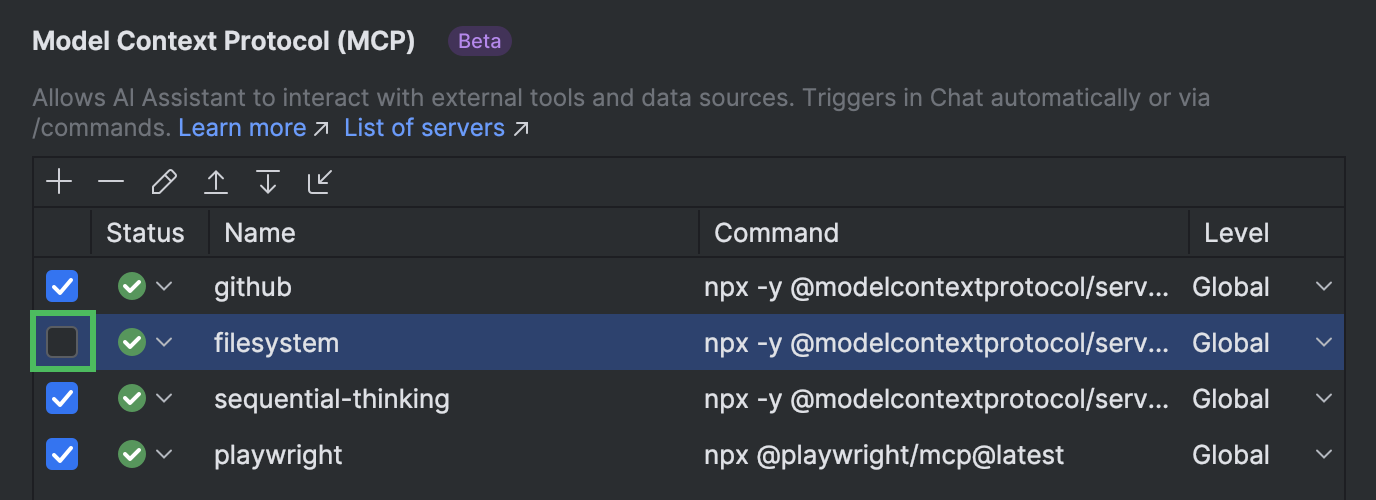
- Click Apply.
Get MCP server logs
For debugging purposes, you might want to review the logs of the spawned MCP server. To do this:
- In the main menu, go to and select Show Log in Explorer on Windows or Show Log in Finder on macOS. This opens the logs directory.
- Locate the mcp folder and open it. This folder contains the logs for each configured MCP server.
JSON configuration examples
This section provides example configurations for connecting AI Assistant to an MCP server, depending on how the server is hosted. It covers locally installed servers, NPX-based setups, Docker-based environments, and a workaround for connecting to remote servers.
Local installation
If the MCP server is installed on your machine, you can connect to it by running the server executable along with any required arguments. A template for such a configuration would look like this:
{ "mcpServers": { "yourServerName": { "command": "command-to-run-server", "args": [ "path-to-server-executable-or-script", "optional-arguments-for-server" ] } } }
- The
commandis the executable or script that launches the MCP server. This could benode, a direct path to an executable file, or another command appropriate for launching the server. - The
argslist contains arguments passed to the server on startup, such as the path to the server script or configuration options.
For example, if you use the Filesystem MCP server, your configuration may look like this:
{ "mcpServers": { "filesystem": { "command": "node", "args": [ "/Users/JohnDoe/IdeaProjects/servers/src/filesystem/dist/index.js", "/Users/JohnDoe/Desktop" ] } } }
Here, the node command runs the server script. The first argument specifies the path to the server script, and the second argument tells the server which directory it is allowed to operate in.
Using NPX
If the MCP server is not installed locally, you can use npx to download and run it on demand. A template for such a configuration would look like this:
{ "mcpServers": { "yourServerName": { "command": "npx", "args": [ "-y", "npm-package-name", "optional-arguments-for-server" ] } } }
- The
commandis set tonpx, which runs a package from the npm registry without installing it globally. - The
argslist includes:-y– to automatically confirm prompts that may appear when running the package for the first time,- the name of the npm package that provides the MCP server,
- any additional arguments passed to the server, such as file paths or configuration options.
For example, if you use the Filesystem MCP server, your configuration may look like this:
{ "mcpServers": { "filesystem": { "command": "npx", "args": [ "-y", "@modelcontextprotocol/server-filesystem", "/Users/JohnDoe/Desktop" ] } } }
Here, the npx command runs the @modelcontextprotocol/server-filesystem package. The path provided in the arguments tells the server which directory it is allowed to operate in.
Using Docker
You can run the MCP server in an isolated environment using Docker. This starts the server inside a container and mounts local folders into it so the server can access them. A template for such a configuration would look like this:
{ "mcpServers": { "yourServerName": { "command": "docker", "args": [ "run", "-i", "--rm", "--mount", "type=bind,src=/local/path,dst=/container/path", "docker-image-name", "/container/path" ] } } }
- The
commandis set todocker, which starts the MCP server inside a container based on the specified Docker image. - The
argslist includes:run– to start a new container,-i– to keep the container interactive so the IDE can communicate with it,--rm– to automatically remove the container after use,- one or more
--mountoptions – to bind local folders (src) to container paths (dst), - the Docker image name that provides the MCP server,
- the final argument that tells the server the directory where it is allowed to operate inside the container.
For example, if you use the Filesystem MCP server, your configuration may look like this:
{ "mcpServers": { "filesystem": { "command": "docker", "args": [ "run", "-i", "--rm", "--mount", "type=bind,src=/Users/JohnDoe/Desktop,dst=/projects/Desktop", "--mount", "type=bind,src=/Users/JohnDoe/Documents,dst=/projects/Documents,ro", "mcp/filesystem", "/projects" ] } } }
Here, the docker command runs the mcp/filesystem image. The local folders /Users/JohnDoe/Desktop and /Users/JohnDoe/Documents are mounted into the container, and the /projects argument tells the server where to operate inside the container.
Workaround for remote servers
If you want to connect to a remote MCP server that uses the HTTP + SSE or Streamable HTTP transport mechanisms, you can use a workaround with themcp-remote proxy package. This proxy bridges AI Assistant and the remote server by running temporarily via npx. A template for such a configuration would look like this:
{ "mcpServers": { "yourServerName": { "command": "npx", "args": [ "-y", "mcp-remote@latest", "https://remote-mcp-server.example.com/sse" ] } } }
{ "mcpServers": { "yourServerName": { "command": "npx", "args": [ "-y", "mcp-remote@latest", "https://remote-mcp-server.example.com/mcp" ] } } }
- The command is set to
npx, which runs a package from the npm registry without installing it globally. - The
argslist includes:-y– to automatically confirm prompts that may appear when running the package for the first time,mcp-remote@latest– the proxy package that bridges AI Assistant and the remote MCP server,- the URL of the remote MCP server (
HTTP + SSEorStreamable HTTPtransport).
For example, to connect AI Assistant to the Microsoft Learn Docs MCP Server, the configuration would look like this:
{ "mcpServers": { "microsoft.docs.mcp": { "command": "npx", "args": [ "-y", "mcp-remote@latest", "https://learn.microsoft.com/api/mcp" ] } } }
Here, npx runs the mcp-remote package, which forwards requests from AI Assistant to the specified remote MCP server.
Use your IDE as an MCP server
Starting with version 2025.2, JetBrains IDEs come with an integrated MCP server, allowing external clients such as Claude Desktop, Cursor, Codex, VS Code, and others to access tools provided by the IDE. This provides users with the ability to control and interact with JetBrains IDEs without leaving their application of choice.
External client setup
For external clients like Claude Code, Claude Desktop, Cursor, VS Code, Codex, and Windsurf, configuration can be performed automatically:
- In the main menu, go to .
- Click Enable MCP Server.
- In the Clients Auto-Configuration section, click Auto-Configure for each client you want to set up for use with the MCP server. This will automatically update their JSON configuration.
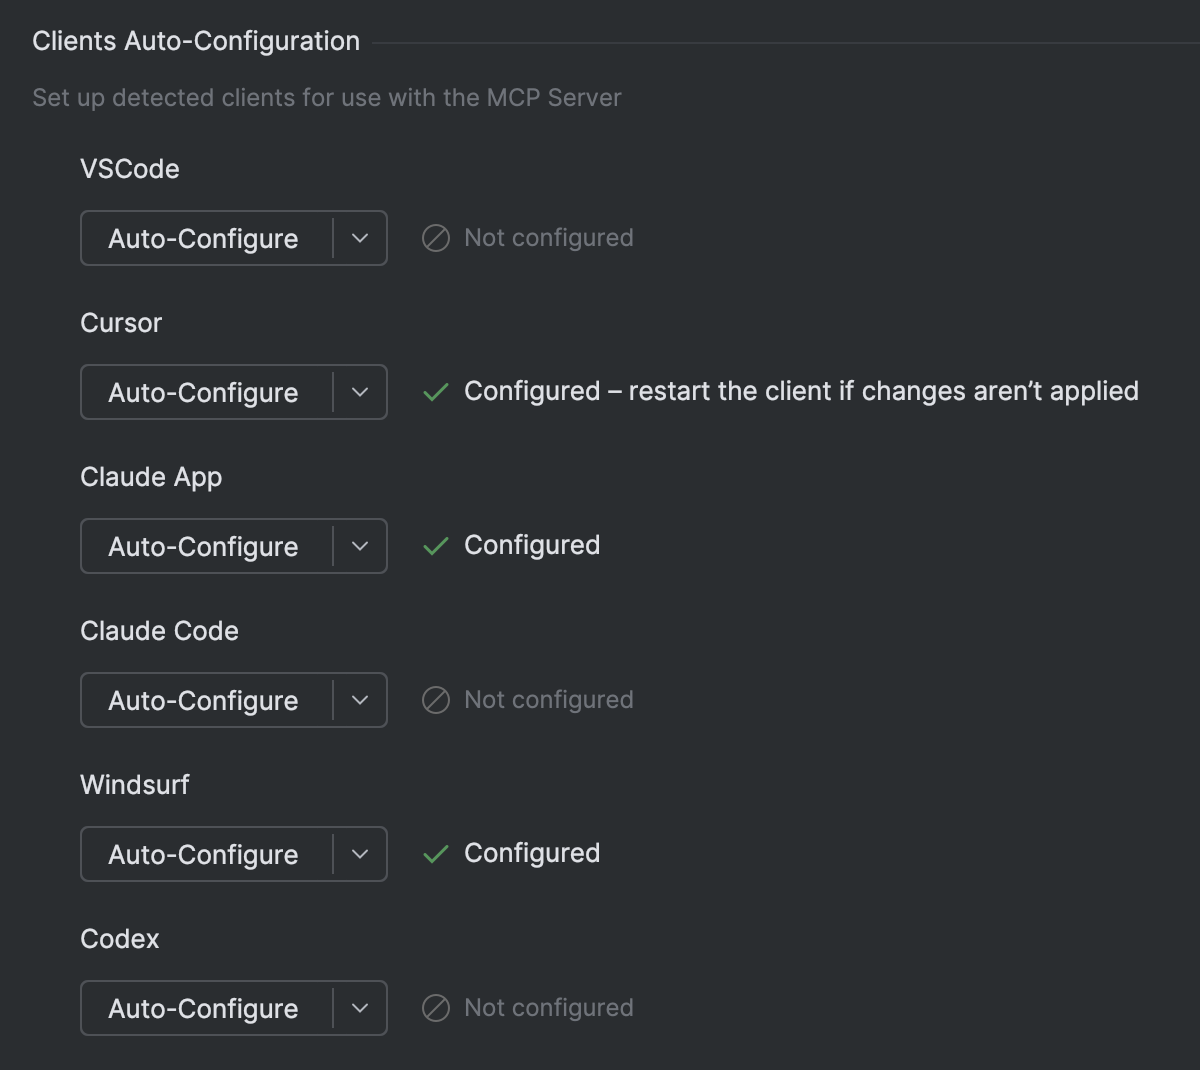
- Restart your client for configuration to take effect.
If you want to connect to the MCP server from any other client, you will need to perform manual configuration:
- In the Manual Client Configuration section, click either Copy SSE Config or Copy Stdio Config depending on the connection type.

- Paste the copied configuration into your client's settings or configuration file.
- Restart your client for configuration to take effect.
Execute actions without confirmation
The MCP server allows connected external clients to execute terminal commands or run configurations in the IDE without prompting for user confirmation each time.
To enable this mode:
- In the main menu, go to .
- In the Command execution section, enable the Run shell commands or run configurations without confirmation (brave mode) setting.
- Click Apply.
Supported tools
Below is the list of tools provided by the MCP server:
execute_run_configuration
Runs a specific run configuration in the current project and waits up to the specified timeout for it to finish. Use this tool to execute a run configuration retrieved with the get_run_configurations tool.
Returns the execution result, including exit code, output, and success status.
Parameters:
configurationName: The name of the run configuration to execute.timeout: Timeout in milliseconds.maxLinesCount: Maximum number of lines to return.truncateMode: How to truncate the text: from the start, in the middle, at the end, or do not truncate at all.projectPath: The project path. Always provide this value if known to reduce ambiguous calls. If only the current working directory is known, you can use it as the project path.
get_run_configurations
Returns a list of run configurations for the current project. A run configuration defines how to run an application, task, or test suite from sources.
The tool also provides additional information like command line, working directory, and environment variables if they are available.
Use this tool to query the list of available run configurations in the current project.
Parameters:
projectPath: The project path. Always provide this value if known to reduce ambiguous calls. If only the current working directory is known, you can use it as the project path.
get_file_problems
Analyzes the specified file for errors and warnings using IntelliJ inspections. Use this tool to identify coding issues, syntax errors, and other problems in a specific file.
Returns a list of problems, including severity, description, and location information.
Parameters:
filePath: Path relative to the project root.errorsOnly: Whether to include only errors or both errors and warnings.timeout: Timeout in milliseconds.projectPath: The project path. Always provide this value if known to reduce ambiguous calls. If only the current working directory is known, you can use it as the project path.
get_project_dependencies
Returns a list of all dependencies defined in the project. Provides structured information about library names.
Parameters:
projectPath: The project path. Always provide this value if known to reduce ambiguous calls. If only the current working directory is known, you can use it as the project path.
get_project_modules
Returns a list of all modules in the project with their types. Provides structured information about each module, including its name and type.
Parameters:
projectPath: The project path. Always provide this value if known to reduce ambiguous calls. If only the current working directory is known, you can use it as the project path.
create_new_file
Creates a new file at the specified path within the project directory. Optionally, writes the provided text into the file.
Parameters:
pathInProject: Path where the file should be created relative to the project root.text(optional): Content to write into the new file.overwrite: Whether to overwrite an existing file. If set tofalse, an exception is thrown in case of a conflict.projectPath: The project path. Always provide this value if known to reduce ambiguous calls. If only the current working directory is known, you can use it as the project path.
find_files_by_glob
Searches for all files in the project whose relative paths match the specified glob pattern. The search is performed recursively in all subdirectories of the project directory or a specified subdirectory. Use this tool to find files by a glob pattern (for example, **/*.txt).
Parameters:
globPattern: Glob pattern to search for. The pattern must be relative to the project root. Example:src/**/*.java.subDirectoryRelativePath(optional): Subdirectory relative to the project to search in.addExcluded: Whether to add excluded/ignored files to the search results. Files can be excluded by the user or by ignore rules.fileCountLimit: Maximum number of files to return.timeout: Timeout in milliseconds.projectPath: The project path. Always provide this value if known to reduce ambiguous calls. If only the current working directory is known, you can use it as the project path.
find_files_by_name_keyword
Searches for all files in the project whose names contain the specified keyword (case-sensitive). Use this tool to locate files when you know part of the file name.
Parameters:
nameKeyword: Substring to search for in the file names.fileCountLimit: Maximum number of files to return.timeout: Timeout in milliseconds.projectPath: The project path. Always provide this value if known to reduce ambiguous calls. If only the current working directory is known, you can use it as the project path.
get_all_open_file_paths
Returns the paths of all files opened for editing in the active editor or any other open editors, relative to the project root. Use this tool to explore currently open editors.
Parameters:
projectPath: The project path. Always provide this value if known to reduce ambiguous calls. If only the current working directory is known, you can use it as the project path.
list_directory_tree
Provides a tree representation of the specified directory in the pseudo-graphic format, similar to the tree utility. Use this tool to explore the contents of a directory or the entire project. Prefer this tool over command-line utilities like ls or dir for directory listing.
Parameters:
directoryPath: Path relative to the project root.maxDepth: Maximum recursion depth.timeout: Timeout in milliseconds.projectPath: The project path. Always provide this value if known to reduce ambiguous calls. If only the current working directory is known, you can use it as the project path.
open_file_in_editor
Opens the specified file in the JetBrains IDE editor. Requires a filePath parameter containing the path to the file to open. The file path can be absolute or relative to the project root.
Parameters:
filePath: Path relative to the project root.projectPath: The project path. Always provide this value if known to reduce ambiguous calls. If only the current working directory is known, you can use it as the project path.
reformat_file
Reformats the specified file in the JetBrains IDE. Use this tool to apply code formatting to a file identified by its path.
Parameters:
path: Path relative to the project root.projectPath: The project path. Always provide this value if known to reduce ambiguous calls. If only the current working directory is known, you can use it as the project path.
get_file_text_by_path
Retrieves the text content of a file using its path relative to the project root. Use this tool to read file contents when you have the file's project-relative path.
Parameters:
pathInProject: Path where the file should be created relative to the project root.truncateMode: How to truncate the text: from the start, in the middle, at the end, or do not truncate at all.maxLinesCount: Maximum number of lines to return.projectPath: The project path. Always provide this value if known to reduce ambiguous calls. If only the current working directory is known, you can use it as the project path.
replace_text_in_file
Replaces text in a file with flexible options for find-and-replace operations. Use this tool to make targeted changes without replacing the entire file content. This is the most efficient tool for file modifications when you know the exact text to replace.
Returns one of the following responses:
ok– replacement was successful.project dir not found– the project directory cannot be determined.file not found– the specified file does not exist.could not get document– the file content cannot be accessed.no occurrences found– the text to replace was not found in the file.
Parameters:
pathInProject: Path to target file relative to the project root.oldText: Text to be replaced.newText: Replacement text.replaceAll: Whether to replace all occurrences.caseSensitive: Whether the search is case-sensitive.projectPath: The project path. Always provide this value if known to reduce ambiguous calls. If only the current working directory is known, you can use it as the project path.
search_in_files_by_regex
Searches for a regex pattern within all files in the project using IntelliJ's search engine. Prefer this tool over reading files with command-line tools because it is much faster.
Occurrences in the results are highlighted by surrounding them with || characters. For example: some text ||substring|| text.
Parameters:
regexPattern: Regex pattern to search for.directoryToSearch: Directory to search in, relative to project root. If not specified, searches the entire project.fileMask: File mask to search for. If not specified, searches for all files. Example:*.java.caseSensitive: Whether the search is case-sensitive.maxUsageCount: Maximum number of entries to return.timeout: Timeout in milliseconds.projectPath: The project path. Always provide this value if known to reduce ambiguous calls. If only the current working directory is known, you can use it as the project path.
search_in_files_by_text
Searches for a text substring within all files in the project using IntelliJ's search engine. Prefer this tool over reading files with command-line tools because it is much faster.
Occurrences in the results are highlighted by surrounding them with || characters. For example some text ||substring|| text.
Parameters:
searchText: Text substring to search for.directoryToSearch: Directory to search in, relative to project root. If not specified, searches the entire project.fileMask: File mask to search for. If not specified, searches for all files. Example:*.java.caseSensitive: Whether the search is case-sensitive.maxUsageCount: Maximum number of entries to return.timeout: Timeout in milliseconds.projectPath: The project path. Always provide this value if known to reduce ambiguous calls. If only the current working directory is known, you can use it as the project path.
get_symbol_info
Retrieves information about the symbol at the specified position in the specified file. Provides the same information as IntelliJ IDEA's Quick Documentation feature. The information may include the symbol's name, signature, type, documentation, and other details, depending on the programming language.
If the position references a symbol, the tool will return a code snippet with the symbol's declaration, if available. Use this tool to understand a symbol's declaration, semantics, and location.
Parameters:
filePath: Path relative to the project root.line: 1-based line number.column: 1-based column number.projectPath: The project path. Always provide this value if known to reduce ambiguous calls. If only the current working directory is known, you can use it as the project path.
rename_refactoring
Renames a symbol (variable, function, class, etc.) in the specified file. Use this tool to perform rename refactoring operations.
Unlike a simple text search-and-replace, the rename_refactoring tool is a context-aware utility that understands the code's structure. It intelligently updates all references to the specified symbol throughout the project, ensuring code integrity and preventing broken references. It is always the preferred method for renaming programmatic symbols.
The tool returns a success message if the rename operation was successful, or an error message if the file or symbol cannot be found, or if the rename operation fails.
Parameters:
pathInProject: Path relative to the project root.symbolName: The exact, case-sensitive name of the existing symbol to be renamed (for example,getUserData).newName: The exact, case-sensitive name for the symbol (for example,fetchUserData).projectPath: The project path. Always provide this value if known to reduce ambiguous calls. If only the current working directory is known, you can use it as the project path.
execute_terminal_command
Executes a specified shell command in the IDE's integrated terminal. Use this tool to run terminal commands within the IDE environment.
Important features and limitations:
- Checks if a process is running before collecting output.
- Limits output to 2000 lines (truncates any excess).
- Times out after the specified timeout, with a notification.
- Requires user confirmation unless Brave Mode is enabled in the settings.
Returns possible responses:
- Terminal output (truncated if over 2000 lines).
- Output with an interruption notice if the command times out.
- Error messages for various failure cases.
Parameters:
command: Shell command to execute.executeInShell: Whether to execute the command in the user's default shell (bash, zsh, etc.). Useful if the command is a shell script or if it is important to preserve the real environment of the user's terminal. If set tofalse, the command will be started as a process.reuseExistingTerminalWindow: Whether to reuse an existing terminal window to avoid creating multiple terminals.timeout: Timeout in milliseconds.maxLinesCount: Maximum number of lines to return.truncateMode: How to truncate the text: from the start, in the middle, at the end, or do not truncate at all.projectPath: The project path. Always provide this value if known to reduce ambiguous calls. If only the current working directory is known, you can use it as the project path.
get_repositories
Retrieves the list of VCS roots in the project. Use this tool to identify all repositories in a multi-repository project.
Parameters:
projectPath: The project path. Always provide this value if known to reduce ambiguous calls. If only the current working directory is known, you can use it as the project path.
10 October 2025