Immich Is a Great Google Photos Alternative You Can Host on Raspberry Pi (original) (raw)
Google Photos is the dominant photo storage and backup solution, effortlessly spiriting your images from your phone into the cloud. But if you don't want to share your personal photos with Google, there are alternatives.
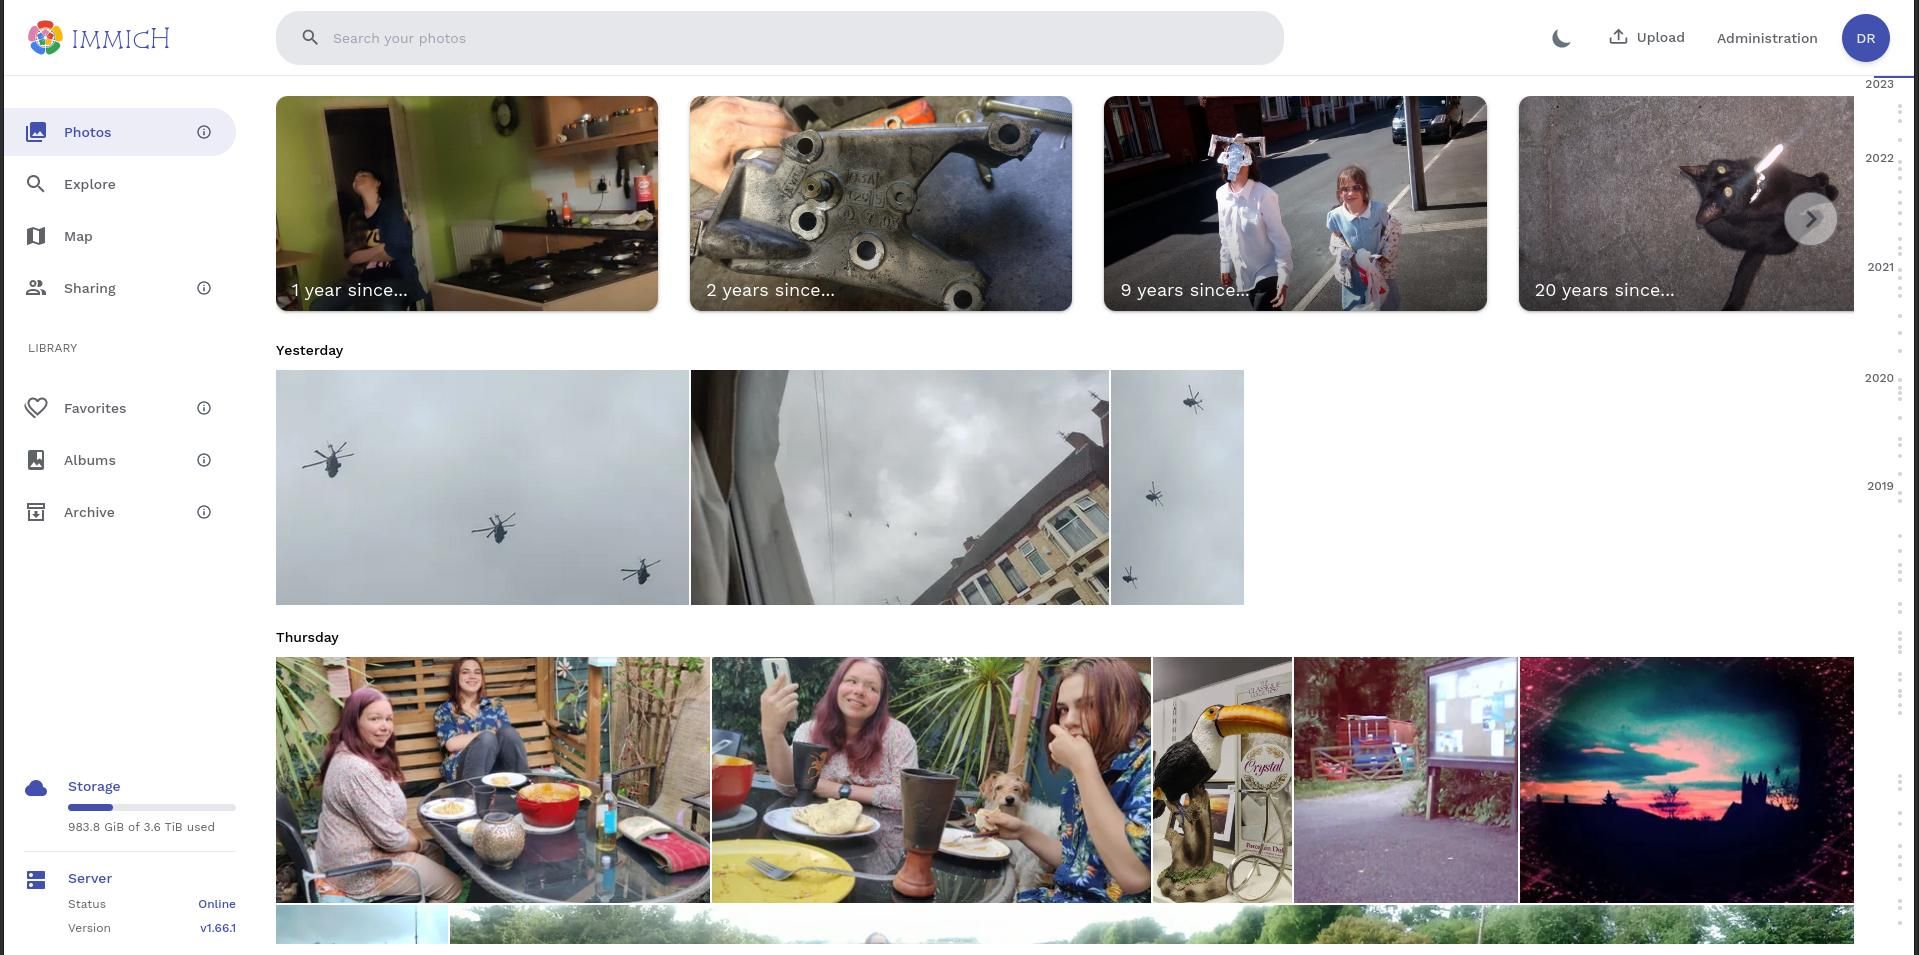
While there are many self-hosted solutions you can host on Raspberry Pi, Immich stands head and shoulders above most competitors. It offers machine learning, multiple users, automatic image classification, facial recognition, native Android and iOS apps, and a host of other features.
Why Install Immich on Raspberry Pi?
Photographs capture parts of our lives we consider are worth committing to memory, and will want to recall at a later date. They're mementos of good times, great meals, high days, and holidays.
In the decades of yore, you would need to carry a film or digital camera with you to snap these occasions, then either have them printed out or manually transfer the files to your computer.
Today, almost everyone carries a phone with two or more inbuilt cameras, and the best phone cameras are good enough to be used by professional photographers.
Automatic Upload
Most of the time, when you snap a picture, it's uploaded to either Google or Apple, and you can access it again through any device using a web interface or app. But there are good reasons you might not want to rely on a third party to host your images.
Aside from that these services are paid-for after you cross a storage threshold—currently 15GB for Google and 5GB for Apple—you can never be sure that the companies aren't snooping through your photo archive or using your images to train generative AIs.
Cloud-hosted photo storage is about more that just storing and accessing your pictures, and in recent years we've become used to automatically generated albums, facial recognition, timelines, object identification, reminders of significant moments, and a searchable timeline. Naturally, it should also come with attractive mobile apps, through which you can upload your photos to the cloud
Immich is self-hosted open-source software which will do all that and more. Here's how to install Immich on your Raspberry Pi. Prior to continuing, you should download your photos from Google, or export your images from iCloud.
How to Install Immich on Raspberry Pi
Before you start, you’ll need to set up your Raspberry Pi as a web server. While you don't strictly need MariaDB or PHP to install Immich, you may find them useful for other self-hosting projects. You should also install the latest release of Docker Compose manually.
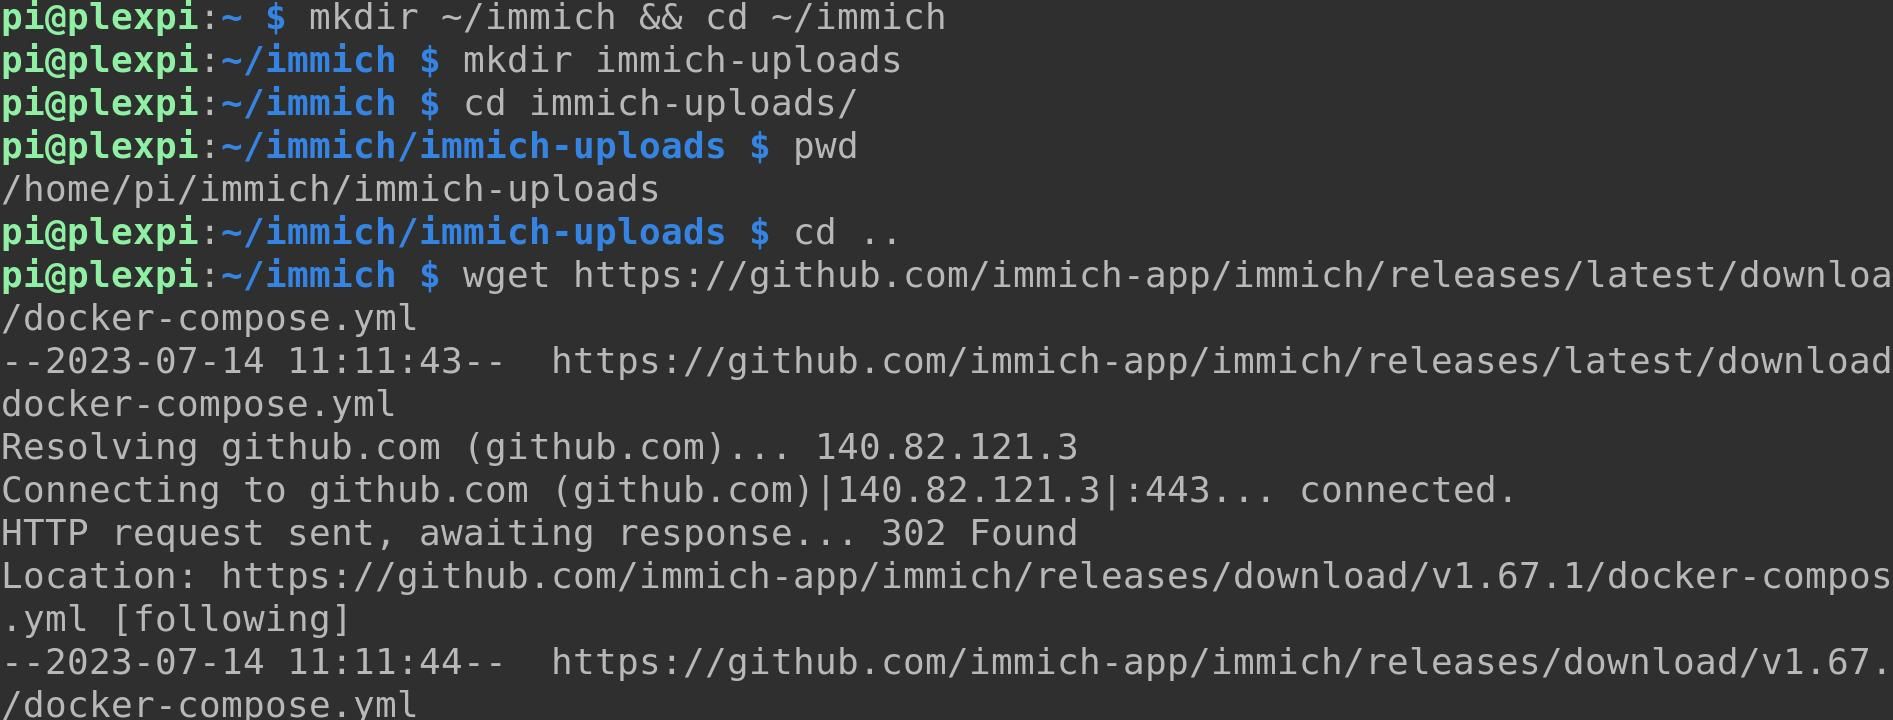
Once your Pi is functioning as a basic web server, create a new directory for Immich, then move into it:
`mkdir ~/immich && cd ~/immich `You will also need to create a directory for uploaded files
`mkdir immich-uploads`You will need the absolute path of this directory later so move into it and use the pwd command to find exactly where it is in your file system:
`cd immich-uploads pwd`
Make a note of the output and keep it safe. Now move up a directory level and use wget to download the Immich docker-compose.yml file and environment file by entering these commands separately:
`cd.. wget https://github.com/immich-app/immich/releases/latest/download/docker-compose.yml
wget -O .env https://github.com/immich-app/immich/releases/latest/download/example.env`
The .env environment file contains variables you need to change before bringing your Immich instance online. Use the nano text editor to open the file:
`nano .env`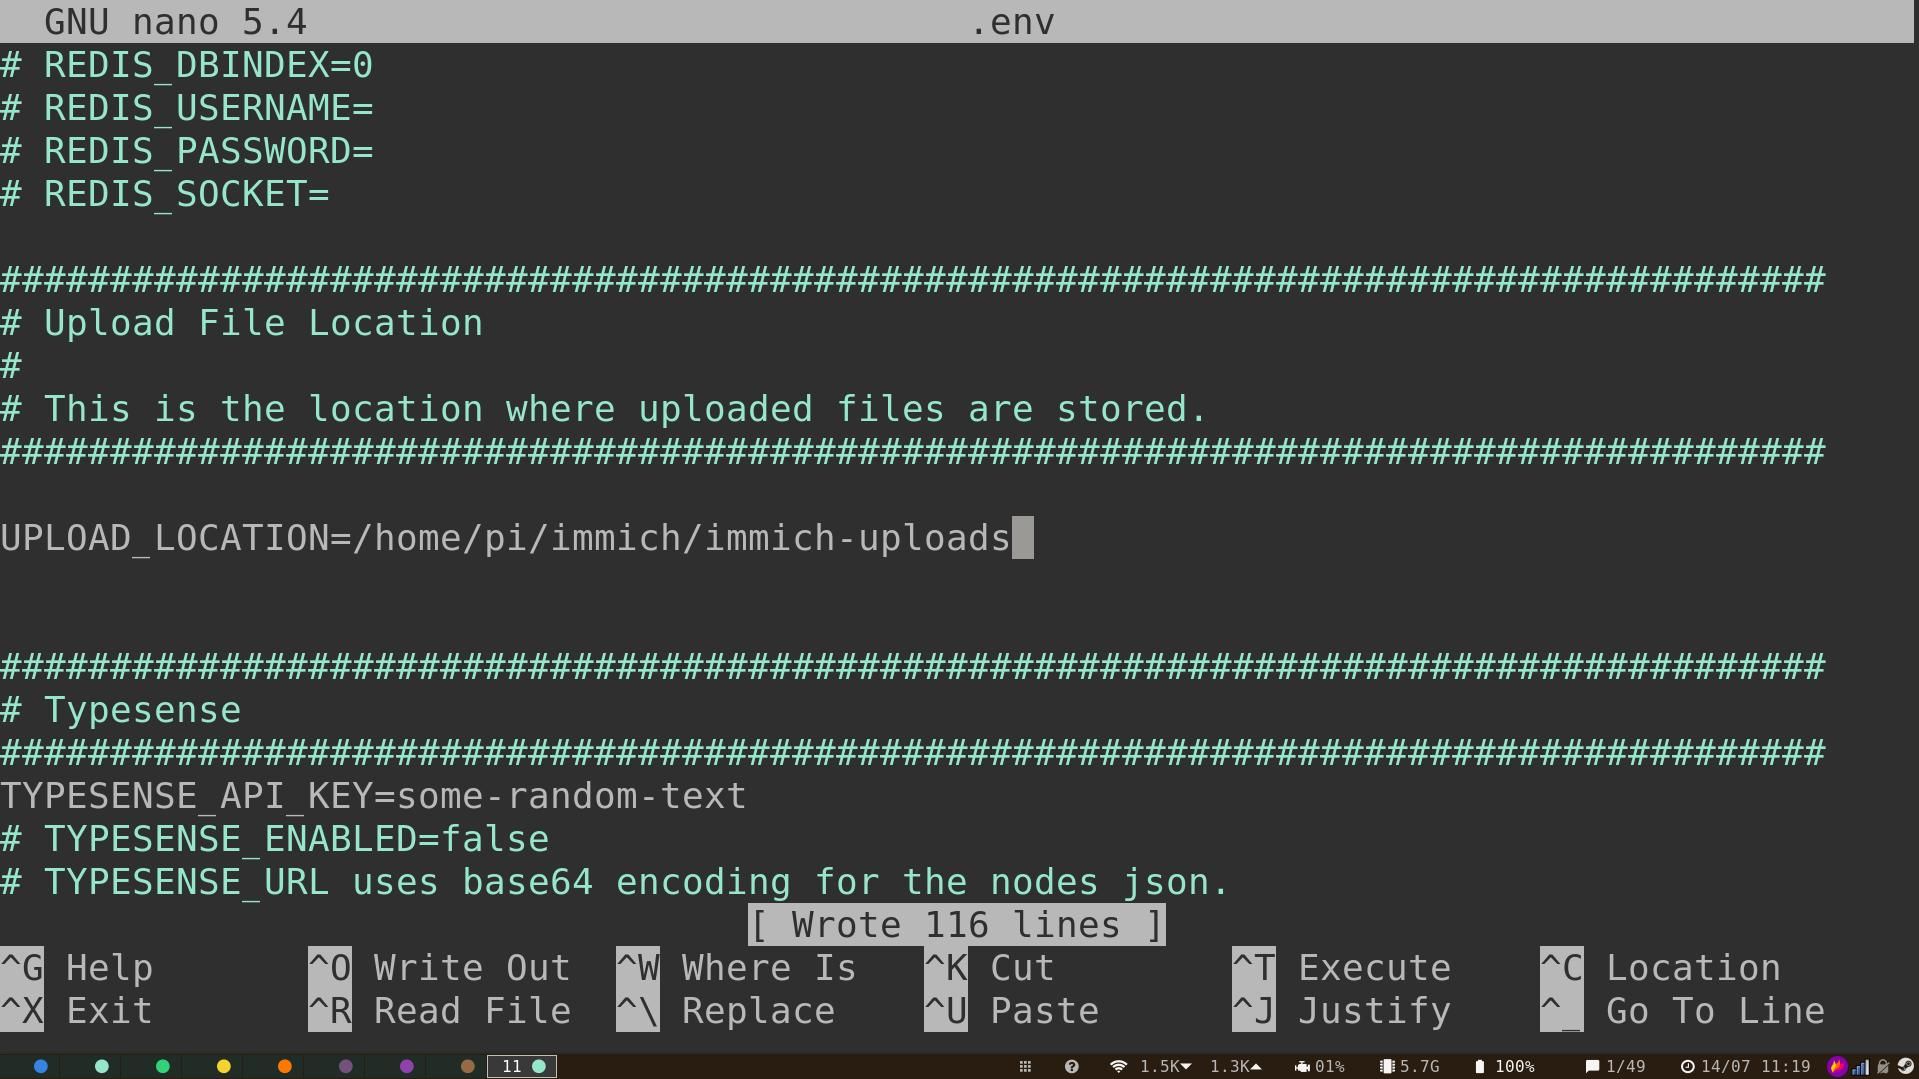
Set the upload location to the upload directory you created earlier. This is the only necessary change you need to make to the file, but there are other configuration options you can specify if you choose to.
If you want Immich to be able to label your photos with the name of the location they were taken, scroll down to the Reverse Geocoding section and uncomment the Reverse Geocoding and REVERSE_GEOCODING_PRECISION lines.
Immich offers four levels of precision. 3 is the most precise and will name settlements with a population of over 500. This precision comes with a memory cost, and setting 3 will require 200MB RAM. In comparison, setting the value to 0 will name cities with over 50,000 inhabitants and suck down a mere 40MB.
Change the PUBLIC_LOGIN_PAGE_MESSAGE to whatever you want users to see before they log into the site.
When you're happy with your changes, Save and exit nano with Ctrl + O then Ctrl + X.
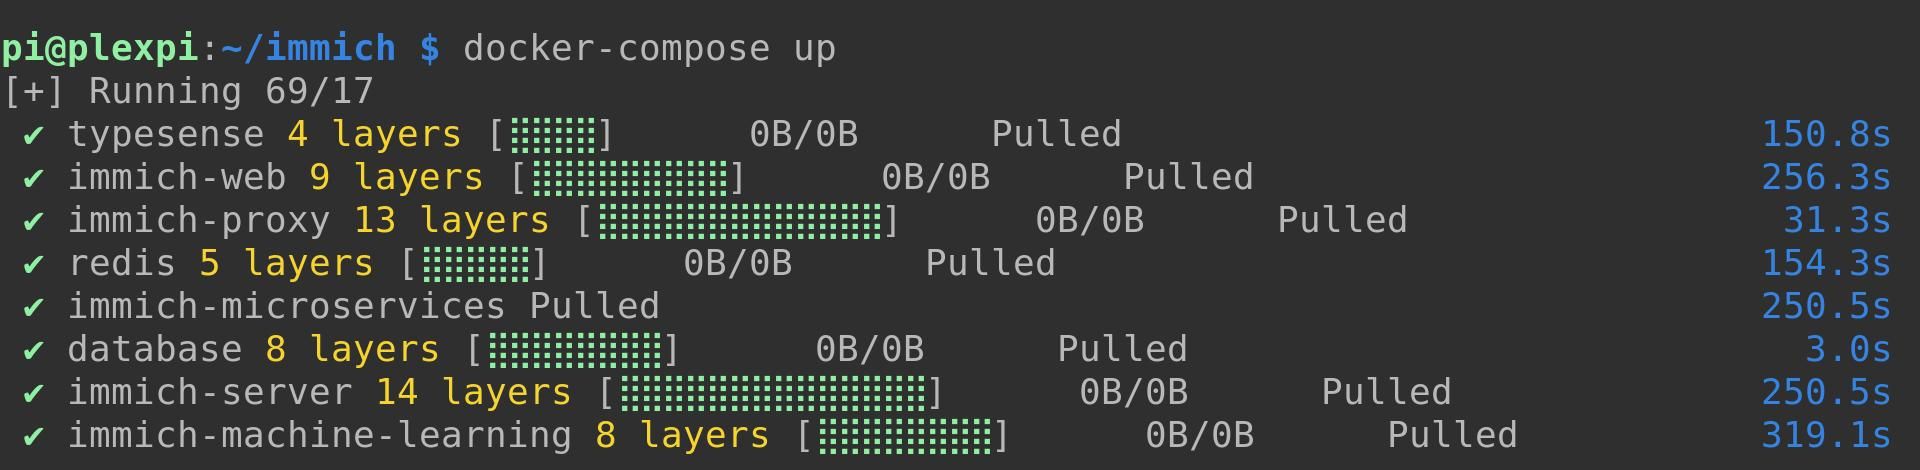
The following command will bring up Docker Compose in detached mode, and download necessary images and set up the containers Immich needs to run.
`docker-compose up -d`The process will take several minutes, during which time you can check out some awesome podcasts in your terminal. When Immich comes online, visit the web app in your browser at your-pi-local-ip-address:2283.
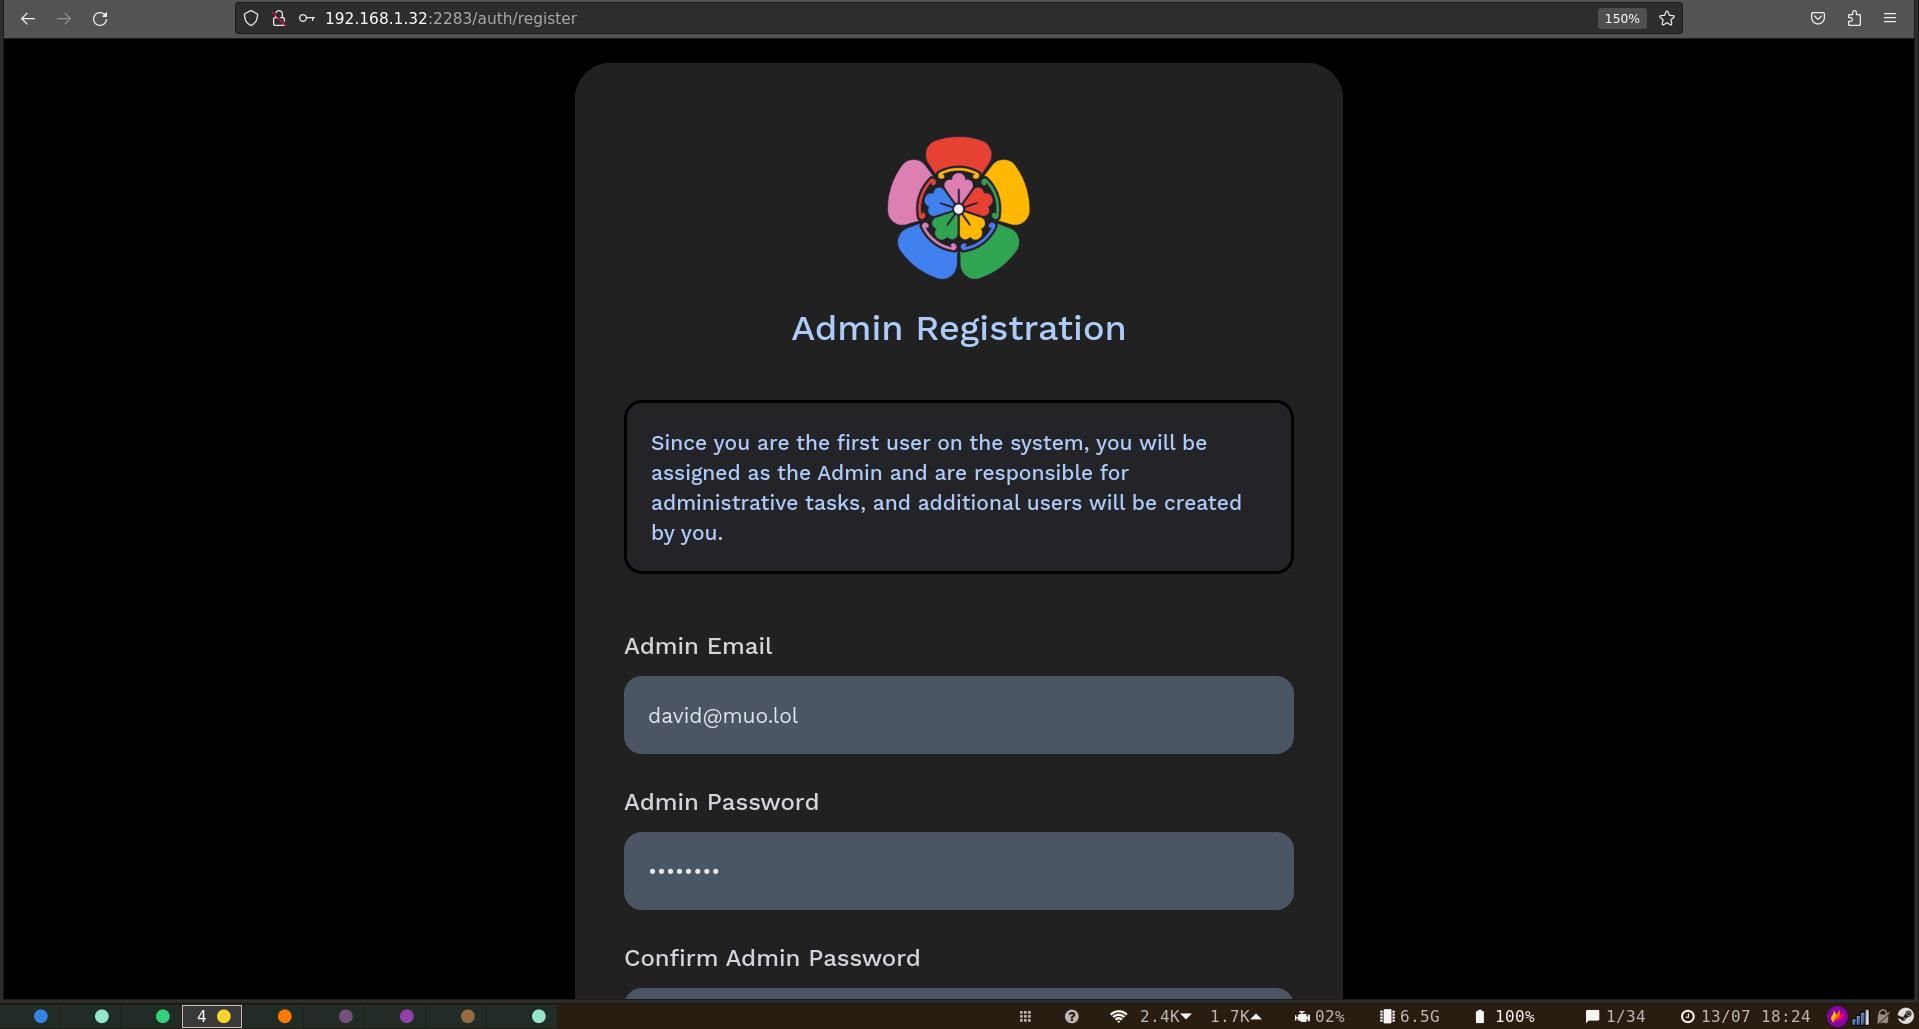
Click Get started, then create an admin user. Your Immich instance will eventually be exposed to the web, so remember to use a strong, unguessable password, then click Sign up. You'll need to log in again with your email address and password.
Upload Your Photos to Immich
Unless you're starting completely from scratch, you probably want to upload your existing photo archive to your new Immich instance. While you can click the Upload button in the top right of the web interface, then select the images manually, this method isn't practical if you have thousands of photos in a multi-gigabyte archive.
The Immich developers have helpfully created a CLI tool you can use to bulk-upload your images to Immich. While it's tempting to use secure copy (SCP) to transfer your files, Immich won't recognize them.
You will need to install the CLI upload tool on your local system, rather than on the Pi itself. But first, you need to have Node Package Manager and Node.js version 16 or above. You can install npm and Node.js on Windows, and it's even easier to install npm and Node.js on Linux.
Back in the web app, click on your user icon or initials in the top right of the screen, then click Account Settings > API Keys > New API Key.
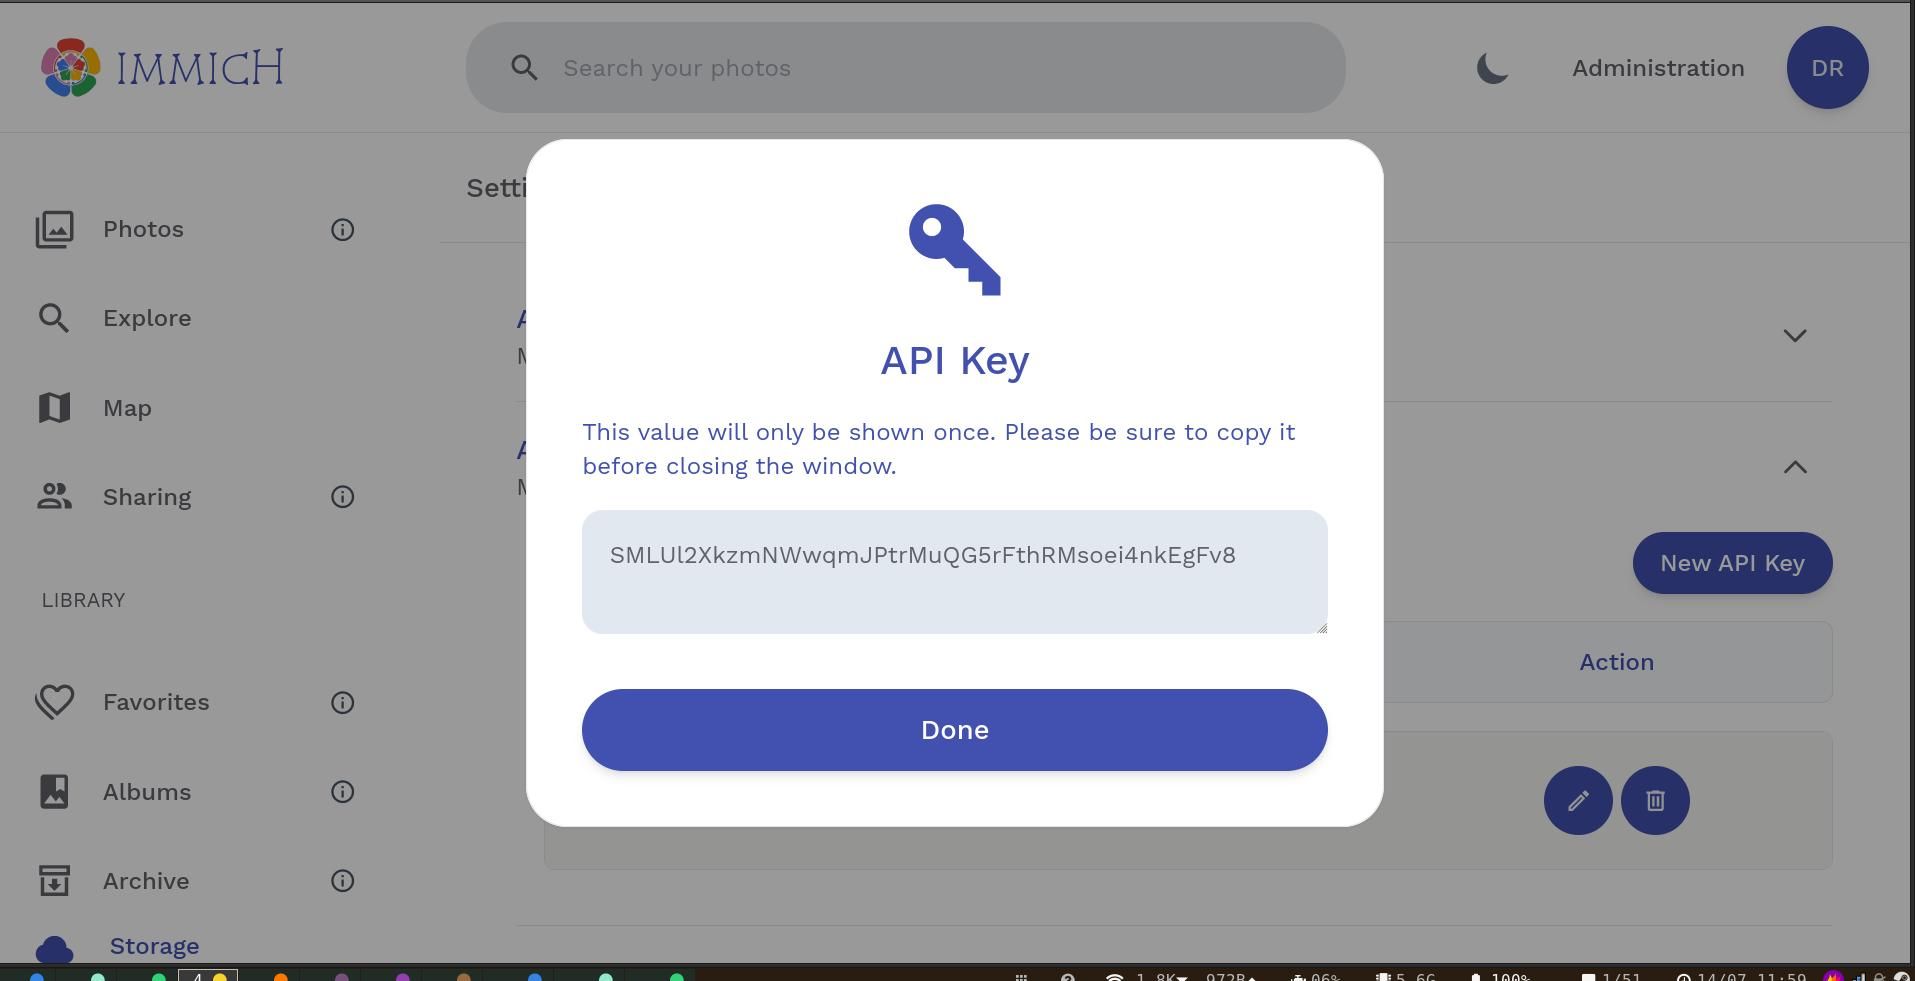
Give the key a name, then press Create. Immich will generate a new API key—make a note of it.
In your terminal window or command prompt, navigate to the directory where your images are stored and enter:
`immich upload --key your-generated-API-key --server http://your-pi-local-ip-address:2283/api --recursive .`Hit y when asked if you want to start the upload process, then sit back as this could take a while. For reference, it took around six hours to upload our 82GB archive of more than 40,000 images, but that's only a fraction of the work.
After upload is complete, Immich will process your images, extract metadata, tag faces, and run object recognition algorithms. During this process, the web interface will be less responsive, and images may appear in the wrong order. For our archive, the process took around four days on an 8GB Raspberry Pi 4B—although it had no noticeable impact on the multitude of other services we habitually host.

You can keep track of the progress through the web interface by clicking Administration > Jobs. Immich will process multiple jobs simultaneously; to change these values and potentially speed up the process, go to Administration > Settings > Job settings, and tweak concurrency to your liking.
Expose Immich to the Web
You will need to create an Apache configuration file for your Immich instance:
`cd /etc/apache2/sites-available && sudo nano immich.conf`In the new file, paste the following:
`<VirtualHost *:80> ServerName your-domain-name.tld
ProxyPass / http://127.0.0.1:2283/
ProxyPassReverse / http:/127.0.0.1:2283/
ProxyPreserveHost On
`
Save and exit nano with Ctrl + O then Ctrl + X. Enable the conf file, then restart Apache:
`sudo a2ensite immich.conf && sudo service apache2 restart`Use Certbot to fetch and deploy TLS certificates and keys:
`sudo certbot`Select your domain name from the list and press Enter. Restart Apache again with:
`sudo service apache2 restart`You can now access your Immich web app using your domain name.
Use Mobile Apps With Immich
If you're using Immich to replicate the functionality of commercial offerings, you'll need a companion app on your phone. Immich is available for Android and iOS, and supports uploading and viewing images and videos, quick navigation and auto-backup, search, and more.
To get started, enter your Immich URL, including the https:// prefix, and log in with your admin credentials. You'll need to grant permission for the app to view your photos and videos.
The interface is straightforward and intuitive, and you should be able to navigate most of it without any help. Click on the cloud icon in the top right corner, and choose the local albums you want to back up, as well as activating automatic backups in the foreground and background.
Download: Immich for iOS | Android (Play Store) | Android (F-Droid)
Immich Is a Work in Progress
Development on Immich is constantly ongoing, and despite work on the project only starting in 2022, it is without doubt a stunningly competent self-hosted replacement for iCloud or Google Photos.
If you'd prefer a project which is slightly more mature, consider deploying PhotoPrism on your Raspberry Pi instead.