How To Install A DIY Slat Wall (Easy Step-by-Step Tutorial) - Making Manzanita (original) (raw)
This DIY slat wall makes a big impact and was easy to create! In this step by step tutorial we'll walk you through the whole process of installing a vertical wood slat wall in your home and share a hack with you for how to build this modern wood accent wall cheaper!
Thank you to Arrow Fastener for sponsoring this DIY slat wall project! All opinions are entirely my own. This post also contains affiliate links, but nothing that I wouldn’t recommend wholeheartedly. Read my full disclosure here.
Have you seen the DIY slat wall trend yet? Instagrammers and bloggers everywhere are adding wood slats to their walls and it creates such a modern and fun look. I love that, unlike the shiplap trend that is usually painted, people are letting those natural wood tones shine through!
When I was planning our modern bohemian living room design, I knew I needed to figure out how to incorporate this awesome vertical wood slat wall into our room. It would also look great in a dining room, master bedroom, or home office (or basically anywhere you wanted to create more visual interest in your room).
This modern wood accent wall was SO easy and is definitely a beginner project. Honestly, the hardest part is ripping the plywood sheets down into slats with a table saw. And that is just because a table saw can be a more advanced type of saw. But alternatively, you could use a track attachment with a circular instead!
Alright, are you ready to see how to create a DIY slat wall in your home? Let’s jump in.
Table of Contents
- Before pictures
- How we saved $500 on this accent wall
- Arrow brad nailer
- Watch video
- Supply list
- #1: Cut plywood into slats.
- #2: Sand slats.
- #3: Seal wood slats.
- #4: Attach wooden slats to wall.
- #5: Fill nail holes.
- After pictures

Want to see more of our living room renovation?
- Modern Bohemian Living Room Mood Board & Layout (our next renovation!) – you are here!
- Removing Baseboards: Tips and Tricks
- How To Remove Carpet Tack Strips – 2 Easy Ways!
- How To Install Laminate Flooring on Concrete
- How To Fill Nail Holes in Wall
- How To Paint A Room For Beginners | Ultimate Guide
- Laying Large Format Tiles | Tile Entryway Reveal
- Easy DIY Tapestry Frame | 6 Simple Steps To Create Fabric Wall Art!
- DIY Slat Wall | Easy Modern Wood Accent Wall Idea
- Faux Concrete Wall Panels Behind Fireplace (No tools required!)
- Modern Boho Living Room Reveal
We are going to be putting a new sectional couch on this wall, so the slat wall will be a fun backdrop for furniture and really draw your eye into that corner!
How we made this DIY slat wall cheaper
Lumber prices are literally insane right now. Even since we worked on this project a few weeks ago, the costs have gone up even more! We’re doing all we can to try to keep lumber costs down over here, which means getting creative on the type of wood we’re using for our woodworking projects!
Originally when I imagined adding a DIY slat wall to our living room, I was planning to use 1 by 2 oak boards for our lumber stock (which by the way, a 1×2 does not actually equal 1 inch by 2 inches…read up about the confusing lumber dimensions).
When I went to plan out the supplies we needed for this wood slat wall, I was flippin’ shocked when I realized that just the wood for this tiny little corner accent wall was going to be over $670. The sticker shock got me and I had to pivot this entire project.
Instead of using 1×2 hardwood, we ripped down large 4′ x 8′ sheets of plywood into 1 1/2″ wide strips! This was the best way for us to save money on this DIY wood slat wall.
From the front view of the wood slat wall, you can’t even tell the difference between plywood and oak hardwood. From the side angle, you can see the layers of plywood veneers, but honestly… it’s pretty cool-looking.
By ripping down wood slats from plywood, we saved about $500. Can you believe that??
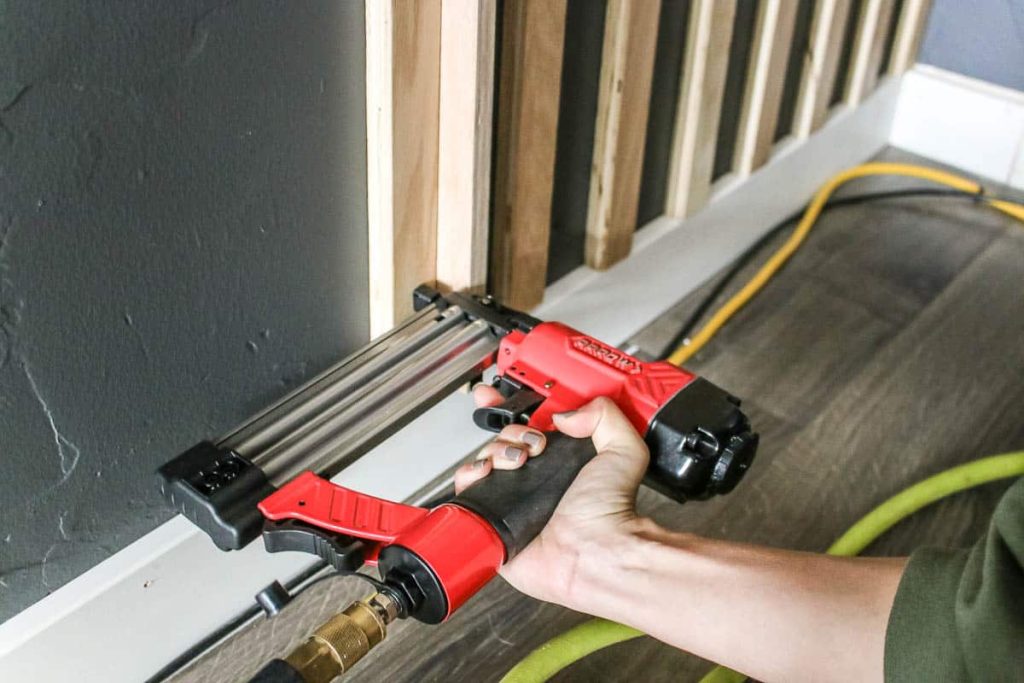
Arrow Pneumatic Brad Nailer (PT18G)
To attach the wood slats to the wall, we’re using Arrow Fastener’s Pneumatic Brad Nailer, which is incredibly easy to use.
It’s an 18 gauge brad nailer, which means the size of the holes that the nail leaves are smaller than a finish nailer – which is usually 15 gauge or 16 gauge (the higher the number of the gauge, the smaller the hole). Read more about the difference between brad and finish nailer here.
What does pneumatic mean?
When you say that a nail gun is pneumatic, it means that it operates using the pressure of air rather than a battery. So in order for pneumatic nail guns to work, they have to be plugged into an air compressor.
If you love DIY videos, be sure to subscribe to our YouTube channel!
How To Make A DIY Slat Wall – Easy Step-by-Step Guide
Step 1. Cut plywood down into slats.
The first step was to cut down the vertical strips of wood from the plywood with our table saw. We made the width of the slats 1 1/2 inches, so they are the same size as a 1×2.
Alternatively, you could just use 1×2 boards. But, as I mentioned earlier, this will cost ya about $500 more.
If you want to avoid the additional cost on your DIY slat wall, we definitely recommend starting with plywood sheets and ripping them down to 1.5 inch slats with a table saw.
Don’t have a table saw? You could use a track attachment with a circular saw!
Step 2. Sand wood slats.
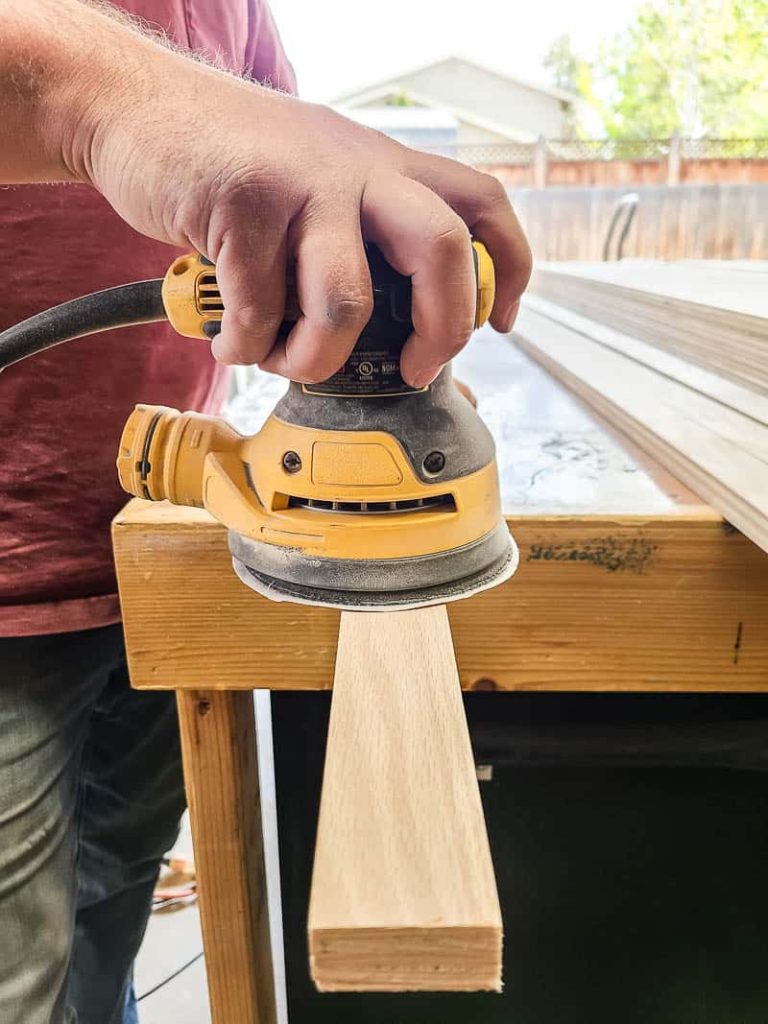
We recommend starting with sanded plywood sheets, so the wood should already be pretty smooth. But it helps to quickly run the orbital sander over the surface with 150- or 220-grit sandpaper and then lightly sand the corners of the slats so they aren’t as sharp.
Step 3. Seal wood.
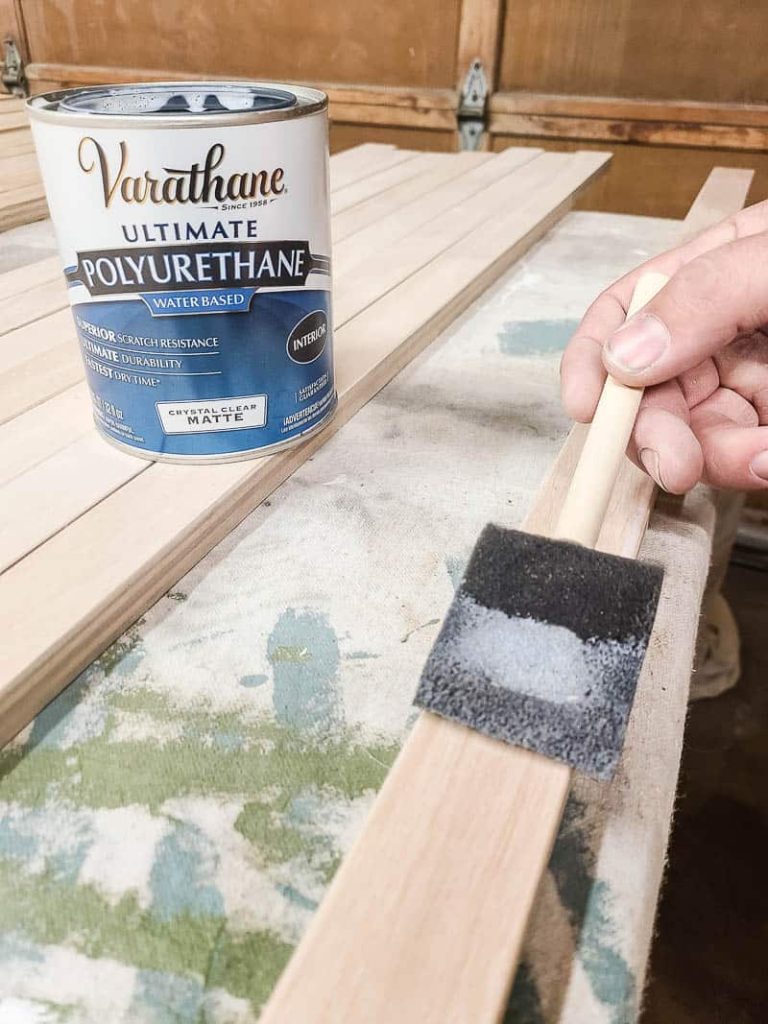
After you’re done sanding, wipe everything down to remove the sawdust. Next brush on matte polyurethane with a foam brush. We did two coats.
I wanted a matte finish to the wood slats on the wall. If you want something with a little more shine, feel free to choose a different finish to the poly.
If you’re trying to decide whether to use polyurethane vs polycrylic for your project, check out this article with an overview of each.
Step 4. Install vertical wood slats on the wall.
Now the fun starts! You can start adding the wood slats to the wall!
Grab your Arrow Fastener brad nailer and load it up with 1 1/2″ 18 gauge brad nails. Hook it up to your air compressor and turn the air compressor on.
The first slat is the most important to get nice and level. Even if you live in a new house and not an old one like us, chances are that your walls are not 100% perfectly straight, so don’t rely on them.
Hold the first wood slat in the corner along with a 4′ level to make sure that the first board is level before attaching.
Add nails in a few spots on that first slat while keeping it level. You will need one nail at the top of the board and a couple spread out evenly in the middle and one more nail at the bottom of the wood slat.
Now that you know that the first slat is level, you can set aside the level and simply use a spare wood slat turned on its side as your spacer between the boards for the rest of the DIY slat wall.
Here’s the deal… the walls in our living room are just over 8′ tall so the 8′ wood slats from the plywood sheets weren’t going to reach from the top of the baseboards to the ceiling. So what we did instead we embraced that into our design!
We chopped about 8″ off of each one and then alternated the wood slats so they were either touching the ceiling or touching the baseboards. I love the unique character this adds to our wood slat wall!
Don’t worry, we were able to use up the scrap we cut off each wood slat…stay tuned for the full reveal of the living room to see how we creatively used them!
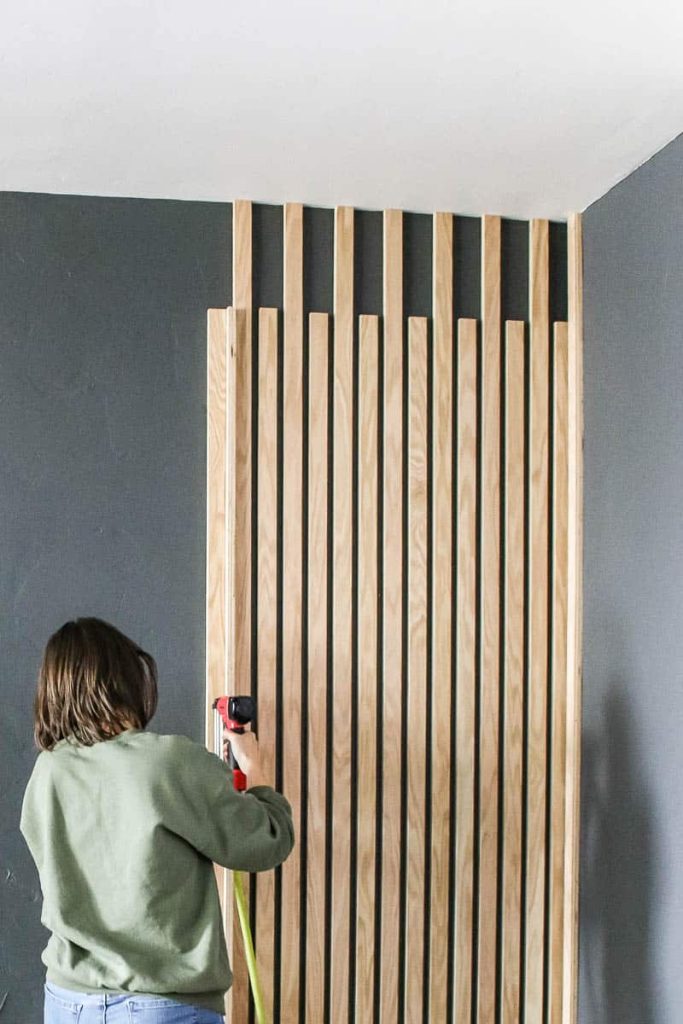
Using an extra wood slat as the spacer between boards on the wall makes this so easy! You just turn the extra wood slat sideways and hold it up against the most recently attached slat. This will be your spacer.
Grab your next wood slat and hold it flush up to your spacer and nail it into place! It’s seriously that easy!
The thickness of the plywood is 3/4″ so once you turn the slat on its side to use as a spacer, that will be the distance between the boards on the slat wall.
Step 5. Fill nail holes on wood slats.
The hole that the 18 gauge Brad nail gun leaves behind on the wood slats is pretty dang small. You could totally get away with just leaving it and not filling the holes, but we decided to fill them.
We used this wood filler, which was a great match for the natural plywood color. We rubbed it on with a finger and immediately wiped it off as smoothly as we could with the palm of our hand.
By doing this, we avoided the need to sand the filled nail hole later. Because when you sand the wood, you’ll also sand off that poly finish and we didn’t want to have to reapply that.
DIY Slat Wall – After Pictures
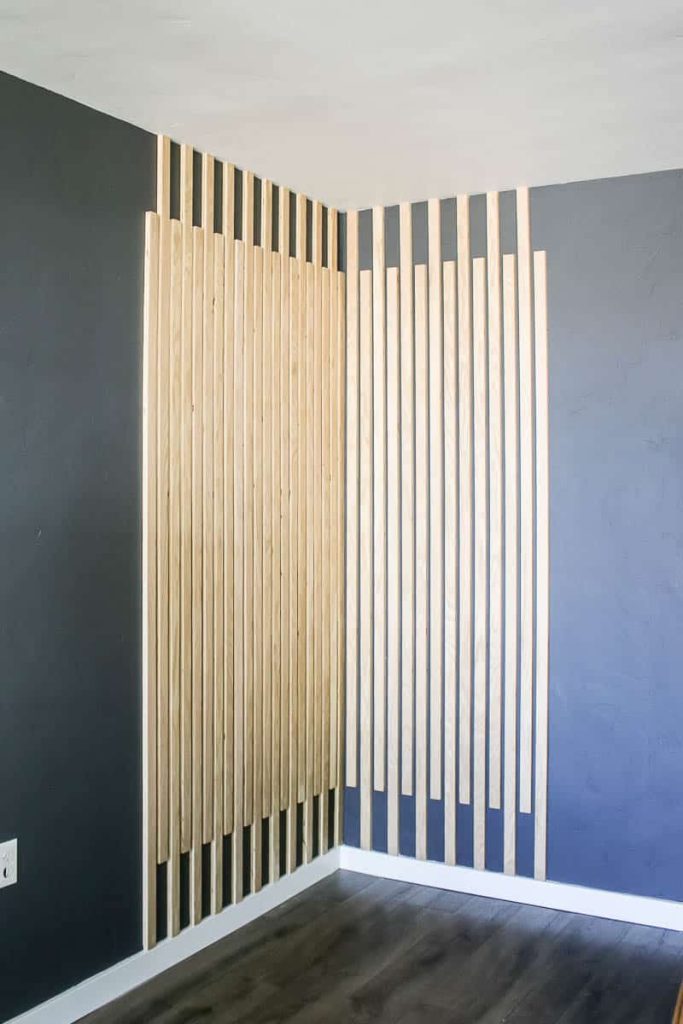
Simple as that, guys! I told you this DIY slat wall was easy! All you do is cut the wooden slats down to size and nail them to the wall.
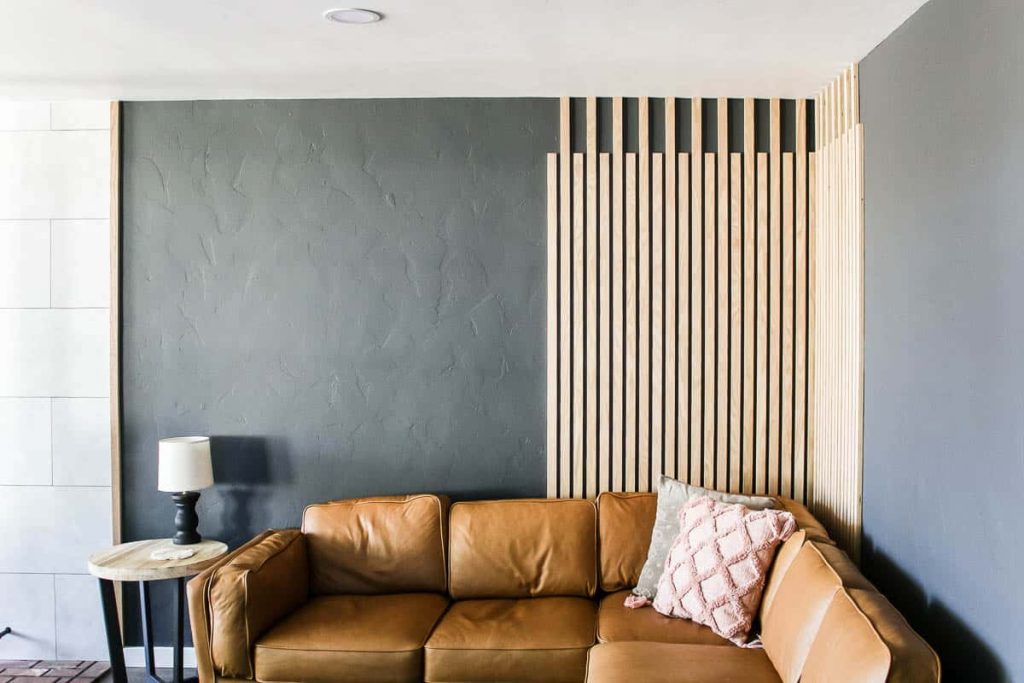
And the impact that the vertical slats have on the entire room is amazing!
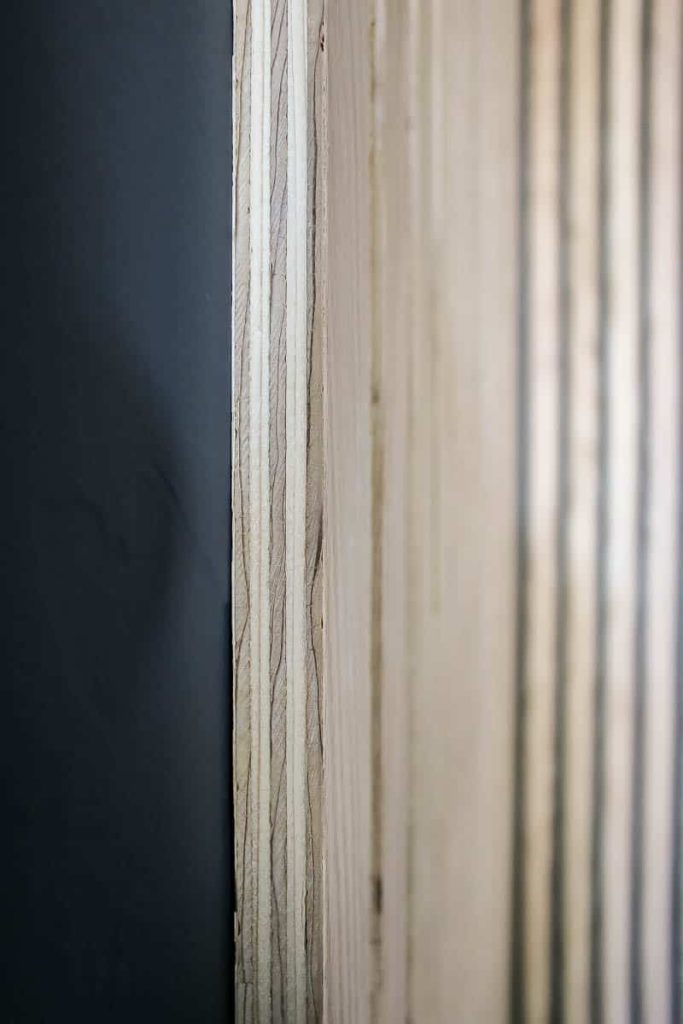
The exposed edges of the plywood are pretty cool, right?
Can’t wait until we get the rest of our new furniture and decor in here so the feature wall can really shine.
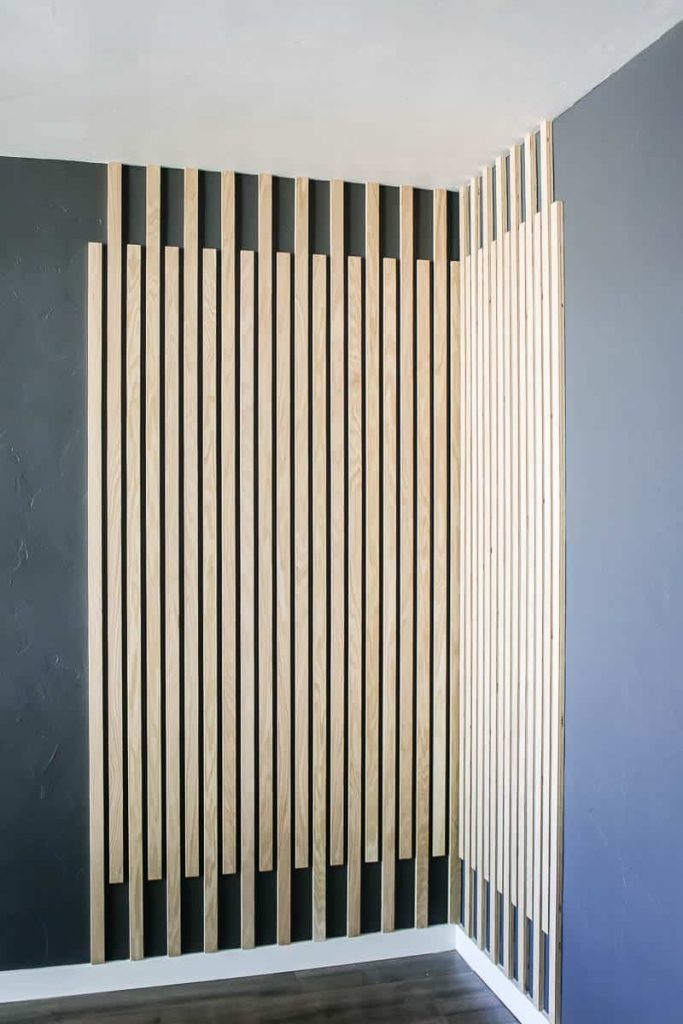
Stay tuned as we continue sharing our living room makeover tutorials and get ready for the big reveal!

Materials
- 4' x 8' sheet of plywood (we needed about 1 1/2 sheets for this corner)
- Matte polyurethane
- 1 1/2" brad nails
- Wood filler
Tools
- Table saw
- Miter saw
- Orbital sander
- 150 grit sandpaper
- Arrow brad nailer
- Foam paint brush
Instructions
- Cut plywood into with 1.5 inch slats with table saw.
- Lightly sand the slats with 150 grit sandpaper and orbital sander.
- Seal slats wood matte polyurethane applied with a foam paint brush.
- Install vertical wood slats on the wall with Arrow's brad nailer and 1 1/2" nails. Be sure to use level on the first slat. Use a spare wood slat turned on its side as a spacer before the boards for the rest of the DIY slat wall.
- Fill nail holes with wood filler (if desired).