Django DeleteView (original) (raw)
Summary: in this tutorial, you’ll learn how to use the Django DeleteView class to define a class-based view that deletes an existing object.
This tutorial begins where the Django UpdateView tutorial left off.
Create a Django DeleteView class #
The Django DeleteView class allows you to define a class-based view that displays a confirmation page and deletes an existing object.
If the HTTP request method is GET, the `DeleteView` view will display the confirmation page. However, if the request is POST, the `DeleteView` view will delete the object.
To use the DeleteView class, you define a class that inherits from it and add attributes and methods to override the default behaviors.
For example, the following defines a TaskDelete class that deletes a task for the Todo app:
`#... from django.views.generic.edit import DeleteView, CreateView, UpdateView from django.contrib import messages from django.urls import reverse_lazy
from .models import Task
class TaskDelete(DeleteView): model = Task context_object_name = 'task' success_url = reverse_lazy('tasks')
def form_valid(self, form):
    messages.success(self.request, "The task was deleted successfully.")
    return super(TaskDelete,self).form_valid(form)
#...`Code language: Python (python)
In this example, we define the `TaskDelete` class that is a subclass of the DeleteView class. The `TaskDelete` class has the following attributes:
modelspecifies the class of the model (Task) that will be deleted.`context_object_name`specifies the object name that will be passed to the template. By default, theDeleteViewclass uses theobjectas the name. However, you can override the name using the`context_object_name`attribute.success_urlis the URL that will be redirected to once the object is deleted successfully.`form_valid()`method is called once the object is deleted successfully. In this example, we create a flash message.
By default, the DeleteView class uses the task_confirmation_delete.html template if you don’t specify it explicitly.
Creating task_confirm_delete.html template #
Create a new file task_confirm_delete.html template in the templates/todo app with the following code:
`{%extends 'base.html'%}
{%block content%}
{%endblock content%}`Code language: HTML, XML (xml)
The task_confirm_delete.html extends the base.html template and contains a form that deletes a task.
Defining a route #
Define a new route in the urls.py that maps a URL that deletes a task with the result of the as_view() method of the TaskDelete view class:
`from django.urls import path from .views import ( home, TaskList, TaskDetail, TaskCreate, TaskUpdate, TaskDelete )
urlpatterns = [ path('', home, name='home'), path('tasks/', TaskList.as_view(),name='tasks'), path('task/int:pk/', TaskDetail.as_view(),name='task'), path('task/create/', TaskCreate.as_view(),name='task-create'), path('task/update/int:pk/', TaskUpdate.as_view(),name='task-update'), path('task/delete/int:pk/', TaskDelete.as_view(),name='task-delete'), ]`Code language: Python (python)
Including a link to delete a task #
Modify the task_list.html template to add a link that deletes a task to each task on the task list:
`{%extends 'base.html'%}
{%block content%}
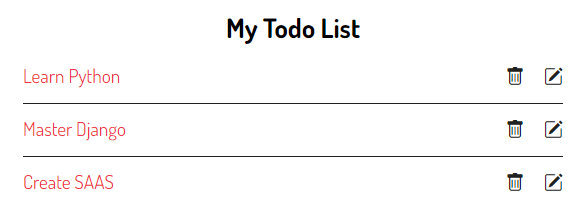
My Todo List
{% if tasks %}-
{% for task in tasks %}
- {{ task.title }} {% endfor %} {% else %}
🎉 Yay, you have no pending tasks! Create Task
{% endif %}If you click the delete button to delete a task on the list, you’ll get the following delete confirmation page:
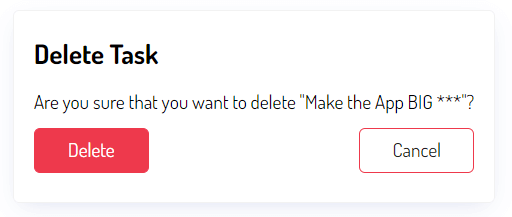
Click the Delete button will delete the task from the database and redirect it back to the task list:
You can download the final code for this Django DeleteView tutorial here.
Summary #
- Use Django
DeleteViewclass to define a class-based view that deletes an existing object.
Was this tutorial helpful ?