18 cool things Windows 7 does that Vista doesn't (original) (raw)
Update: read Windows 7 vs Windows Vista vs Windows XP
From Windows 3.1 to Windows Vista, the Windows operating system has taken many giant leaps. And while Vista received a lukewarm reception from some users, Windows 7 is likely to be remembered for addressing those criticisms.
In fact, there aren't many changes to the overall look of Windows 7 when compared to Windows Vista. Instead, Microsoft seems to have paid attention to the feedback it received and created an OS that is not only stable, but also very capable.
So what is new in Windows 7? Here are 18 cool things Windows 7 does that Vista doesn't.
- 85 Windows 7 tips, tricks and secrets
- Beginner's guide to Windows 7
- 25 cool Windows 7 interface tweaks
1. Shake 'em away
Ever had 10 Notepad, two Powerpoint and 50 Outlook windows open? Want to minimise all of them except the most important one? In Windows 7, you can grab the top of the window and shake it about to scare away all of the other open windows. Simple.
2. Jumplists
Sign up to be the first to know about unmissable Black Friday deals on top tech, plus get all your favorite TechRadar content.
Jumplists are a new feature that give you the option to view a list of recently accessed files by application, even when the application isn't open, by right-clicking on the application's icon in the taskbar. It also allows you to quickly access a favourite playlist without opening your media player. Jumplists can also be found integrated into the Start Menu.
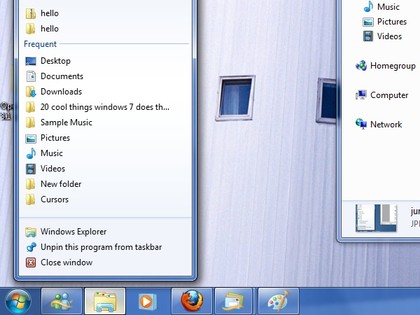
TIME-SAVER: The Jumplist for Windows Explorer – pretty useful
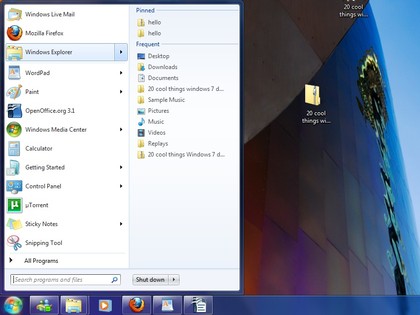
START HERE: A Jumplist integrated into the Start Menu
3. A step forward in previewing
In Vista, hovering over a minimised window on the taskbar would provide a preview of the window. In Windows 7, a similar preview pops up which also gives the option to close a window (within the preview), along with a full-size 'peek'. You can also press Win + T to scroll along previews in the taskbar.
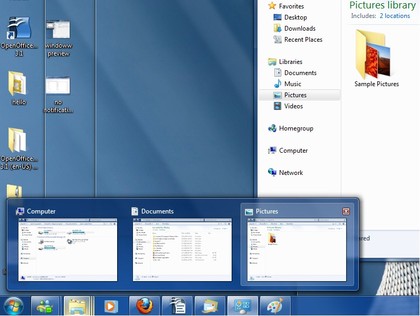
PREVIEW PLUS: A smaller preview, along with a full-size 'peek' with the ability to close the window
4. Snap into place
Simply drag your window to the left or right edge of the desktop to snap and resize the window to one half of the screen. Drag the window to the top to maximise it. A pretty neat idea made neater by the use of the keyboard shortcuts (Win + respective arrow keys). No longer do you have to frustratingly position the mouse at the edge of the window to resize it.
5. XP Mode
This time, you do not have to slap your head that same way when Vista would not run an XP application. For those XP applications that do not work under Windows 7, you can download XP Mode free from the Microsoft website and run XP applications in an emulated XP environment in Windows 7. Imagine Parallels on Mac OS X without the need to fish out money on an extra OS.
6. An easier and quicker way to adjust multiple displays
Do you constantly connect your computer to different external monitors or projectors, especially at work? Try Win + P, and duplicating or extending your display to the other monitor takes just a second. Win + P presents you with an Alt + Tab style menu, which is ideal if you give a lot of presentations at work on your laptop.
7. A personalised Stage for your device
With the new 'Device and Printers' button on the Start Menu, devices which are connected to your computer can have their own Stage. This Device Stage presents supported devices with a photo-realistic render and a link to the vendor's website, along with other updates and useful information (such as firmware updates and manuals).
8. (Almost) eliminate the notification area!
What, I can even get rid of the clock and volume icons? Yes. Click the arrow that gives access to the overflow icons in the notification area and click 'customise'. Select each icon and click 'hide icon and notifications' to remove it. Clean.
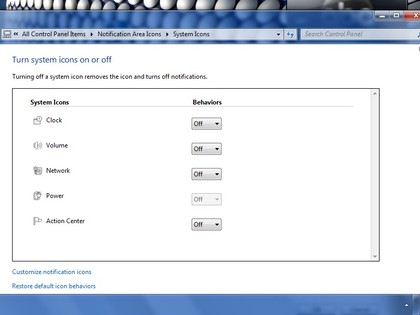
QUIETER: Stop all those notifications – but you might want to keep the clock there
9. Problem Steps Recorder
The 'Problem Steps Recorder' lets you record a particular problem you are having with your PC so you can send it to someone who may be able to help. Click 'Record', and a screenshot is taken with every mouse click, allowing comments to be added in between if required. These screenshots (and comments, if any) are placed in a well-formatted HTML document that is placed inside a zipped folder on your desktop - ideal to be attached to an email.
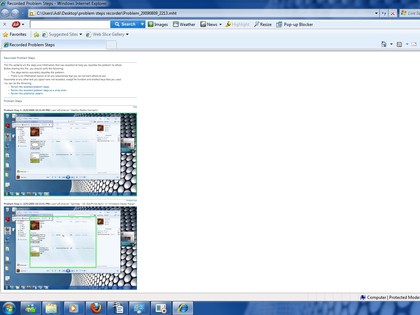
A PROBLEM HALVED: Simple, yet so effective. Send this to tech savvy friends or even manufacturers