Leaf Clay Dish (original) (raw)
All activities should be supervised by an adult. As an Amazon Associate, I earn from qualifying purchases. This post may contain affiliate links.
Fall is the perfect time to do crafts with leaves and nature. This leaf clay dish is one older kids can make. It would make a beautiful gift they can personalize for a birthday or Christmas.
RELATED: Pressed Flower Clay Dish

If you love crafts with nature, be sure to see our post on how to press flowers and how to make a pressed flower clay dish.
Supplies Needed to Make a Leaf Clay Dish
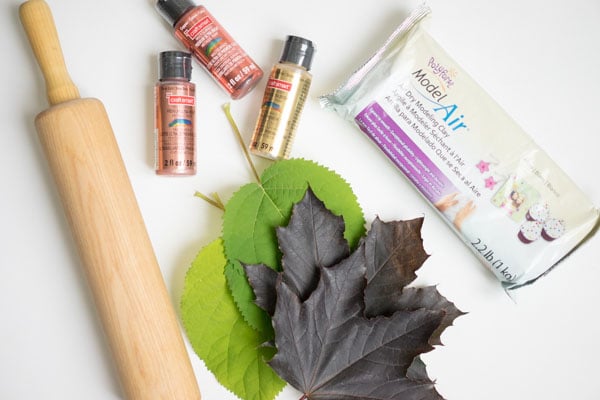
- Air Dry Clay
- Leaves – we used the leaves from a hydrangea plant. Use hydrangea leaves or preferably one similar as a maple leaf does not fold up as nicely to form a dish
- Note: If you would like to make a leaf bowl instead, a maple leaf would work perfectly for this
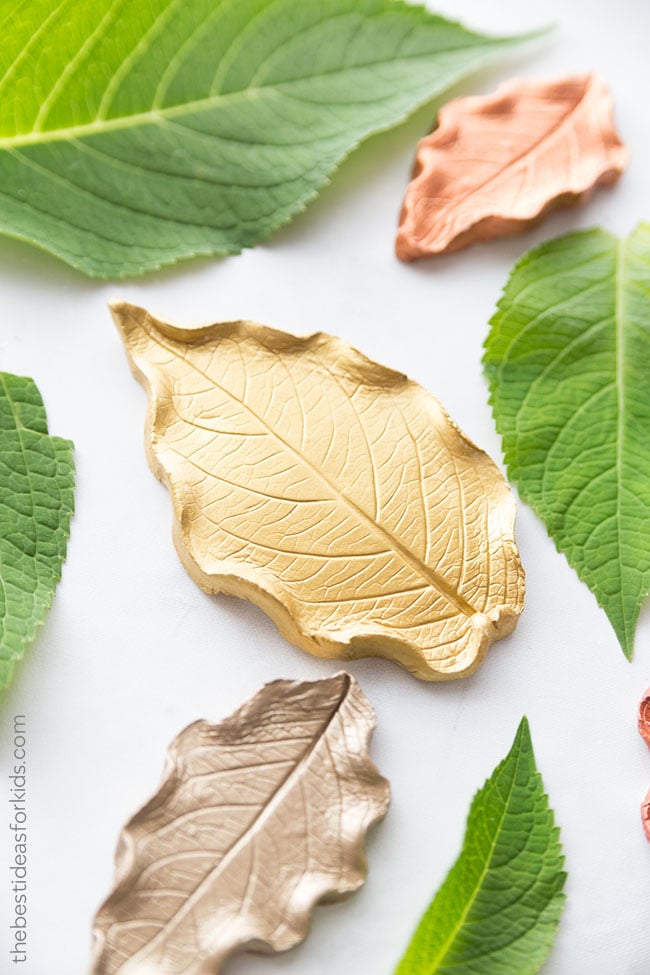
- Acrylic paint – we used rose gold, gold and bronze
- Sealer – mod podge gloss
- Knife
We made painted these leaf dishes a bit more formal than kids would probably want to make, but older kids may like these colors. You can use any color you’d like! These would also look great in a bright red, orange or yellow too for fall.
These clay dishes can be used as a ring dish or simply to hold items like keys and coins. You can even turn it into a leaf bowl by using different leaves!
Watch the Video Tutorial!
How to Make a DIY Clay Dish
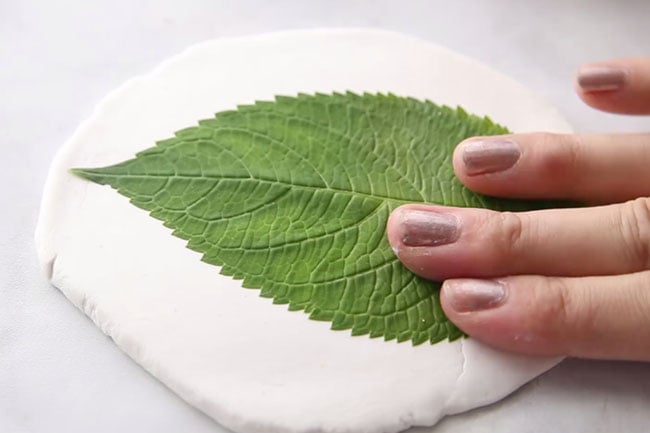
1. First gather your leaves. We used hydrangea leaves which is recommended for their shape. We did try a maple leaf and due to the shape of the leaf, it did not roll up well (feel free to try different leaf shapes as it is easy to roll out and start over if you do not like the way it looks).
Note – if you want to make a leaf bowl then using a maple leaf would be fine.
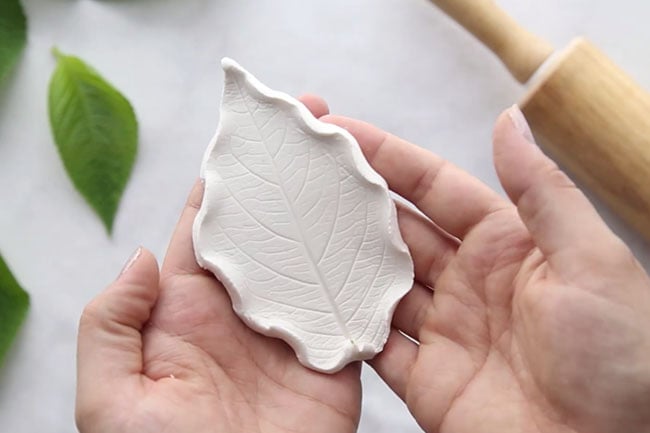
2. Cut out a piece of your air dry clay. Roll it out and then stamp your leaf onto it. Press firmly and make sure to press on all parts of the leaf to get a complete imprint.
3. Take off your leaf and cut around the outline of the leaf with a knife (have adults do this part).
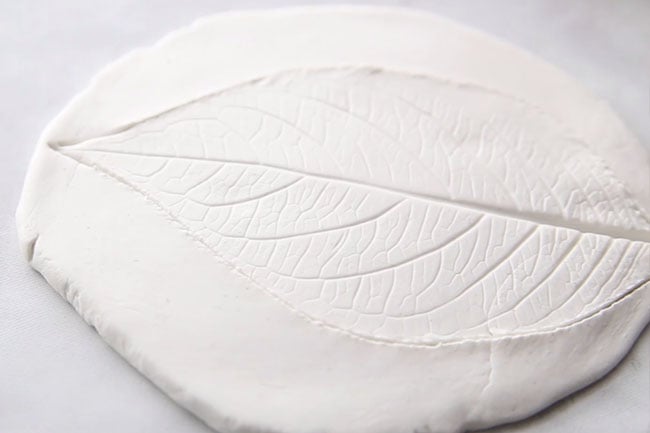
4. Now remove the excess air dry clay from around your imprint.

5. Gently start to roll up sections of your clay. There is no specific pattern required, just leave a bit of space in between the rolls. Leave the tip of the leaf intact. If any portions of the clay are not smooth, dip a sponge in a bit of water and use it to smooth out portions of the clay.
Note: If you’d like to make a leaf bowl instead, place your leaf inside a small bowl to shape the clay into a bowl shape.
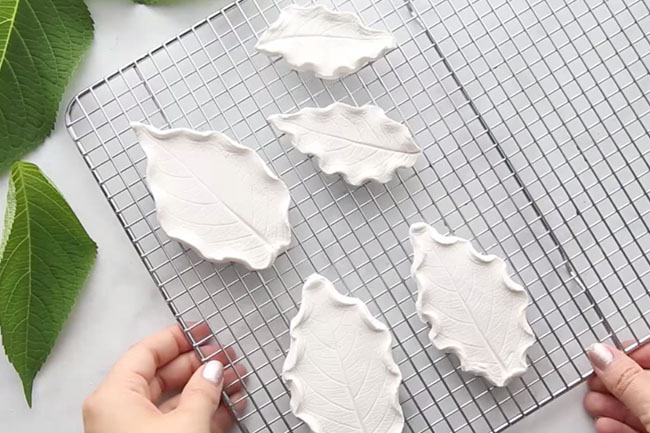
6. Allow the clay to air dry and harden. Preferably on a cookie drying rack so that the bottom gets exposed to air as well. After 24 hours, check if the top of the clay is hardened. If it is, flip it over to allow the bottom to air dry. If not, let it dry for another 24 hours and then flip it the next day if needed.
7. Once your clay dishes are dry and hardened, you can now paint them! We did 2 coats but if you really want to ensure coverage for gold, it may require 3 coats. Darker colors would be fine with 2 coats, while lighter colors like gold and yellow may need 3.
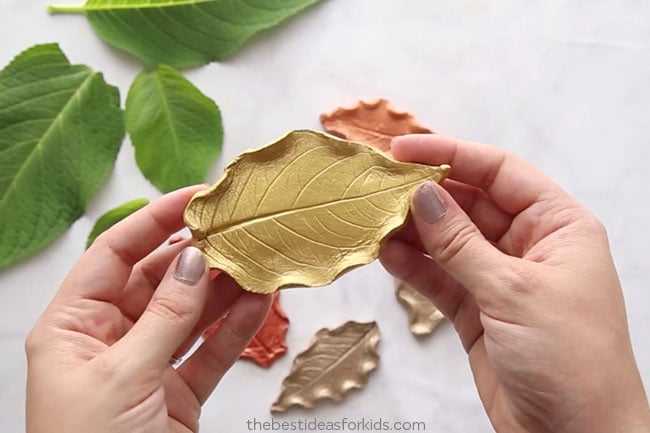
8. Seal them with mod podge gloss or a more heavy duty sealer if desired.
Note: If you would like to use these leaf clay dishes as soap dishes, you will need to use a heavy duty waterproof sealer.

Now you can enjoy these beautiful keepsakes for years to come!
More Fall Crafts for Kids
Get a free leaf template to create these beautiful leaf silhouettes – this is an easy craft for kids of all ages!
For more fun fall crafts, check out our fall potato stamping quick and easy tutorial for making potato stamps!
