Create a distraction free JPA and Hibernate dev environment (original) (raw)
To quickly learn and understand Java Persistence API development, the best option is to eschew all the peripheral technologies and put together a minimalistic JPA and Hibernate development environment that allows the developer to concentrate on the core technology without distraction.
A minimal JPA and Hibernate development environment requires the following three things:
- A JDK installation
- A Hibernate distribution
- A simple text editor
That is all we will use in this tutorial. However, if developers want to perform extensive software development with Java and JPA, they should use a powerful IDE such as Eclipse or IntelliJ.
JPA and Hibernate JDK requirement
The latest version of both JPA and Hibernate requires Java 8 as a bare minimum, although the Java 11 LTS release is recommended. As long as the local JDK installation doesn't predate Java 8, the Hibernate and JPA code will compile just fine. In this example, I have JDK 14 installed in a root directory folder named C:\_jdk-14.
Along with the JDK installation, configure the JAVA_HOME variable and add the JDK's \bin to the system's PATH.
Obtain the Hibernate and JPA distribution
JPA is a specification while Hibernate is an implementation of that spec. So to do JPA development, a distribution of an implementation is required. Hibernate is one of many JPA implementations, with others including EclipseLink and DataNucleus. For this article, the focus is Hibernate.
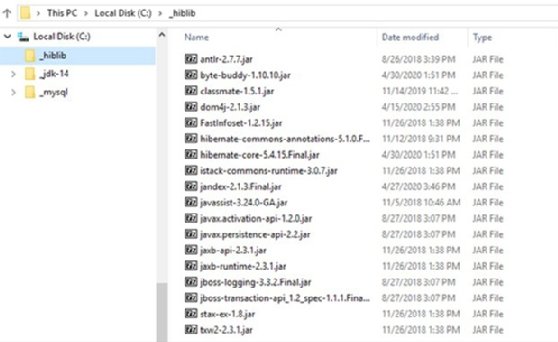
For JPA 2.2 support, download Hibernate 5.4 as a zip file. The extracted Hibernate 5.4 zip file contains a folder named required which contains all the JAR files JPA requires at both runtime and compile time. Move these JAR files to a folder where they are easily referenced by the JDK. I copied all these files to a folder named C:\_hiblib. If you have JDBC drivers on hand, add them to this folder as well.

The required Hibernate and JPA JAR files must be easily accessed at runtime.
We will only compile JPA code in this example to validate the local Hibernate and Java configuration.
Create a JPA annotated entity
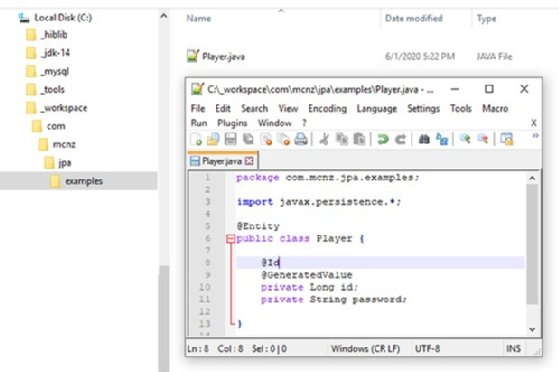
A big part of JPA and Hibernate development is for the developer to create JavaBeans and subsequently annotate various class declarations, properties and methods. In this example we will create a simple source file named Player.java in a package named com.mcnz.jpa.examples. I use a folder named C:\_workspace to save all my Java source code, which means the Player.java file must be placed in the appropriate subfolder, as show in the accompanying image.

The Player class combines Java code with Hibernate-backed JPA annotations.
The Player.java source code will be relatively succinct. It will have two properties named id and password. It will have a JPA @Entity annotation before the class declaration, and an @Id and @GeneratedValue annotation on the id field.
package com.mcnz.jpa.examples; import javax.persistence.*;
@Entity public class Player { @Id @GeneratedValue private Long id;
private String password;}
This class combines both Java code and JPA annotations. These JPA annotations are provided through the Hibernate distribution. If this code can be compiled successfully with the JDK's javac utility, then you have configured the JPA and Hibernate development environment correctly.
The command to compile the Java code -- which must be typed out on a single line in a command window -- is as follows:
C:> javac -classpath "C:_hiblib*" C:_workspace\com\mcnz\jpa\examples\Player.java

When Hibernate and JPA source code compiles, a new .class file will appear.
If this command executes without error and a file named Player.class is created alongside the Player.java source file, a class that combines both Java code and JPA annotations was successfully compiled.
The JPA and Hibernate development environment is now configured properly and a developer can move onto the next step, which involves writing code that connects to and interacts with the underlying database.