Getting Started (original) (raw)
Toggle table of contents sidebar
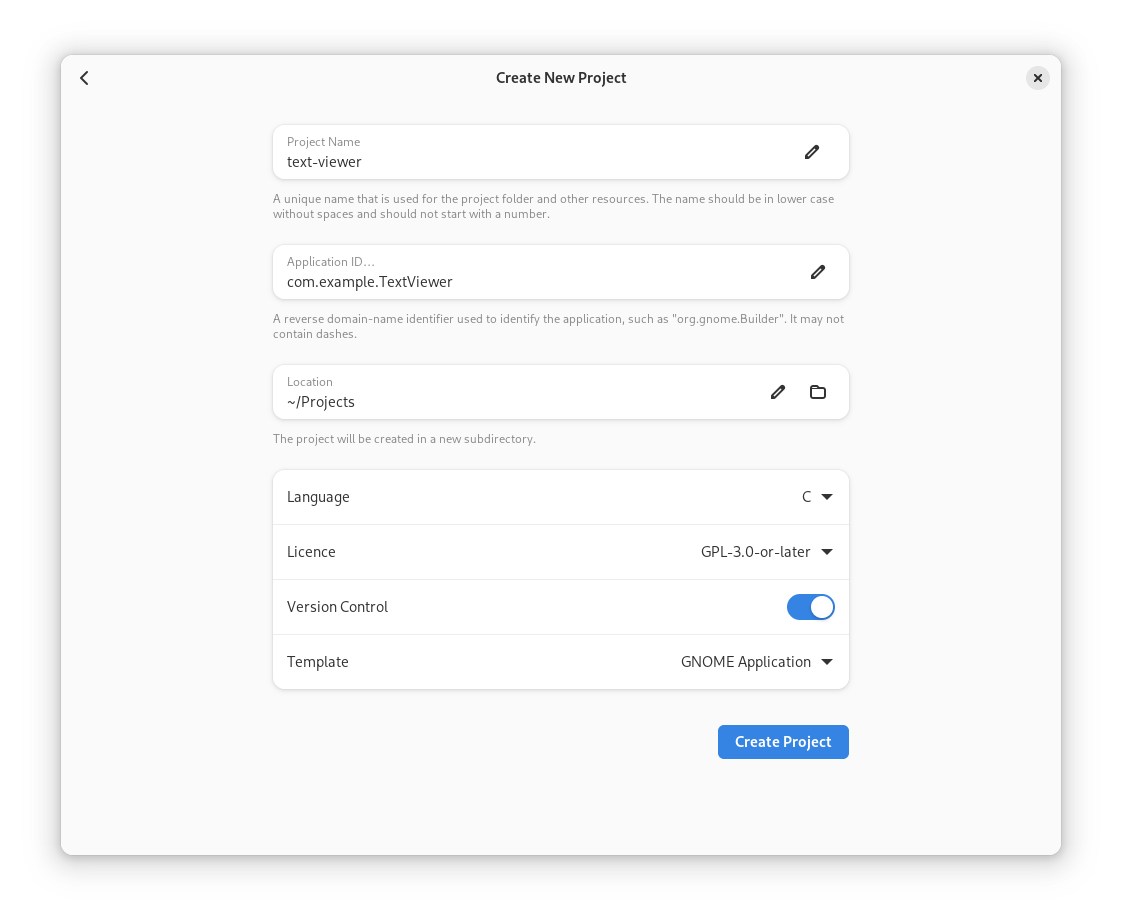
In order to start writing an application for the GNOME desktop environment, you should follow these steps:
- download and install the latest version of GNOME Builder
- in the Welcome screen, select Create new project…
- configure the project options
- write “text-viewer” as the project’s name
- write “com.example.TextViewer” as the project’s application id.
- select GPL-3.0-or-later as the licensing terms for your project
- select the GNOME Application template

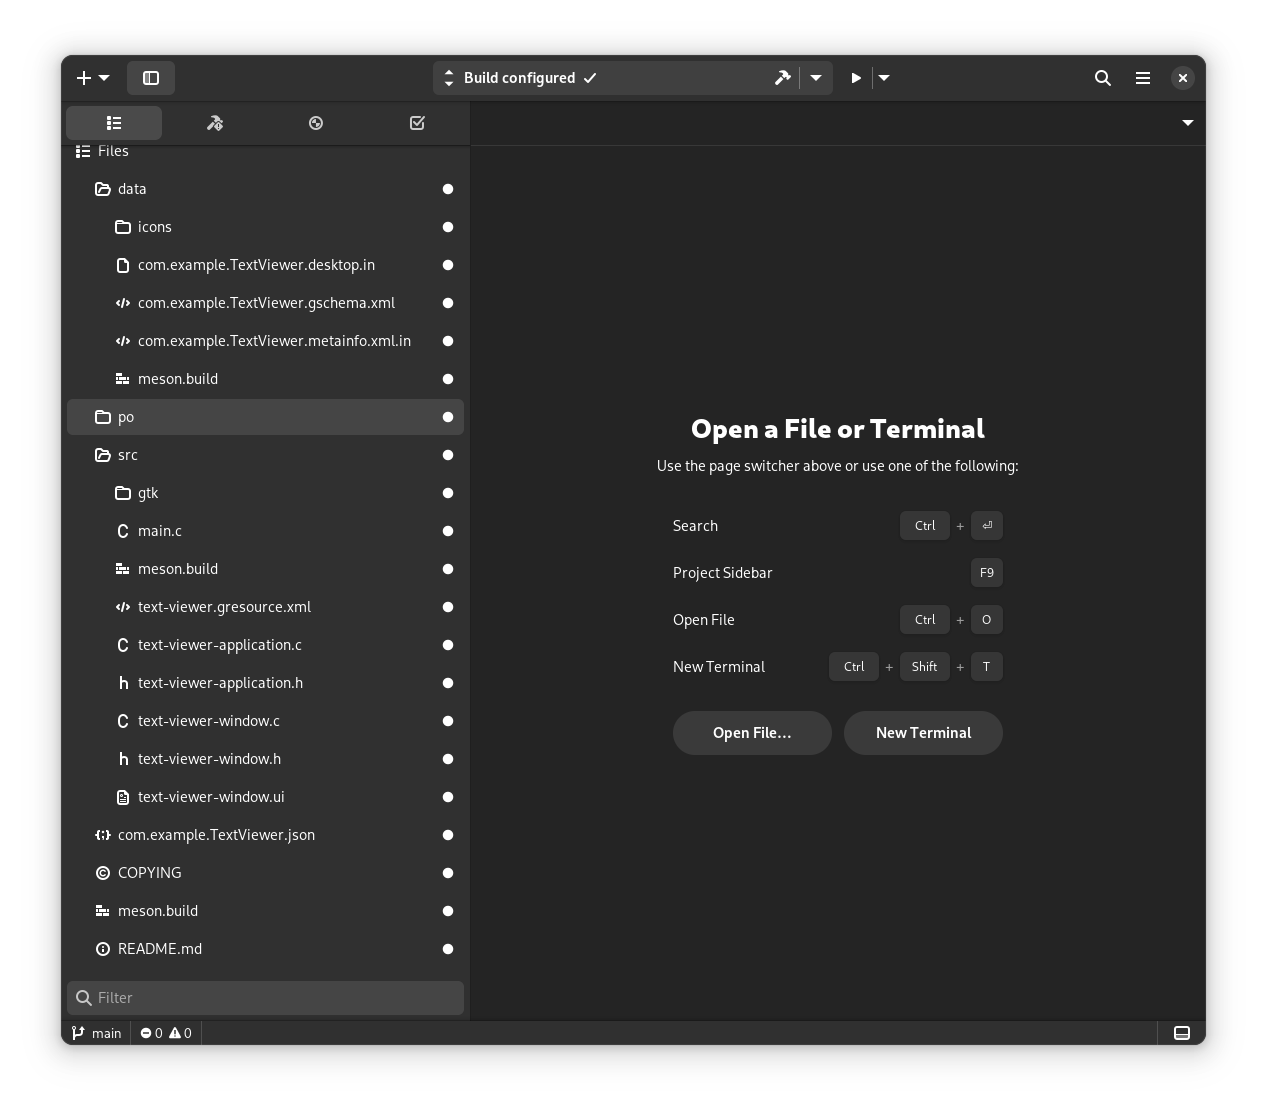
Once Builder finishes creating your application’s project, you will find the following files:
com.example.TextViewer.json
This is the Flatpak manifest for your application. You can use the manifest to define your project’s dependencies. The default manifest depends on the latest stable version of the GNOME platform. You can also include additional dependencies not provided by the GNOME runtime.
meson.build
This is the main Meson build file, which defines how and what to build in your application.
src
This is the directory with the sources of your application, as well as the UI definition files for its widgets.
src/text-viewer.gresource.xml
The GResourcemanifest for assets that will be built into the project usingglib-compile-resources.
po/POTFILES
The list of files containing translatable, user-visible strings.
data/com.example.TextViewer.gschema.xml
The schema file for the settingsof the application.
data/com.example.TextViewer.desktop.in
The desktop entry file for the application.
data/com.example.TextViewer.appdata.xml.in
The application metadataused by app stores and application distributors.
If you want to, you can now build and run the application by pressing the_Run Project_ button, or Shift + Ctrl + Space.
Note
The code in this tutorial is available on GitLab.