Guided Hardware Setup for Microchip Boards - MATLAB & Simulink (original) (raw)
You can use the Hardware Setup add-on to configure your target Microchip hardware board for the hardware-software co-design workflow. To set up the board, you load the MathWorks® firmware image onto an SD card, then use the Hardware Setup Add-On to configure the board, establish an Ethernet connection to the hardware, and set the hardware connections. For more information, see Hardware-Software Co-Design Workflow for SoC Platforms.
Prerequisites
Before using the Hardware Setup add-on, install the HDL Coder™ Support Package for Microchip FPGA and SoC Devices. See Download and Install HDL Coder Support Package for Microchip FPGA and SoC Devices.
Additionally, you must have this software:
- For Windows machines, install Win32DiskImager.
- For Linux machines, install bmaptool.
Open the Hardware Setup tool
You can launch the Hardware Setup add-on by using the Add-Ons panel, thehdlHardwareSetup function, or the HDL Coder app.
Using Add-Ons Panel
You can start the Hardware Setup add-on by opening the Add-Ons panel. Select > .
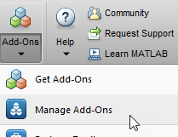
To launch the Hardware Setup add-on, point to the HDL Coder Support Package for Microchip FPGA and SoC Devices and click the Settings button  .
.
Using hdlHardwareSetup Function
You can also start the Hardware Setup add-on by using hdlHardwareSetup function. Enter this command in MATLAB® command window:
Using HDL Coder App
Alternatively, you can start the Hardware Setup add-on by using the HDL Coder app in Simulink®. To open the Hardware Setup from the Simulink Toolstrip,
- In Simulink, click the Apps tab and selectHDL Coder.
- In the HDL Code tab, in theOutput section, set the drop-down button toIP Core.
- Click the Settings button to open the HDL Code Generation > Target tab of Configuration Parameters dialog box. Set Target Platform to your target microchip board. Click OK.
- In the HDL Code tab, click Build Bitstream>Hardware Setup.

Configure Board Using the Hardware Setup Add-On
To configure your SD card and hardware board, follow the instructions in each step of the Hardware Setup tool.
- Review the Host Machine Checklist
- Select Hardware Board
- Download Required Third-Party Tools
- Download Linux Image
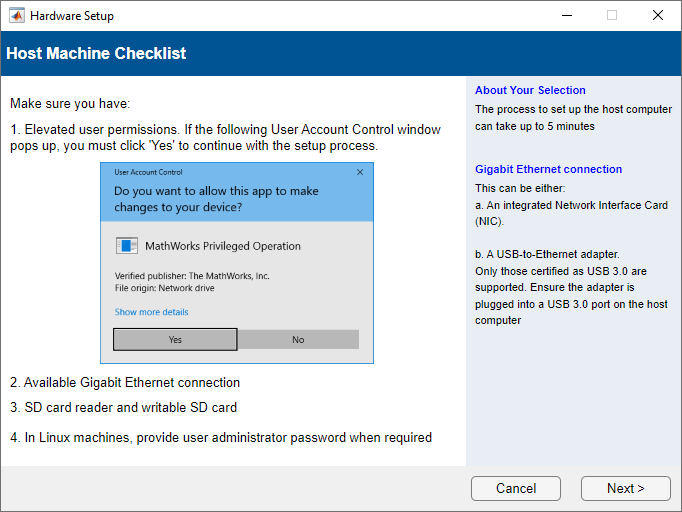
Review the Host Machine Checklist
Because the software runs operating system commands to configure the network card, you may require administrator privileges to use the Hardware Setup add-on. When the User Account Control window opens, enter your user permissions. In Windows®, you can also start MATLAB using Run as administrator. In Linux® machines, enter the user administrator password.
This step also checks the available Gigabit Ethernet connection, SD card reader, and writable SD card. Click Next to proceed.
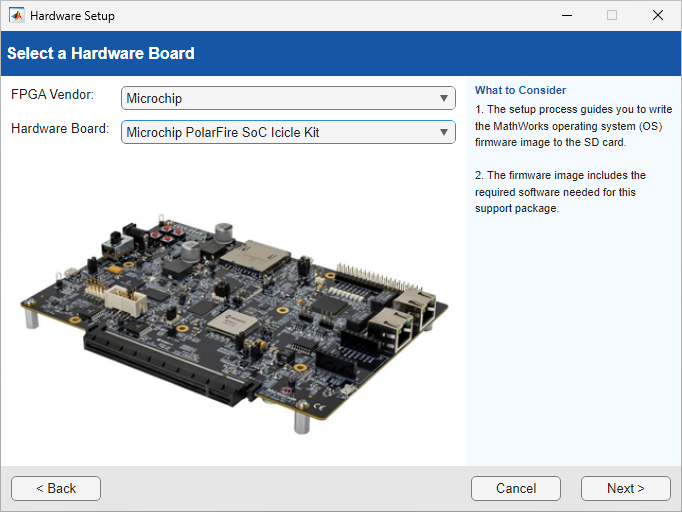
Select Hardware Board
Set FPGA Vendor to Microchip and set Hardware Board to your target hardware. The page displays your selected hardware. For more information on the supported hardware, see Supported EDA Tools and Hardware. Click Next.
Download Required Third-Party Tools
You can automatically or manually download third-party tools for your board.
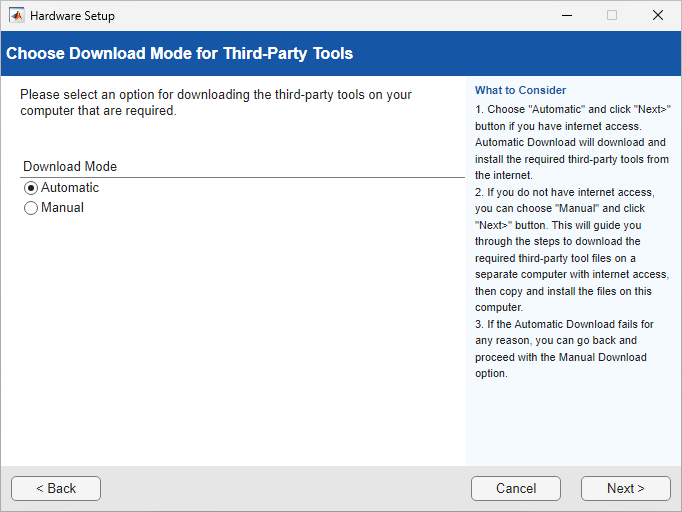
If you select Automatic, the wizard downloads the necessary third-party tools from the internet to your host computer, which must have internet connectivity.
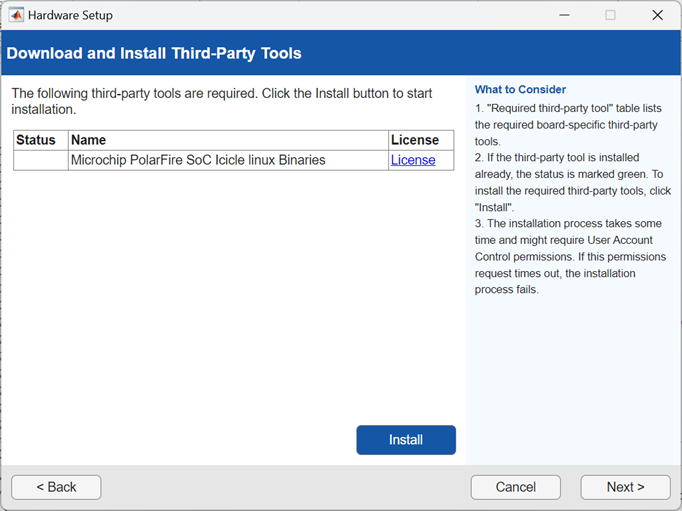
After the download completes, the third-party tools are available in the folder_supportpackageinstallationfolder_/downloads/, where supportpackageinstallationfolder is the folder where the HDL Coder Support Package for Microchip FPGA and SoC Devices is installed. To get to the root folder of the support packages, use the matlabshared.supportpkg.getSupportPackageRoot function. Extract the microchip_linuxbinaries folder.
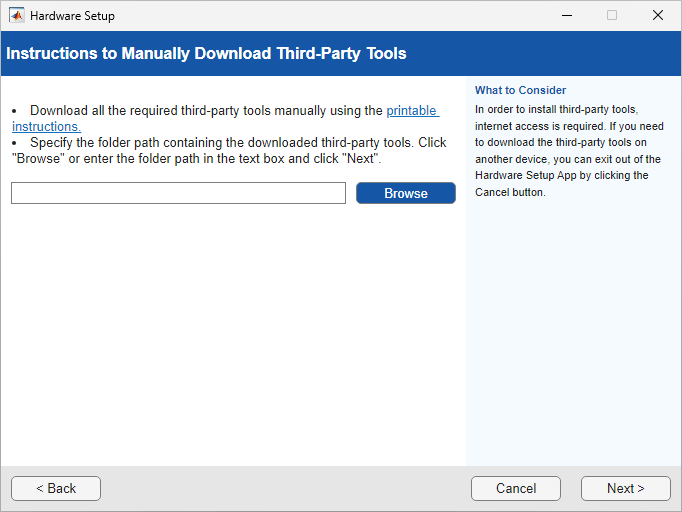
For host computers that do not have internet access, selectManual to manually download the third-party tools. The wizard provides step-by-step instructions for downloading the required third-party tools. Use another computer with internet access to download these tools and then transfer them to your host computer. After transferring the required third-party tools to the host computer, specify the folder path that contains the third-party tools and click Next.
Download Linux Image
This step provides instructions to download the Linux image to SD card. To download Linux image to SD card, use Win32DiskImager or bmaptool.

After copying the Linux image to the SD card, clickFinish.
See Also
Topics
- Download and Install HDL Coder Support Package for Microchip FPGA and SoC Devices
- Supported EDA Tools and Hardware