Test code using JUnit in JVM – tutorial | Kotlin (original) (raw)
This tutorial shows you how to write a simple unit test in a Kotlin/JVM project and run it with the Gradle build tool.
In this project, you'll use the kotlin.test library and run the test using JUnit. If you're working on a multiplatform app, see the Kotlin Multiplatform tutorial.
To get started, first download and install the latest version of IntelliJ IDEA.
Add dependencies
- Open a Kotlin project in IntelliJ IDEA. If you don't have a project, create one.
- Open the
build.gradle(.kts)file and check that thetestImplementationdependency is present. This dependency allows you to work withkotlin.testandJUnit:
dependencies { // Other dependencies. testImplementation(kotlin("test")) }
dependencies { // Other dependencies. testImplementation 'org.jetbrains.kotlin:kotlin-test' } - Add the
testtask to thebuild.gradle(.kts)file:
tasks.test { useJUnitPlatform() }
test { useJUnitPlatform() }
Here's a complete code for the build.gradle.kts:
plugins { kotlin("jvm") version "2.2.0" } group = "org.example" version = "1.0-SNAPSHOT" repositories { mavenCentral() } dependencies { testImplementation(kotlin("test")) } tasks.test { useJUnitPlatform() }
Add the code to test it
- Open the
Main.ktfile insrc/main/kotlin.
Thesrcdirectory contains Kotlin source files and resources. TheMain.ktfile contains sample code that printsHello, World!. - Create the
Sampleclass with thesum()function that adds two integers together:
class Sample() { fun sum(a: Int, b: Int): Int { return a + b } }
Create a test
- In IntelliJ IDEA, select Code | Generate | Test... for the
Sampleclass: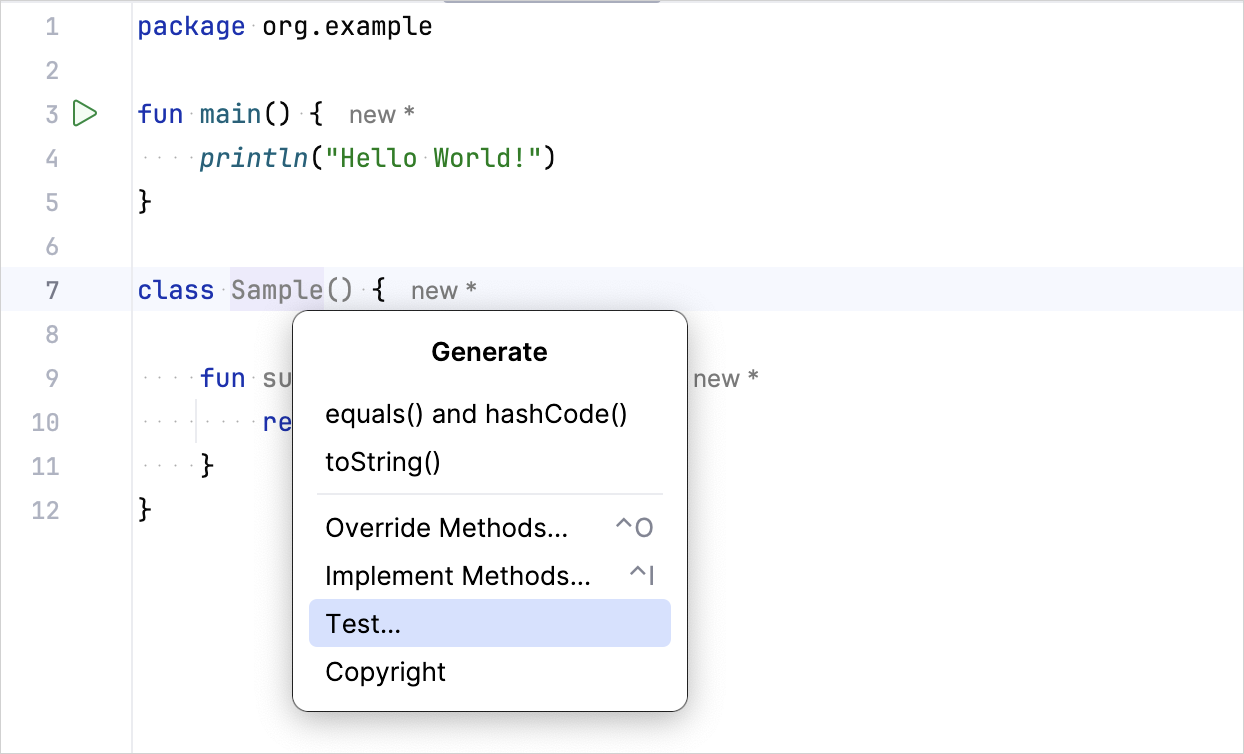
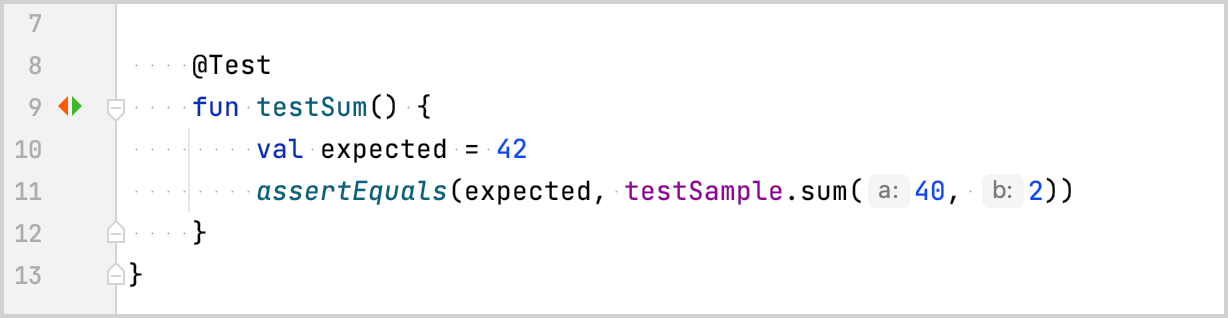
- Specify the name of the test class. For example,
SampleTest: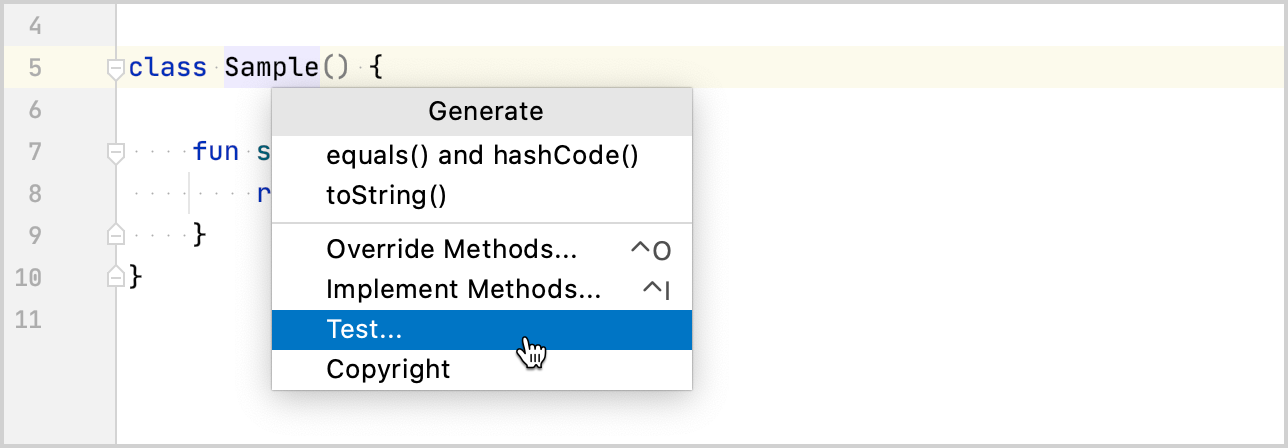
IntelliJ IDEA creates theSampleTest.ktfile in thetestdirectory. This directory contains Kotlin test source files and resources. - Add the test code for the
sum()function inSampleTest.kt:- Define the test
testSum()function using the @Test annotation. - Check that the
sum()function returns the expected value by using the assertEquals() function.
import org.example.Sample import org.junit.jupiter.api.Assertions.* import kotlin.test.Test class SampleTest { private val testSample: Sample = Sample() @Test fun testSum() { val expected = 42 assertEquals(expected, testSample.sum(40, 2)) } }
- Define the test
Run a test
- Run the test using the gutter icon:
- Check the result in the Run tool window:
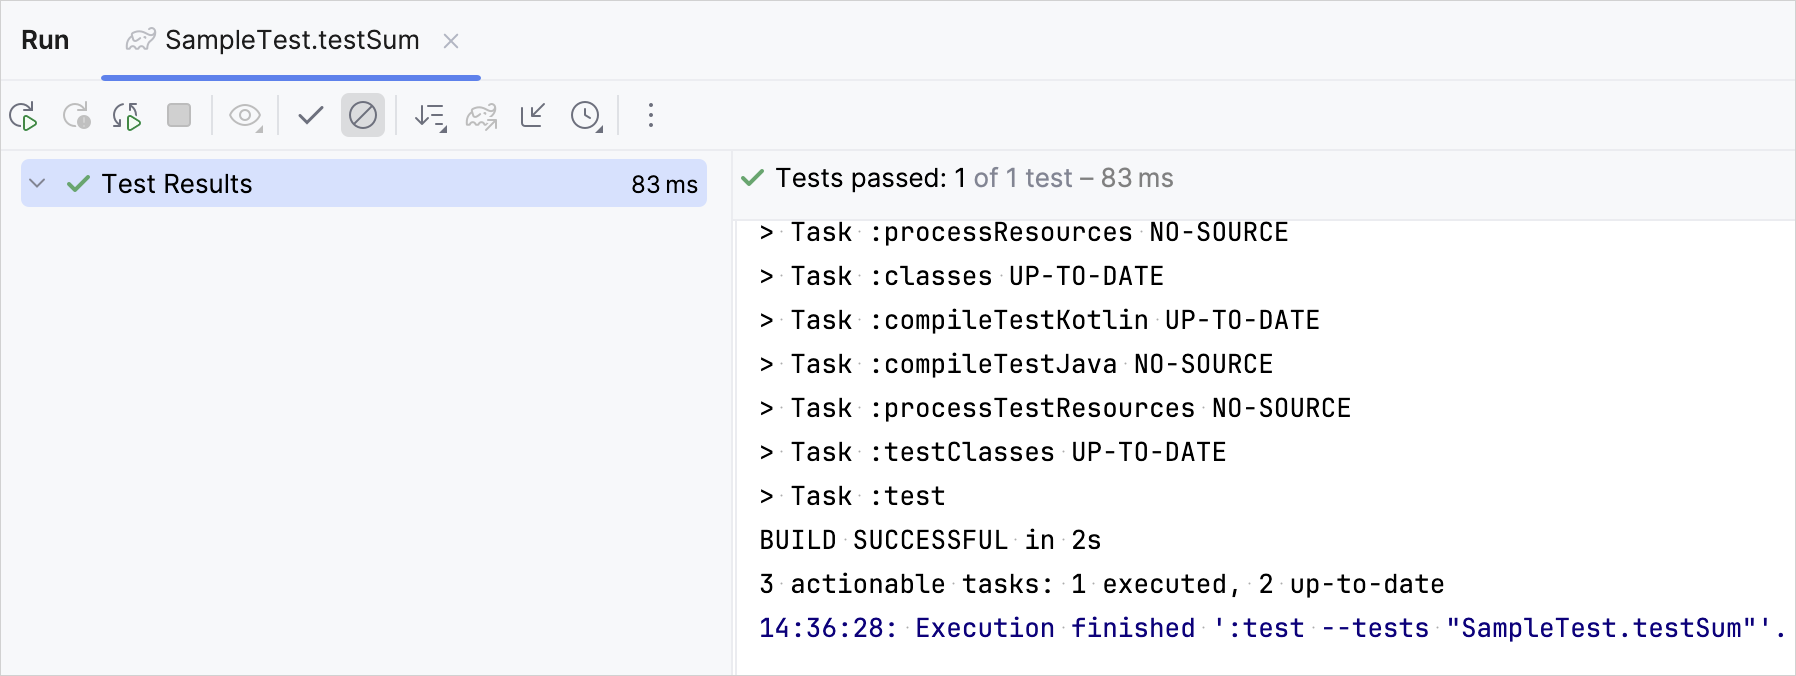
The test function was executed successfully. - Make sure that the test works correctly by changing the
expectedvariable value to 43:
@Test fun testSum() { val expected = 43 assertEquals(expected, classForTesting.sum(40, 2)) } - Run the test again and check the result:
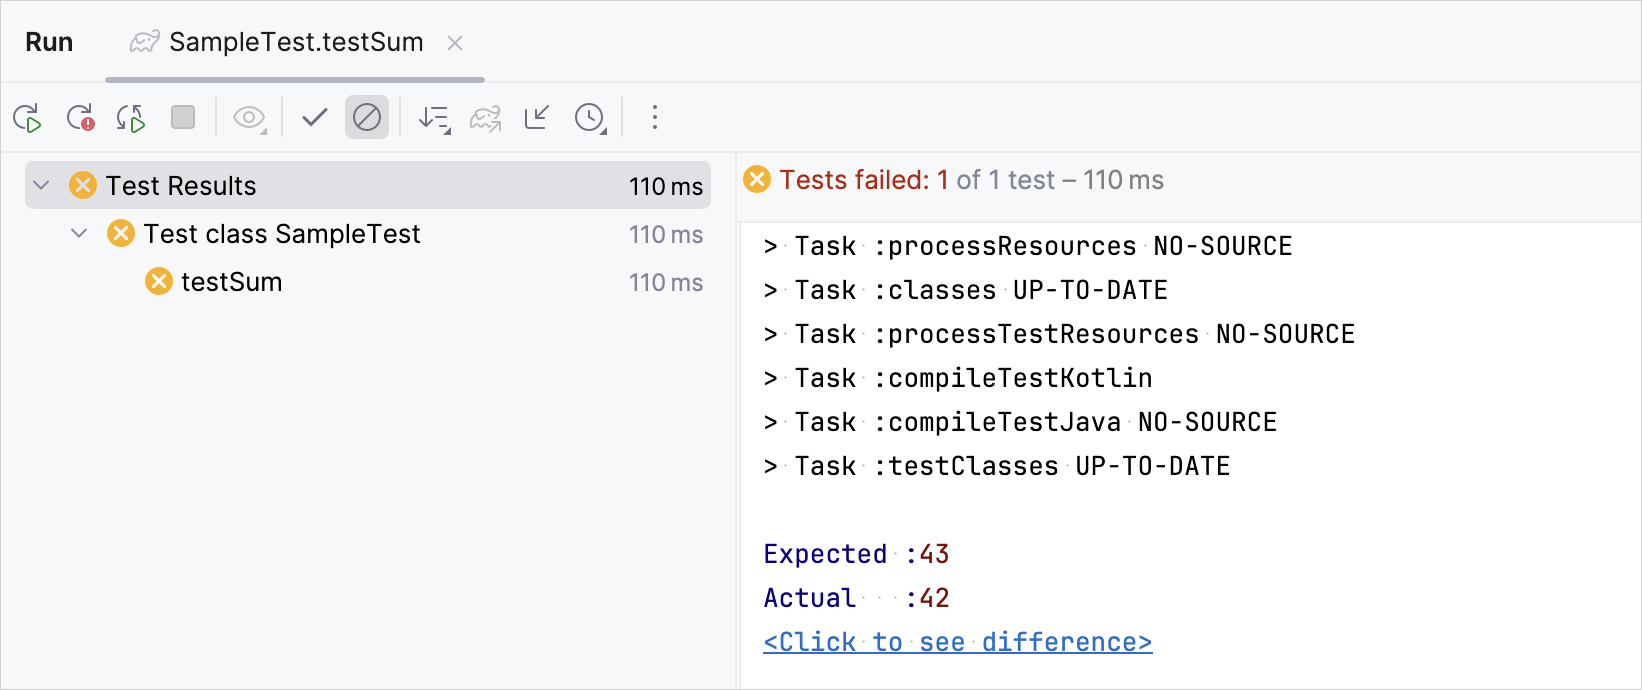
The test execution failed.
What's next
Once you've finished your first test, you can:
- Write more tests using other kotlin.test functions. For example, use the assertNotEquals() function.
- Improve your test output with the Kotlin Power-assert compiler plugin. The plugin enriches the test output with contextual information.
- Create your first server-side application with Kotlin and Spring Boot.
Last modified: 24 April 2025