Menus and toolbars | IntelliJ IDEA (original) (raw)
As you work with the IDE, you perform some actions more often than the others. To maximize your productivity, learn the default shortcuts for your favorite actions or assign shortcuts for them. You can also customize the menus and toolbars to only contain the actions that you need, regroup them, and configure their icons.
For example, if you work with a Java project, you might want to remove other framework files that you do not use from the menu to keep that part of the menu shorter and leave only the needed options.
Customize menus and toolbars
Press Ctrl+Alt+S to open settings and then select .
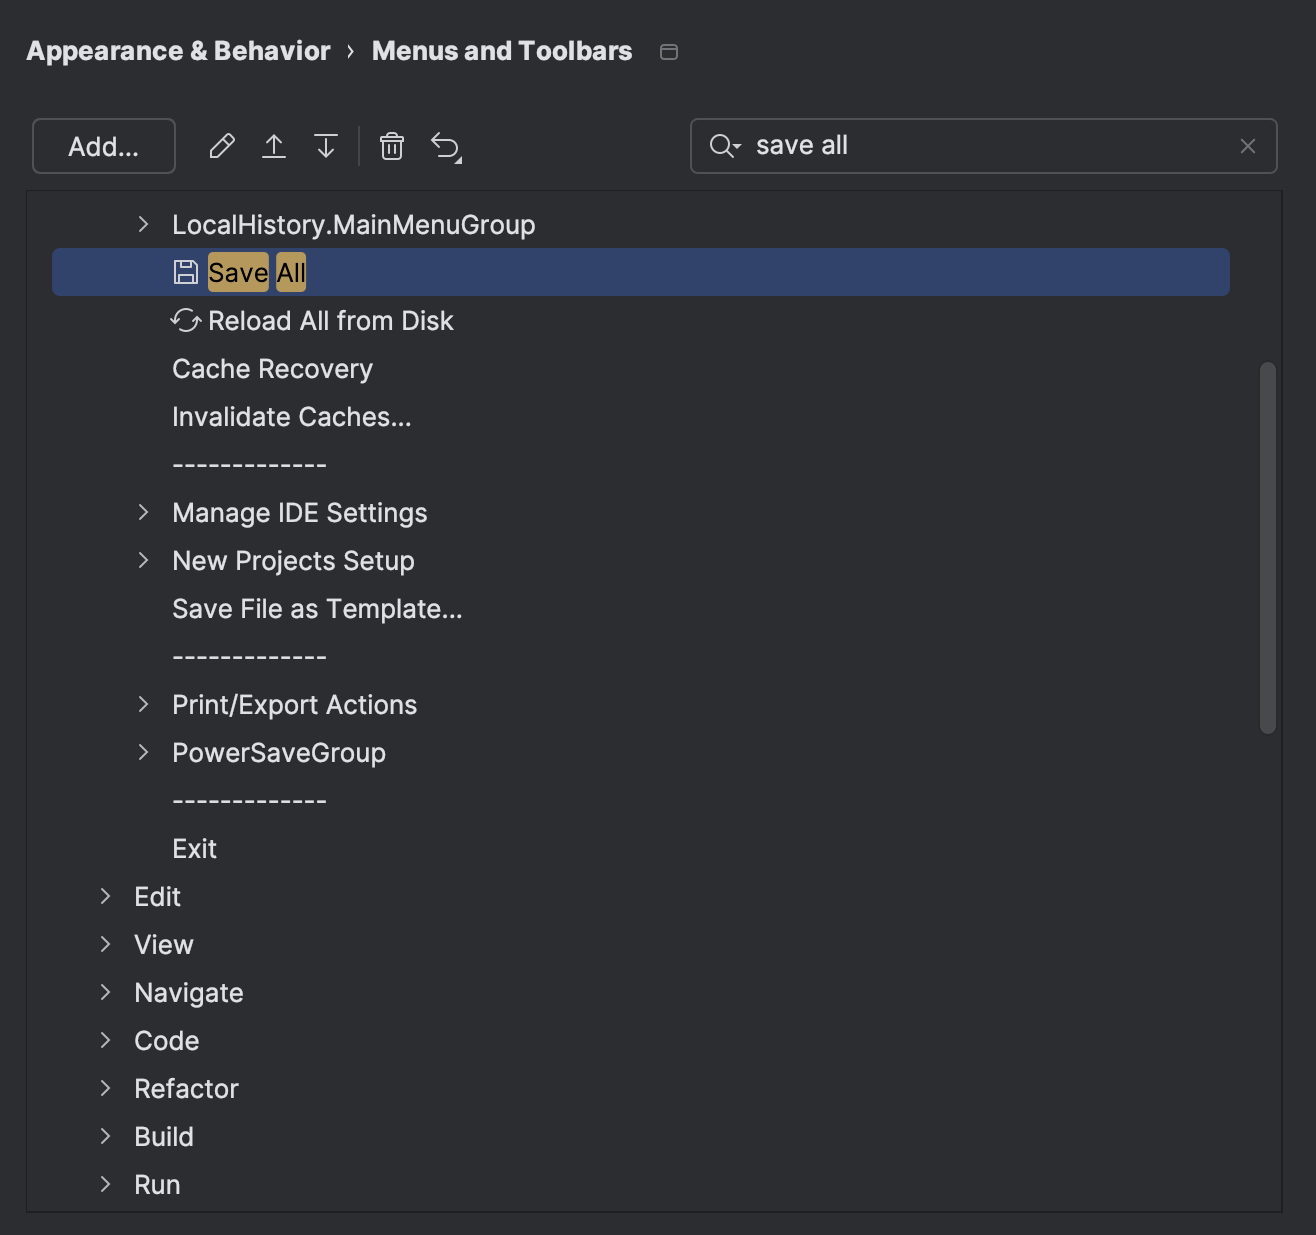
In the list of available menus and toolbars, expand the node you want to customize and select the desired item:
- Click Add to add an action or a separator under the selected item.
- Click
 to add or change the icon for the selected action.
 - Click
 or
or  to move the selected item up or down. By doing so, you can change the action's location in the menu.
 - Click
 to remove the selected item.
 - Click
 to restore the selected action or all actions to default settings.
Click OK to save your changes.
Press Ctrl+Alt+S to open settings and then select .
Select the menu option for which you want to change or add an icon and click
.Select an icon from the list or click
 to upload your own icon.
You can use only PNG or SVG files as icons. The IntelliJ IDEA Community Edition repository contains most of the icons used in the IDE.
Customize the main toolbar
Quickly add actions to the toolbar
If you miss an action on the main toolbar, you can add it from the list of popular actions.
- Right-click the toolbar, point to Add Action to Main Toolbar, and select the action that you want to add from the list.
If the action that you want to add is not on the list of popular actions, use the Customize Main Toolbar dialog.
The selected action appears on the toolbar. You can remove it or change its icon using the Customize Main Toolbar dialog.
Configure main toolbar actions
Use this option to access all available actions that can be added to the main toolbar. It also allows you to change icons for toolbar actions and remove actions from the toolbar.
- Right-click the toolbar and click Customize Toolbar.
- In the list of available toolbar sections, expand the node you want to customize and select the desired item:
- Click Add to add an action or a separator under the selected item.
- Click to remove the selected item.
- Click to add or change the icon for the selected action.
- Click or to move the selected item up or down. By doing so, you can change the action's location in the menu.
- Click to restore the selected action or all actions to default settings.
- Click OK to save your changes.
Configure the toolbar color
Use colored headers to simplify navigation between several open projects. You can assign a unique color and icon to each of your projects, making it easier to distinguish them in your workspace.
By default, the IDE picks the color that matches the color of the project icon, but you can set your own color.
- Right-click the toolbar, select Change Project Color, and choose one of the pre-defined colors from the list.
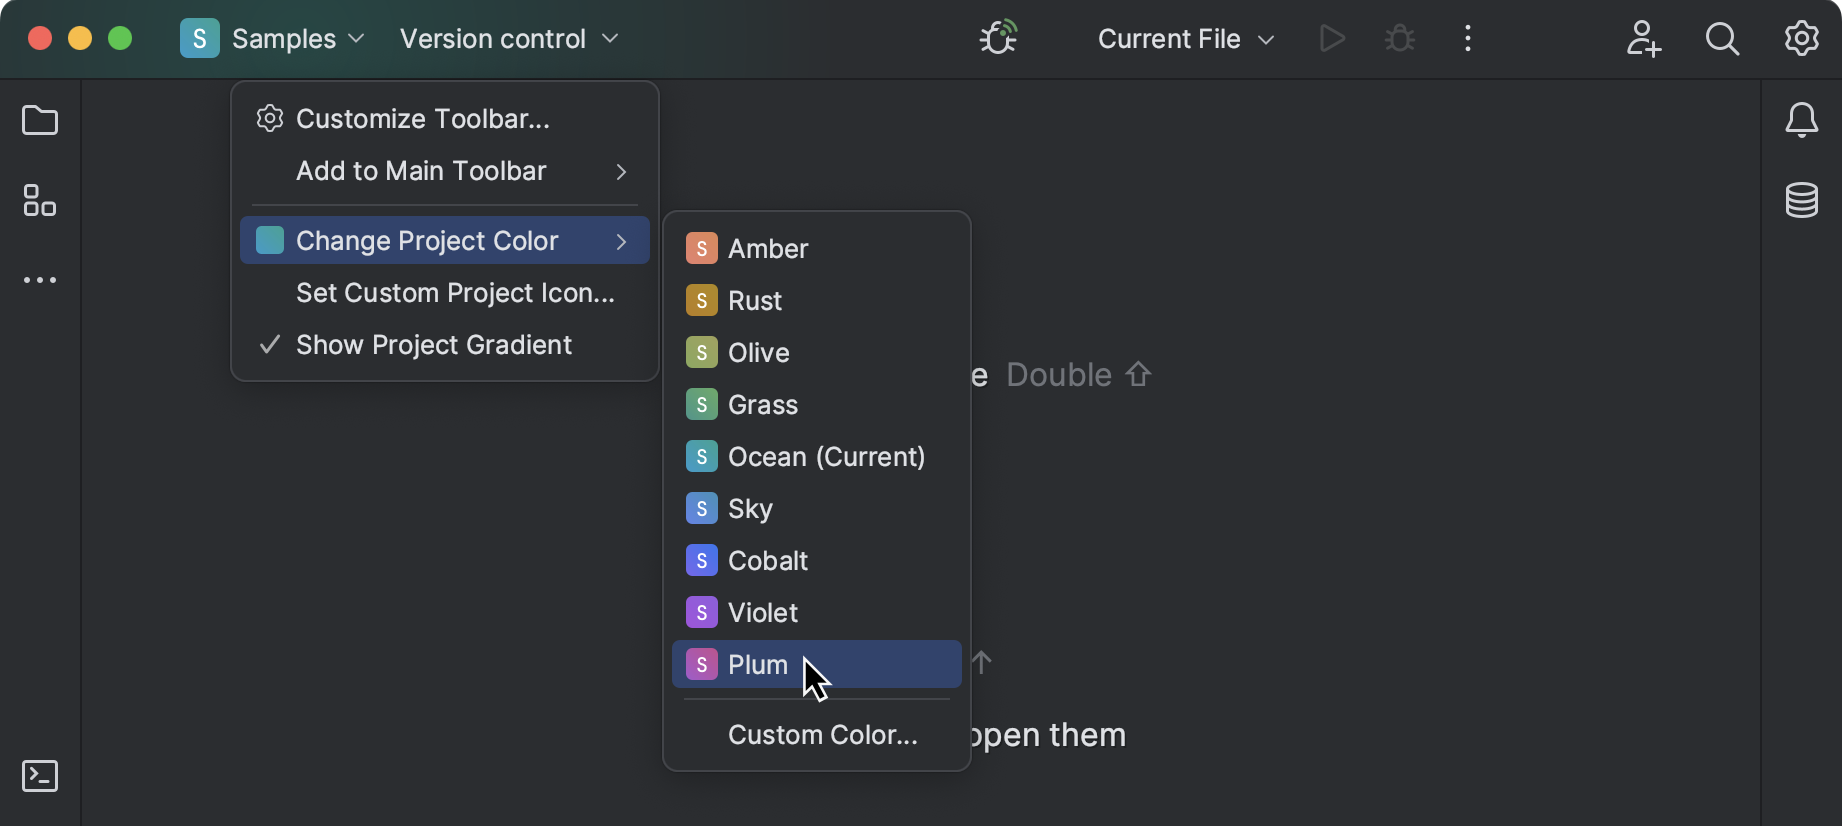
- If you want to use a different color, click Custom Color and select a shade using the color picker that opens.
To turn the feature off, right-click the toolbar and disable the Show Project Gradient option. You can also disable colors in settings: press Ctrl+Alt+S, select and disable Use project colors in main toolbar.
Change the project icon
- Right-click the toolbar and click Set Custom Project Icon.
- In the dialog that opens, click Choose SVG file and specify the path to the SVG file that you want to use as an icon.
- Click OK to save your changes.
Hide the toolbar
If you prefer to have less visual clutter in your IDE window, you can hide the toolbar.
- In the main menu, go to and disable Toolbar.
When the toolbar is hidden, the IDE window header has a plain look without any IntelliJ IDEA widgets or controls.
Show the main menu as a toolbar (Windows and Linux)
The main menu is the standard menu bar of the application window with File, Edit, View, and other menus.
By default, the main menu is hidden under the hamburger icon  on Windows and Linux. You can configure the IDE to display the main menu as a separate toolbar.
- Press Ctrl+Alt+S to open settings and then select . Enable the Show main menu in a separate toolbar option.
- Alternatively, go to in the main menu and enable Show Main Menu in Separate Toolbar.
Show and hide UI elements
If you have a small monitor, you can hide some of the UI elements that you never use. These elements are described in User interface.
- In the main menu, go to and enable or disable the necessary elements.
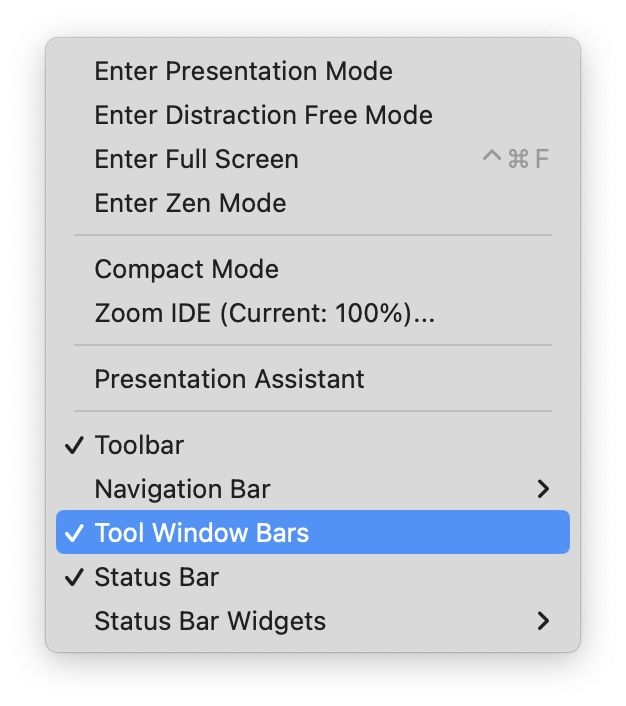
- Show Main Menu in Separate Toolbar (Windows and Linux only): Hidden under the hamburger icon, this is the standard menu bar of the application window with File, Edit, View, and other menus. Enable this option to display the main menu as a separate toolbar.
- Toolbar: Located in the window header, this is the main toolbar with widgets for switching between projects, working with VCS branches, and running configurations. The toolbar is configurable: you can add and remove widgets and buttons.
- Navigation Bar: Located in Status Bar, it allows you to navigate the directories and files of your project with Alt+Home as an alternative to the Project tool window. See Navigation bar.
Use the submenu to change the location of the bar or enable displaying fields and methods. - Tool Window Bars: Located on the edges of the window, these bars contain buttons for showing, hiding, and arranging the tool windows. See Tool window bars and buttons.
- Status Bar: Located at the bottom of the window, it shows event messages, indicates the overall project and IDE status, and provides quick access to some settings via widgets. See Status bar.
- Status Bar Widgets: Located in the right part of the status bar. You can also right-click the status bar to show and hide widgets.
Quick lists with your favorite actions
A quick list is a popup that contains a custom set of IntelliJ IDEA actions. Think of it as a custom menu or toolbar, for which you can assign a shortcut for quick access. You can create as many quick lists as necessary. Each action in a quick list is identified by a number from 0 through 9.
There are a number of predefined quick lists, but note that they are not configurable:
- Refactor this Ctrl+Alt+Shift+T
- VCS Operations Alt+`
For example, you can create a list of actions that do not have shortcuts assigned to them and refer to that list by one shortcut followed by the number associated with a specific action. You can also create a quick list of your favorite Gradle tasks or a list of different run configurations that you can invoke with one shortcut.
Create a quick list
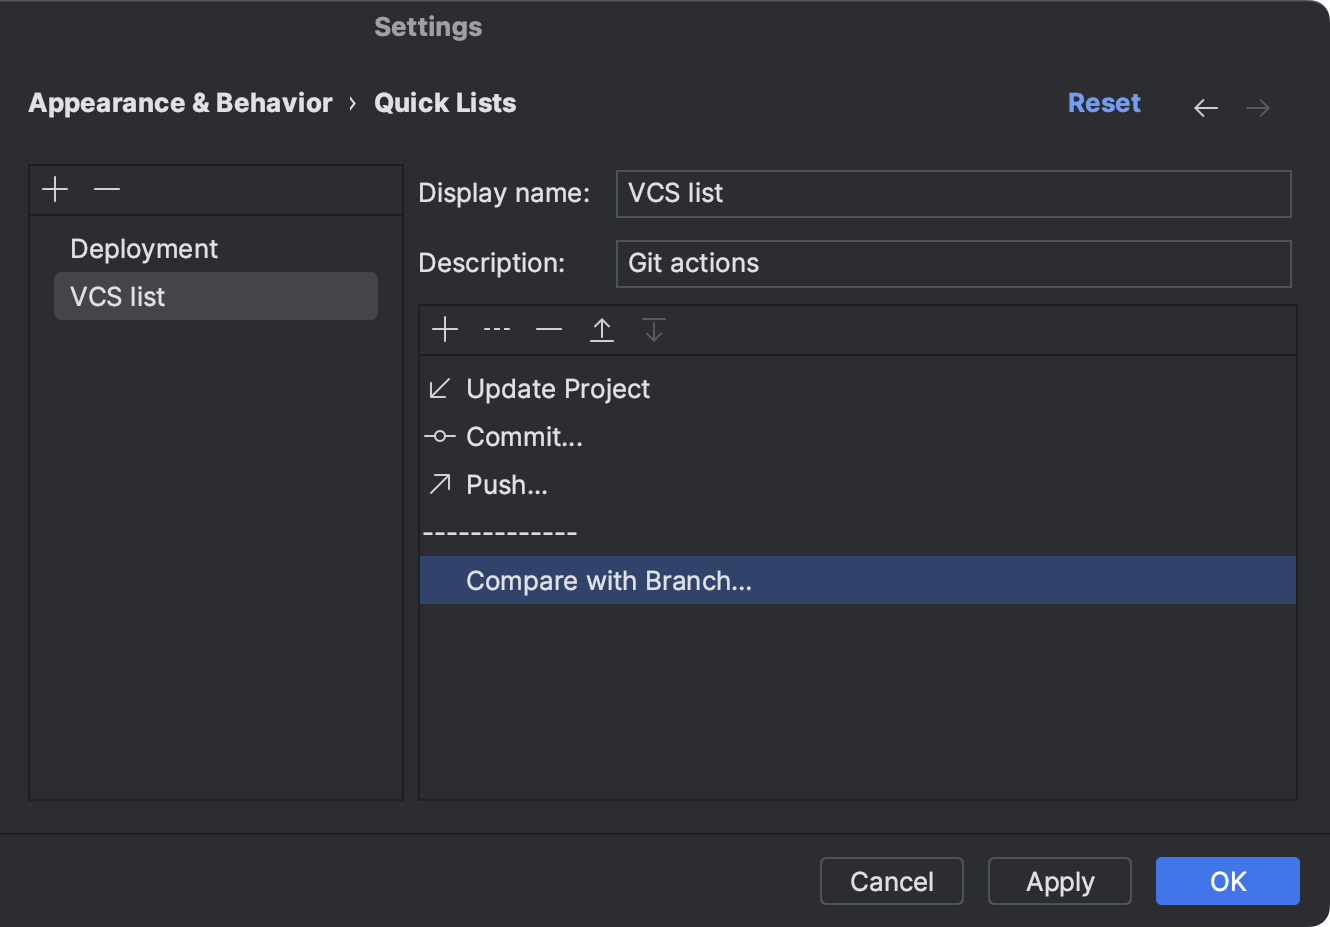
- Press Ctrl+Alt+S to open settings and then select .
- Click
 or press Alt+Insert on the left pane to create a new quick list.
 - In the Display name field, specify the name of the quick list. Optionally, provide the quick list description.
- On the right pane, add and arrange the actions on the quick list:
- Click to add an action or a separator under the selected item.
- Click
 to remove the selected item.
 - Click
 to add a separator line.
 - Click or to move the selected item up or down. By doing so, you can change the action's location in the menu.
- Click
- Click OK to save the changes.
Assign a shortcut to a quick list
- Press Ctrl+Alt+S to open settings and then select .
- Expand the Quick Lists node and select your quick list. Add a keyboard shortcut and save the changes.
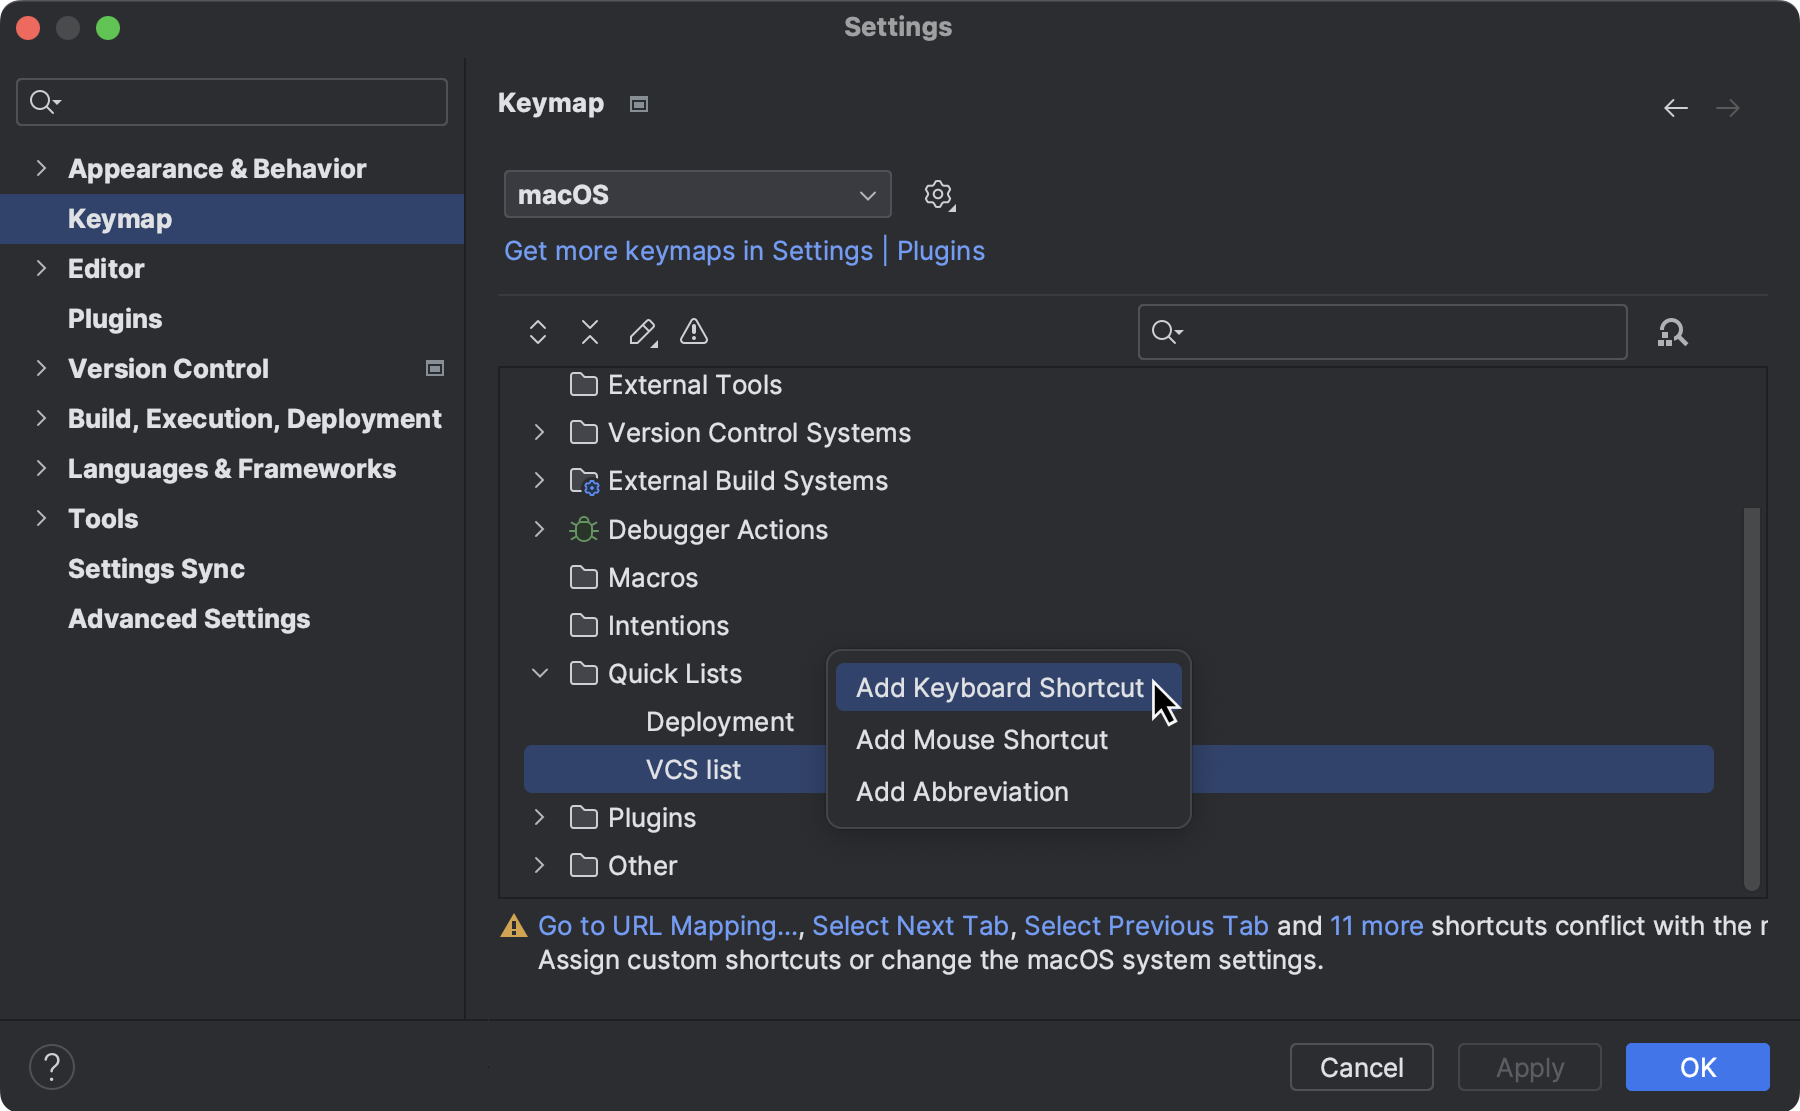
For more information, refer to Configure keyboard shortcuts. - Click OK to save the changes.
In the editor, access the quick list by the associated shortcut.
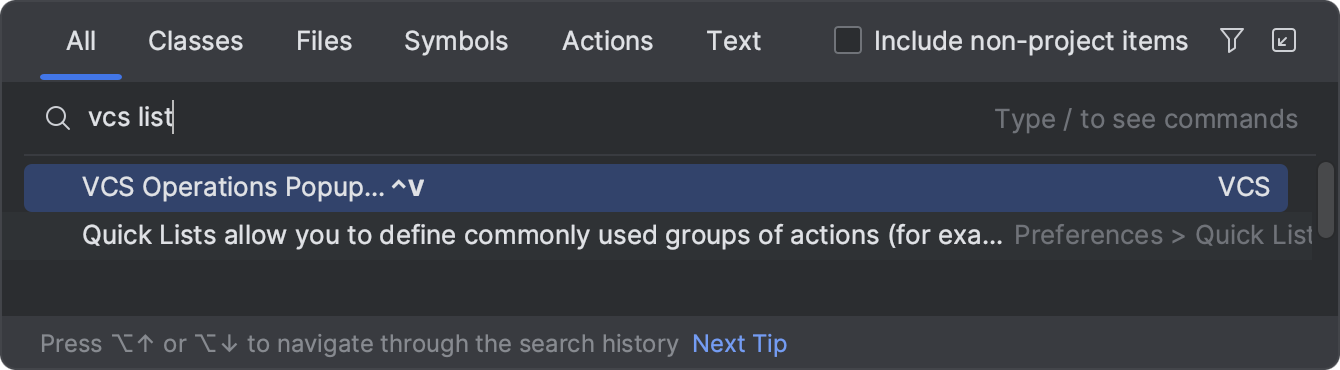
If you don't remember the shortcut, you can search for your quick list by its name. Press Shift twice and type the name of the quick list.
Last modified: 03 February 2025