Terminal | IntelliJ IDEA (original) (raw)
IntelliJ IDEA includes an embedded terminal emulator for working with your command-line shell from inside the IDE. Use it to run Java tools, Git commands, set file permissions, and perform other command-line tasks without switching to a dedicated terminal application.
Enable the Terminal plugin
This functionality relies on the Terminal plugin, which is bundled and enabled in IntelliJ IDEA by default. If the relevant features are not available, make sure that you did not disable the plugin.
- Press Ctrl+Alt+S to open settings and then select .
- Open the Installed tab, find the Terminal plugin, and select the checkbox next to the plugin name.
Initially, the terminal emulator runs with your default system shell, but it supports many other shells, such as Windows PowerShell, Command Prompt cmd.exe, sh, bash, zsh, csh, and so on. For more information about changing the shell, refer to Terminal settings.
Open the Terminal tool window
- Go to or press Alt+F12.
By default, the terminal emulator runs with the current directory set to the root directory of the current project. For more information about changing the default start directory, refer to Terminal settings. - Right-click any file (for example, in the Project tool window Alt+1 or any open editor tab) and select to open the Terminal tool window with a new session in the directory of that file.
Start a new local session
- To start a new session in a separate tab, click
 on the toolbar or press Ctrl+Shift+T.
To run multiple sessions inside a tab, right-click the tab and select Split Right or Split Down in the context menu.
The Terminal saves tabs and sessions when you close the project or IntelliJ IDEA. It preserves tab names, the current working directory, and even the shell history.
To close a tab, click  on the Terminal toolbar or press Ctrl+F4.
Press Alt+Right and Alt+Left to switch between active tabs. Alternatively, you can press Alt+Down to see the list of all terminal tabs.
To clear the terminal screen, press Ctrl+L.
Start a new SSH session
- On the toolbar, click
 and select New SSH Session.
 - Enter the address of the host to which you want to connect, and provide authentication data.
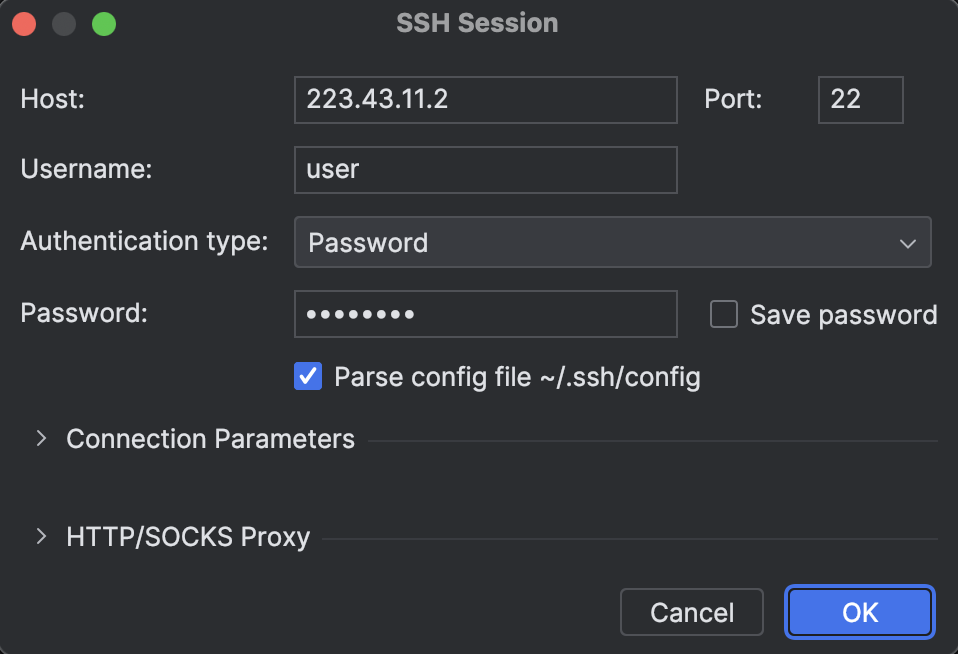
Or, if you have configured SSH configurations, you can select one of them from the list.

To terminate the connection, click in the terminal tab.
Rename terminal tab
- Right-click the tab and select Rename Session from the context menu.
Search in terminal
- To search for a certain string in a terminal session, press Ctrl+F. This searches all text in the session: the prompt, commands, and output.
By default, the search is not case-sensitive. You can click  Match case in the search field to make it case-sensitive.
Configure the terminal emulator
- Press Ctrl+Alt+S to open settings and then select .
- Alternatively, click on the Terminal toolbar and select Settings.
For more information, refer to Terminal settings.
Run IDE features from the terminal
Instead of running a specific command in the integrated terminal and reading console output, you can use the relevant IDE feature, like a tool window or a dialog that implements this functionality. For example, you can launch a gradle or mvn command from the Terminal tool window and view its output in the Run or Debug tool window.
Enable running IntelliJ IDEA commands from the Terminal
- Open the Settings dialog (Ctrl+Alt+S) and go to .
- Select the Run Commands using IDE checkbox.
Run a command in the Run or Debug tool window from the terminal
- Type a command in the terminal and notice how it is highlighted.

- Instead of pressing Enter, which runs the command in the terminal, press Ctrl+Enter to open the corresponding GUI element.
To run the command in the Debug tool window, press Ctrl+Shift+Enter.
This feature also works with most of the commands recognized by Run Anything (press Ctrl twice), for example npm or rails depending on what plugins you have installed. To run a highlighted command in debug mode (use the Debug tool window instead of Run) press Ctrl+Shift+Enter.
Select Terminal engine
There are currently three terminal engines in IntelliJ IDEA:
- Classic. This is our standard terminal emulator, built on the JediTerm library, with user input (commands and keystrokes) sent directly to the underlying shell.
- Experimental 2024 (deprecated). This terminal (known as New Terminal in IntelliJ IDEA 2024.*) integrated advanced IDE features, such as autocompletion and AI capabilities. However, it also introduced compatibility challenges, and as a result, it has been deprecated. Selecting this terminal engine will be available only to those who enabled it in IntelliJ IDEA 2024.*. You can find the documentation for it in the earlier version of IntelliJ IDEA Help.
- Reworked 2025 (Beta). This is currently a work in progress aimed at ensuring better performance and compatibility with classic CLI behavior.
- Open the Terminal tool window: .
- In the tool window header, click
 and select a terminal engine.
Alternatively, open the IDE settings (Ctrl+Alt+S) and go to .
Last modified: 17 April 2025