Database tool window | PyCharm (original) (raw)
Enable the Database Tools and SQL plugin
This functionality relies on the Database Tools and SQL plugin, which is bundled and enabled in PyCharm by default. If the relevant features are not available, make sure that you did not disable the plugin.
- Press Ctrl+Alt+S to open settings and then select .
- Open the Installed tab, find the Database Tools and SQL plugin, and select the checkbox next to the plugin name.
Overview
In the Database tool window, you can work with databases and DDL data sources. You can view and modify data structures in your databases and perform other associated tasks.
The available data sources are shown as a tree of data sources, schemas, tables, and so on.
If no data sources are currently defined, use the New command Alt+Insert to create a data source and connect to a database. For more information about data sources, refer to Data sources topic.
Once PyCharm is connected to a database, Database tool window will display the introspected database objects. For more information about database tree viewing options, refer to View Options chapter. For more information about working with database objects in PyCharm, refer to the corresponding object topics.
Most of the functions in this window are accessed by using the toolbar icons or context menu commands. Many of the commands have keyboard shortcuts.
Browse your databases
Find database objects
- To search for a database object in Database tool window, start typing the object's name. Matching database objects will be highlighted.
To toggle the speed search filter, click Speed Search Filter. To move between several highlighted items, press Up and Down.
For more information about speed search, refer to Speed Search in tool windows.
Filter database objects
You can filter database objects and hide the objects you do not need to see. To do this, use either the object filter in data source settings or the tool window item filter.
- Object filter in data source settings
For example, you can filter out all tables with names starting withpayment_.- To filter database objects, open Data Sources and Drivers dialog ( Shift+Enter) .
- On the left pane of the dialog, select the data source in which you want to filter database objects.
- In the Schemas tab, navigate to Object filter and enter the pattern. In our example,
table:-payment_.*.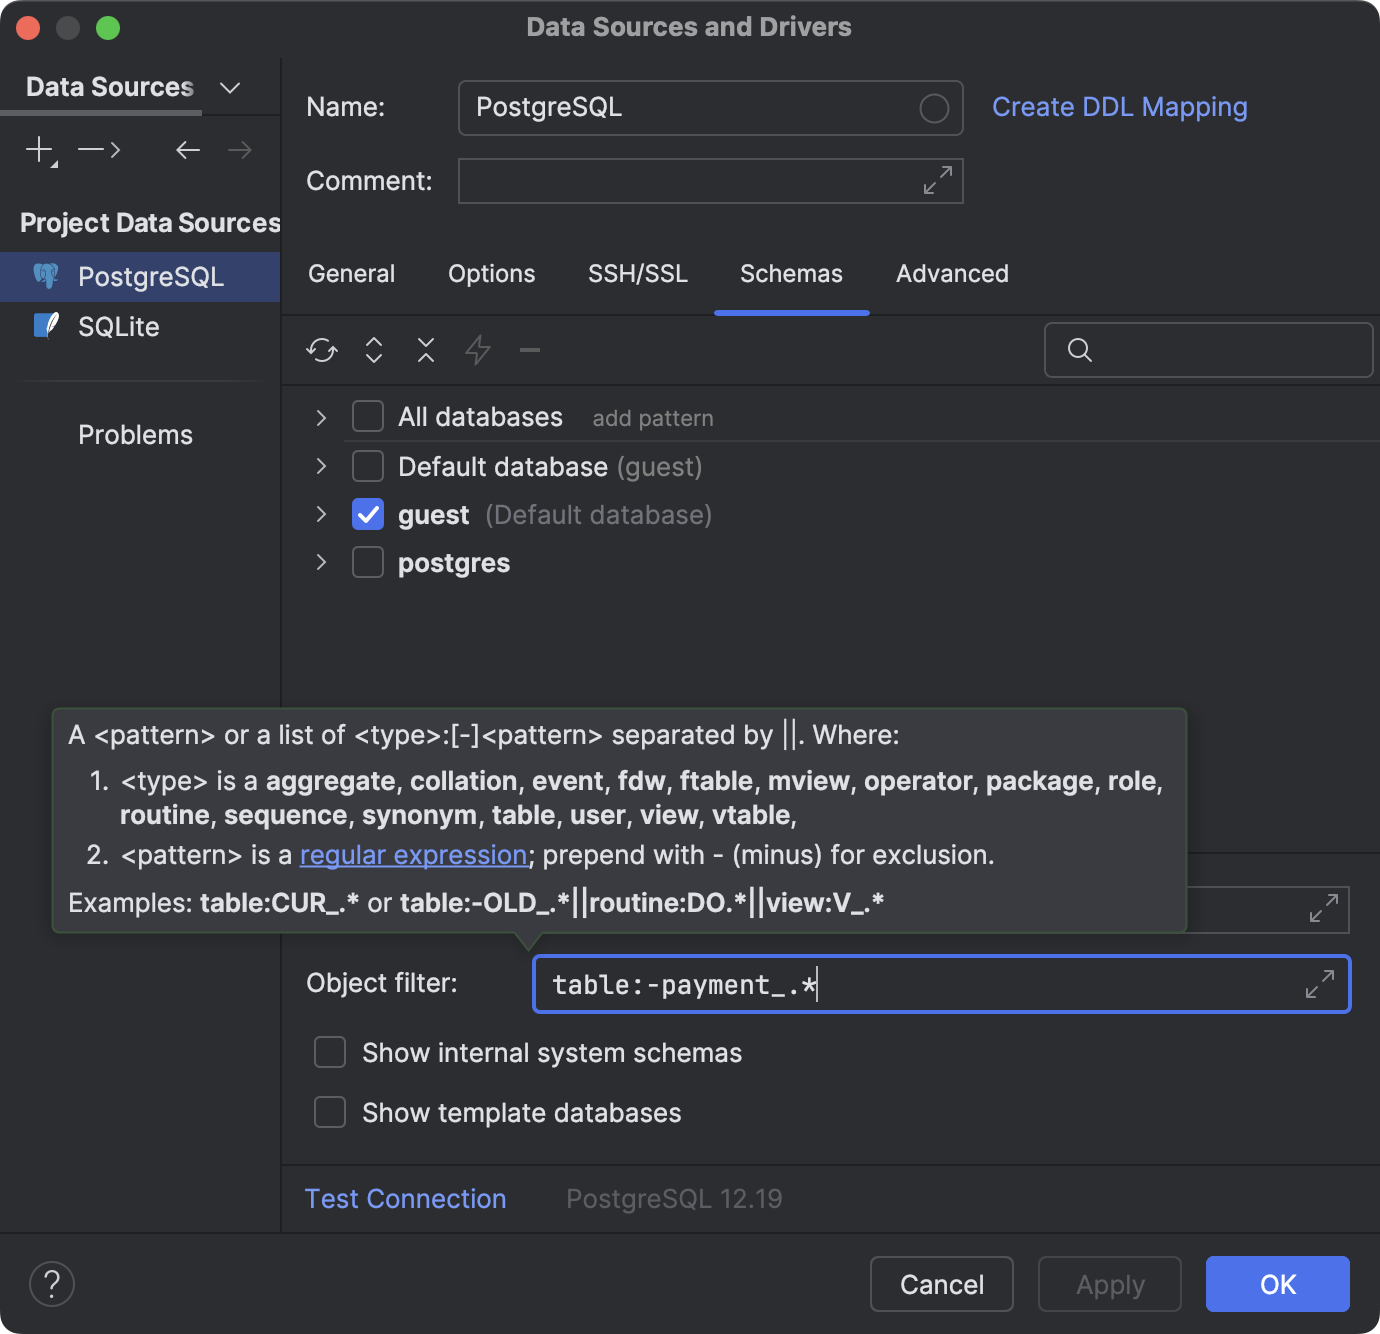
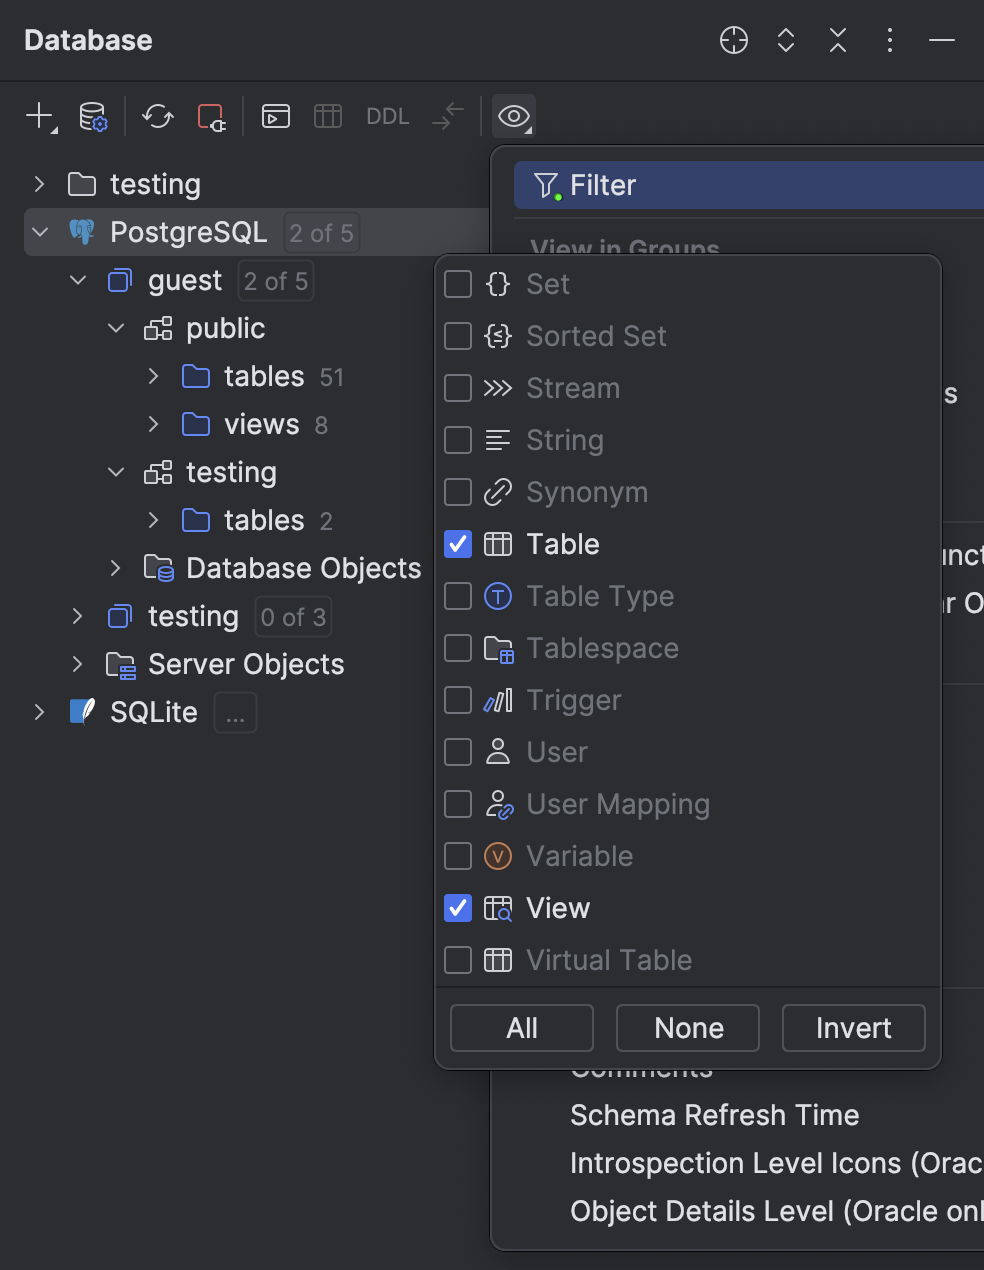
- Item filter in the tool window view options
- In the toolbar, click
 View Options and select
  Filter.
 - Select or deselect the items that you want to see or hide.
- To confirm the selection, click any area in the Database tool window.
- In the toolbar, click

Show more schemas
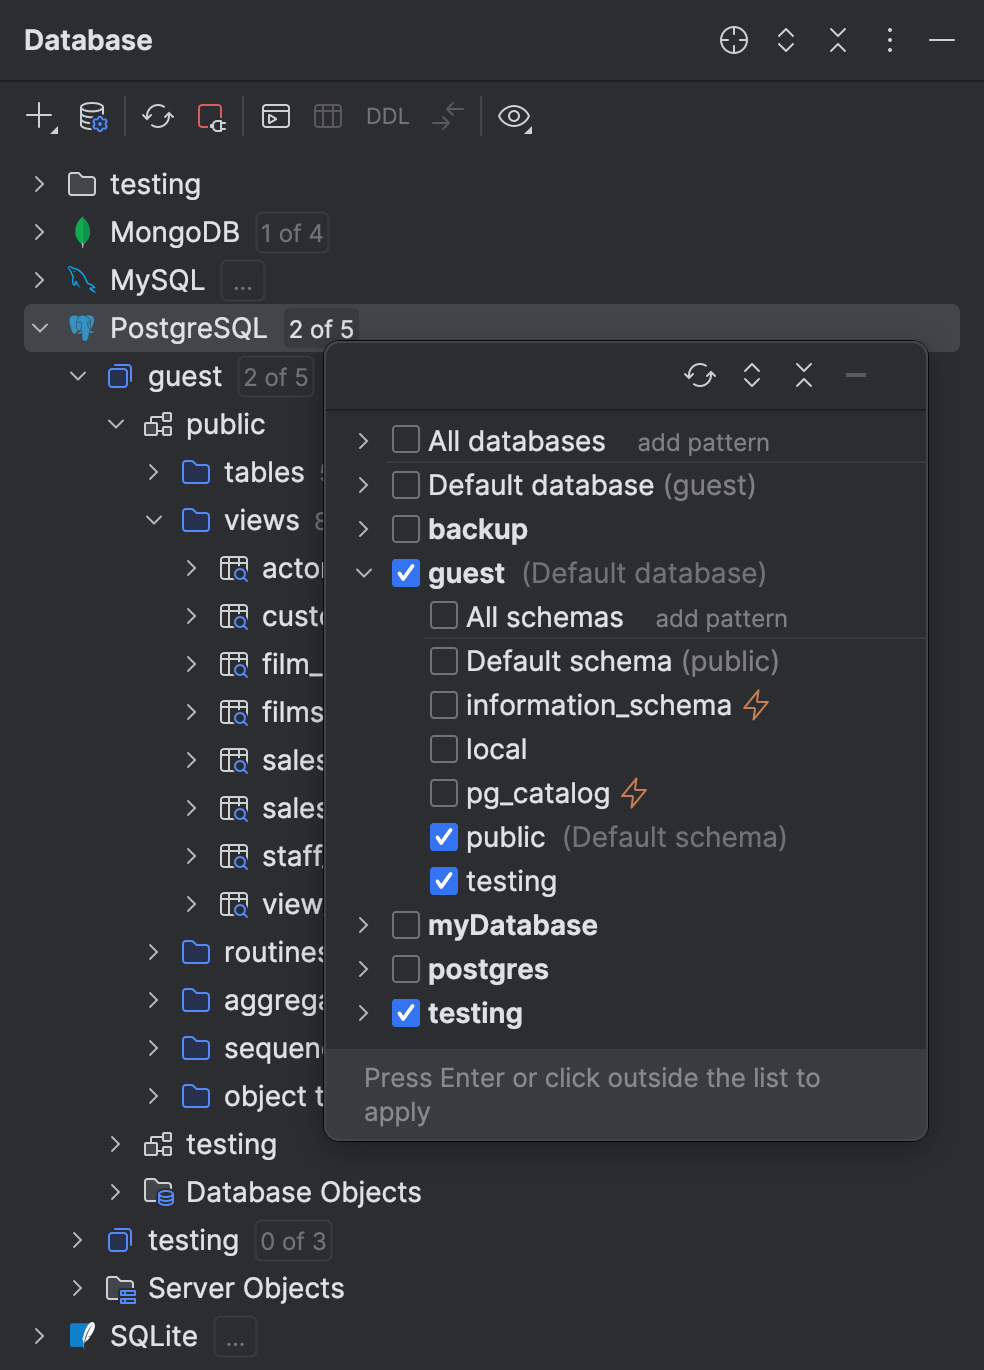
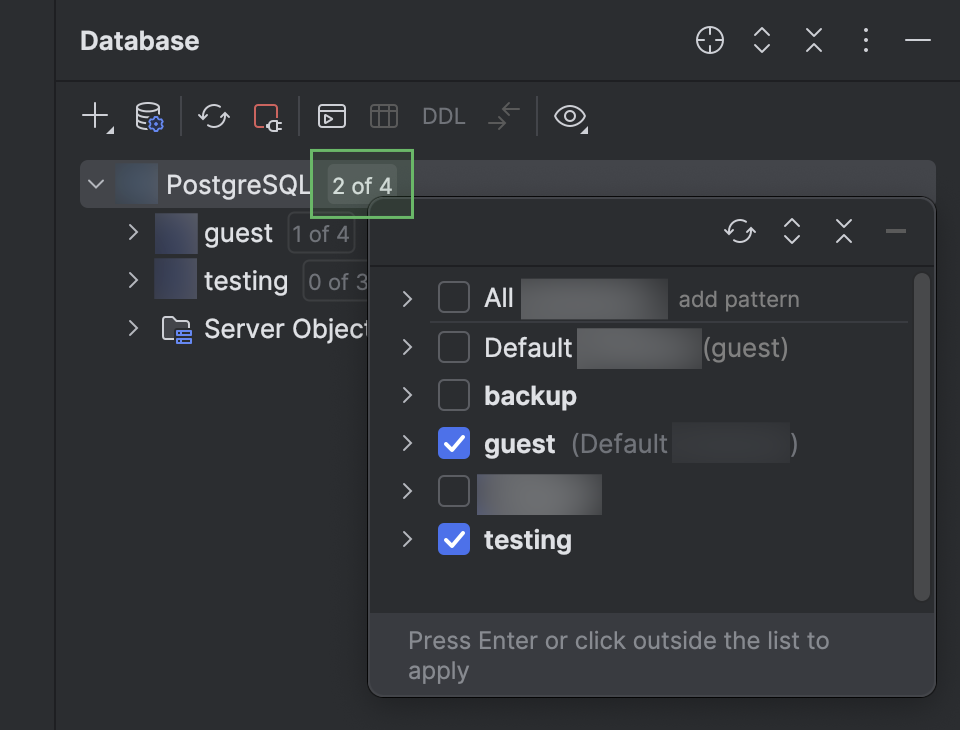
Database tool window displays introspected databases and schemas of your data sources. For a database or schema to be shown in the tree, select it in the schema selector of a data source.
For more information about introspection, refer to Glossary.
- To see more schemas under your new data source node, click the N of M button and select the ones you need. PyCharm will introspect and show them.
View a group in a table
- In the Database tool window, click a node that groups database objects, and press F4.
For more information about toggling groups view, refer to Customize the view of objects.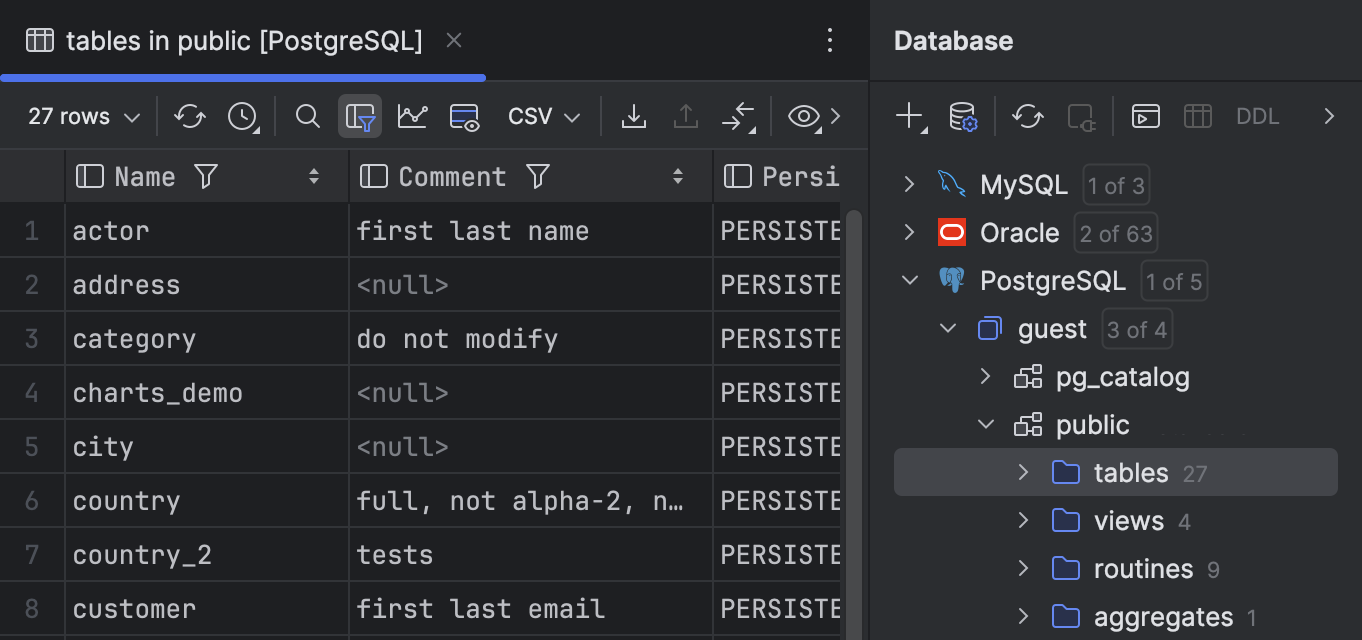
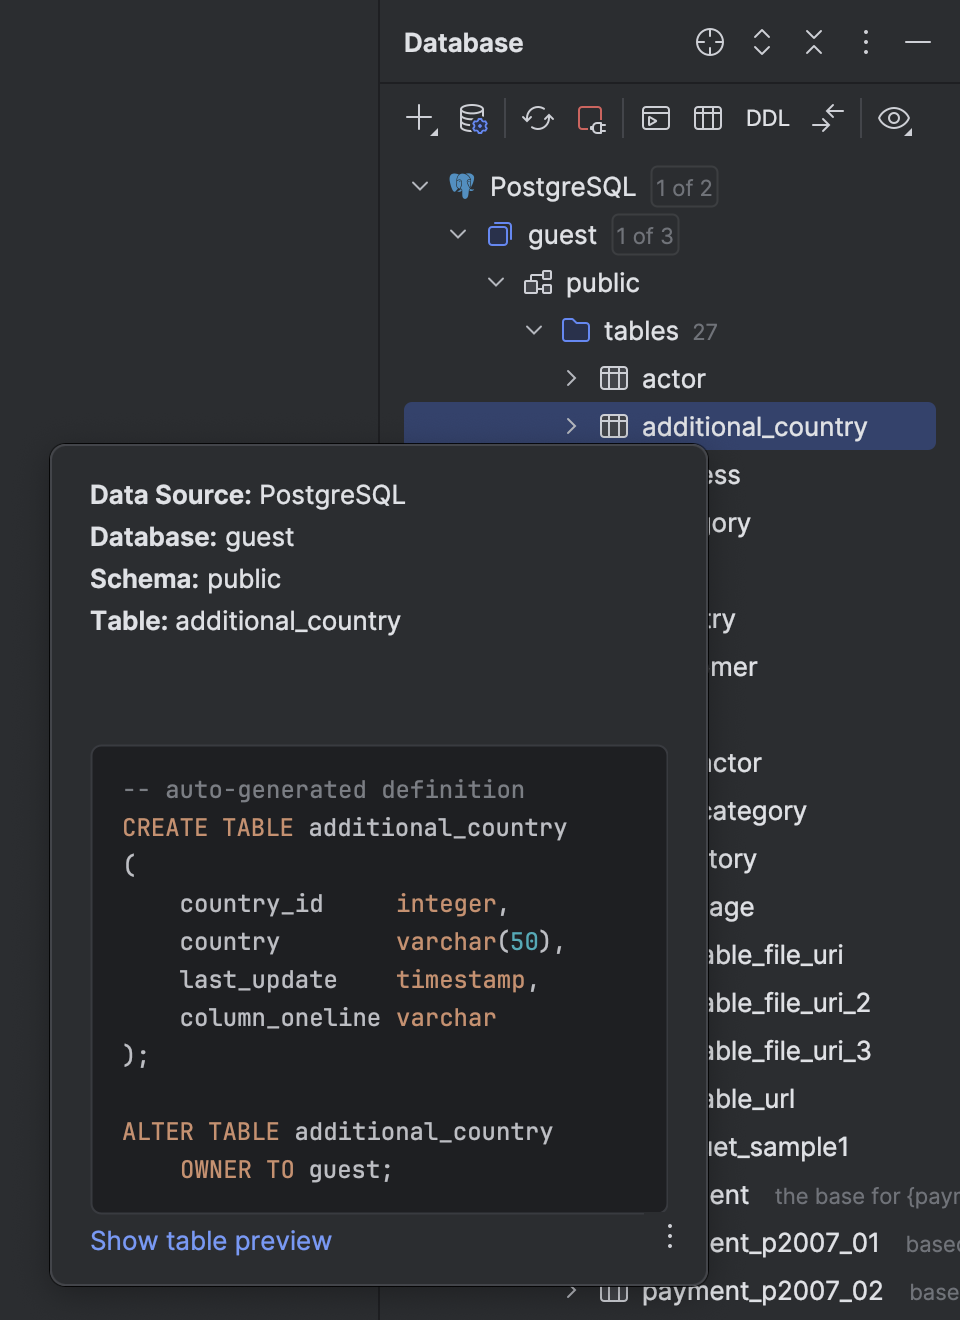
View quick documentation
- Quick documentation displays information about the item. To view the information, select the item and press Ctrl+Q.
Scroll to the object opened in editor
- To scroll to a database object in the database tree, place the caret over the object's name in code editor. Then, in Database tool window tool window toolbar, click
 Scroll from Editor.
The corresponding nodes will open and the object will be highlighted in the database tree.
Use folders in the tree
Database allows creating folders and grouping data sources in them. You can also move one folder to another and create subfolders. Folders configuration is stored in .idea/db-forest-config.xml. You can add this configuration file to the VCS to share it with your colleagues, or you can also ignore it in the VCS.
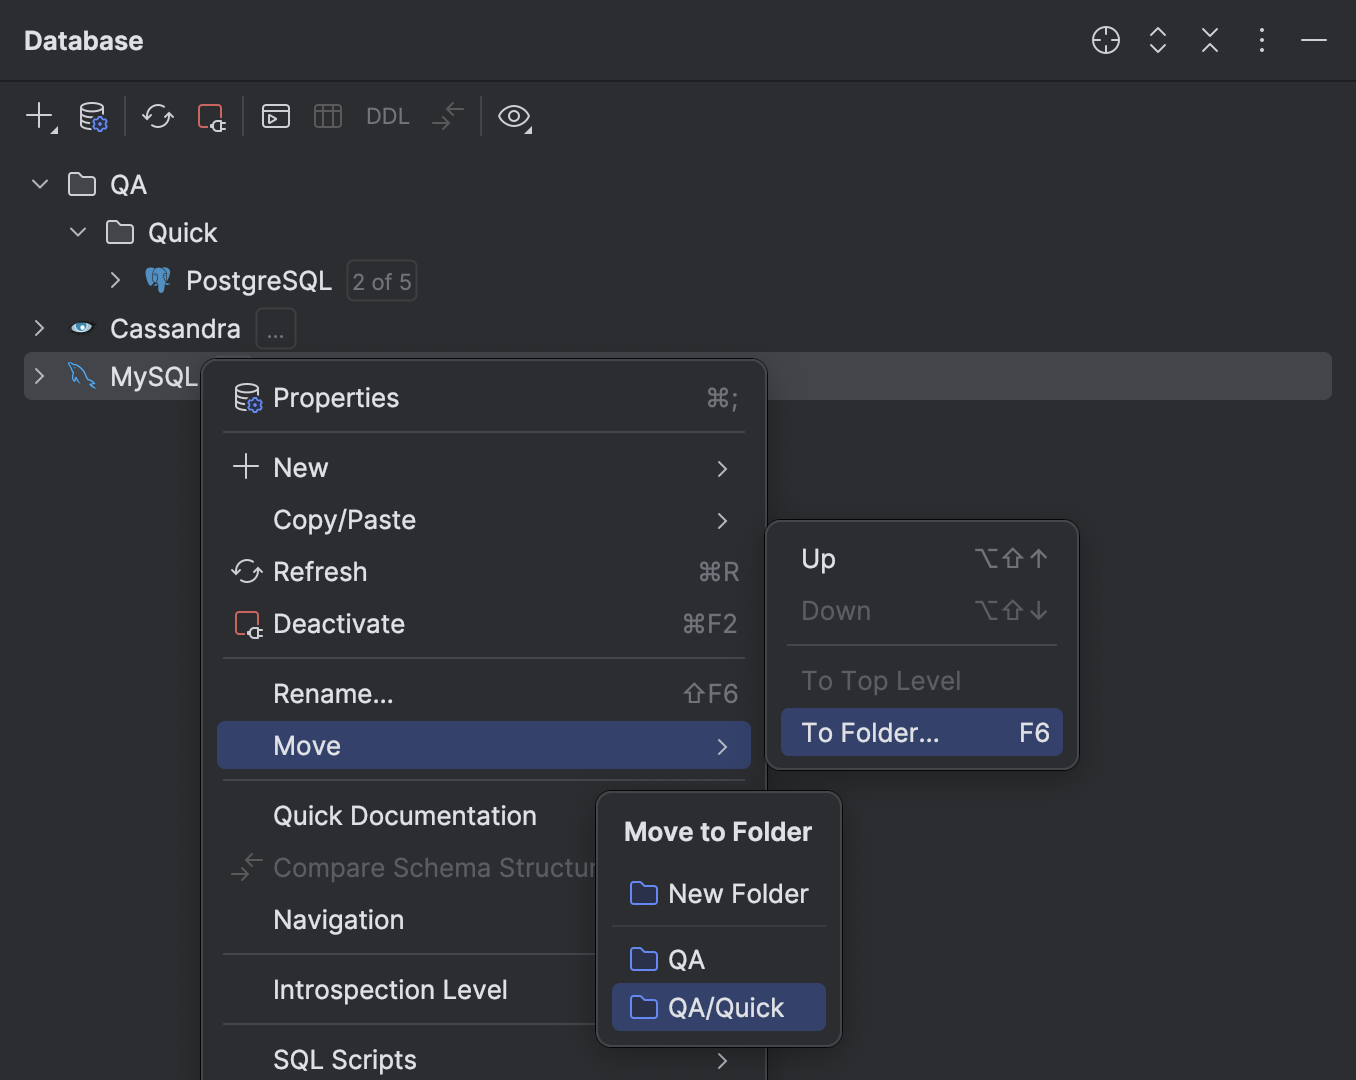
Move tree items to folders
- To group data sources in a folder or move one folder to another, right-click the item and select .
In the Move to Folder popup, select the folder you want to move the item to. You can move the item to an existing folder, create a new folder and move the item in it, or move the item to the top level.
For more information about grouping data sources, refer to Group data sources in folders.
Reorder folders and data sources
To move folders and data sources in the tree, use the Move context menu actions and corresponding shortcuts.
- To move an item up and down the list, select and . Alternatively, press Alt+Shift+Up and Alt+Shift+Down.
- To move an item to the highest level of the tree, select .

Configure the tree view
Customize the view of objects
- To group, enable, or sort data sources, click View Options on the Database tool window toolbar and select the necessary options.
In the Database tool window, the view of database objects tree changes instantly.
For more information about the database tree view options, refer to View Options.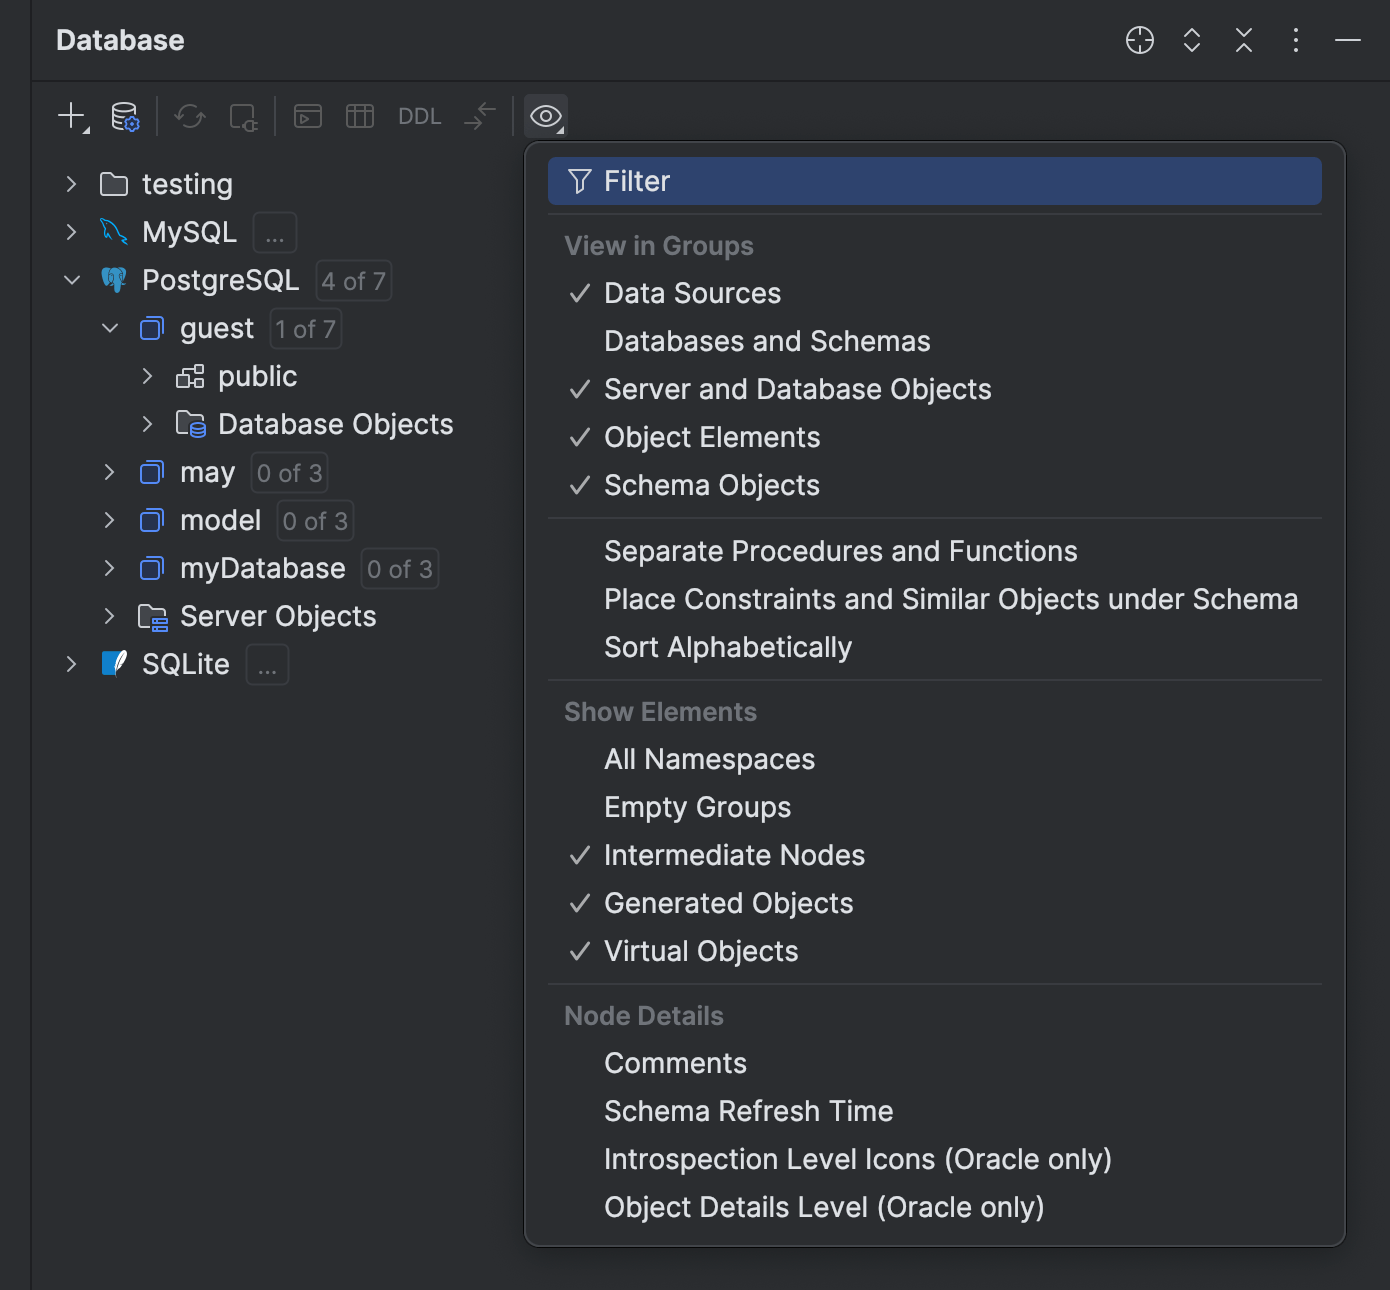
Toggle groups for non-major objects
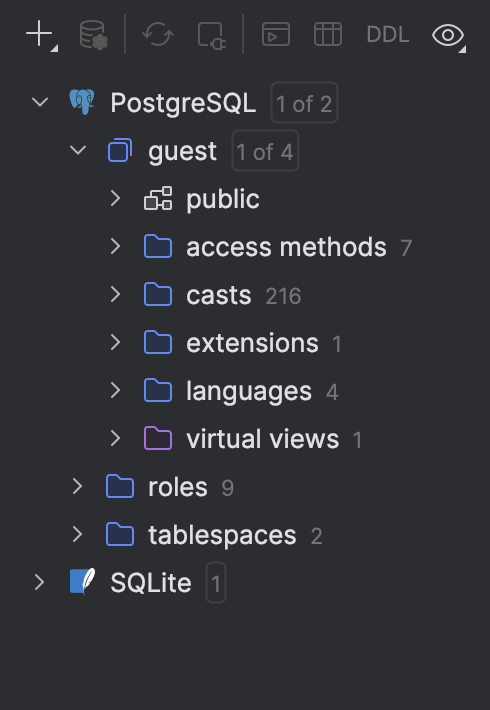
- By default, non-major objects are grouped in the Database Objects and Server Objects nodes. To toggle this grouping, click View Options in the toolbar, navigate to View in Groups and click Database and Server Objects.
For more information about view options, refer to the Database topic.
- Grouping enabled
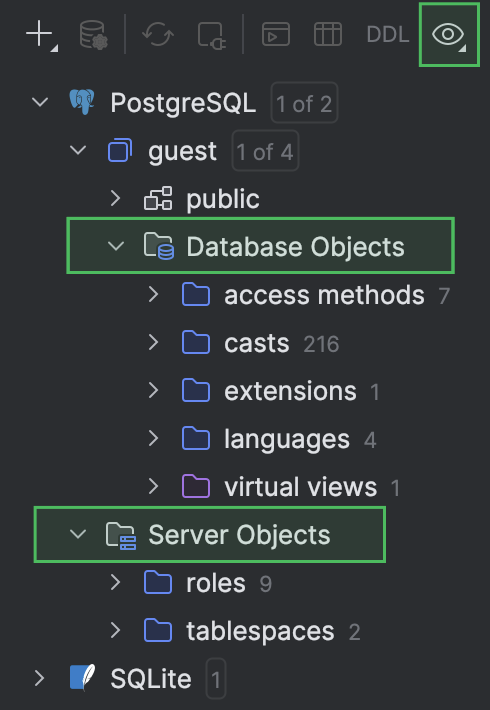
- Grouping disabled
Assign colors to data sources and database objects
To have better differentiation between databases, you can assign a color to a data source. The color can be enabled in Database, code editor and data editor tab headers, code editors and grids, and in toolbars.
- In Database tool window, right-click the data source and navigate to .
- In the Database Color Settings dialog, select the color that you want to assign and where to enable it.
For more information about the settings in this dialog, refer to the Database Color Settings dialog reference topic. - Apply the changes and close the dialog.
For more information about assigning color to a data source in its settings dialog, refer to Assign a color to a data source.
Show tree indent guides
In the Database tool window, you can display vertical lines that mark indent levels and help you better understand the hierarchy of the objects in your databases.
- Press Ctrl+Alt+S to open settings and then select .
- In the Tree Views section, enable the Show indent guides option.
- Tree indent guides are enabled

- Tree indent guides are disabled
Show comments and last refresh date
You can view comments and last refresh timestamps for the objects in the database tree.
- In the toolbar, click View Options, navigate to Node Details and select Comments and Schema Refresh Time.
Productivity tips
Create a quick table backup
- You can create a quick table backup before any significant data manipulation. To do this, drag the table to the original schema and create a copy of the table in Import dialog.
For more information about the dialog, refer to Import dialog.
Reference info
You can right-click the window header and use the context menu to configure its viewing mode, associate the window with a different tool window bar, or resize and hide the window.
You can also use the toolbar buttons:
| Item | Shortcut | Description |
|---|---|---|
|
Automatically sets the focus on the object name in the Database tool window when the editor area is in focus. | |
 |
Ctrl+NumPad + | Expand all nodes in the current view. |
 |
Ctrl+NumPad - | Collapse all expanded nodes in the current view. |
 |
HideShift+Escape | Hide the tool window .To hide all the tool windows, press Ctrl+Shift+F12. |
| Item | Description |
|---|---|
| Autoscroll from Editor | Makes the database object, that is opened in the editor, automatically selected in the Database tool window. Disables the Scroll from Editor setting. |
| Show Query Console Toolbar | Display the toolbar in the query file tabs. |
 Speed search Speed search |
Opens the input field of the Speed Search in tool windows feature. |
| Show Toolbar | Display the toolbar in the Database tool window. |
| View Mode | This option lets you control general appearance and behavior of the tool window. For full information, refer to Tool window view modes. |
| Move to | To associate the tool window with a different tool window bar, select this command, and then select the destination tool window bar (Top, Left, Bottom or Right). For full information, refer to the Move tool windows chapter. |
| Resize | To resize the tool window by moving one of its borders, select this command, and then select the necessary Stretch to option.Note that this command is not available for the floating mode. |
| Remove from Sidebar | This command hides the tool window, removes the associated tool window button from the tool window bar, and removes the tool window from the quick access menu ( or or  ).To open the tool window again (and restore the associated features), use the main menu: or press Alt+1. ).To open the tool window again (and restore the associated features), use the main menu: or press Alt+1. |
| Help | This command opens the description of the Project tool window in the PyCharm online help. |
Toolbar


New
Create a new data source, query file, or a driver.
Available for: Data sources and database objects.
![]()
Data Source Properties Shift+Enter
Open the Data Sources and Drivers dialog to manage your data sources and their settings.
Available for: All node types.

Refresh Ctrl+F5
Update the view of the selected element (that is to synchronize the view of the element with its actual state in the database).
See also, Data Sources and Drivers dialog.
Available for: Data sources and their elements.
![]()
Deactivate Ctrl+F2
Close the database connection for the selected data source or data sources.
Available for: Data sources with active connections and their elements.
![]()
Jump to Query Console Ctrl+Shift+F10
Open the list of query files for the selected data source.
Available for: Data sources and their elements.
![]()
Edit Data F4
Open a table view of the object in the data editor. This option works for tables, views, and materialized views.
Available for: Corresponding elements in data sources.
DDL
Go to DDL Ctrl+B
Open the DDL script of the selected object.
For example, if you press this shortcut on a table's name in the SELECT statement, you will see the DDL of this table (the CREATE TABLE statement).

Available for: Corresponding elements in data sources.

Compare Structure Ctrl+D
Compare the structure of two database objects in the Migration dialog. The comparison results are shown in the Diff Viewer.
Available for: Two selected database objects of the same kind.
View Options
Open the list of database object tree viewing options, including the item filter. For more information about the options, refer to the View Options chapter.
Available for: All items.
View Options
The view options, generally, define what is shown in the tool window and how. To view or change these options, click View Options on the toolbar.
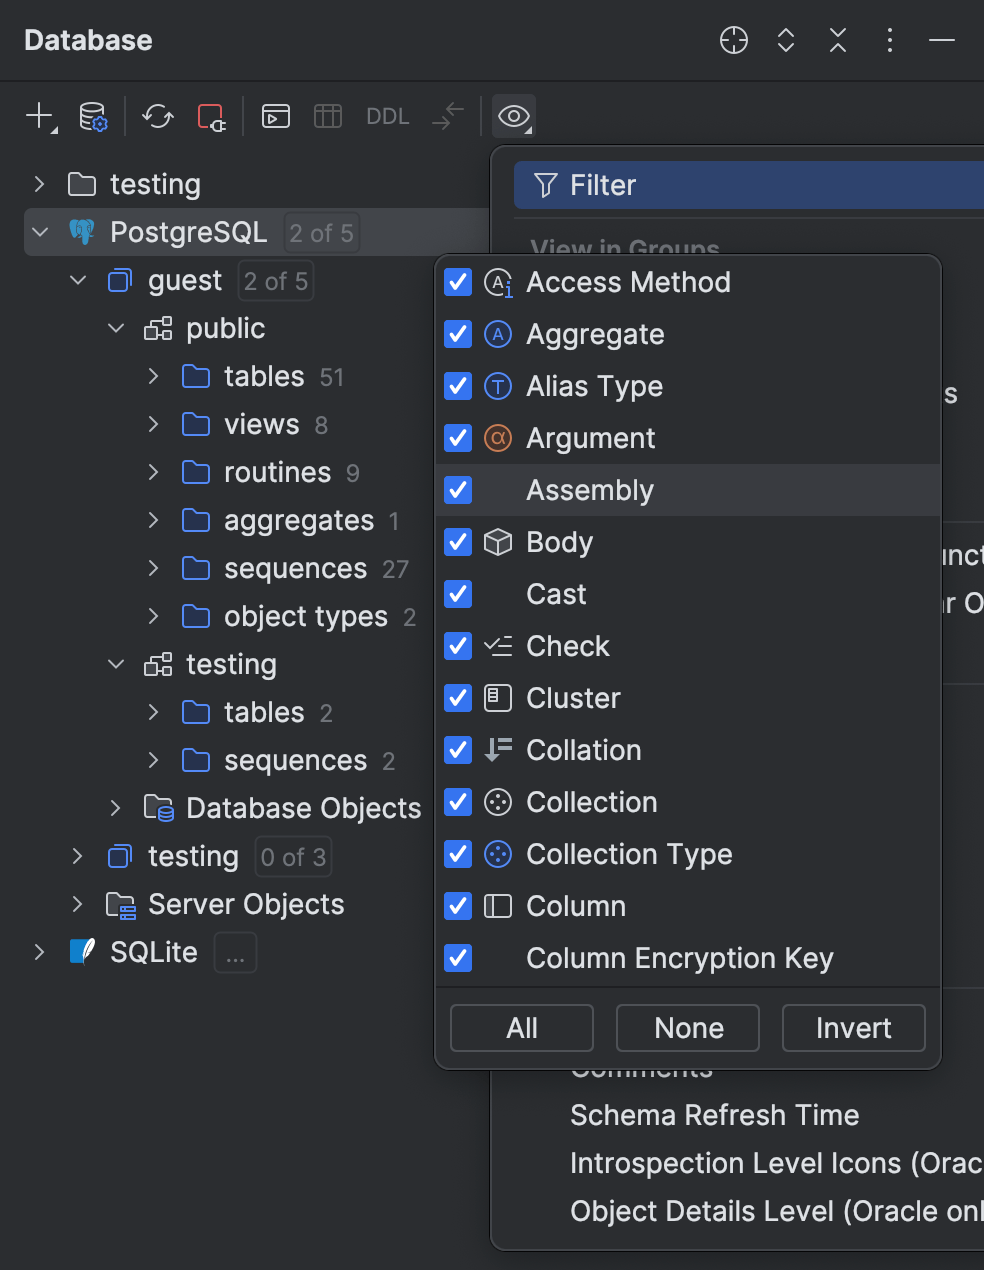
 Filter
Open a list of database objects that you can filter. The list of database objects depends on the selected database. To see a full list of available database objects and their icons, go to Icons for data sources and their elements.
The green dot in the corner of filter icon indicates that the filter is on and some objects are filtered out.
Everything is filtered out except views and tables
Nothing is filtered out
Displays folders for databases and schemas.
Displays folders for server and database objects, Server Objects and Database Objects correspondingly. This setting concerns users, roles, tablespaces, modules, foreign data wrappers, and other rarely used objects.
This option defines how table elements are shown.
- When on, there are separate nodes for columns, indexes, primary and foreign key constraints, and triggers (shown as folders). The elements appear in the corresponding groups.
- When off, there is no such grouping and, generally, only columns are shown for tables.
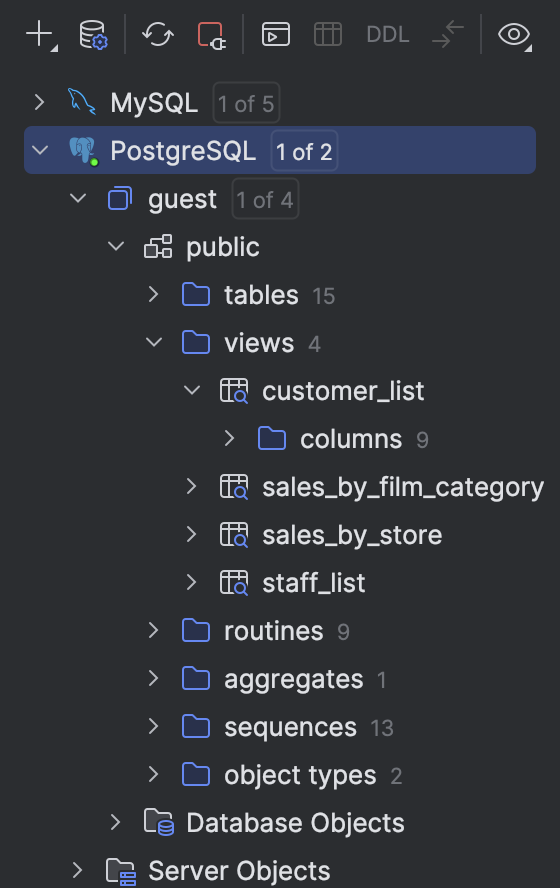
Defines how schema elements are shown.
- When on, there are separate nodes for tables, views, and stored routines (shown as folders). Tables, views and routines (procedures and functions) are shown as elements of the corresponding groups.
- When off, there is no explicit grouping for tables, views, and routines. Tables and views are followed by procedures and functions.
In Microsoft SQL Server, Oracle, and PostgreSQL, separates procedures and functions into different folders.
Display nodes for object names that exist in a schema namespace. For example, nodes for keys, CHECK constraints, indexes, triggers, rules, and other objects.
You can use this option in the following situations:
- To find an object inside a schema with the help of a quick search.
- To see the columns under the table node. To do this, turn off the Empty Groups.
Order database objects alphabetically. When the option is disabled, the natural sort order is applied.
Show all databases and schemes even if they are not selected for introspection.
- When the All Namespaces option is disabled, the databases that are not selected for introspection do not appear in the Database tool window.
- When the All Namespaces option is enabled, the databases that are not selected for introspection are displayed in the Database tool window.
If the Schema Objects or Object Elements options are selected, you can select to show or hide the categories that contain no elements.
Shows or hides parent nodes only when you do not have other objects on the same level with a parent.
For Oracle, shows or hides auto-generated objects in the tree. It concerns the following objects:
- Materialized view logs
- The underlying tables for materialized views
- Secondary tables
Show or hides the following objects:
- Virtual foreign keys
- Virtual views
- Virtual columns
Display comments for database objects.
Display the local date and time of the last performed introspection for schemas.
The feature is currently not supported for ClickHouse, Redis, Apache Cassandra, and Apache Hive.
Context-menu actions appear when you right-click an object in the Database tool window.
![]() Properties Shift+Enter
Properties Shift+Enter
Open the Data Sources and Drivers dialog to manage your data sources and their settings.
Available for: Data source and DDL data source nodes.
New
Create a new data source, role, database, schema, query file, table, column, index, a primary, or a foreign key. The list of options depends on which element is currently selected.
Available for: Data sources and database objects.
Ctrl+C
Copy the XML code snippet with connection settings to the clipboard.
Available for: Data source nodes.
Ctrl+Alt+Shift+C
Copy the fully qualified name of the selected item to the clipboard.
Available for: Data sources and their elements.
Ctrl+D
Create a copy of the selected data source. Specify the properties of the data source in the Data Sources and Drivers dialog that opens.
Available for: Data source and DDL data source nodes.
![]() Edit Data F4
Edit Data F4
Open a table view of the object in the data editor. This option works for tables, views, and materialized views.
Available for: Corresponding elements in data sources.
Move to Folder F6
Move the selected data source to a folder. If no folders exist yet, create the first one in the Move to Folder popup that appears.
For more information about grouping data sources, refer to Group data sources in folders.
Available for: Data source and DDL data source nodes.
Refresh Ctrl+F5
Update the view of the selected element (that is to synchronize the view of the element with its actual state in the database).
See also, Data Sources and Drivers dialog.
Available for: Data sources and their elements.
![]() Deactivate Ctrl+F2
Deactivate Ctrl+F2
Close the database connection for the selected data source or data sources.
Available for: Data sources with active connections and their elements.
Quick Documentation Ctrl+Q
View basic information about the selected element.
To close the documentation popup, press Escape.
Available for: Data sources and their elements.
For more information about quick documentation, refer to quick documentation.
Compare Structure With Ctrl+D
Compare the structure of two database objects in the Migration dialog. The comparison results are shown in the Diff Viewer.
Available for: Two selected database objects of the same kind.
Ctrl+B
Open the DDL script of the selected object.
For example, if you press this shortcut on a table's name in the SELECT statement, you will see the DDL of this table (the CREATE TABLE statement).
Available for: Corresponding elements in data sources.
Jump to Query Console Ctrl+Shift+F10
Open the list of query files for the selected data source.
Available for: Data sources and their elements.
 Run Function or Run Procedure
Run the selected function or procedure.
Available for: Data source elements: functions, procedures.
Introspection Level
Change the introspection level either for the whole database or for a particular schema. Children inherit a level that is set for a parent.
Available for: Data Source nodes.
Ctrl+Alt+G
Generate data definition structures for database objects. For example, you can generate DDL files for a single table or for all the tables in the schema. Also, you can customize generation settings. For example, you can set what syntax to use for table creation: CREATE TABLE or CREATE TABLE IF NOT EXISTS.
Available for: Data source elements.
For more information about using SQL Generator, refer to the Generate DDL definitions for database objects and Change output settings of the SQL Generator chapters.
Requests the DBMS server to get or generate a source text for this object, receives this text, and puts it to the clipboard.
Available for: Data sources and their elements.
Ctrl+Alt+Shift+G
Generate a DDL of the object and copy it to the clipboard.
Available for: Data sources and their elements.
Ctrl+Alt+Shift+B
Generate a DDL of the object and copy it to the query file.
Available for: Data sources and their elements.
Shift+F6
Rename the selected item. Specify the new name in the dialog that opens.
Available for: Data sources and their elements.
Enable triggers and constraints for the selected table.
Available for: Data source elements: tables.
Disable triggers and constraints for the selected table.
Available for: Data source elements: tables.
Modify the database object comment in the Modify Comment dialog.
Modify the grants of a database object in the Modify Grants of <object_name> dialog.
Remove all the rows in the selected table.
Available for: Data source elements: tables.
or Delete
Remove the selected item.
Available for: Data sources and their elements.
Open a popup with available schemas for the current data source.
See also, Show and hide schemas.
Available for: Data sources and their elements.
Shift+Ctrl+Alt+F
Search for data in your databases or a group of databases without knowing the data's exact location.
Available for: Data sources and their elements.
For more information about the full-text search, refer to Full-text search in databases.
Open the Database Color Settings dialog to set or change the color for the selected element or elements.
Available for: Data sources and their elements.
F11
Add the selected item to bookmarks.
Available for: Data sources and their elements.
Generate a Java entity class for the selected table. In the dialog that opens, specify the directory in which the JAVA class file should be generated.
Available for: Data sources and their elements.
Switch to the directory where theGenerate POJOs.cljexample script file is located.
Available for: Data sources and their elements.
Save data for the selected tables and views in files. Select the output format (for example, SQL Inserts, Tab-separated (TSV), JSON-Clojure.json.clj).
Available for: Data source elements: tables and views.
Import a text file containing delimiter-separated values (CSV, TSV, and so on) into your database.
If a schema is currently selected, PyCharm will create a new table for the data that you are importing. If a table is selected, PyCharm will try to add the data to the selected table.
Available for: Database tables.
F5
Create a copy of the selected table. You can create a copy in a different scheme or data source. For example, you can copy the actor table from MySQL to PostgreSQL.
Available for: Database tables and views.
Create your DDL data source by dumping a regular data source to a root/repository folder.
Available for: Data sources and their elements.
or
Run mysqldump or pg_dump for the selected items. mysqldump and pg_dump are native MySQL and PostgreSQL tools. They are not integrated into PyCharm. You can read about them at dev.mysql.com and postgresql.org.
Available for: Data source nodes.
or or Restore
Run mysql, pg_restore, or psql to restore a data dump. These tools are native for MySQL and PostgreSQL. They are not integrated into PyCharm. You can read about them at dev.mysql.com and postgresql.org.
Available for: Data source nodes.
Ctrl+Alt+Shift+U
View a UML class diagram for the selected data source or table in a separate editor tab.
Available for: Data sources and their elements.
View a UML class diagram for the selected data source or table in a popup.
Available for: Data sources and their elements.
Generate a diagnostic representation of the database in a PyCharm internal format. This information might be helpful for the support team if some database objects exist in the database but do not show up in the Database tool window.
Available for: Data sources and their elements.
Generate three files that include information about the following:
- dataSource.txt: the data source.
- introspector.txt: a module that was used to load the metadata from the database.
- model.xml: a part of the database model.
This information is helpful when introspection works incorrectly.
Available for: Data sources and their elements.
Open the JDBC Log Setting dialog to configure the JDBC driver log settings.
Available for: Data sources and their elements.
Ctrl+Shift+F5
Delete the data source information from cache and load it again. This action is available on the data source node only.
Available for: Data source nodes.
Delete the information that PyCharm has accumulated about your database. This action is available on the data source node only.
Use this command when you experience issues like wrong display of data structures or errors during synchronization.
To check if this has eliminated the problem, use the Synchronize command.
Available for: Data source nodes.
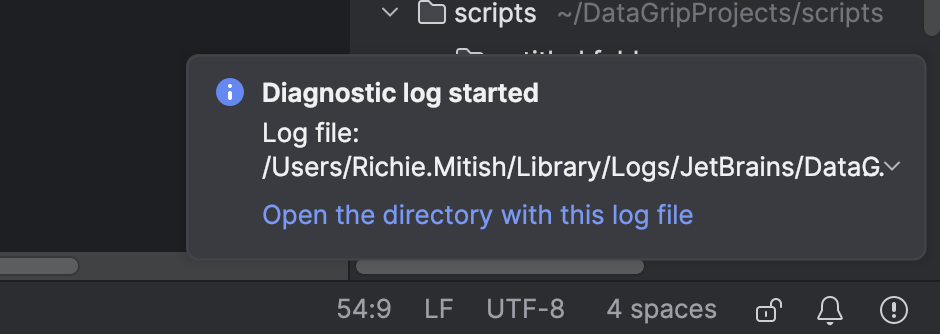
Enables the diagnostic mode where PyCharm writes the introspection log.
You can access the log file by clicking the link in the Diagnostic log started and Diagnostic log stopped notification popups that appear once you enable and disable the mode.
Icons
Data sources and their elements
| Icon | Description |
|---|---|
| Access Method | |
| Aggregate | |
 |
Alias Type |
| Argument | |
| Body | |
| Check | |
| Cluster | |
| Collation | |
| Collection Type | |
| Column.For more information about column icon combinations, refer to Possible icon combinations for columns. | |
| Data File | |
| Database | |
 |
Read-only status |
| DDL data source | |
| Default | |
 |
Exception |
| Extension | |
| External Schema | |
| Foreign Data Wrapper | |
| Foreign Key | |
| Foreign Table | |
| Index | |
| Key | |
| Materialized Log | |
| Materialized View | |
| Object Attribute | |
|
Object Type |
| Operator | |
| Package | |
| Primary key | |
| Projection | |
| Data sources | |
| Role | |
| Routine | |
 |
Rule |
| Scheduled Event | |
| Schema | |
| Sequence | |
| Server | |
| Stored procedure or function | |
| Synonym | |
| Table | |
|
Table Type |
| Tablespace | |
| Trigger | |
| User | |
| User Mapping | |
 |
Variable |
 |
View |
| Virtual column | |
| Virtual foreign key | |
| Virtual view | |
| Virtual Table |
Possible icon combinations for columns
| Icon | Foreign key | Primary key | Indexed | NOT NULL |
|---|---|---|---|---|
 |
||||
|
||||
|
||||
|
||||
|
|
|||
|
|
|
|
|
|
|
|
||
|
|
|
||
|
|
|||
|
|
|
||
|
|
|||
|
|
|||
|
|
|
||
|
|
|||
|
|
01 December 2025