DICOM Server Manager Demo (original) (raw)
The LEADTOOLS DICOM Server Manager Demo configures three different DICOM Servers by default. These DICOM Servers use the LEADTOOLS PACS Server Framework. Each DICOM Server implements different DICOM Services using different add-ins. Additionally, a Server Manager application is provided to configure and manage all of the servers from a single user interface.
Users can add or remove supported DICOM Services from any of the servers by simply adding or removing the add-ins under the server folder. Please note that one add-in can implement multiple DICOM Services but multiple add-ins are not allowed to support the same DICOM service under a single server configuration.
Server Manager Demo:
The PACS Server Manager (CSLeadtools.Dicom.Server.Manager_Original.exe) is a sample application that uses the LEADTOOLS DICOM Service Admin SDK to allow users to manage multiple PACS Framework from one application. Users can add, remove and configure Servers; and start, stop and pause any or all server services. The application also allows DICOM client configuration for each server and exposes the add-in level settings for all configured Add-ins when implemented. In addition, users can view the transaction log of all servers from this application.
The following figure shows the LEADTOOLS DICOM Server Manager:
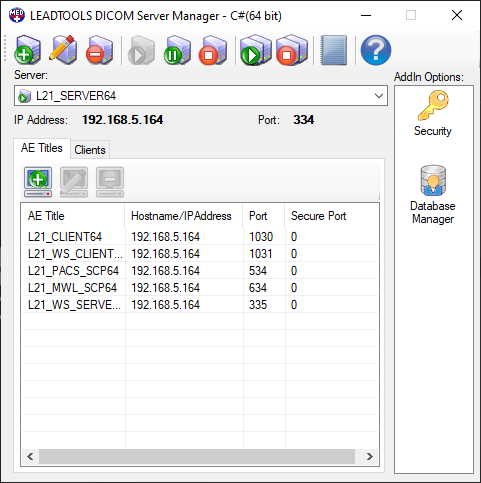
Server Manager Interface:
Server - The Server drop-down list box lists all configured DICOM Servers.
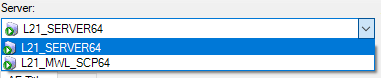
The following figure shows the configured PACS Framework Servers:
IP Address - The IP address of the selected server
Port - The Port to which the selected server is listening.
Selecting a server from the list box displays a list of icons under the Add-in Options List, as shown in the following figure:

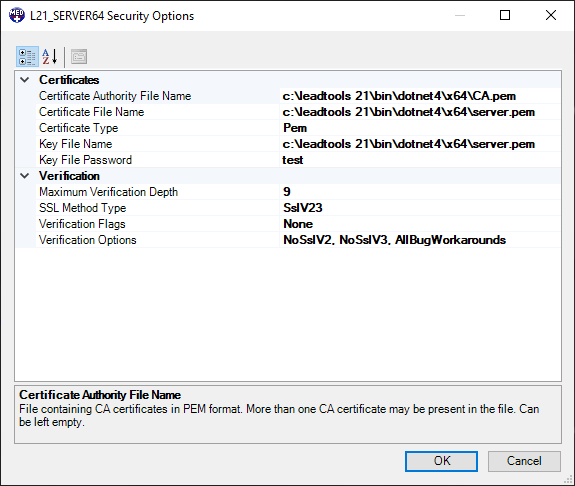
Each icon represents an installed Add-in on the server. Double-clicking an icon displays the settings` dialog for that Add-in. For example, double-clicking the Security icon(

) displays the Security Options dialog as shown in the following figure:
Note:More detailed information of individual Add-ins is documented under the respective server documentation.

**Add DICOM Server button**- Click to open the **Add New Server** dialog. The **Add New Server** dialog Settings tab is shown in the following figure:
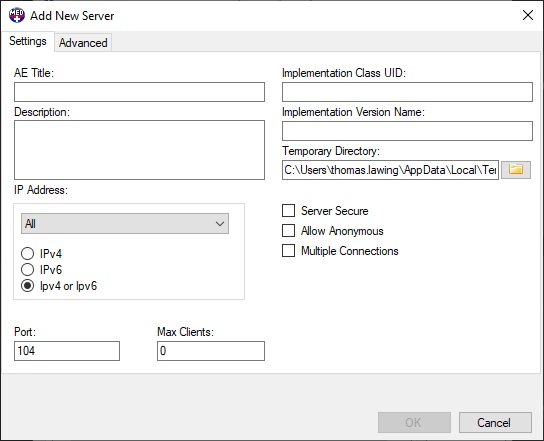
The Add New Server dialog Settings Tab has the following fields:
Settings Tab
- AE Title - The Server AE Title
- Implementation Class UID - Server implementation class
- Description - Server description
- Implementation Version Name - Server implementation version name
- IP Address - Server IP Address
- Temporary Directory - Location of the temporary files. DICOM uses temporary files during the course of creating a dataset. If this parameter is not specified, DICOM temporary files are kept in the Windows temporary file location.
- Port - Server port to listen on.
- Max Clients - Maximum number of clients that are allowed to connect to server.
- Server Secure - Select this check box to make this a secure server that uses the DICOM secure transport profile.
- Allow Anonymous - Select this check box to allow anonymous client access. Note that an anonymous client is not able to retrieve images from the server.
- Enable Service Log - Select this check box to enable logging (a default implementation is provided that logs to the Windows event log).
- Multiple Connections - Select this check box to allow the same AE title to connect multiple times from the same IP address (concurrent connections from the same remote AE).
The Add New Server dialog Advanced tab is shown in the following figure:
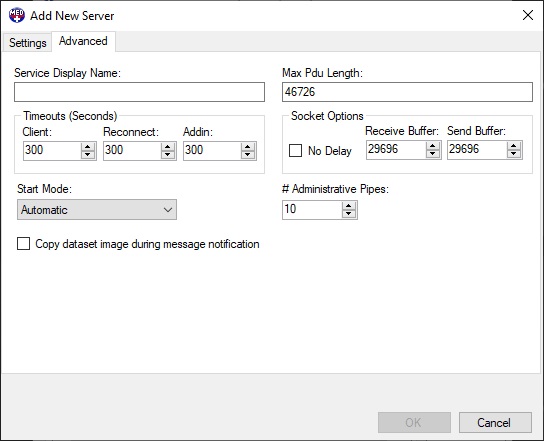
The Add New Server dialog Advanced tab has the following fields:
Advanced Tab
- Service Display Name - Name to display in the Windows Service Manager application. If no name is specified, the display name defaults to Dicom Server [AE Title].
- Max Pdu Length - Maximum length of data transfer. If no value is specified, the maximum length defaults to 16384 bytes.
- Timeouts (Seconds)
- Client - Amount of time before disconnecting a client due to no client activity.
- Reconnect - Amount of time for the server to reconnect to a client and perform some operation.
- AddIn - Amount of time for an add-in to process a DICOM request.
- Socket Options
- No Delay - Disables the Nagle algorithm for sending data. This socket option is included for backward compatibility with Windows Sockets 1.1.
- Receive Buffer - Specifies the total per-socket buffer space reserved for receives. If no buffer size is specified, it defaults to 29696 bytes.
- Send Buffer - Specifies the total per-socket buffer space reserved for sends. If no buffer size is specified, it defaults to 29696 bytes.
- Start Mode - Sets the start mode of the windows service.
- Automatic - Have the Service Control Manager start the service automatically during system startup.
- Manual - Start the service manually.
- Disabled - Disable the ability to start the service.
- Copy dataset image during message notification - Selecting this check box (to copy images) can degrade the performance of the server. When this check box is clear, only image-related tags of the dataset are copied during a message. Notification. Enabling this option could adversely impact the performance of the server.
After a Server is configured, a new directory is created in the application folder based on the AE Title of the server. For instance, if your application directory is c:\Dicom Servers\ and you created a server with the AE Title " L21_MWL_MPPS_SRV"; the new directory will be c:\Dicom Servers\ L21_MWL_MPPS_SRV\. This directory contains all the settings for the new server as follows:
- Settings.xml - Holds all settings for the service.
- AddIns Directory - All add-ins created for this server need to be placed in this directory in order for the add-ins to be available to the server. Add-ins have to be placed in each server's add-in directory).

**Edit Server Button** - For editing or change the configuration of an existing DICOM Server.
**Delete Server button** - Used for deleting a configured DICOM Server.
**Start Server button** - Used to start DICOM Server Service for the selected server from drop-down list box. A service's running state is indicated by a green circle and white triangle() next to server name.
**Start All Servers button** - Used to start all configured DICOM server services.
**Pause Server button** - Used to Pause the currently selected service.
**Stop Server Button**- Used to stop the currently selected DICOM Server Service.
**Stop All Servers button** - Used to stop all DICOM Server Services.
**Log button**- Used for viewing the DICOM message log. Clicking the Log button opens Event Log dialog, as shown in the following figure: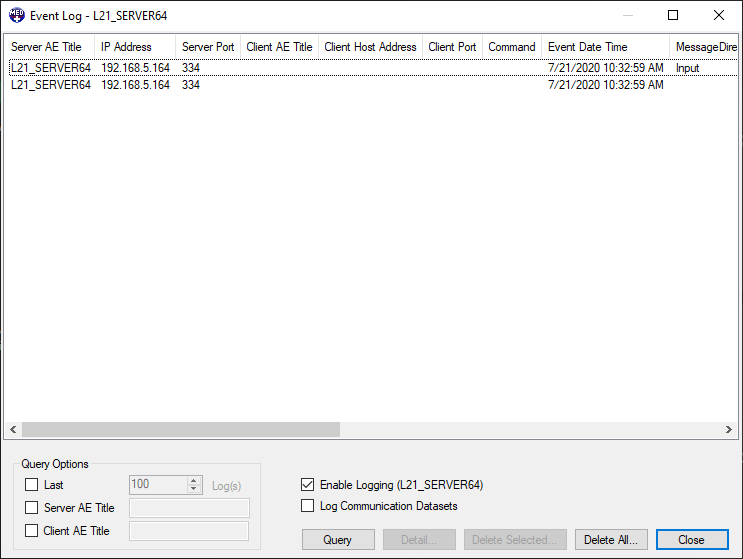
The Event Log Dialog has the following fields:
List View - Displays summary information.
Query Options Pane - Allows basic filtering of event log reports. The Query Options pane is shown in the following figure:
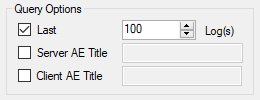
The Query Options Pane has the following fields:
- Last - Select the Last check box in order to view the last event log.
- Log(s) -Select the number of event logs for viewing.
- Server AE Title - Select the check box to filter by the Server AE Title, and enter the Server AE Title for which to search
- Client AE Title - Select the check box to filter by the Client AE Title, and enter the Client AE Title for which to search

**Query Button -** Click the Query button to refresh the list view to display the results of the search using the criteria specified in the Query Options Pane.
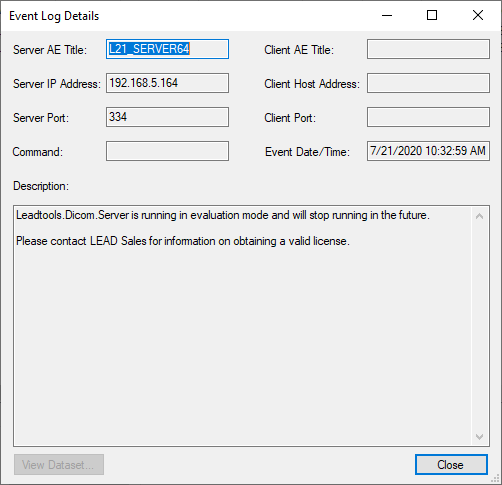
**Detail Button -** Click the Detail button to open the Event Log Details dialog. The dialog is shown in the following figure:
The Event Log Details dialog has the following fields:
- Server AE Title - The Server AE Title
- Server IP Address - Server's IP Address
- Server Port- Port number the server is using
- Client AE Title - The Client AE Title
- Client IP Address - Client's IP Address
- Client Port- Port number the server is using
- Event Date/Time- The date and time at which the event occurred.
- Description - Event description
- View Dataset - Opens the dataset for viewing.
- Close - Closes the dialog.

**Delete Selected Button -** Click the Delete Selected button to delete the selected message. The following dialog displays:
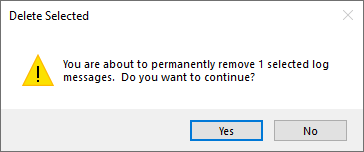
Click Yes to remove the selected log message. Click No to close the dialog and return to the Event Log dialog.

**Delete All Button -** Click the Delete All button to delete all messages. The following dialog displays:
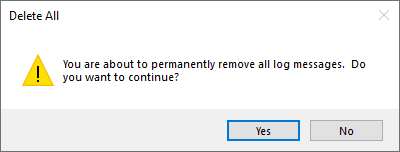
Click Yes to remove the log messages. Click No to close the dialog and return to the Event Log dialog.

**Close Button -** Click the Close button to close the dialog.
AE Titles Tab - This tab shows the configured list of clients for the currently selected server while a server service is running. The server register IAeTitle implementation is responsible for handling the Service Manager requests. The following actions are available on the AE Titles Tab:

**Add AE Title button** - Configures a new client connection. Clicking the button displays the following dialog:
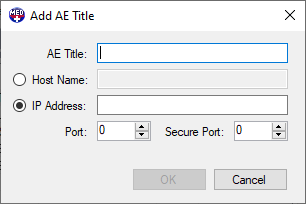
- AE Title - Client AE title. AE Titles should be unique among clients.
- Host Name - Host name of the client station. Use the host name if a fixed IP address is not available.
- IP Address - IP Address of the client station.
- Port - Client reconnect port. Port the client uses to accept incoming DICOM connections (i.e. Storage SCP service by Client to retrieve image from server as part of C-MOVE message process).
- Secure Port - Client reconnect secure port. If a secure port is specified it will be used instead of the port. Please note that one of the add-ins in the server must implement secure communication for this to work. For example, placing the LEADTOOLS default security AddIns (Leadtools.AddIn.Security.dll) on any server and configuring it will allow secure communication.

**Edit AE Title button** -Use this to edit an existing client configuration. Enabled when a client is selected from the current client list. Clicking the button opens an Edit AE Title dialog similar to the **Add AE Title** dialog.
Note: Double-clicking a client list item also displays the Edit AE Title dialog.

**Delete AE Title** - Deletes the selected client configuration.
LEADTOOLS installs the following sample PACS Framework Servers Demos: