Combine Multiple Plots - MATLAB & Simulink (original) (raw)
This example shows how to combine plots in the same axes using the hold function, and how to create multiple axes in a figure using the tiledlayout function.
Combine Plots in Same Axes
By default, new plots clear existing plots and reset axes properties, such as the title. However, you can use the hold on command to combine multiple plots in the same axes. For example, plot two lines and a scatter plot. Then reset the hold state to off.
x = linspace(0,10,50); y1 = sin(x); plot(x,y1) title('Combine Plots')
hold on
y2 = sin(x/2); plot(x,y2)
y3 = 2*sin(x); scatter(x,y3)
hold off
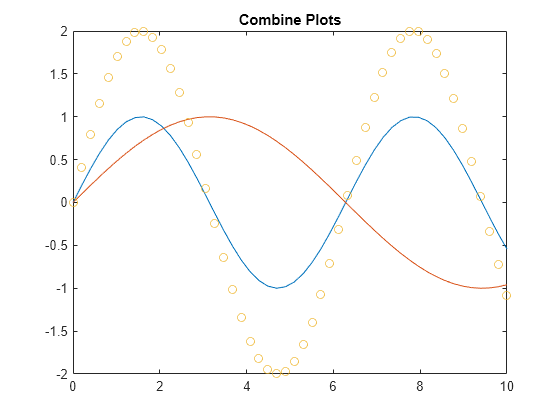
When the hold state is on, new plots do not clear existing plots or reset axes properties, such as the title or axis labels. The plots cycle through colors and line styles based on the ColorOrder and LineStyleOrder properties of the axes. The axes limits and tick values might adjust to accommodate new data.
Display Multiple Axes in a Figure
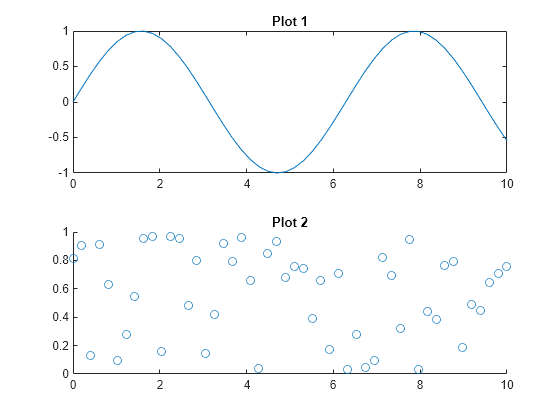
You can display multiple axes in a single figure by using the tiledlayout function. This function creates a tiled chart layout containing an invisible grid of tiles over the entire figure. Each tile can contain an axes for displaying a plot. After creating a layout, call the nexttile function to place an axes object into the layout. Then call a plotting function to plot into the axes. For example, create two plots in a 2-by-1 layout. Add a title to each plot.
x = linspace(0,10,50); y1 = sin(x); y2 = rand(50,1); tiledlayout(2,1)
% Top plot nexttile plot(x,y1) title('Plot 1')
% Bottom plot nexttile scatter(x,y2) title('Plot 2')
Create Plot Spanning Multiple Rows or Columns
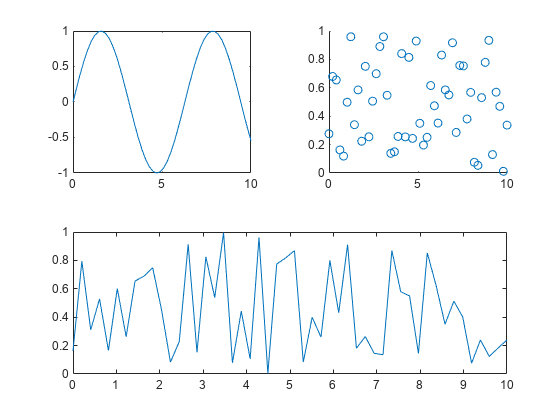
To create a plot that spans multiple rows or columns, specify the span argument when you call nexttile. For example, create a 2-by-2 layout. Plot into the first two tiles. Then create a plot that spans one row and two columns.
x = linspace(0,10,50); y1 = sin(x); y2 = rand(50,1);
% Top two plots tiledlayout(2,2) nexttile plot(x,y1) nexttile scatter(x,y2)
% Plot that spans nexttile([1 2]) y2 = rand(50,1); plot(x,y2)
Modify Axes Appearance
Modify the axes appearance by setting properties on each of the axes objects. You can get the axes object by calling the nexttile function with an output argument. You also can specify the axes object as the first input argument to a graphics function to ensure that the function targets the correct axes.
For example, create two plots and assign the axes objects to the variables ax1 and ax2. Change the axes font size and _x_-axis color for the first plot. Add grid lines to the second plot.
x = linspace(0,10,50); y1 = sin(x); y2 = rand(50,1); tiledlayout(2,1)
% Top plot ax1 = nexttile; plot(ax1,x,y1) title(ax1,'Plot 1') ax1.FontSize = 14; ax1.XColor = 'red';
% Bottom plot ax2 = nexttile; scatter(ax2,x,y2) title(ax2,'Plot 2') grid(ax2,'on')

Control Spacing Around the Tiles
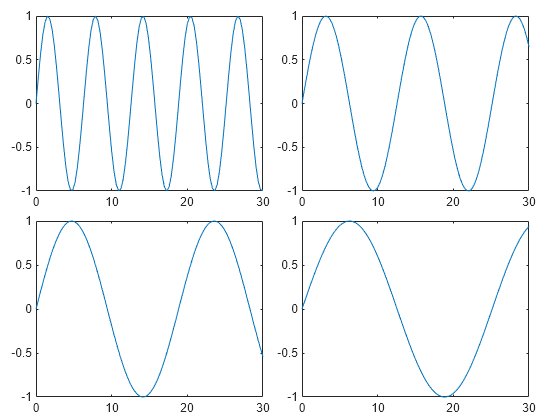
You can control the spacing around the tiles in a layout by specifying the Padding and TileSpacing properties. For example, display four plots in a 2-by-2 layout.
x = linspace(0,30); y1 = sin(x); y2 = sin(x/2); y3 = sin(x/3); y4 = sin(x/4);
% Create plots t = tiledlayout(2,2); nexttile plot(x,y1) nexttile plot(x,y2) nexttile plot(x,y3) nexttile plot(x,y4)
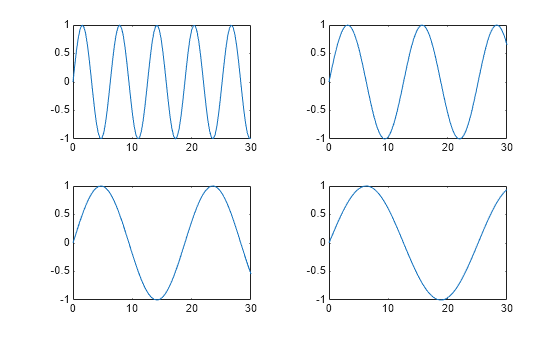
Reduce the spacing around the perimeter of the layout and around each tile by setting the Padding and TileSpacing properties to 'compact'.
t.Padding = 'compact'; t.TileSpacing = 'compact';
Display Shared Title and Axis Labels
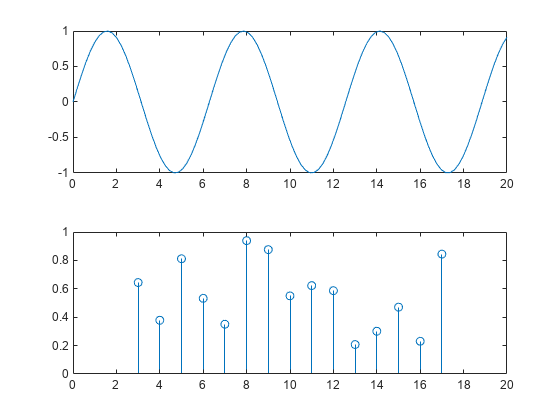
You can display a shared title and shared axis labels in a layout. Create a 2-by-1 layout t. Then display a line plot and a stem plot. Synchronize the _x_-axis limits by calling the linkaxes function.
x1 = linspace(0,20,100); y1 = sin(x1); x2 = 3:17; y2 = rand(1,15);
% Create plots. t = tiledlayout(2,1); ax1 = nexttile; plot(ax1,x1,y1) ax2 = nexttile; stem(ax2,x2,y2)
% Link the axes linkaxes([ax1,ax2],'x');
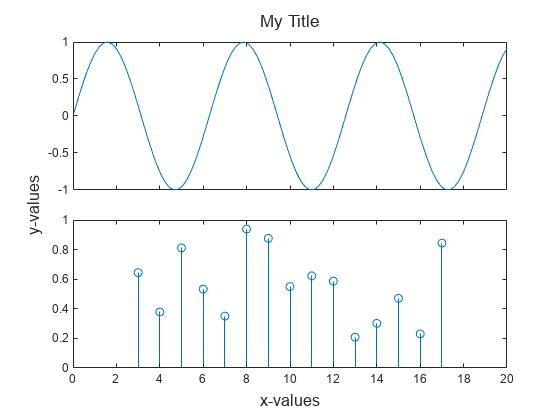
Add a shared title and shared axis labels by passing t to the title, xlabel, and ylabel functions. Move the plots closer together by removing the _x_-axis tick labels from the top plot and setting the TileSpacing property of t to 'compact'.
% Add shared title and axis labels title(t,'My Title') xlabel(t,'x-values') ylabel(t,'y-values')
% Move plots closer together xticklabels(ax1,{}) t.TileSpacing = 'compact';
See Also
Functions
- tiledlayout | nexttile | title | hold