Dynamic Data Futures – Part 1 Adding Advanced Filters UPDATED (original) (raw)
- Part 1 - Getting Dynamic Data Futures filters working in a File Based Website.
- Part 2 - Create the AnyColumn filter from the Dynamic Data Futures Integer filter.
- Part 3 – Creating the AnyColumnAutocomplete filter.
Getting Dynamic Data Futures filters working in File Based Website
1. Adding Dynamic Data Futures to your Website
From the File menu of you file based website select Add –> Existing Project… (see Figure 1) and browse to the folder where you unzipped the Dynamic Data Futures to, and select the DynamicDataFutures.csproj file this will add the Futures project and none of the samples.

Figure 1 – Adding an Existing Project to the file based website
2. Adding a Reference to Dynamic Data Futures and AjaxToolkit
Right mouse click the website root and click Add Reference…

Figure 2 - Adding a reference to the website
When the dialogue box pops up choose the Projects Tab and select the DynamicDataFutures project and click OK.
Now you will need to do the same for the AjaxToolkit, only this time you need to click the Browse tab and navigate to the folder where you have downloaded and extracted the AjaxToolkit to, select the DLL in the sample website’s bin folder and click OK.

Figure 3 – Selecting the AjaxToolkit DLL
3. Adding the new Filter User Controls to the website
Right mouse click the DynamicData folder in your Dynamic Data Website and select New Folder, name the folder Filters.
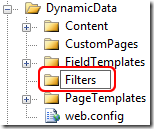
Figure 4 – Adding the Filters Folder
New right mouse click the newly created folder and select Add Existing Items…
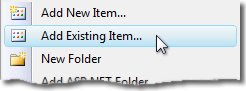
Figure 5 - Add Existing Items
Browse to the folder containing DynamicDataFutures project and then navigate to the DynamicData\Filters folder in the samples website

Figure 6 – Selecting the Filter files (excluding the designer files)
Now select all except the .designer.cs files and click Add.
Now we will need to copy the following files:
Copy the following to the App_Code folder.
- AutocompleteFilter.asmx.cs
- CascadeAttribute.cs
Copy the following to the root of the website.
- AutocompleteFilter.asmx
- AutocompleteStyle.css
- AjaxToolkitFixes.css
4. Converting Web Application files to work in a file based Website
We are going to use some advanced search and replace (not just because I like showing off) to demonstrate these features in Visual Studio 2008:
- Search and replace using simple regular expression.
- Replace by file extension.
- Replace in files in a particular folder.
Things that need to be changes:
- Namespaces needs to be removed from the Inherits property of the control tag in the ascx files.
- CodeBehind changes to CodeFile
- Namespace surrounding the user control class in the ascx.cs files.
To Find and Replace in only the DynamicData\Filters folder:

Figure 7 – Find and Replace if Files in a specific folder
Using Figure 6 use the following steps with each of the Search Patterns.
- Enter the text to search for.
- If you need to do it in all the sub-folders.
- Click to set the folder to find file in (see Figure 7).
- Note the Match case option is not checked (when searching for CodeBehind you may miss codebehind or Codebehind or codeBehind with it checked).
- Check when using Regular Expressions or Wild Cards.
- The files extension or pattern to match.
- Click to start the Find and Replace.

Figure 8 – Setting the Search Folders
- Click the up folder button until you see some folders below then navigate to you website and the DynamicData folder.
- Click the add button to add the folder to the list of folders to search in (we are only interested in the Filters folder here).
- The folder is added to the Selected folders list.
Search Patterns:
start without the Regular expression checkbox unchecked.
- Find Inherits="DynamicDataFuturesSample. and Replace with Inherits="
- Find CodeBehind and Replace with CodeFile
Check the Regular expression checkbox for this.
- Find namespace DynamicDataFuturesSample\n\{\n Replace with "" nothing.
- Find namespace DynamicDataFuturesSample \{\n Replace with "" nothing (Note the space instead of the \n).
- Find \n\} and replace with nothing.
Note: Note there is only ever one } preceded by a linefeed except if you have two classes in the same file, also if you repeat the search after doing a CTRL+K and CTRL-D to reformat the code, then you will again remove the last brace in the file.
- The hit CTRL+K and CTRL-D to reformat the code in each file before saving it.
And now manually edit the following three files removing namespace and changing NOT CodeBehind to CodeFile in AutocompleteFilter.asmx.
- AutocompleteFilter.asmx.cs
- AutocompleteFilter.asmx
- CascadeAttribute.cs
5. Making the Necessary Changes to allow Advanced Filter to Work
To make Dynamic Data Futures work with the website we will need to make the following changes to the List and ListDetails pages:
- Add a Tag Mapping in the web.config.
- Register the Dynamic Data Futures assembly and tag in the web.config.
- Change each PageTemplates FilterRepeater a little.
- Edit the Site.master to add a link to the AutocompleteStyle.css file ***UPDATED***
Note: The Tag mapping is a great idea and I didn’t know it was there until DynamicDataFutures added the ImprovedDynamicValidator.
So add the Tag Mapping to the pages collection in configuration->system.web->pages see Listing 1.
... ... ... ...Listing 1 – Where to add the Tag Mapping
Listing 2 shows the Tag Mapping to be added, as you can see the classes including full namespace are show in tagType and mappedTagType.
This sorts out the FilterRepeater being replaced by the AdvancedFilterRepeater.
Listing 3 – Register the Dynamic Data Futures assembly and tag
Listing 3 add a registration for the Dynamic Data Futures assembly and tag in the web.config.
Listing 4 – Add Ajax Toolkit to the website
Note: You need to add the AjaxToolkit and Dynamic Data Futures assemblies and tags to the controls collection, the AjaxToolkit is need as some of the other Filters require it.
Next in the List.aspx and ListDetails.aspx PageTemplates you need to add the DelegatingFilter and remove the DynamicFilter and also remove the AssociatedControlID="DynamicFilter$DropDownList1" from the Label control above the DynamicFilter making the whole FilterRepeater (aliased AdvancedFilterRepeater via Tag Mapping) look like Listing 5.
<asp:FilterRepeater ID="FilterRepeater" runat="server">
<asp:Label runat="server" Text='<%# Eval("DisplayName") %>' />
<asp:DelegatingFilter
runat="server"
ID="DynamicFilter"
OnSelectionChanged="OnFilterSelectedIndexChanged" />
Listing 5 – The finished FilterRepeater.
Note: It would have been nice to map the DynamicFilter to DelegatingFilter also but the parameters are not the same between controls, I suppose you could always rename them in the DynamicDataFutures source and then map it. But then when a new version DynamicDataFutures is released you would need to remember to rename the properties again.
The DynamicFilter has OnSelectedIndexChanged and the DelegatingFilter has OnSelectionChanged, if they were the same you could also use the tag mapping.
Add the following line to the Site.master head tag
Dynamic Data Site **_<_** **_link href="AutocompleteStyle.css" rel="stylesheet" type_** **_="text/css" />_** **_<_** **_link href="AjaxToolkitFixes.css" rel="stylesheet" type_** **_="text/css" />_**Listing 6 - adding a link to the Site.master head
UPDATED: Forget to add a link to the AjaxToolkitFixes.css and AutocompleteStyle.css in the Site.master file.
6. Now to Test the AdvancedFilterRepeater and new Filters
To test this out we need to add a Metadata file to our website, see Listing 6.
using System; using System.Collections.Generic; using System.ComponentModel; using System.ComponentModel.DataAnnotations; using System.Linq; using System.Web; using Microsoft.Web.DynamicData;
[MetadataType(typeof(Order_Detail_MD))] public partial class Order_Detail { public class Order_Detail_MD { // Use the Cascade.ascx filter control. // // Specify that the list of items in the products filter should be // filtered by the Product.Category foreign key column. [Filter(FilterControl = "Cascade")] [Cascade("Category")] public object Product { get; set; }
    // Don't show the Order filter
    [Filter(Enabled = false)]
    public object Order { get; set; }
}
}
Listing 7 – Order_Details Metadata
Run the website and go to Order_Details table and you should have the Cascade filter there and also the Orders filter should be missing also, see Figure 9.

Figure 9 – Cascade filter in operation
The next step is to add our own filter the AnyColumn filter which of course will filter any column.