How to Create Your First Model in Spring MVC? (original) (raw)
Last Updated : 20 Apr, 2026
Spring MVC is a powerful Web MVC framework for building web applications. It is designed around the Model-View-Controller (MVC) pattern, which separates the application into three main components Model, View and Controller.
- Model is used to transfer data from controller to view.
- Uses Model interface to store key-value pairs.
- Data can be accessed in JSP using Expression Language (EL)
Prerequisites
- Eclipse (EE version)
- Spring JAR Files
- Apache Tomcat
Step-by-Step Implementation
Followings are the steps to implement the first model in Spring MVC:
Step 1: Create Dynamic Web Project
- Open STS/Eclipse
- Create a Dynamic Web Project
- Ensure proper project structure is generated
Step 2: Add Spring JAR Files
- Download required Spring JARs
- Go to: src > main > webapp > WEB-INF > lib
- Paste all JAR files in this folder
Step 3: Configure Apache Tomcat Server
- Add Tomcat server in IDE
- Configure it with your project
- Ensure server starts successfully
Step 4: Configure Dispatcher Servlet (web.xml)
- Go to: src > main > webapp > WEB-INF > web.xml file.
- Add servlet configuration
**File: web.xml:
XML `
springmvc-view-resolver index.html index.jsp index.htm default.html default.jsp default.htm
<absolute-ordering />

<servlet>
    <!-- Provide a Servlet Name -->
    <servlet-name>viewresolver-dispatcher</servlet-name>
    <!-- Provide a fully qualified path to the DispatcherServlet class -->
    <servlet-class>org.springframework.web.servlet.DispatcherServlet</servlet-class>
    <load-on-startup>1</load-on-startup>
</servlet>

<servlet-mapping>
    <!-- Provide a Servlet Name that you want to map -->
    <servlet-name>viewresolver-dispatcher</servlet-name>
    <!-- Provide a url pattern -->
    <url-pattern>/demo.com/*</url-pattern>
</servlet-mapping>
`
**Note: One should be well aware of what is Dispatcher Servlet in Spring as it is a crucial concept to understand prior adhering ahead.
Step 5: Create Spring Configuration File
- Go to: src > main > webapp > WEB-INF and create an XML file
- Create file: viewresolver-dispatcher-servlet.xml
And the name of the file must be in this format:
YourServletName-servlet.xml
**For example: For this project, the name of the file must be
viewresolver-dispatcher-servlet.xml
So either you can create a Spring Configuration File or you can just create a simple XML file and add the below lines of code inside that file.
**File: viewresolver-dispatcher-servlet.xml:
XML `
<context:component-scan base-package="com.demo.controllers">
`
Step 6: Create Controller Class
- Go to: src/main/java
- Create package (e.g., com.demo.controllers)
- Create class DemoController
- Annotate with @Controller
@Controller
public class DemoController {}
**Note: Spring will automatically initialize the class having a @Controller annotation and register that class with the spring container.
- Use
@RequestMapping("/hello") - Return view name
"demo"
// Annotation
@RequestMapping("/hello")
// Method
public String helloWorld()
{
return "";
}
Now in the return statement, we have to return some views (web pages), so whenever the endpoint '/hello' is invoked we can see our result on the web page. So let's create our first View.
Step 7: Create View (JSP Page)
- **Go to: WEB-INF
- **Create folder: views
- **Create file: demo.jsp
File: demo.jsp:
HTML `
GeeksforGeeks Welcome Page!
`
Now go to the DemoController class and inside the _helloWorld() method we have to return a value something like this.
return "demo";
**File: DemoController.java:
Java `
// Java Program to Illustrate DemoController Class
package com.demo.controllers;
// Importing required classes import org.springframework.stereotype.Controller; import org.springframework.web.bind.annotation.RequestMapping;
// Class @Controller public class DemoController {
// Method
@RequestMapping("/hello") public String helloWorld()
{
    // Just return the page name
    // No Path, no extension
    return "demo";
}
}
`
Step 8: Create Model and Send Data
Modify controller method:
- Add Model parameter
- Add data: model.addAttribute("myNameValue", myName)
- Create data: String myName = "Amiya Rout"
**File: DemoController.java:
Java `
package com.demo.controllers;
// Importing required classes import org.springframework.stereotype.Controller; import org.springframework.ui.Model; import org.springframework.web.bind.annotation.RequestMapping;
// Class @Controller public class DemoController {
// Method
@RequestMapping("/hello")
public String helloWorld(Model model) {

    // Sending data to view (jsp page)
    String myName = "Amiya Rout";
    model.addAttribute("myNameValue", myName);

    // Just return the page name
    // No Path, no extension
    return "demo";
}
}
`
**Step 9: Display Data in JSP
- Use Expression Language (EL)
- And to display the data inside our jsp page we have to modify the demo.jsp page.
- And we can do it by the following line of code
${myNameValue}
Now the complete code for Demo.jsp is given below and you are done.
HTML `
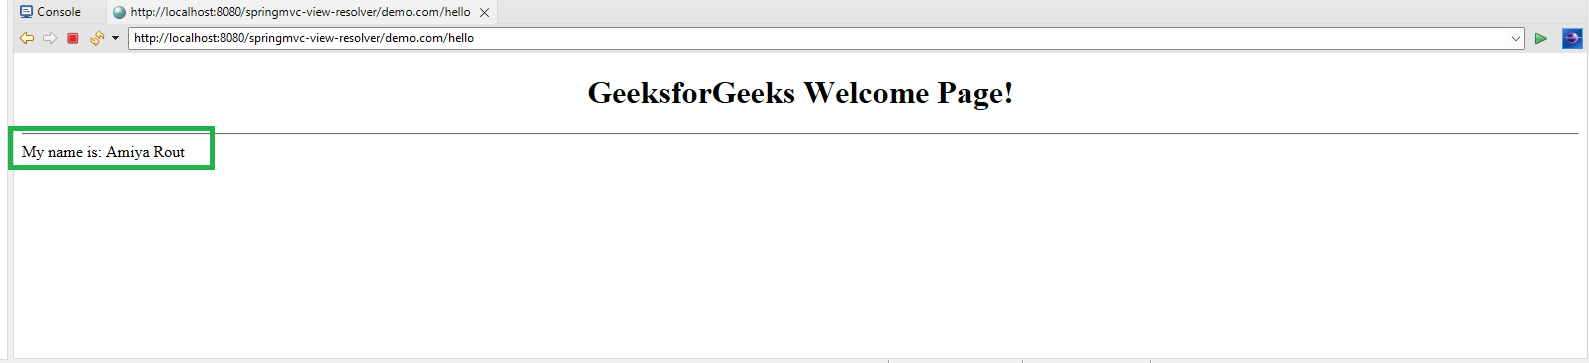
GeeksforGeeks Welcome Page!
My name is: ${myNameValue}
`
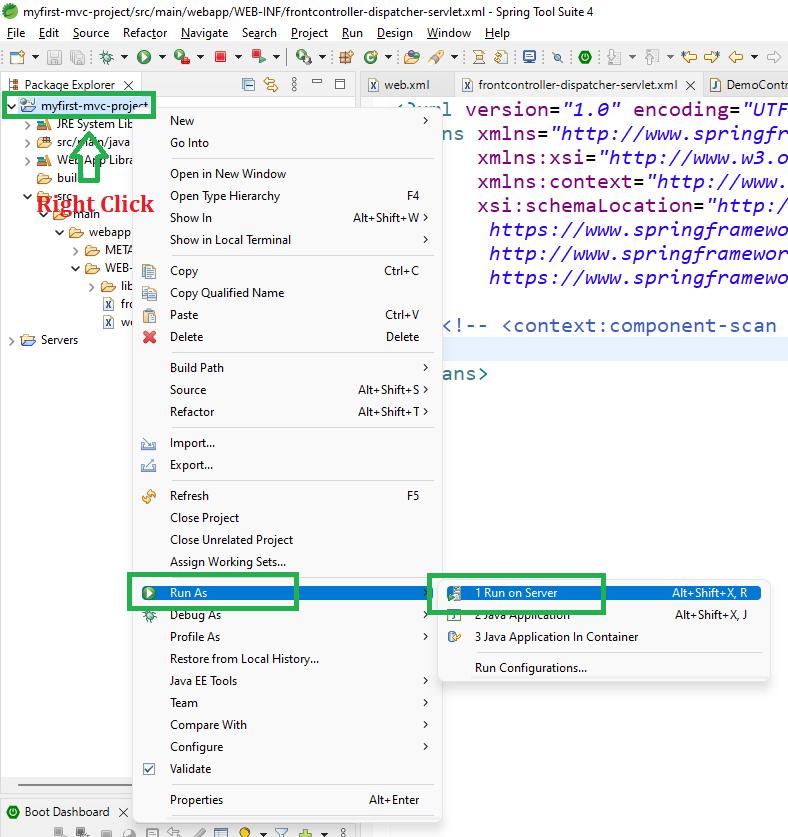
**Step 10: Run Application
- Right-click project ->Run on Server
After that use the following URL to run your controller
http://localhost:8080/springmvc-view-resolver/demo.com/hello
**Output: