GridView in Android with Example (original) (raw)
Last Updated : 23 Jul, 2025
A GridView is a type of AdapterView that displays items in a two-dimensional scrolling grid. Items are inserted into this grid layout from a database or from an array. The adapter is used for displaying this data, setAdapter() method is used to join the adapter with GridView. The main function of the adapter in GridView is to fetch data from a database or array and insert each piece of data in an appropriate item that will be displayed in GridView. This is what the GridView structure looks like. We are going to implement this project using both Java and Kotlin Programming Language for Android.

Some Important XML attributes of GridView
| Attribute | Description |
|---|---|
| android:numColumns | Defines the number of columns to be set on the grid |
| android:horizontalSpacing | Defines the spacing between two columns in the view |
| android:verticalSpacing | Defines the spacing between two rows in the view |
| android:columnWidth | Defines the width of each column. Use "auto_fit" for default |
| android:stretchMode | Defines the stretch capability of column to fill the grid's available width. Possible values are "none", "spacingWidth", "columnWidth", and "spacingWidthUniform" |
| android:choiceMode | Defines the type of selection mode to be used in the GridView. Possibles values are "none", "singleChoice", "multipleChoice", and "multipleChoiceModal" |
| android:scrollbars | Defines the type of scrollbars for the GridView. |
Step By Step Implementation
Step 1: Create a New Project in Android Studio
To create a new project in Android Studio please refer to How to Create/Start a New Project in Android Studio .
The code for that has been given in both Java and Kotlin Programming Language for Android.
**Step 2: Add the Required Dependencies
Add the Google Repository to your settings.gradle.kts File.
repositories { // add the following google() mavenCentral() }
After adding this Dependency, sync the Project and now we will move towards its implementation.
**Step 3: Working with the XML Files
Next, go to the **activity_main.xml file, which represents the UI of the project. Below is the code for the activity_main.xml file. Comments are added inside the code to understand the code in more detail.
**activity_main.xml:
XML `
<androidx.constraintlayout.widget.ConstraintLayout xmlns:android="http://schemas.android.com/apk/res/android" xmlns:app="http://schemas.android.com/apk/res-auto" xmlns:tools="http://schemas.android.com/tools" android:id="@+id/main" android:layout_width="match_parent" android:layout_height="match_parent" android:background="@color/white" tools:context=".MainActivity">
<GridView
    android:id="@+id/grid_view"
    android:layout_width="match_parent"
    android:layout_height="match_parent"
    android:gravity="center"
    android:layout_marginTop="40dp"
    android:numColumns="2"
    android:verticalSpacing="24dp"
    app:layout_constraintEnd_toEndOf="parent"
    app:layout_constraintHorizontal_bias="0.5"
    app:layout_constraintStart_toStartOf="parent"
    app:layout_constraintTop_toTopOf="parent"
    tools:listitem="@layout/card_item" />
</androidx.constraintlayout.widget.ConstraintLayout>
`
Design UI:
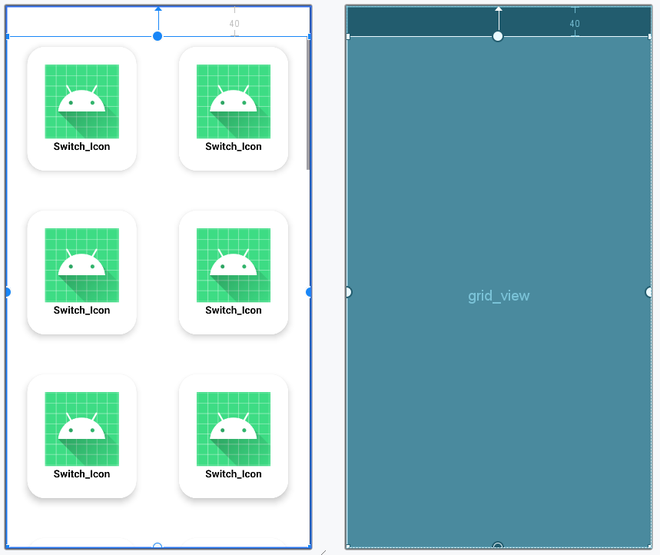
**- Create an XML layout file for each item of GridView
Create an XML file for each grid item to be displayed in GridView. Click on the app > res > layout > Right-Click > Layout Resource file and then name the file as card_item . Below is the code for the card_item.xml file.
card_item.xml:
XML `
<androidx.cardview.widget.CardView xmlns:android="http://schemas.android.com/apk/res/android" xmlns:app="http://schemas.android.com/apk/res-auto" android:layout_width="wrap_content" android:layout_height="wrap_content" android:layout_gravity="center" app:cardUseCompatPadding="true" app:cardCornerRadius="24dp" app:cardElevation="5dp">
<LinearLayout
    android:layout_width="wrap_content"
    android:layout_height="wrap_content"
    android:layout_margin="24dp"
    android:orientation="vertical">

    <ImageView
        android:id="@+id/image_view"
        android:layout_width="100dp"
        android:layout_height="100dp"
        android:layout_gravity="center"
        android:src="@mipmap/ic_launcher" />

    <TextView
        android:id="@+id/text_view"
        android:layout_width="match_parent"
        android:layout_height="wrap_content"
        android:text="@string/app_name"
        android:textColor="@color/black"
        android:textStyle="bold"
        android:textAlignment="center" />
</LinearLayout>
</androidx.cardview.widget.CardView>
`
Design UI:

**Step 5: Create a Model Class for Storing Data
Model Class is the Java/Kotlin Class that handles data to be added to each GridView item of GridView. For Creating Model Class. Now click on app > java/kotlin > apps package name > Right-Click on it. Then Click on New > Java Class/Kotlin Class. Name your Java/Kotlin Class file as CourseModel. Below is the code for the < CourseModel file.
CourseModel File:
Java `
public class Model { private String name; private int image;
public Model(String name, int image) {
    this.name = name;
    this.image = image;
}

public String getName() {
    return name;
}

public void setName(String name) {
    this.name = name;
}

public int getImage() {
    return image;
}

public void setImage(int image) {
    this.image = image;
}
}
Kotlin
class Model( var name: String, var image: Int )
`
**Step 6: Create an Adapter Class
Adapter Class adds the data from Modal Class in each item of GridView which is to be displayed on the screen. For Creating Adapter Class. Now click on app > java/kotlin > {package-name-directory} > Right-Click on it. Then Click on New > Java/Kotlin Class. Name your Java/Kotlin Class file as GridViewAdapter. Below is the code for the GridViewAdapter file.
GridViewAdapter File:
Java `
package org.geeksforgeeks.demo;
import android.content.Context; import android.view.LayoutInflater; import android.view.View; import android.view.ViewGroup; import android.widget.ArrayAdapter; import android.widget.ImageView; import android.widget.TextView;
import java.util.ArrayList; import java.util.List;
public class GridViewAdapter extends ArrayAdapter {
public GridViewAdapter(Context context, ArrayList<Model> list) {
    super(context, 0, list);
}

@Override
public View getView(int position, View convertView, ViewGroup parent) {

    View itemView = convertView;
    if (itemView == null) {
        itemView = LayoutInflater.from(getContext()).inflate(R.layout.card_item, parent, false);
    }

    Model model = getItem(position);

    TextView textView = itemView.findViewById(R.id.text_view);
    ImageView imageView = itemView.findViewById(R.id.image_view);

    if (model != null) {
        textView.setText(model.getName());
        imageView.setImageResource(model.getImage());
    }

    return itemView;
}
}
Kotlin
package org.geeksforgeeks.demo
import android.content.Context import android.view.LayoutInflater import android.view.View import android.view.ViewGroup import android.widget.ArrayAdapter import android.widget.ImageView import android.widget.TextView
class GridViewAdapter( context: Context, list: ArrayList ) : ArrayAdapter<Model?>(context, 0, list as List<Model?>) {
override fun getView(position: Int, view: View?, parent: ViewGroup): View {

    var itemView = view
    if (itemView == null) {
        itemView = LayoutInflater.from(context).inflate(R.layout.card_item, parent, false)
    }

    val model: Model? = getItem(position)
    val textView = itemView!!.findViewById<TextView>(R.id.text_view)
    val imageView = itemView.findViewById<ImageView>(R.id.image_view)

    textView.text = model!!.name
    imageView.setImageResource(model.image)
    return itemView
}
}
`
**Step 7: Working with the MainActivity File
Go to the MainActivity File and refer to the following code. Below is the code for the MainActivity File. Comments are added inside the code to understand the code in more detail.
MainActivity File:
Java `
package org.geeksforgeeks.demo;
import android.os.Bundle; import android.widget.GridView; import androidx.appcompat.app.AppCompatActivity;
import java.util.ArrayList;
public class MainActivity extends AppCompatActivity {
private GridView gridView;

@Override
protected void onCreate(Bundle savedInstanceState) {
    super.onCreate(savedInstanceState);
    setContentView(R.layout.activity_main);

    gridView = findViewById(R.id.grid_view);
    ArrayList<Model> list = new ArrayList<>();

    list.add(new Model("DSA", R.drawable.gfg_logo));
    list.add(new Model("JAVA", R.drawable.gfg_logo));
    list.add(new Model("C++", R.drawable.gfg_logo));
    list.add(new Model("Python", R.drawable.gfg_logo));
    list.add(new Model("Javascript", R.drawable.gfg_logo));
    list.add(new Model("DSA", R.drawable.gfg_logo));

    GridViewAdapter adapter = new GridViewAdapter(this, list);
    gridView.setAdapter(adapter);
}
}
Kotlin
package org.geeksforgeeks.demo
import android.os.Bundle import android.widget.GridView import androidx.appcompat.app.AppCompatActivity
class MainActivity : AppCompatActivity() {
private lateinit var gridView: GridView

override fun onCreate(savedInstanceState: Bundle?) {
    super.onCreate(savedInstanceState)
    setContentView(R.layout.activity_main)

    gridView = findViewById(R.id.grid_view)
    val list = ArrayList<Model>()

    list.add(Model("DSA", R.drawable.gfg_logo))
    list.add(Model("JAVA", R.drawable.gfg_logo))
    list.add(Model("C++", R.drawable.gfg_logo))
    list.add(Model("Python", R.drawable.gfg_logo))
    list.add(Model("Javascript", R.drawable.gfg_logo))
    list.add(Model("DSA", R.drawable.gfg_logo))

    val adapter = GridViewAdapter(this, list)
    gridView.adapter = adapter
}
}
`
Output:
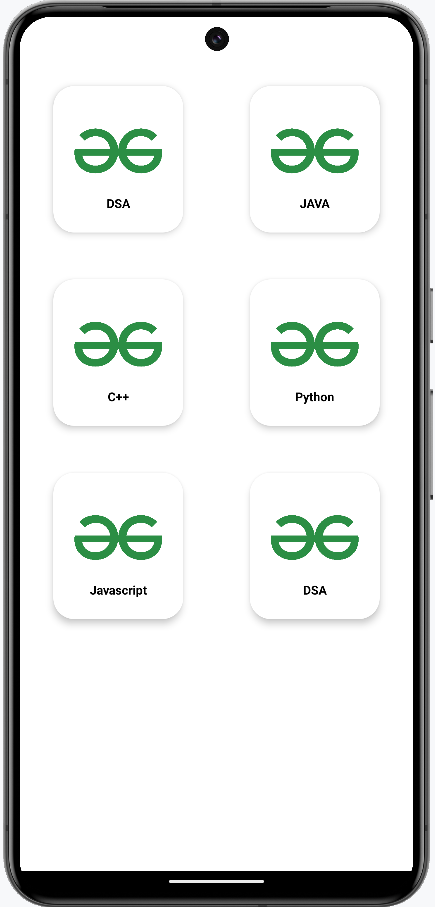
_For learning more about the topic refer to these articles: