AWS NACL (Network Access Control List) (original) (raw)
Last Updated : 23 Jul, 2025
Amazon web services provide a wide list of services and makes sure that these services do not have to compromise with security. AWS takes security with highest priority and provides a comprehensive set of tools and features to help the users protect their data and applications in the cloud.
Section 1: What Are Network Access Control Lists (NACLs)?
One such feature of security provided by AWS(Amazon Web Services) is the Network Access Control List(NACL). This NACL is defined by default for every Virtual Private Network(VPC). However, you can create custom NACL according to your requirements. These NACL define inbound and outbound rule for subnets present in VPC. These have almost the same function as Security Groups the only difference is NACL works in subnet levels and Security groups are defined for instances and other resources.
Section 2: Why Use NACLs?
**Example 1:
Let's take a scenario where you have two VPC(VPC One and VPC Two) and a VPC peering is established between both the VPCs. Now when a request comes from VPC two for particular subnet of VPC one, how will the VPC one distinguish it? For this we use NACL. In NACL we define which traffic is destined to enter and leave subnet One.
**Example2:
Suppose you have a VPC and you have two subnets subnet1 and subnet two. Now you want to give someone permission to work only with subnet two resources. This can be done using NACL. Only permitted user will be given access to the subnet after verifying their by IP address. Let's understand with a diagram:

- When a VPC is created, a modifiable default NACL is created for the subnets of the VPC. If we do not intent to use default one, we can explicitly create our own NACL. However, if we do not explicitly define then a default one gets associated automatically.
- The default NACL allows inbound and outbound traffic from anywhere.
- A Network ACL can be associated with multiple subnets. However, a subnet can only be associated with a single NACL. After being associated with one NACL if we try to attach again then the old association is removed.
- NACL contains inbound and outbound rules each with a rule number(1 to 32766). Rules are then evaluated in order, deciding whether to allow or deny.
- 5. NACLs are stateless which means the information about old traffic are not saved.
Section 3: Key Concepts and Terminologies
- **Rule Number: Rules can be numbered starting from 1 to 32766. It is evaluated in ascending order, which means from lower to higher. If a lower numbered rule is matched with the traffic, it is applied regardless of any higher numbered rule, contradicting it.
- **Protocol: You can specify the protocol of the traffic that should match (EX: ICMP,TCP).
- **Port Number: To specify the listening port.(Ex: Port 80 for HTTP)
- **Source: This is for inbound rules only to specify the source with what CIDR value is allowed.
- **Destination: This is for outbound rules only to specify the destination with what CIDR value is allowed.
- **Type: The type of traffic can be All traffic or specific such as "SSH".
- **Allow/Deny: To Specify whether to allow or deny the traffic.
Section 4: Creating and Managing NACLs
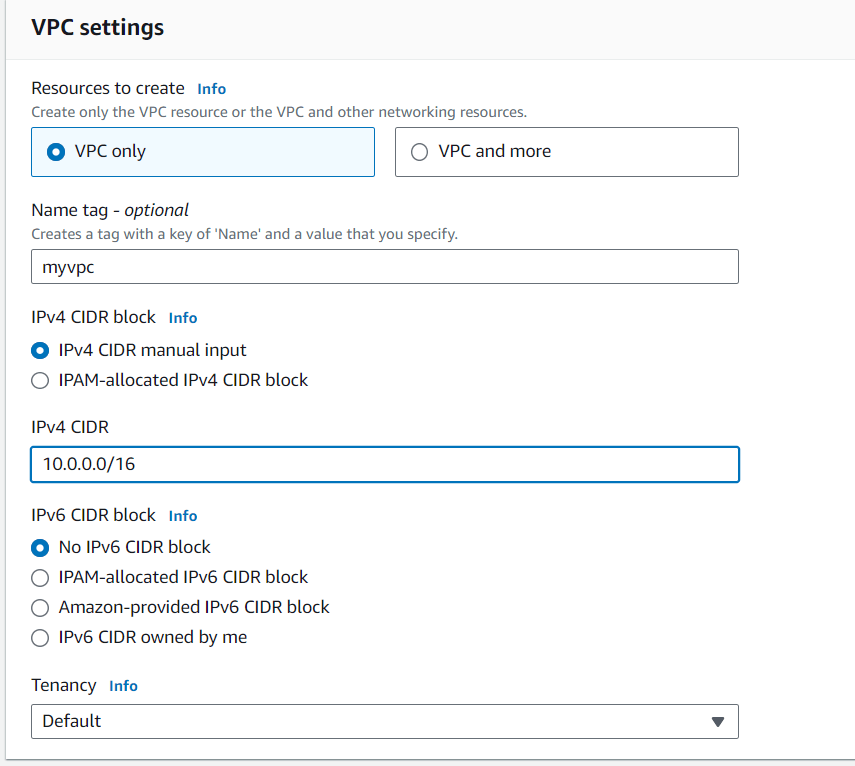
**Step 1: In AWS first create a VPC
**Step 2: Create subnet and Associate it with a route table
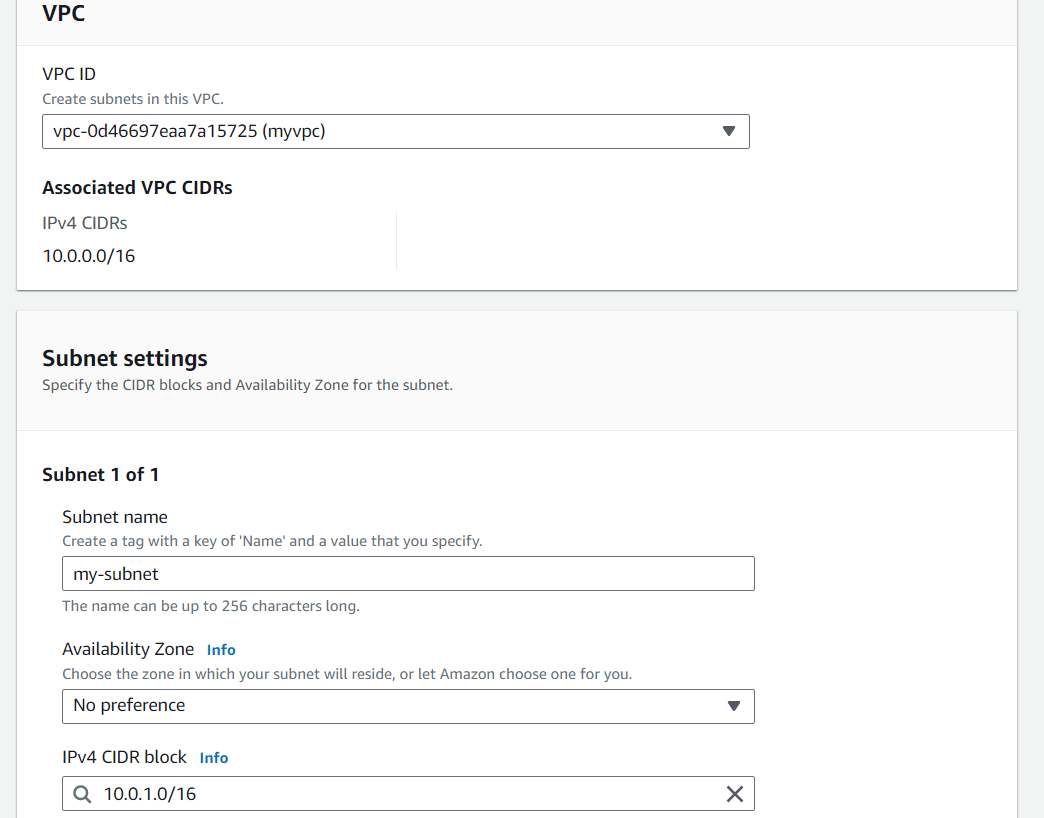
.png)
**Step 3: Go to NACL, you will find a default NACL
So create one:
- Click on create Network ACL
- Give a name
- To attach it with VPC-> Under VPC choose your VPC
- Click on Create

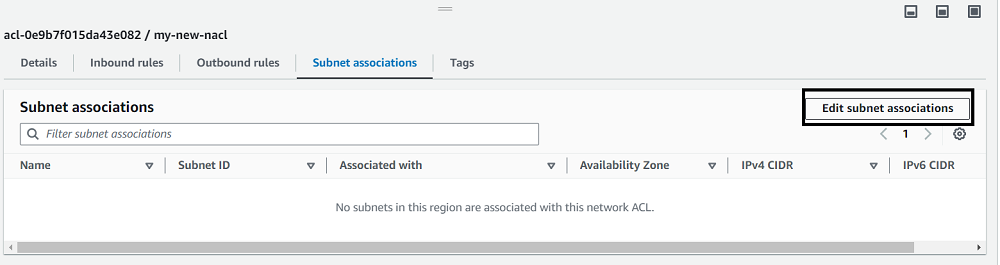
**Step 4: Click On the NACL created go to subnet association there click on Edit subnet association
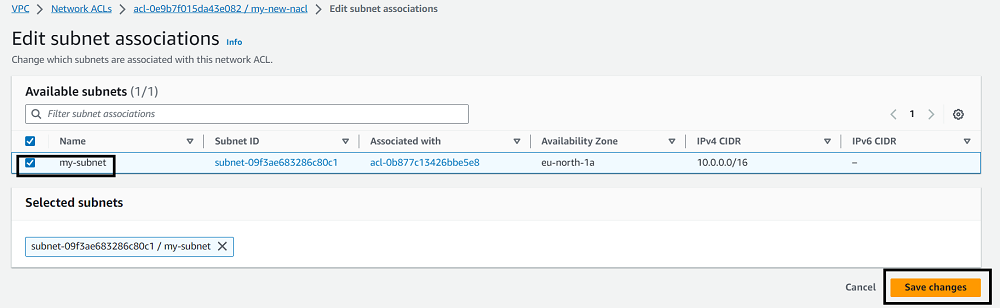
**Step 5: Click the desired subnet and Save changes
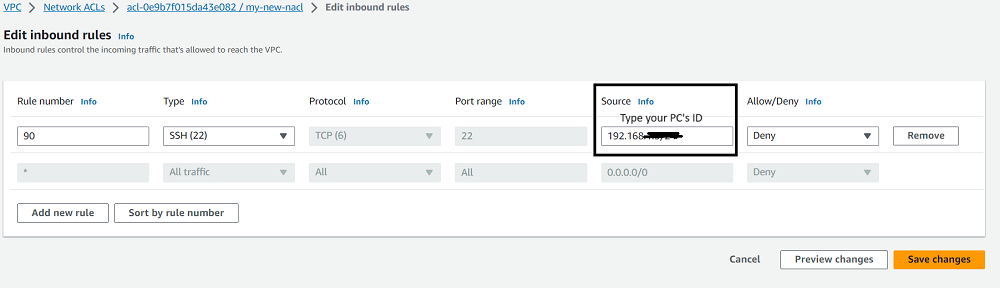
Go to inbound rules of the NACL. Click on edit inbound rule
**Step 6: In edit rule give rule number-90 for SSH type traffic and give your pc's IP address and "Deny" the permission.Save Changes
 Section 5: Testing NACL
Now create a instance under the same subnet with default security group(in order to understand how NACL works however the best practice is to use own Security Group)
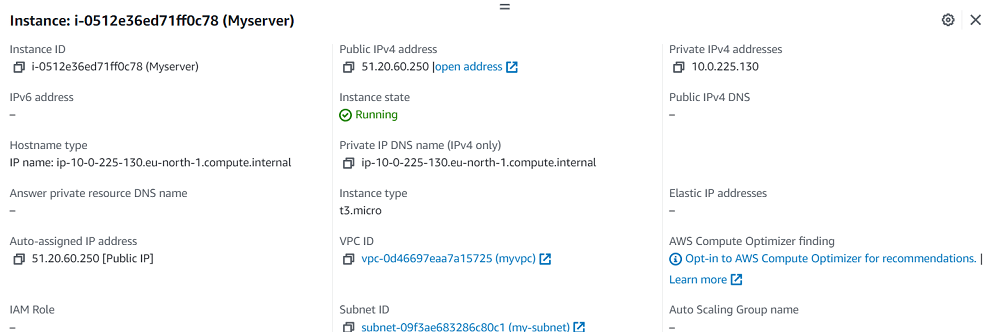
Now try to ssh into the server through your cmd. You won't be able to SSH into the server due to restriction by NACL
