Building a Context Sharing System using MCP (original) (raw)
Last Updated : 16 Apr, 2026
Model Context Protocol (MCP) is an open protocol developed by Anthropic that standardizes how applications share contextual information with Large Language Models (LLMs). Think of MCP as a universal connector or “USB port” for AI applications that helps them to exchange and use contextual data seamlessly. In this article we will make a project in which:
- We create an MCP server that enables multiple agents (AI assistants, apps or processes) to store, search and share contextual data.
- This context could be any text like user preferences, chat history, instructions, etc.
- Then we test and inspect our server with the MCP Inspector GUI.
Step 1: Install Libraries
We will install the required libraries we will need.
- **mcp[cli]: The official Model Context Protocol SDK and CLI tools from Anthropic.
- **asyncio: Python’s library for asynchronous programming to handle multiple clients smoothly. C++ `
pip install mcp[cli]
pip install asyncio
`
Step 2: Setting Up Project Directory Structure
We will create our project folder, organize files in similar structure as this maintains hierarchy. The commands to create folders are:
- **mkdir mcp-context-sharing: Creates a new project folder.
- **cd mcp-context-sharing: Moves into the project folder.
- **mkdir src: Creates a folder for source code inside the project.
- **mkdir src/server: Creates a folder for server code inside the source folder.
This sets up a clean, organized folder structure for the project.
PowerShell `
mkdir mcp-context-sharing cd mcp-context-sharing mkdir src mkdir src\server
Bash
mkdir -p mcp-context-sharing/src/server cd mcp-context-sharing
`
We will create our MCP server inside the main.py within the src/server folder.
Step 3: Create MCP Server
Open the main.py file in any of the IDE or editor and edit that file.
- **asyncio: Enables asynchronous programming, so the server can handle multiple requests concurrently without blocking.
- **MCPServer: Imported from the MCP SDK; this class creates an MCP server instance.
- **server = MCPServer(): Initializes the server that can expose "tools"—functions callable by clients following MCP.
- **context_store = {}: A dictionary that stores contextual data organized by agent names. Each agent maps to a list of stored strings. Python `
import asyncio from mcp import MCPServer
server = MCPServer() context_store = {}
`
2. Define MCP Tools
MCP tools are functions annotated with @server.tool(), making them remotely callable. These run asynchronously due to async def.
**Tool 1: share_context
- **Purpose: Allows agents to store new pieces of context (strings) under their unique name.
- If the agent doesn't exist yet in context_store, create a new entry holding an empty list.
- Append the given content to the agent’s list.
- Returns a confirmation message. Python `
@server.tool() async def share_context(agent: str, content: str): """ Store context from a specified agent. """ if agent not in context_store: context_store[agent] = [] context_store[agent].append(content) return {"result": f"Context stored from {agent}: {content}"}
`
**Tool 2: retrieve_context
- **Purpose: Allows clients to search all stored contexts and retrieve entries that contain the specified query string.
- The search is case-insensitive.
- It collects all matching entries in the matching list along with the agent who stored them.
- If no matches are found, returns a message indicating that. Python `
@server.tool() async def retrieve_context(query: str): """ Retrieve all stored context entries matching the query text. """ matching = [] for agent, contents in context_store.items(): for content in contents: if query.lower() in content.lower(): matching.append({"agent": agent, "content": content}) if not matching: return {"result": f"No context found matching query: {query}"} return {"result": matching}
`
**Tool 3: list_all_context
- **Purpose: Provides a full dump of the store, revealing all contexts saved under all agents.
- Useful for inspecting what has been stored so far without filtering. Python `
@server.tool() async def list_all_context(): """ Return the full context store with contexts from all agents. """ return context_store
`
2. Starting the MCP Server
When the script runs, it:
- Prints a startup message.
- Calls server.serve() to start an asynchronous event loop.
- The server listens constantly for incoming MCP client requests, enabling remote calls to the defined tools. Python `
if name == "main": print("MCP server started and waiting for clients...") server.serve()
`
Step 4: Update the settings.json for MCP Inspector
The settings.json was updated to configure VS Code’s MCP Inspector so it knows how to launch and communicate with the MCP server. Specifically, it tells the Inspector:
- To run the MCP server using the command python with the argument pointing to the server script (src/server/main.py).
- To use the STDIO transport method, meaning it will exchange messages with the server via standard input/output streams.
We are using VS Code for editing our project,
- Press Ctrl + Shift + P
- Type Preferences: Open User Settings (JSON)
- Press enter and type: JSON `
{ "servers": [ { "name": "Local MCP Server", "command": "python", "arguments": ["src/server/main.py"], "transport": "stdio" } ] }
`
- **name: Identifies this server setup inside VS Code.
- **command: The executable to run—in this case, Python.
- **arguments: The script file that starts the MCP server.
- **transport: The communication channel. Here, "stdio" means standard input/output streams are used for sending/receiving MCP messages between Inspector and server.
Step 5: Starting MCP Server
After saving the server file, we will start the server,
- Changes directory to the project root.
- Executes the MCP server script.
- The server will start running and wait for clients (like MCP Inspector) to connect and invoke tools. PowerShell `
cd C:\Path\To\mcp-context-sharing python src/server/main.py
Bash
cd /path/to/mcp-context-sharing python src/server/main.py
`
Step 6: Running MCP Server
After the MCP Server starts, on a new we type commands to open the MCP Inspector GUI.
- This command launches the MCP Inspector development GUI.
- The GUI opens a web browser automatically at http://localhost:3000.
- The GUI acts as a client that can interact with the running MCP server and call its tools. PowerShell `
cd C:\Path\To\mcp-context-sharing & "C:\Users\YOUR_USERNAME\AppData\Roaming\Python\Python313\Scripts\mcp.exe" dev src/server/main.py
Bash
cd /path/to/mcp-context-sharing mcp dev src/server/main.py
`
**Output:
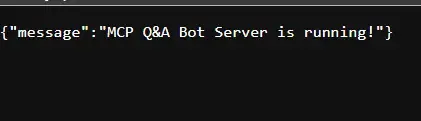
Running MCP Server
Step 7: MCP Inspector GUI
After successfully running the commands, the GUI opens on localhost server automatically, if not then we can paste the following link to open the GUI:
Text `
`
In the GUI, we can see various tabs.
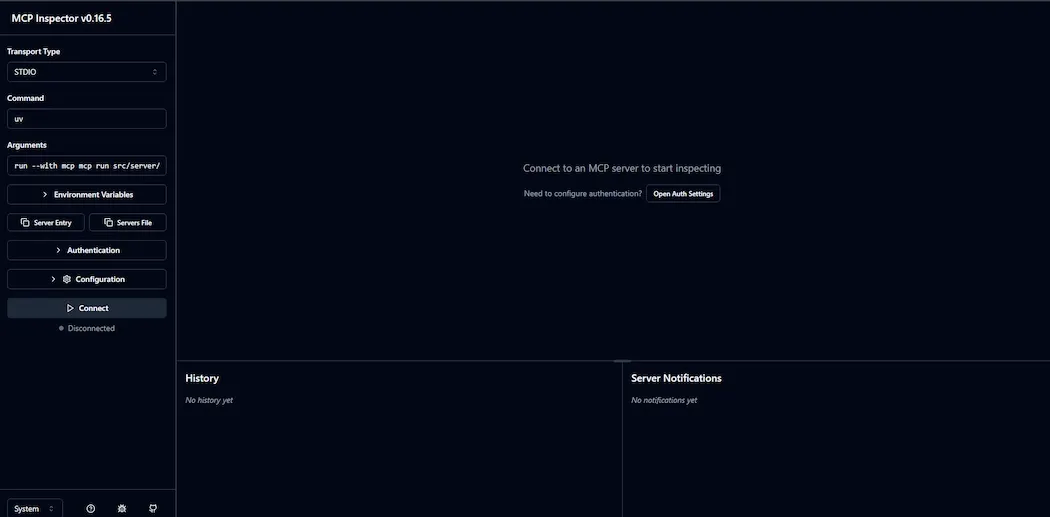
MCP Inspector GUI
Step 8: Changes in Connection Tab
In the Inspector we make certain changes:
- **Transport Type: STDIO lets MCP Inspector talk to the server using standard input/output streams, a simple way for local processes to communicate without networking.
- **Command: python tells Inspector to run the Python interpreter.
- **Arguments: src/server/main.py specifies the MCP server script to run.
- Click Connect starts the server process and establishes communication between Inspector and server.
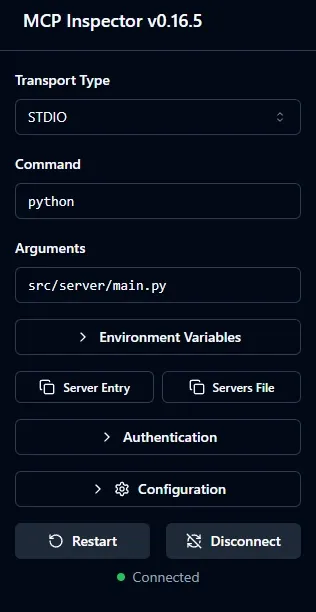
Server Connection
After the successful connection, it can be confirmed by the Connected notification.
- **Resources: Manage reusable data files or assets used by tools and prompts.
- **Prompts: Create and edit templates with variables to guide language model responses.
- **Tools: List and run callable MCP tools from the server with manual inputs.
- **Ping: Check if the MCP server is online and responsive.
- **Sampling: Adjust text generation settings like randomness and creativity.
- **Elicitation: Control the style and tone of generated language output.
- **Roots: Set base knowledge or data for tools and agents to reference.
- **Auth: Manage security by configuring authentication and access control for the server.

Menu
2. We Select the Tools Tab
- Click on the Tools tab in the top menu.
- This displays options to interact with the tools our server exposes.
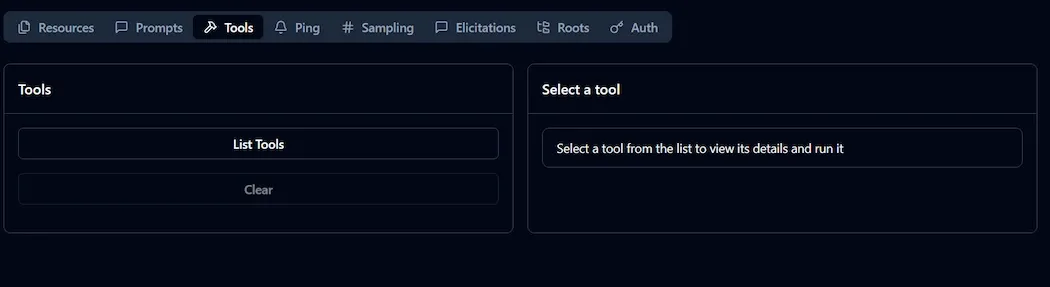
Tool Tab
3. Click List Tools
Shows all the MCP tools available from your server, like share_context, retrieve_context and list_all_context.
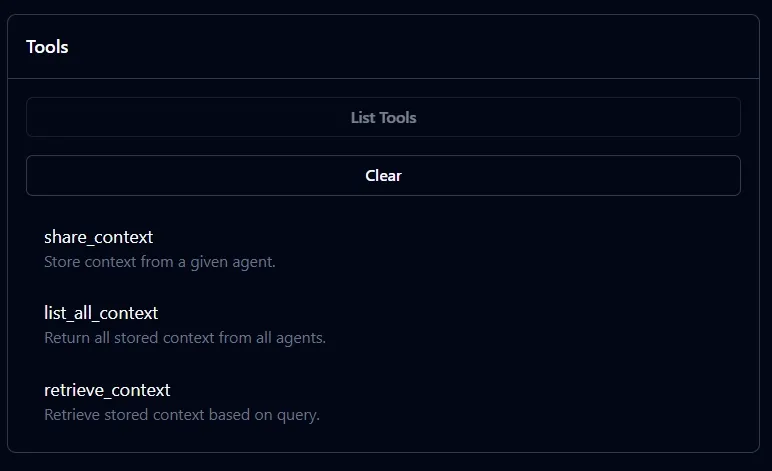
Available Tools
4. We select the retrieve_context
- Select retrieve_context to open an input form where you can type a query string.
- Running this tool searches all stored contexts for matching entries containing that query.
- The tool returns and displays all relevant stored contexts.
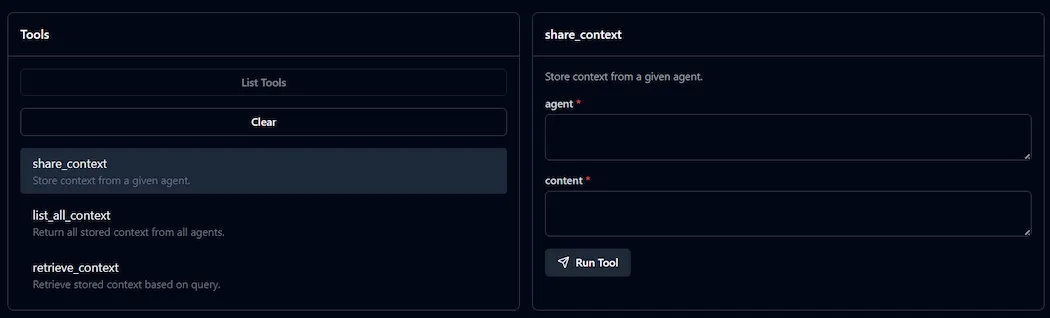
Share context tool
- We can add various context here, different agents can store different data by just simply specifying the agent name along with the content and then press Run tool button to save the data.
6. We can get all the stored context from all the agents by selecting the list_all_context
- Select the list_all_context tool from the Tools tab.
- Running this tool immediately returns the complete context store without any filtering or searching.
- It shows all contexts stored from all agents in one view.
- Useful for inspecting the full data set or auditing what has been saved so far.
The source code can be downloaded from here.
We have build a simple and powerful MCP server in python which enables seamless context sharing among agents. Using the MCP protocol, we built tools to store data per agent and search it by query and tested everything with the MCP Inspector.