Deploying Model on Hugging Face Spaces (original) (raw)
Last Updated : 14 Apr, 2026
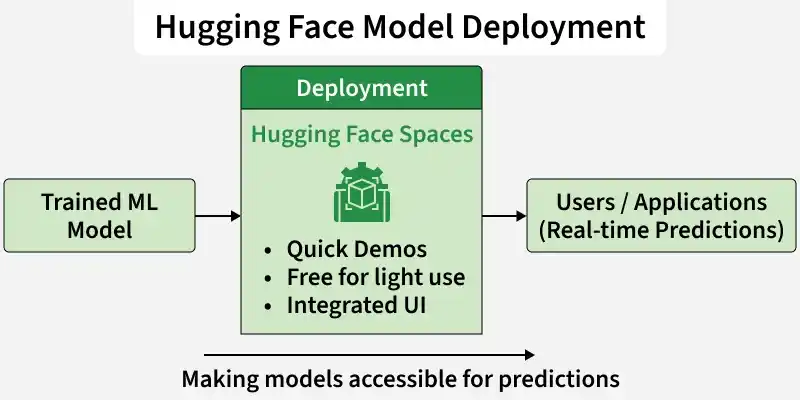
Deploying a model allows developers to share machine learning applications to user via an interactive web interface. Hugging Face Spaces provides an easy way to host and demonstrate AI models without complex infrastructure setup.
Hugging Face Spaces
Understanding Hugging Face Spaces
Model deployment is the phase where your trained model stops being just code in a Jupyter Notebook and starts delivering value. Think of it as moving from experimentation to execution. At a strategic level, deployment happens in two primary modes depending on your objective demonstration or large scale integration.
- Users interact with the model through a simple web UI.
- No complex backend setup required.
- Ideal for quick sharing and feedback collection.
- Example platform: Hugging Face Spaces
Use Hugging Face Spaces when you need:
- A live demo for your portfolio
- A shareable link for interviews or research
- A quick web interface without managing servers
- Easy public interaction with your model
Deploying with Hugging Face Spaces
Suppose you trained a model that classifies emails as Spam or Not Spam. Now you want users to paste email text into a web interface and instantly see the prediction. Hugging Face Spaces is ideal for this.
Step 1: Create a Model Repository
1. Go to huggingface and create an account
2. Click your profile icon and then New Model
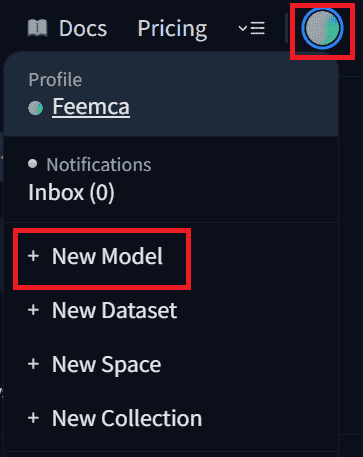
Click on New Model
3. Fill in the following details and click on Create model:
- **Repository name: email-spam-classifier
- **Visibility: Public (or Private if needed)
- **License: Choose appropriate license
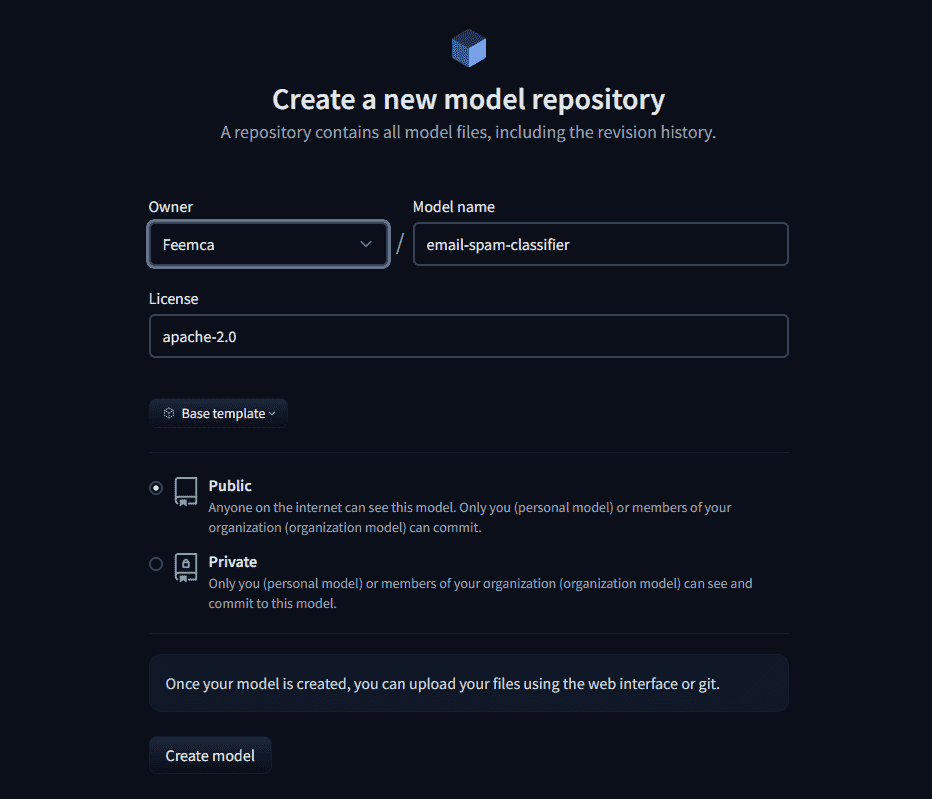
Fill the details
Step2: Upload Your Model Files
Inside your new model repository:
1. Click File uploader
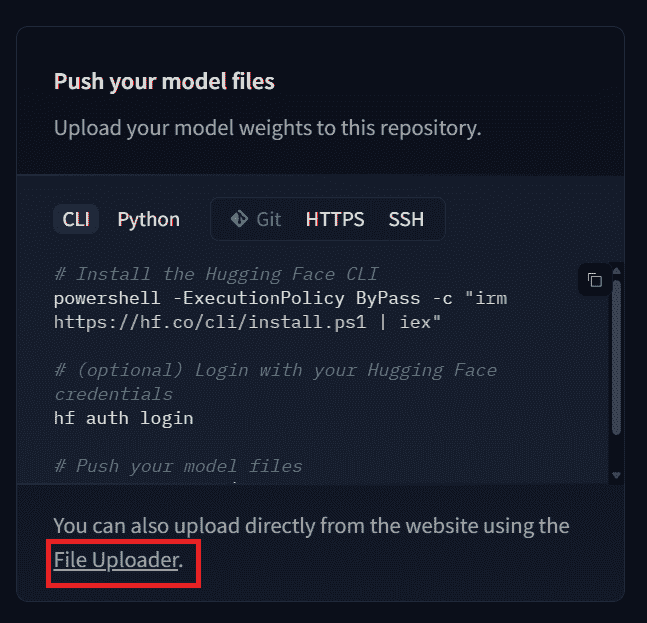
Click file uploader
2. Drag and drop your model and vectorizer files one by one :
- Raw email text is provided as input.
- The text is converted into numerical features using a TF-IDF Vectorizer.
- The trained machine learning model (Multinomial Naive Bayes) predicts the label.
- Output is returned as: Spam or Not Spam
You can also download the model used in this demonstration from here and vectorizer file from here
3. Add a commit message (e.g., First Model) and Click Commit changes. Your model is now stored on the Hugging Face Hub ,Do the same for vectorizer file.
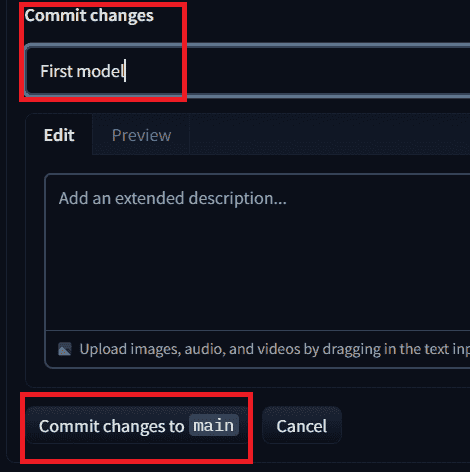
Add a commit message and commit the changes
Step 3: Create a New Space
Once your model is uploaded to the Hub, the next move is to build a live web app using Hugging Face Spaces.
1. Go to Hugging Face and click Create New Space
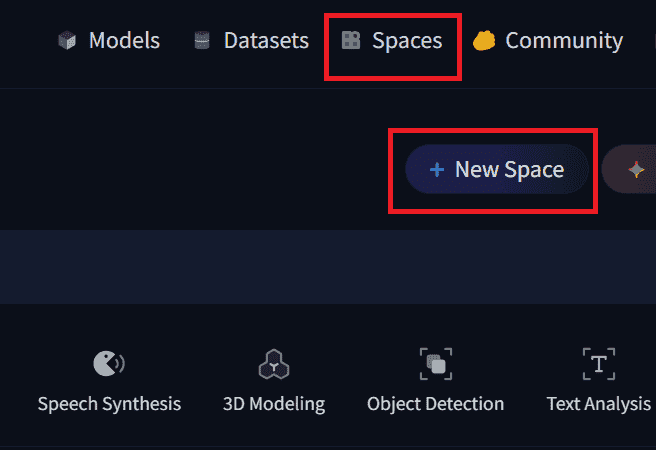
Click on new space
2. Fill in:
- **Space Name: email-spam-classifier-demo
- **License: Choose appropriately
- **SDK: Select Gradio
- **Hardware: CPU
- And then click Create Space
Step4: Create app.py
1. Now after creating the space, inside your space click create the app.py, It will open a new file editor inside your Space.
2. Write the following code inside that editor and click commit to main. Here we:
- Downloads the trained model and vectorizer from our Hugging Face repository.
- Loads them to make predictions.
- Converts user email text into numbers using the vectorizer.
- Predicts Spam or Not Spam using the model.
- Creates a small Gradio web app and launches it publicly. Python `
import gradio as gr from huggingface_hub import hf_hub_download import joblib
model_path = hf_hub_download( repo_id="your-username/email-spam-classifier", filename="model.pkl" )
vectorizer_path = hf_hub_download( repo_id="Your user name/email-spam-classifier", filename="vectorizer.pkl" )
model = joblib.load(model_path) vectorizer = joblib.load(vectorizer_path)
def predict_email(text): transformed_text = vectorizer.transform([text])
prediction = model.predict(transformed_text)

return "Spam" if prediction[0] == 1 else "Not Spam"
demo = gr.Interface( fn=predict_email, inputs=gr.Textbox(lines=5, placeholder="Paste your email text here..."), outputs="text", title="Email Spam Classifier", description="Enter email content to detect whether it is Spam or Not Spam." )
demo.launch()
`
Step 5: Create requirements.txt
1. Now inside your space click contribute and then create a new file
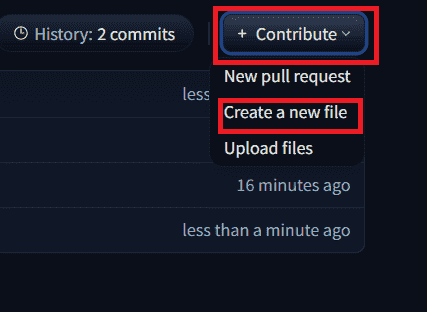
Create new file
2. Name the file as requirements.txt , write required libraries in it and click commit
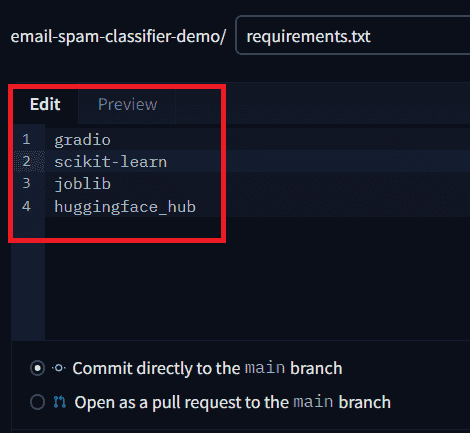
Write required libraries
Step 6: Automatic Hosting on Hugging Face Spaces
Once you commit your files (app.py, requirements.txt, model files), everything else is handled automatically by Hugging Face Spaces.
- Installs all dependencies from requirements.txt
- Builds the execution environment
- Runs your Gradio application
- Generates a public URL