How to FineTune an LLM from Hugging Face (original) (raw)
Last Updated : 23 Jul, 2025
Large Language Models (LLMs) have transformed different tasks in natural language processing (NLP) such as translation, summarization, and text generation. Hugging Face's Transformers library offers a wide range of pre-trained models that can be customized for specific purposes through fine-tuning. Adjusting an LLM with task-specific data through fine-tuning can greatly enhance its performance in a certain domain, especially when there is a lack of labeled datasets.
**This article will examine how to fine-tune an LLM from Hugging Face, covering model selection, the fine-tuning process, and an example implementation.
Selecting a Pretrained LLM
The initial step before fine-tuning is choosing an appropriate pre trained LLM. Hugging Face provides a range of models such as GPT, BERT, T5, among others that are suitable for text classification, generation, or question answering tasks. You have the option to select a model based on what your task demands.
- **BERT is well-suited for text classification, sentence classification, and named entity recognition tasks.
- **GPT (Generative Pretrained Transformer) is most suitable for tasks involving generating text.
- **T5 (Text-To-Text Transfer Transformer) is versatile for tasks that involve text inputs and outputs, like translation or summarization.
You can search for a model on Hugging Face's model hub based on your task and dataset to choose a model. The pre-trained models typically come with fine-tuned versions for various tasks such as sentiment analysis, summarization, and others.
Fine-Tuning Process
After choosing the model, the next step involves adjusting it on a dataset that is specific to the domain. The process of fine-tuning typically includes these steps:
- **Utilize the Pretrained Model and Tokenizer: Hugging Face simplifies the process of loading both the model and its tokenizer.
- **Get the Dataset Ready: Tokenize and format the dataset to align with the model's input requirements. Hugging Face’s dataset library makes it simple to load and prepare datasets.
- **Task definition: Fine-tuning is specific to the task at hand. You have the ability to adjust models for different purposes such as text categorization, generating language, or answering questions. The selection of a task determines the final organization of results.
- **Model Training: By utilizing the Trainer class from Hugging Face, you can set up a training loop, input the model, dataset, and optimizer, and kickstart the fine-tuning procedure.
- **Assess and Save the Model: Following the fine-tuning process, assess the model's performance on a validation dataset, and if it meets expectations, save the model for later use.
Fine-tuning LLM Model from HuggingFace : DistilBERT
Fine-tuning a language model (LLM) can significantly enhance its performance on specific tasks, such as sentiment analysis. In this section, we will walk through the process of fine-tuning a DistilBERT model using the Hugging Face Transformers library. We'll focus on the Yelp Polarity dataset, a well-known dataset for binary sentiment classification (positive or negative reviews).
**Requirements
Before we dive into the code, ensure you have the following libraries installed:
pip install transformers datasets torch gradio
Step 1: Load the Model and Tokenizer
We start by importing the necessary libraries and loading the DistilBERT model and its tokenizer.
Python `
from transformers import DistilBertTokenizer, DistilBertForSequenceClassification
Load the DistilBERT model and tokenizer
tokenizer = DistilBertTokenizer.from_pretrained('distilbert-base-uncased') model = DistilBertForSequenceClassification.from_pretrained('distilbert-base-uncased', num_labels=2)
`
Step 2: Load the Dataset
Next, we will load the Yelp Polarity dataset. This dataset contains text reviews labeled as either positive or negative.
Python `
from datasets import load_dataset
Load the Yelp Polarity dataset
dataset = load_dataset('yelp_polarity')
`
Step 3: Tokenize the Dataset
We need to tokenize the text data so that it can be processed by the model. We define a function to tokenize the dataset and apply it to both the training and testing splits.
Python `
Tokenize the dataset
def tokenize_function(examples): return tokenizer(examples['text'], padding='max_length', truncation=True)
tokenized_train = dataset['train'].map(tokenize_function, batched=True, num_proc=4) tokenized_test = dataset['test'].map(tokenize_function, batched=True, num_proc=4)
`
Step 4: Set Training Arguments
Now, we specify the training parameters, such as learning rate, batch size, number of epochs, and evaluation strategy.
Python `
from transformers import Trainer, TrainingArguments
Set training arguments
training_args = TrainingArguments( output_dir='./results', learning_rate=2e-5, per_device_train_batch_size=16, per_device_eval_batch_size=16, num_train_epochs=1, weight_decay=0.01, evaluation_strategy="epoch" )
`
Step 5: Initialize the Trainer
With the model, tokenizer, and training arguments ready, we can initialize the Trainer.
Python `
Initialize the trainer
trainer = Trainer( model=model, args=training_args, train_dataset=tokenized_train.select(range(1000)), # Use a subset for faster training eval_dataset=tokenized_test.select(range(500)) # Use a subset for evaluation )
`
Step 6: Fine-Tune the Model
Now, we can proceed to fine-tune the model on the training data.
Python `
Fine-tune the model
trainer.train()
`
**Output:
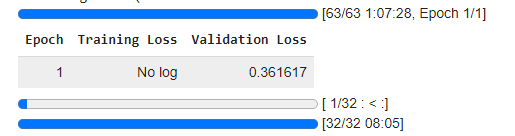
Step 7: Evaluate the Model
After training, we should evaluate the model's performance on the test dataset.
Python `
Evaluate the model
trainer.evaluate()
`
Step 8: Save the Model
Finally, we save the fine-tuned model and tokenizer for future use.
Python `
Save the model for future use
model.save_pretrained('./fine_tuned_yelp_model') tokenizer.save_pretrained('./fine_tuned_yelp_model')
`
Step 9: Create a Prediction Function
To use our fine-tuned model for sentiment analysis, we define a function that takes a text input, tokenizes it, and predicts the sentiment.
Python `
import torch
Function to perform sentiment prediction using the fine-tuned model
def predict_sentiment(text): inputs = tokenizer(text, return_tensors="pt", padding=True, truncation=True, max_length=512) outputs = model(**inputs) predictions = torch.argmax(outputs.logits, dim=-1).item()
if predictions == 1:
    return "Positive"
else:
    return "Negative"
`
Step 10: Build a Gradio Interface
To make our model more user-friendly, we can create a simple web interface using Gradio.
Python `
import gradio as gr
Gradio interface
interface = gr.Interface(fn=predict_sentiment, inputs="text", outputs="text", title="Sentiment Analysis with DistilBERT", description="Enter a review and get a sentiment (positive or negative).")
Launch the Gradio app
interface.launch()
`
**Output:

Conclusion
Fine-tuning a language model from Hugging Face enables you to customize robust pretrained models for your individual needs, enhancing results and reducing lengthy training durations. By utilizing pre-existing knowledge, it is possible to fine-tune models with less data and in less time, making it perfect for a range of natural language processing tasks. The transformers library from Hugging Face streamlines this task by providing strong APIs and a model hub, enabling you to concentrate on the task at hand rather than the intricacies of training complex models from the beginning.