How To Install GCP CLI In Linux, Windows ? (original) (raw)
Last Updated : 23 Jul, 2025
The gcloud, or Google Cloud Platform Command-Line Interface (CLI), simplifies organizing and managing the resources for GCP and provides many features and services. Users manage infrastructure continuously through continuous integration with GCP offerings like compute engines, cloud storage, and Kubernetes engines. The ability to script continuous processes with automation tools improves resource administration consistency and efficiency. Provides more security features to ensure that operations are safe and that help and documentation are available for all users. The GCP CLI, in its entirety, enables users to manage GCP resources, services, and infrastructure from the command line effectively. This article will teach us how to install the gcloud cli on Linux and Windows OS.
Featured in Google Cloud Command-line interface
Google Cloud Platform (GCP) CLI (Command Line Interface) is a powerful tool for managing GCP resources and services from the command line. Here's what it offers:
- **Resource Management: Google Cloud provides virtual machines, storage buckets, databases, and various other GCP resources that can be created, managed, removed, and modified.
- **Service Interaction: Connect or establish a connection with the different GCP services, like BigQuery, Cloud Storage, Kubernetes Engine, and Compute Engine.
- **Deployment: Access tools like Cloud Functions, App Engine, and Cloud Run to deploy and manage the applications on the GCP infrastructure.
- **Monitoring: Keep an eye on and evaluate the functionality and condition of your GCP services and resources.
- **Security: To ensure safe operations, manage permissions and access control for GCP resources.
- **Networking: Manage and configure networking components, including subnets, firewall rules, VPNs, and virtual private clouds (VPCs).
- **Integration: Take advantage of APIs and SDKs to integrate GCP services with external tools and systems.
- **Automation: Scripting and automation features can be used to automate workflows and routine tasks.
- **Cost Management: For the best possible spending, keep an eye on and manage the GCP resource costs.
- **Cross-Platform Support: Available for several operating systems (OS), providing administrators and developers options, including Linux, macOS, and Windows.
Steps to Configure GCP Cli on Linux
How to launch a virtual machine on GCP
**Step 1: SSH to a virtual machine. I have taken Ubuntu OS.

**Step 2: Using below command update the packages
sudo apt-get update

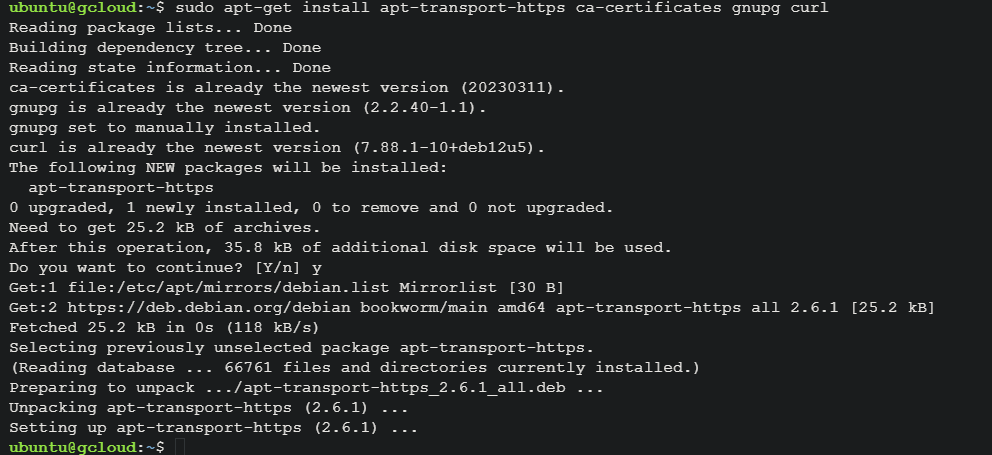
**Step 3: To install the required packages and dependencies on a Linux machine running Debian, execute the command below.
sudo apt-get install apt-transport-https ca-certificates gnupg curl
**Step 4: The Google Cloud apt-key.gpg file is downloaded via cURL by the command below, which then streams it to GPG to dearmor and converts it to binary format. Once the output has been dearmored, it is saved in the /usr/share/keyrings directory as cloud.google.gpg. Usually, this procedure is employed to safely append a GPG key to the system's keyring, enabling the system to authenticate packages obtained from the Google Cloud repository.
curl https://packages.cloud.google.com/apt/doc/apt-key.gpg | sudo gpg --dearmor -o /usr/share/keyrings/cloud.google.gpg

**Step 5: Using the below command to verify the package is added or not into the repository.
echo "deb [signed-by=/usr/share/keyrings/cloud.google.gpg] https://packages.cloud.google.com/apt cloud-sdk main" | sudo tee -a /etc/apt/sources.list.d/google-cloud-sdk.list

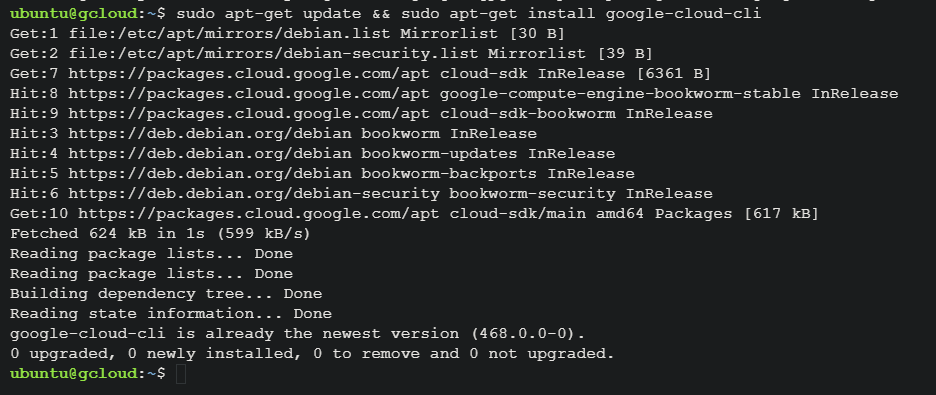
**Step 6: Using apt-get update, the program below first modifies the package lists for all accessible software repositories. Next, it uses apt-get install to install the Google Cloud CLI (google-cloud-cli) package. The && operator ensures that the second command (apt-get install google-cloud-cli) will not be run until the first action (apt-get update) has properly completed. The past ten releases are always available in the repository.
sudo apt-get update && sudo apt-get install google-cloud-cli
**Step 7: Verify the Gcloud Cli using the below command.
gcloud --version

Steps to Configure GCP Cli on Windows
**Step 1: Refre the official document and get the official link to download the gcloud exe file on our local. I have downloaded the using the below link from the official documentation.
https://dl.google.com/dl/cloudsdk/channels/rapid/GoogleCloudSDKInstaller.exe

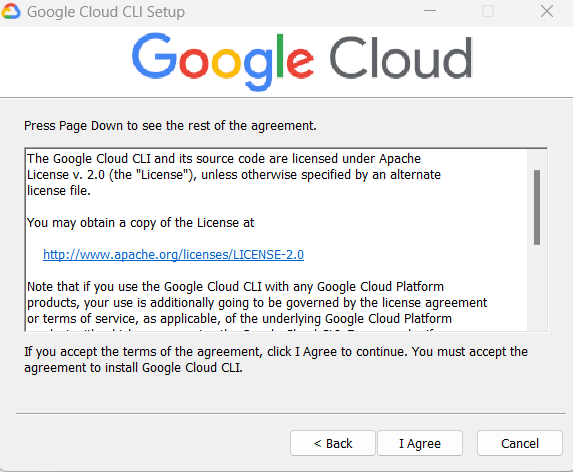
**Step 2: Docuble click on google cloud SDK installer (i.e., Gcloud exe file) or Run as a administrator and click on next.

**Step 3: Read the terms and policies and agree the agreement by clicking the I agree button.
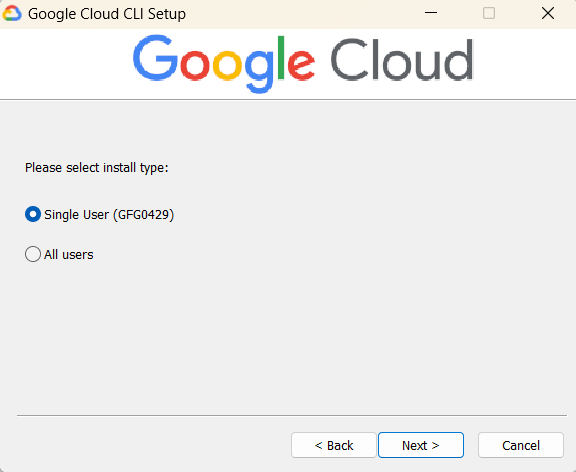
**Step 4: Select the user based on our requirement single or all users and click on next.
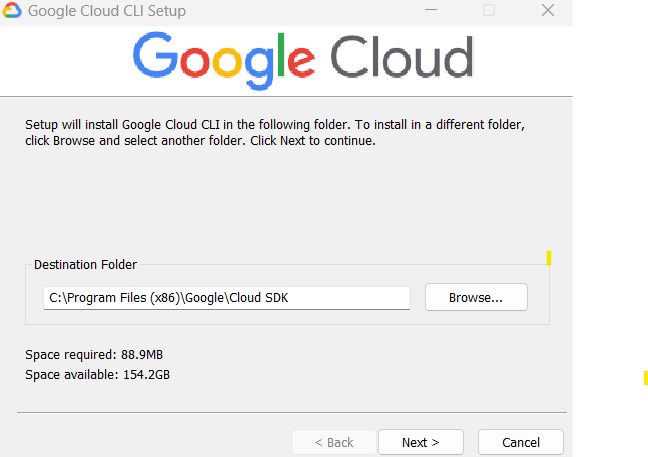
**Step 5: By Default the path selected if you want you can change the installation path by clicking the browse option then click on next.
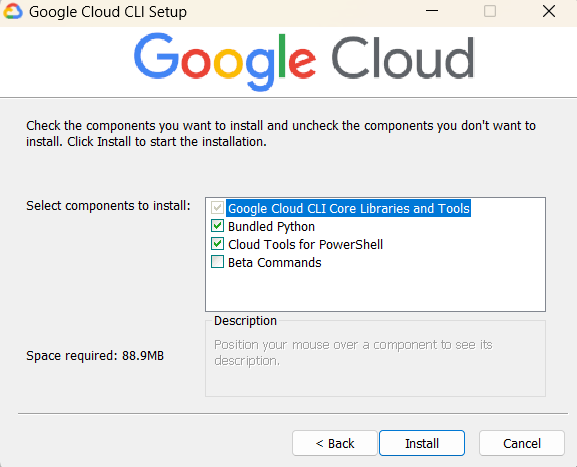
**Step 6: Select the component to install form the gcloud package. Recomoned to leave it default then click on install.
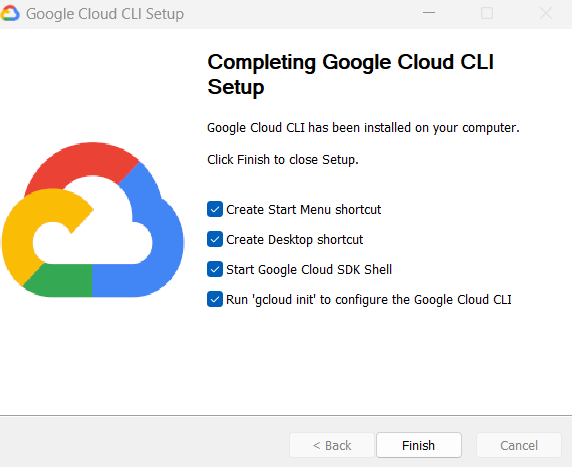
**Step 7: Below image shows the installation of gcloud cli. This will take few minutes to install the gcloud. Afret installation completed click on Next.

**Step 8: After installation click on finish and configure the our project.
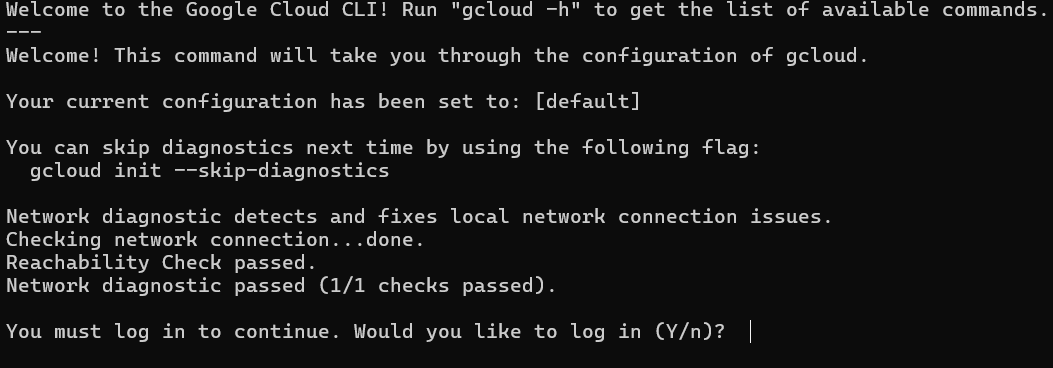
gcloud init
Below image shows the afte execution of gcloud init
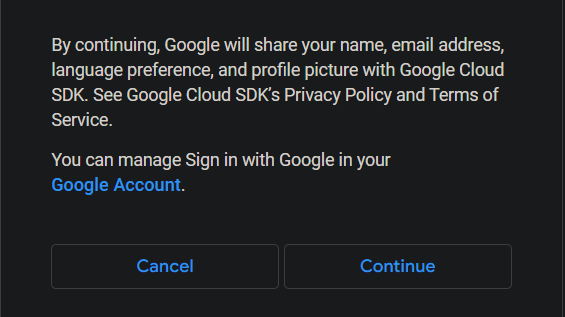
Autenticate the our project by clicking the continue and enter our credentials.
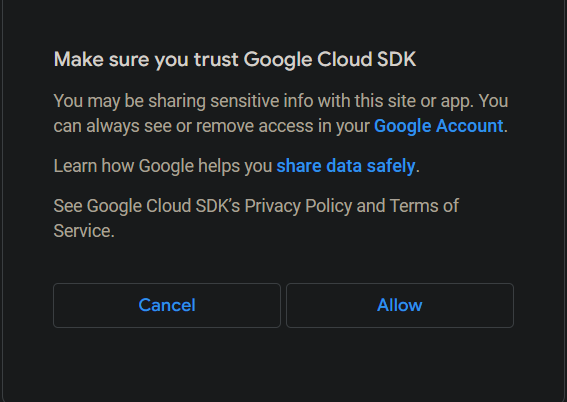
Afte succesfull authentication click on allow to access the our project.
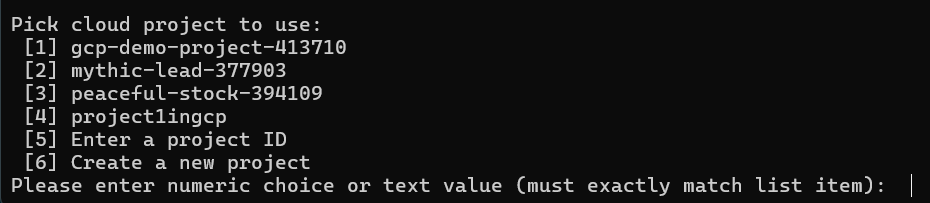
Below images shows the list of projects and select oue project