Installing Linux Using a Virtual Machine (original) (raw)
Last Updated : 28 Nov, 2025
Installing Linux on a Virtual Machine (VM) allows users to explore Linux’s power and flexibility without modifying their main operating system. Virtual machines enable running multiple operating systems simultaneously on a single computer.
- They provide a safe and isolated environment ideal for testing, development, and learning purposes.
- This guide will walk you through the process of installing Linux on a virtual machine for a smooth and efficient setup.
- We will focus on installing Ubuntu, one of the most popular Linux distributions.
These instructions are also applicable to other Linux distributions with minor adjustments.
Steps to Install Linux on a Virtual Machine
The first step is to choose the right virtualization program for you. Here are some popular choices:
- VirtualBox (Available for free and open-source)
- VMware Workstation Player (Free for individual download only)
- Hyper-V (Included in Windows professional and enterprise editions)
Installation of Oracle VirtualBox
Oracle VirtualBox is a virtualization tool that allows users to run other operating systems on a host OS. For example, you can install Ubuntu on your Windows 11 system virtually using VirtualBox.
**Step 1 : To download VirtualBox, visit the Virtualbox website and choose the right version for your OS.
-660.jpg)
Installling Oracle Virtual Box
Choose the correct package to download VirtualBox based on your primary OS (Operating System). Here we are using windows operating system so will choose **Windows Hosts package to download.
**Step 2 : Run the downloaded setup or exe file. If it asks for making changes on your device, click **Yes.
**Step 3: Click **Next on setup wizard. It will redirect you to "custom setup" dialog box where you can choose or change the features that will be going to installed on you system.
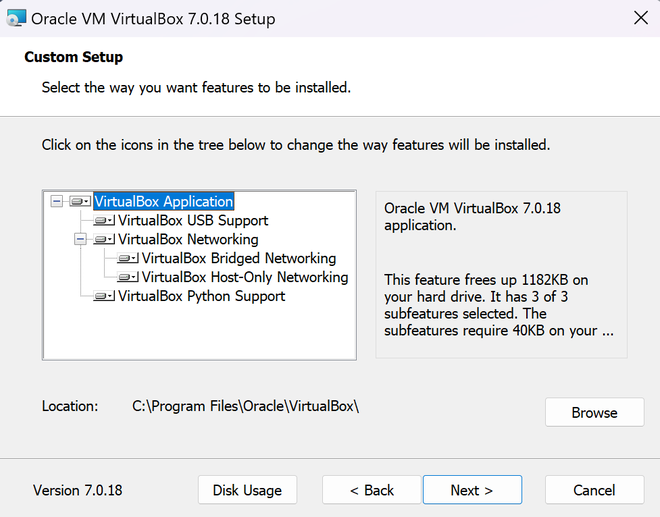
Here, we will not make any changes. Click on Next, it will ask "**Proceed with the installation ?", Click **yes to go to next menu. Then, click on install. It will take some time to install on your system, basically depends on system to system. After that, click on finish.
Installing Linux Using a Virtual Machine
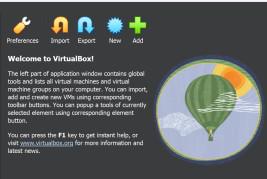
Step 4: Launch VirtualBox and Create a New VM
After installing VirtualBox on your system, open the application. The VirtualBox Manager window will appear. From here, you can view any previously created virtual machines and create new ones.
Click on New to start creating a new virtual machine. You will be asked to enter:
- A name for your VM
- The location/path where the VM files will be saved
- The type of operating system (Windows, macOS, or Linux)
- The version of the operating system (for example, Ubuntu or Debian).
Step 5: Select Operating System and ISO
- Click on New and provide the required details. You will also need to choose the ISO image of the operating system you want to install.
- We are using Ubuntu (a Linux distribution), but you can choose any other Linux distribution as well.
- Download the latest Ubuntu LTS version. At the time of writing, Ubuntu 24.04 LTS is the latest release.
- Select the downloaded ISO file. VirtualBox will automatically detect the OS type and version.
- Click Next to continue.

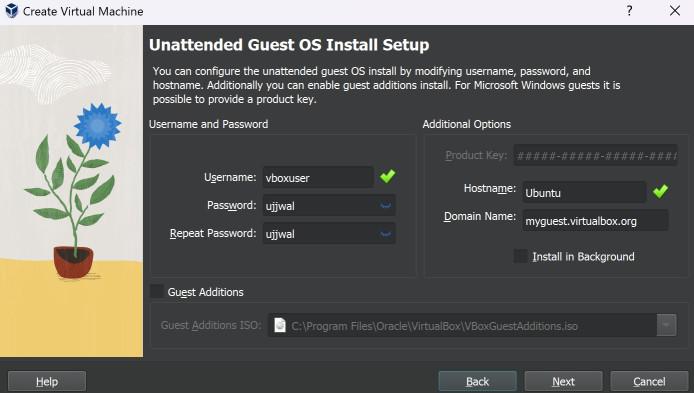
Step 6: Configure User Settings
For Ubuntu, VirtualBox allows you to define:
- Username
- Password
- Hostname
You can either customize these settings or use the default values. After that, click Next.
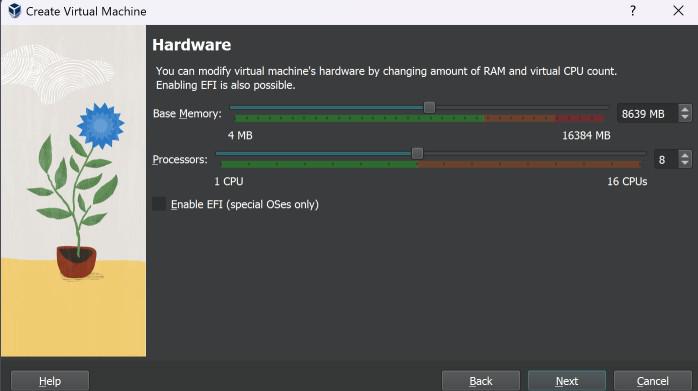
Step 7: Allocate Memory and CPU
Now, allocate system resources for your VM:
- Assign around half of your system’s RAM to the VM.
- **For example, if your system has 16 GB RAM, allocate 8 GB to the virtual machine.
- Choose the number of CPU cores as per your system capability.
Click Next once done.
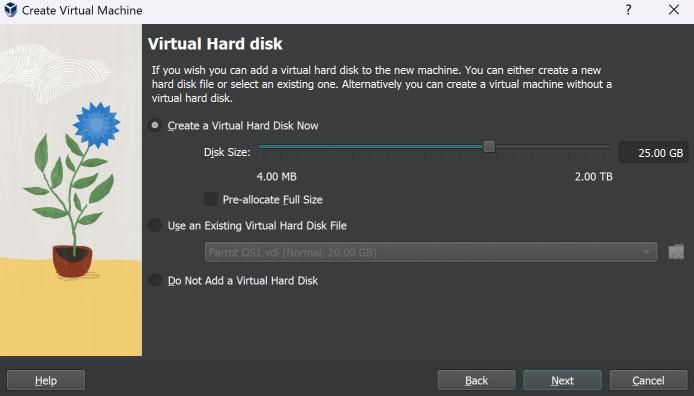
Step 8: Allocate Virtual Hard Disk
- Allocate storage for your virtual machine. It is recommended to provide at least 20 GB of space for Ubuntu to run smoothly.
- Click Next to proceed.
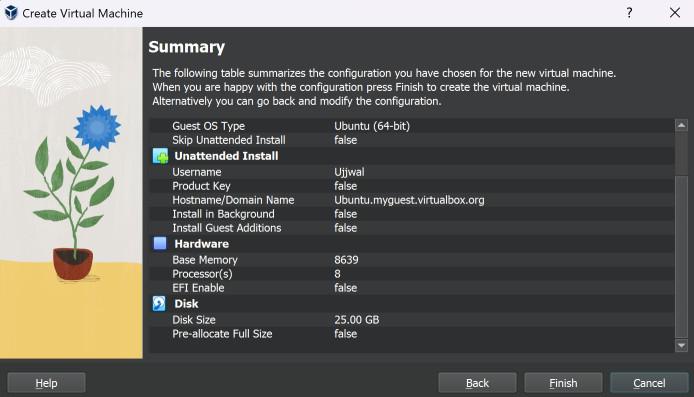
Step 9: Review and Finalize
- Review all the configurations you’ve made on the summary screen.
- If everything looks correct, click Finish to create the virtual machine and begin the installation process.
- Ubuntu will now start installing automatically. Wait a few minutes while the files are copied and the system is set up.
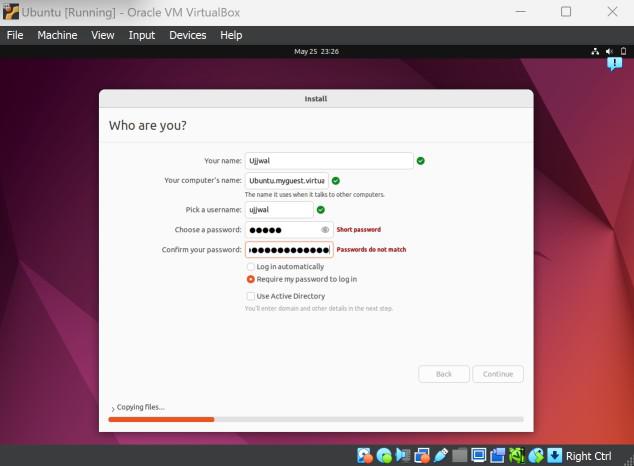
Step 10: Final Setup Inside Ubuntu
During installation, you will be asked to:
- Set a password for your Ubuntu user account.
- Optionally enable automatic login if you don’t want to enter a password every time.
Click Continue.
I
After this, a welcome screen will appear. The system may take some time to complete the setup as it configures essential files. You will also be guided through first-time Ubuntu settings like:
- Ubuntu Pro subscription (optional)
- Privacy settings
- Other personalization options
No need to worry - the process is smooth and user-friendly.
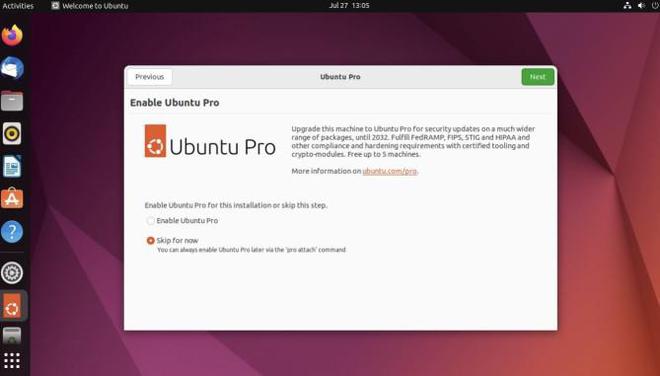
And that’s it. You’re all set!
Enable Fullscreen and Clipboard Support
The Linux VM might not resize to full screen automatically. To fix this:
**Step 1: Open Terminal and run:
sudo apt update
**Step 2: Then install the required packages:
sudo apt install -y build-essential linux-headers-$(uname -r)
**Step 3: In VirtualBox menu, go to Devices > Insert Guest Additions CD image.
**Step 4: If it doesn’t autorun, open the disk, right-click -> Open in Terminal.
sudo ./VBoxLinuxAdditions.run
**Step 5: Enter your password and press Enter and after completion, reboot your VM.
Once rebooted, resizing the window will now adjust the display properly.
Benefits of Using a Virtual Machine
Virtual machines provide a flexible, secure, and cost-effective way to run multiple operating systems and applications on a single physical computer.
1. Better Resource Utilization
- Allows multiple virtual machines to run on a single physical system.
- Maximizes the use of CPU, RAM, and storage without wasting hardware.
2. Enhanced Security and Stability
- Each VM runs in an isolated environment, so failures don’t affect others.
- Improves system reliability by containing crashes and malware within one VM.
3. Scalability
- VMs can be easily created, deleted, or resized as per system requirements.
- Helps in quickly scaling resources up or down without hardware changes.
4. Cost Effectiveness
- Reduces the need for multiple physical machines, saving hardware costs.
- Lowers power consumption and maintenance expenses.
5. Good for Testing
- Provides isolated environments for safe application testing and experiments.
- Prevents damage or conflicts with the main operating system.
6. Disaster Recovery
- Virtual machines can be easily backed up and restored in case of failure.
- Supports quick system recovery through VM image restoration.
7. Seamless Migration
- VM workloads can be moved between systems or data centers easily.
- Reduces downtime during hardware upgrades or migrations.
8. Snapshots and Cloning
- Snapshots allow saving the current state of a VM at any moment.
- Cloning helps create exact copies for backup or testing purposes.