GridLayouts in Kivy | Python (original) (raw)
Last Updated : 20 Jan, 2026
GridLayout in Kivy places widgets into a table-like structure made of rows and columns. Each widget is automatically placed into the next available cell based on the order in which it is added.
**Example: In this example, a TextInput is placed inside a GridLayout to show how a single widget fits inside a grid cell.
Python `
from kivy.app import App from kivy.uix.gridlayout import GridLayout from kivy.uix.textinput import TextInput
class Main(App): def build(self): g = GridLayout(cols=1) t = TextInput(text="Enter name") g.add_widget(t) return g
Main().run()
`
**Output
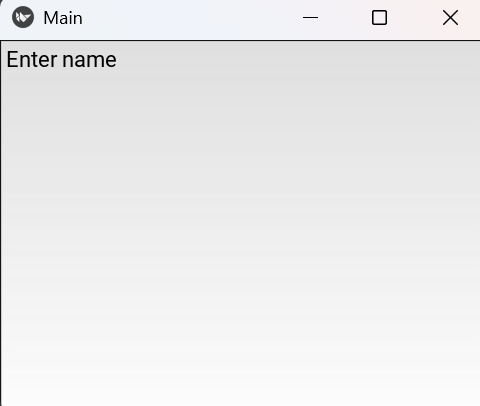
A single text input box appears in the window.
**Explanation:
- GridLayout(cols=1) creates one column
- TextInput() creates the input box
- g.add_widget(t) adds the widget to GridLayout
- return g displays the layout
Syntax
GridLayout(rows=None, cols=None)
**Parameters:
- **rows: number of horizontal rows
- **cols: number of vertical columns
- **size_hint_x: controls widget width
- **size_hint_y: controls widget height
- **row_force_default: forces fixed row height
- **row_default_height: sets row height
- **add_widget(widget): inserts a widget into the grid
Examples
**Example 1: In this example, four buttons are arranged in a 2×2 grid with equal size.
Python `
from kivy.app import App from kivy.uix.gridlayout import GridLayout from kivy.uix.button import Button
class Main(App): def build(self): g = GridLayout(cols=2) g.add_widget(Button(text="A")) g.add_widget(Button(text="B")) g.add_widget(Button(text="C")) g.add_widget(Button(text="D")) return g
Main().run()
`
**Output
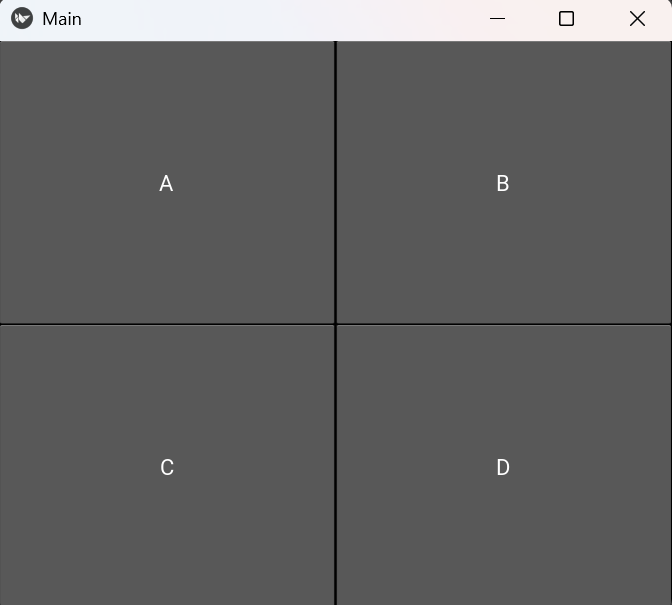
Four buttons appear in two rows and two columns.
**Explanation:
- GridLayout(cols=2) creates two columns
- Button() creates each button
- g.add_widget() inserts widgets into the grid
- Widgets fill cells in left-to-right order
**Example 2: In this program, all rows are given a fixed height.
Python `
from kivy.app import App from kivy.uix.gridlayout import GridLayout from kivy.uix.button import Button
class Main(App): def build(self): g = GridLayout(cols=2, row_force_default=True, row_default_height=40) g.add_widget(Button(text="A")) g.add_widget(Button(text="B")) g.add_widget(Button(text="C")) g.add_widget(Button(text="D")) return g
Main().run()
`
**Output
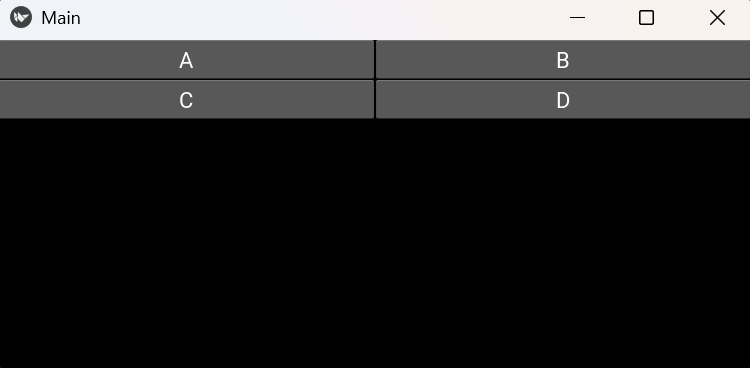
All rows appear with the same fixed height.
**Explanation:
- row_force_default=True forces fixed row size
- row_default_height=40 sets row height
- Button() widgets fit inside fixed rows
- GridLayout keeps all cells aligned