How to Install Python on Mac [2025 Guide for M1, M2, M3, and M4 Macs] (original) (raw)
Last Updated : 12 Jul, 2025
Most modern versions of macOS (including macOS 12.3 and above) come with Python pre-installed, but it's usually an outdated Python 2.x version. Since Python 2 is no longer supported, it’s important to install the latest version (Python 3.x) to unlock its full power for programming, scripting, and development.
This guide provides a **step-by-step tutorial to show all effective ways of **installing and updating Python on macOS (MacBook Old Version and New Versions like M1, M2, M3 or M4), From checking your pre-installed version to downloading and updating the latest Python and setting up essential tools like **IDEs and **package managers, this guide will help you easily install Python on any MacBook Device.
Easy Steps to Install Python on MacOS
Prerequisites
- A Running MacOS Laptop.
- Access to Macbook Administrative Privileges or Password.
**How to Check the Pre-Installed Python Version on MacOS
Below are the quick and easy steps to Check the Pre-Installed Python Version on MacOS so that you can directly update the Python Latest version using Terminal and Homebrew.
Step 1: Open the **Terminal.app
Press Command + Space, type **Terminal, and hit **Enter.
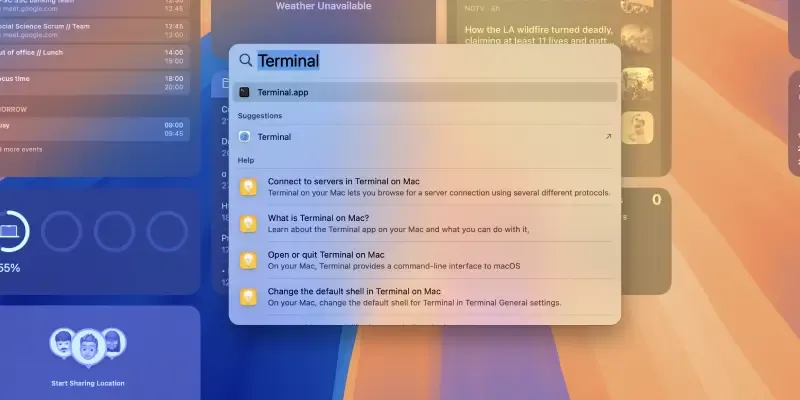
Open the Terminal
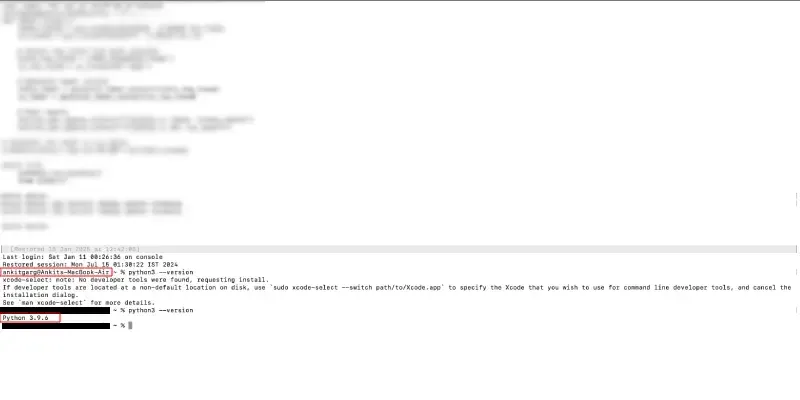
Step 2: Confirm Pre-Installed Python Version
Run the following command to check the installed **Python 3 version:
python3 --version
**Popup Appears: The xcode-select command requires the command line developer tools. Would you like to install the tools now?
When installing **Homebrew (or sometimes Python directly), you might encounter a popup prompting you to install **Command Line Developer Tools. These tools are required for many macOS development tasks, including Python installation.
**Solution: When you see a popup asking you to install "Command Line Developer Tools" > Click on Install and wait for some time to Download the software. Ensure you’re connected to a stable Wi-Fi network.

Confirm Pre-Installed Python Version
Troubleshooting Command Line Developer Tools Installation Fails Error
Manually install the tools by running
xcode-select --install
Step 3: Preview Output
- If you see something like
Python 3.x.x(Like in the below Image it shows Python 3.9.6), this means Python 3 is already installed. Now, we will Ensure the version matches the latest installed version (e.g., Python 3.13.x) after following further steps mentioned below in this guide. - If the command returns an error or no version is shown, Python 3 is not installed.
**Troubleshooting:
- **Command Not Found: If
python3doesn’t work, Python 3 is not installed. Continue with the installation.- **Outdated Version: If an old version of Python 3 is installed, upgrade it using Homebrew (see Step 3).
Preview Output
**How to Install Homebrew on Mac
**Homebrew is a package manager for macOS that makes the software installation easy, including Python. In order to **install Python on Mac using Brew, you first need to Intsall Homebrew on your Mac device. Follow the below easy steps in order to install Homebrew on Mac even if you have the pre-installed Python in your Mac Device:
Step 1: Open **Terminal
Use the Shortcut key Command + Space, type **Terminal, and hit Enter.
**Step 2: Copy and Paste the Command in Terminal
/bin/bash -c "$(curl -fsSL https://raw.githubusercontent.com/Homebrew/install/HEAD/install.sh)"
Step 3: Press **Enter and Follow the On-Screen Instructions
- When checking for Sudo Access, you may be prompted to enter your Password.
IMPORTANT: What is "Checking for sudo access (which may request your password)"
Homebrew itself does not require
sudoto function. However, the installer does usesudoduring the initial setup to create the necessary installation directory at/opt/homebrewand configure its permissions. Additionally,sudois used to install and configure the Xcode Command Line Tools if they are not already installed. Once Homebrew is installed and set up, it no longer requiressudofor any of its operations.
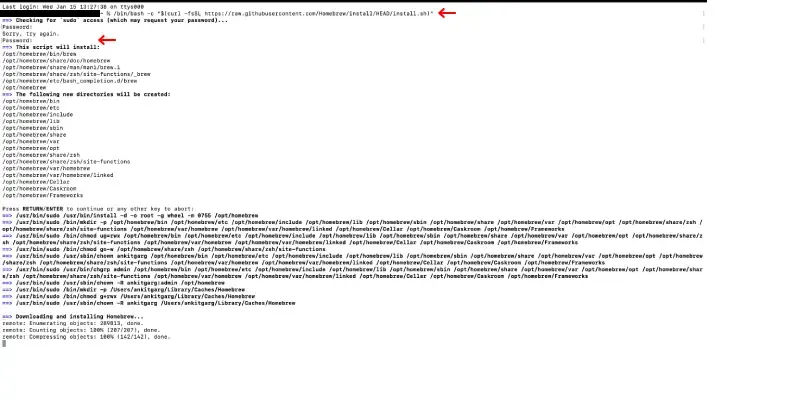
Copy and Paste the Command in Terminal
N**ext steps:
Run these commands in your terminal to add Homebrew to your **PATH:
echo >> /Users/userprofile/.zprofile
echo 'eval "$(/opt/homebrew/bin/brew shellenv)"' >> /Users/userprofile/.zprofile
eval "$(/opt/homebrew/bin/brew shellenv)"
In all the above given command Change "userprofile" with the actual username of your device.
Step 4: Verify Homebrew Latest Version or Update Homebrew
Once installation is complete, verify Homebrew by running:
brew --version
You should see a version number, confirming that Homebrew is installed.

Verify Homebrew Latest Version or Update Homebrew
**Important: If you see the older Homebrew version installed, then run the following command to update Homebrew:
brew update

Update older Homebrew version
**How to Install Python on Mac (Using Homebrew)
Now lets begin installing Python Latest version in your Mac Device, Using Homebrew is the simplest way to install Python 3 latest version, as it ensures you get the latest stable version.
Step 1: Open **Terminal
Press Command + Space, type **Terminal, and hit Enter.
Step 2: Run the following command
This command will download and install Python 3 latest version along with pip, the Python package manager.
brew install python
Wait for the process to complete. You may see progress indicators as Homebrew downloads and installs dependencies.
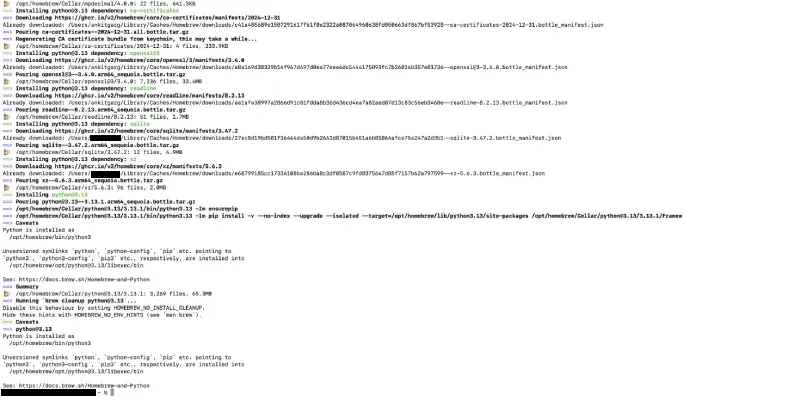
Install Python on Mac
Step 3: Verify the Python Installation
python3.13 --version
If installed correctly, you’ll see the version number (e.g., Python 3.13.1).

Verify the Python Installation
Step 4: Verify pip installation
pip3 --version
If pip3 is installed, it will display its version.

Verify pip installation
Common Issues and Fixes when Installing Python on MacOS
Below are the most common Issues that arises when installing Python in your Mac, all these errors and issues looks difficult but they are very easy to fix in some quick steps:
**Error: **Command Not Found : Ensure Homebrew is installed correctly by running
_Now run the following command, in order to fix any issue related to Homebrew not running in your terminal.
brew doctor
Now after pressing the enter, it will show issues, If issues are reported, follow the suggested fixes.
**Error: Incomplete Installation
Reinstall Python by copy and paste the following command in the terminal.
brew reinstall python
**Test Your Python Installation on Macbook
Testing ensures that Python is set up correctly and ready for use.
Step 1: Open **Terminal
Press Command + Space, type **Terminal, and hit **Enter.
Step 2: Launch Python
python3
You’ll see a >>> prompt, indicating Python is ready.
Step 4: Run a test script
print("Hello, Python!")
If you see Hello, Python!, Python is working correctly.

Run a test script
Step 4: Exit Python
exit()

Exit Python
**Adding Python to PATH (If Python Not Running)
If Python3 command doesn’t work after installation, you might need to add Python to your system PATH.
**How to Add Python to PATH on Mac
Step 1: Open **Terminal
Use the shortcut key Command + Space, type **Terminal, and hit Enter.
Step 2: Edit the Shell Configuration File
**For macOS Catalina or later (default shell is Zsh):
nano ~/.zshrc
**For older macOS versions (default shell is Bash):
nano ~/.bash_profile
Step 3: Add the Line in the File
Add the following line at the end of the file:
export PATH="/usr/local/opt/python/libexec/bin:$PATH"
Step 4: Save the changes:
Press Ctrl + O, then **Enter, followed by Ctrl + X .
Step 5: Reload the Configuration
Now use the below command to reload the configuration to add Python to PATH on Mac
source ~/.zshrc
**How to Verify PATH Changes on Mac
Now verify the above steps tp preview the PATH Changes on Mac for Python Intsllation, If the version appears, Python 3 is successfully added to PATH.
Run the following Command
python3 --version
How to Install Python on Mac from the Official Website (Alternate Method)
Step 1: Visit Python Website
Visit the official Python website and download the installer for macOS.
Step 2: Open .pkg File and Complete the Automatic Installation
Open the .pkg file and follow the installation steps.
Step 3: Open Terminal and Verify the Python installation
python3 --version
If you still faces difficulty in installing the Python on Mac from the Python.Org Click here
Install a Python IDE (Optional for Learning)
While you can write Python scripts in any text editor, using an Integrated Development Environment (IDE) makes coding easier and more efficient.
Recommended IDEs for Beginners
IDLE
- Pre-installed with Python, perfect for beginners.
**GeeksforGeeks IDE
- Most used by Coputer Science Users
- Lightweight, customizable, and supports Python extensions.
VS Code (Visual Studio Code)
- Lightweight, customizable, and supports Python extensions.
- Download from Visual Studio Code.
PyCharm
- Feature-rich IDE ideal for professional Python development.
- Download from PyCharm.
**Install Essential Python Libraries (Optional)
To expand Python’s functionality, you can install libraries using pip3.
**Popular Python Libraries:
- **NumPy: For numerical computations.
- **Pandas: For data analysis and manipulation.
- **Flask: For web development.
- **Matplotlib: For data visualization.
How to Install Python Libraries on Mac
Step 1: Open **Terminal
Use Shortcut key to open Command + Space > Type **Terminal > Hit **Enter.
Step 2: Use the following command
Click here to know all Python Libraries to understand each usecase.
pip3 install library_name
Replace library_name with the library you want to install, e.g., numpy.
**Conclusion
Installing **Python on your Mac opens the door of opportunities in **programming, **data analysis, and **automation tasks. By following this step-by-step guide, you can seamlessly set up Python, ensuring compatibility with the latest tools and frameworks.
From **web development and **machine learning to **scripting automation, Python empowers you to tackle a wide range of tasks with ease. With its growing popularity in **data science, **artificial intelligence, and **software development, getting Python up and running on your Mac is a crucial step toward enhancing your technical skills and productivity.